Implementer training - content auditor
Configuring content auditor
The content auditor provides a series of reports on various aspects of a result page’s content.
The content auditor is primarily designed for web and file content but could be adapted to other content sources.
| Interpretation of content auditor reports is covered in detail in INSIGHTS 101 - Search insights and optimization tools. |
The content auditor reports can be customized in a number of ways. Customizations include:
-
Reporting on custom metadata
-
Specifying undesirable text
-
Defining acceptable reading grades
Most customizations are applied as soon as the configuration change is saved, however some require an update of related data sources for the changes to take effect.
Tutorial: Content auditor reports
-
Log in to the insights dashboard where you are doing your training.
See: Training - search dashboard access information if you’re not sure how to access the training. Ignore this step if you’re treating this as a non-interactive tutorial. -
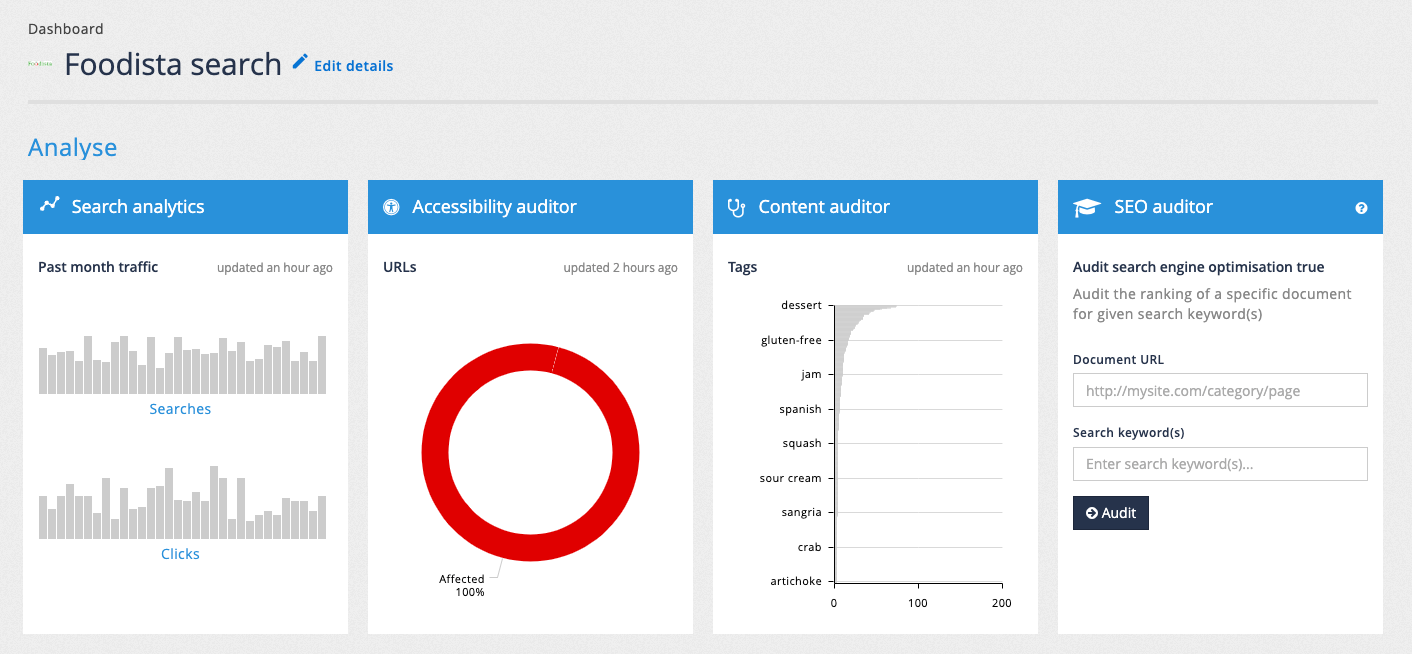
Navigate to the foodista service then click on the content auditor tile, or select content auditor from the sidebar menu.
-
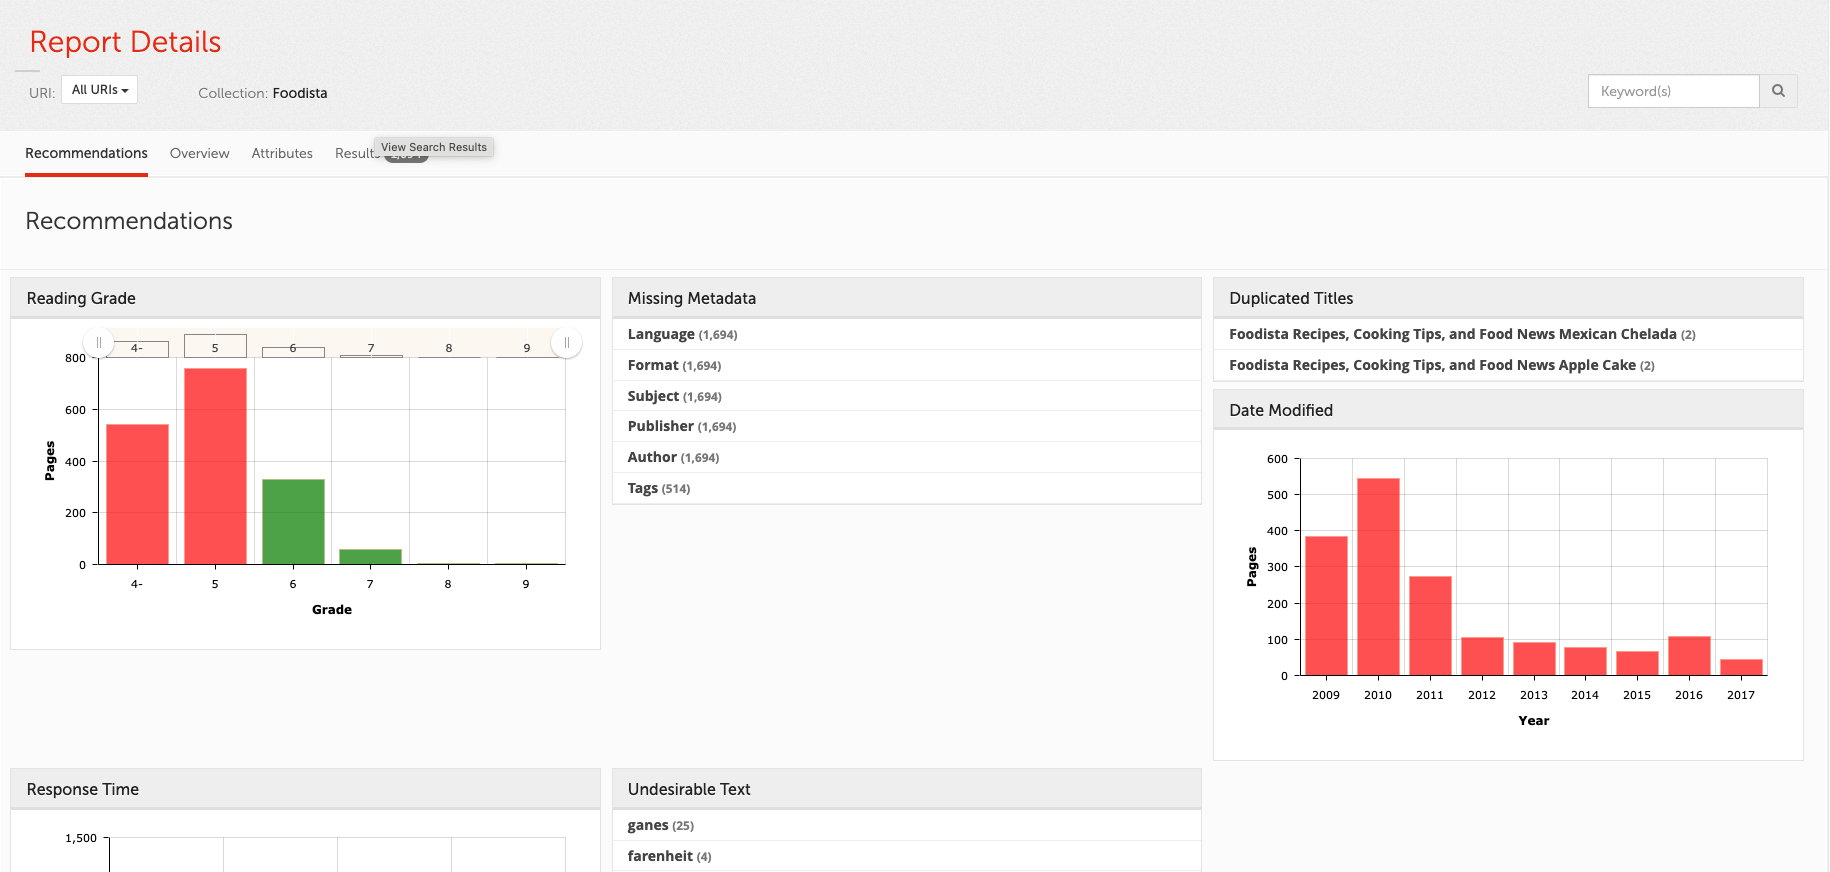
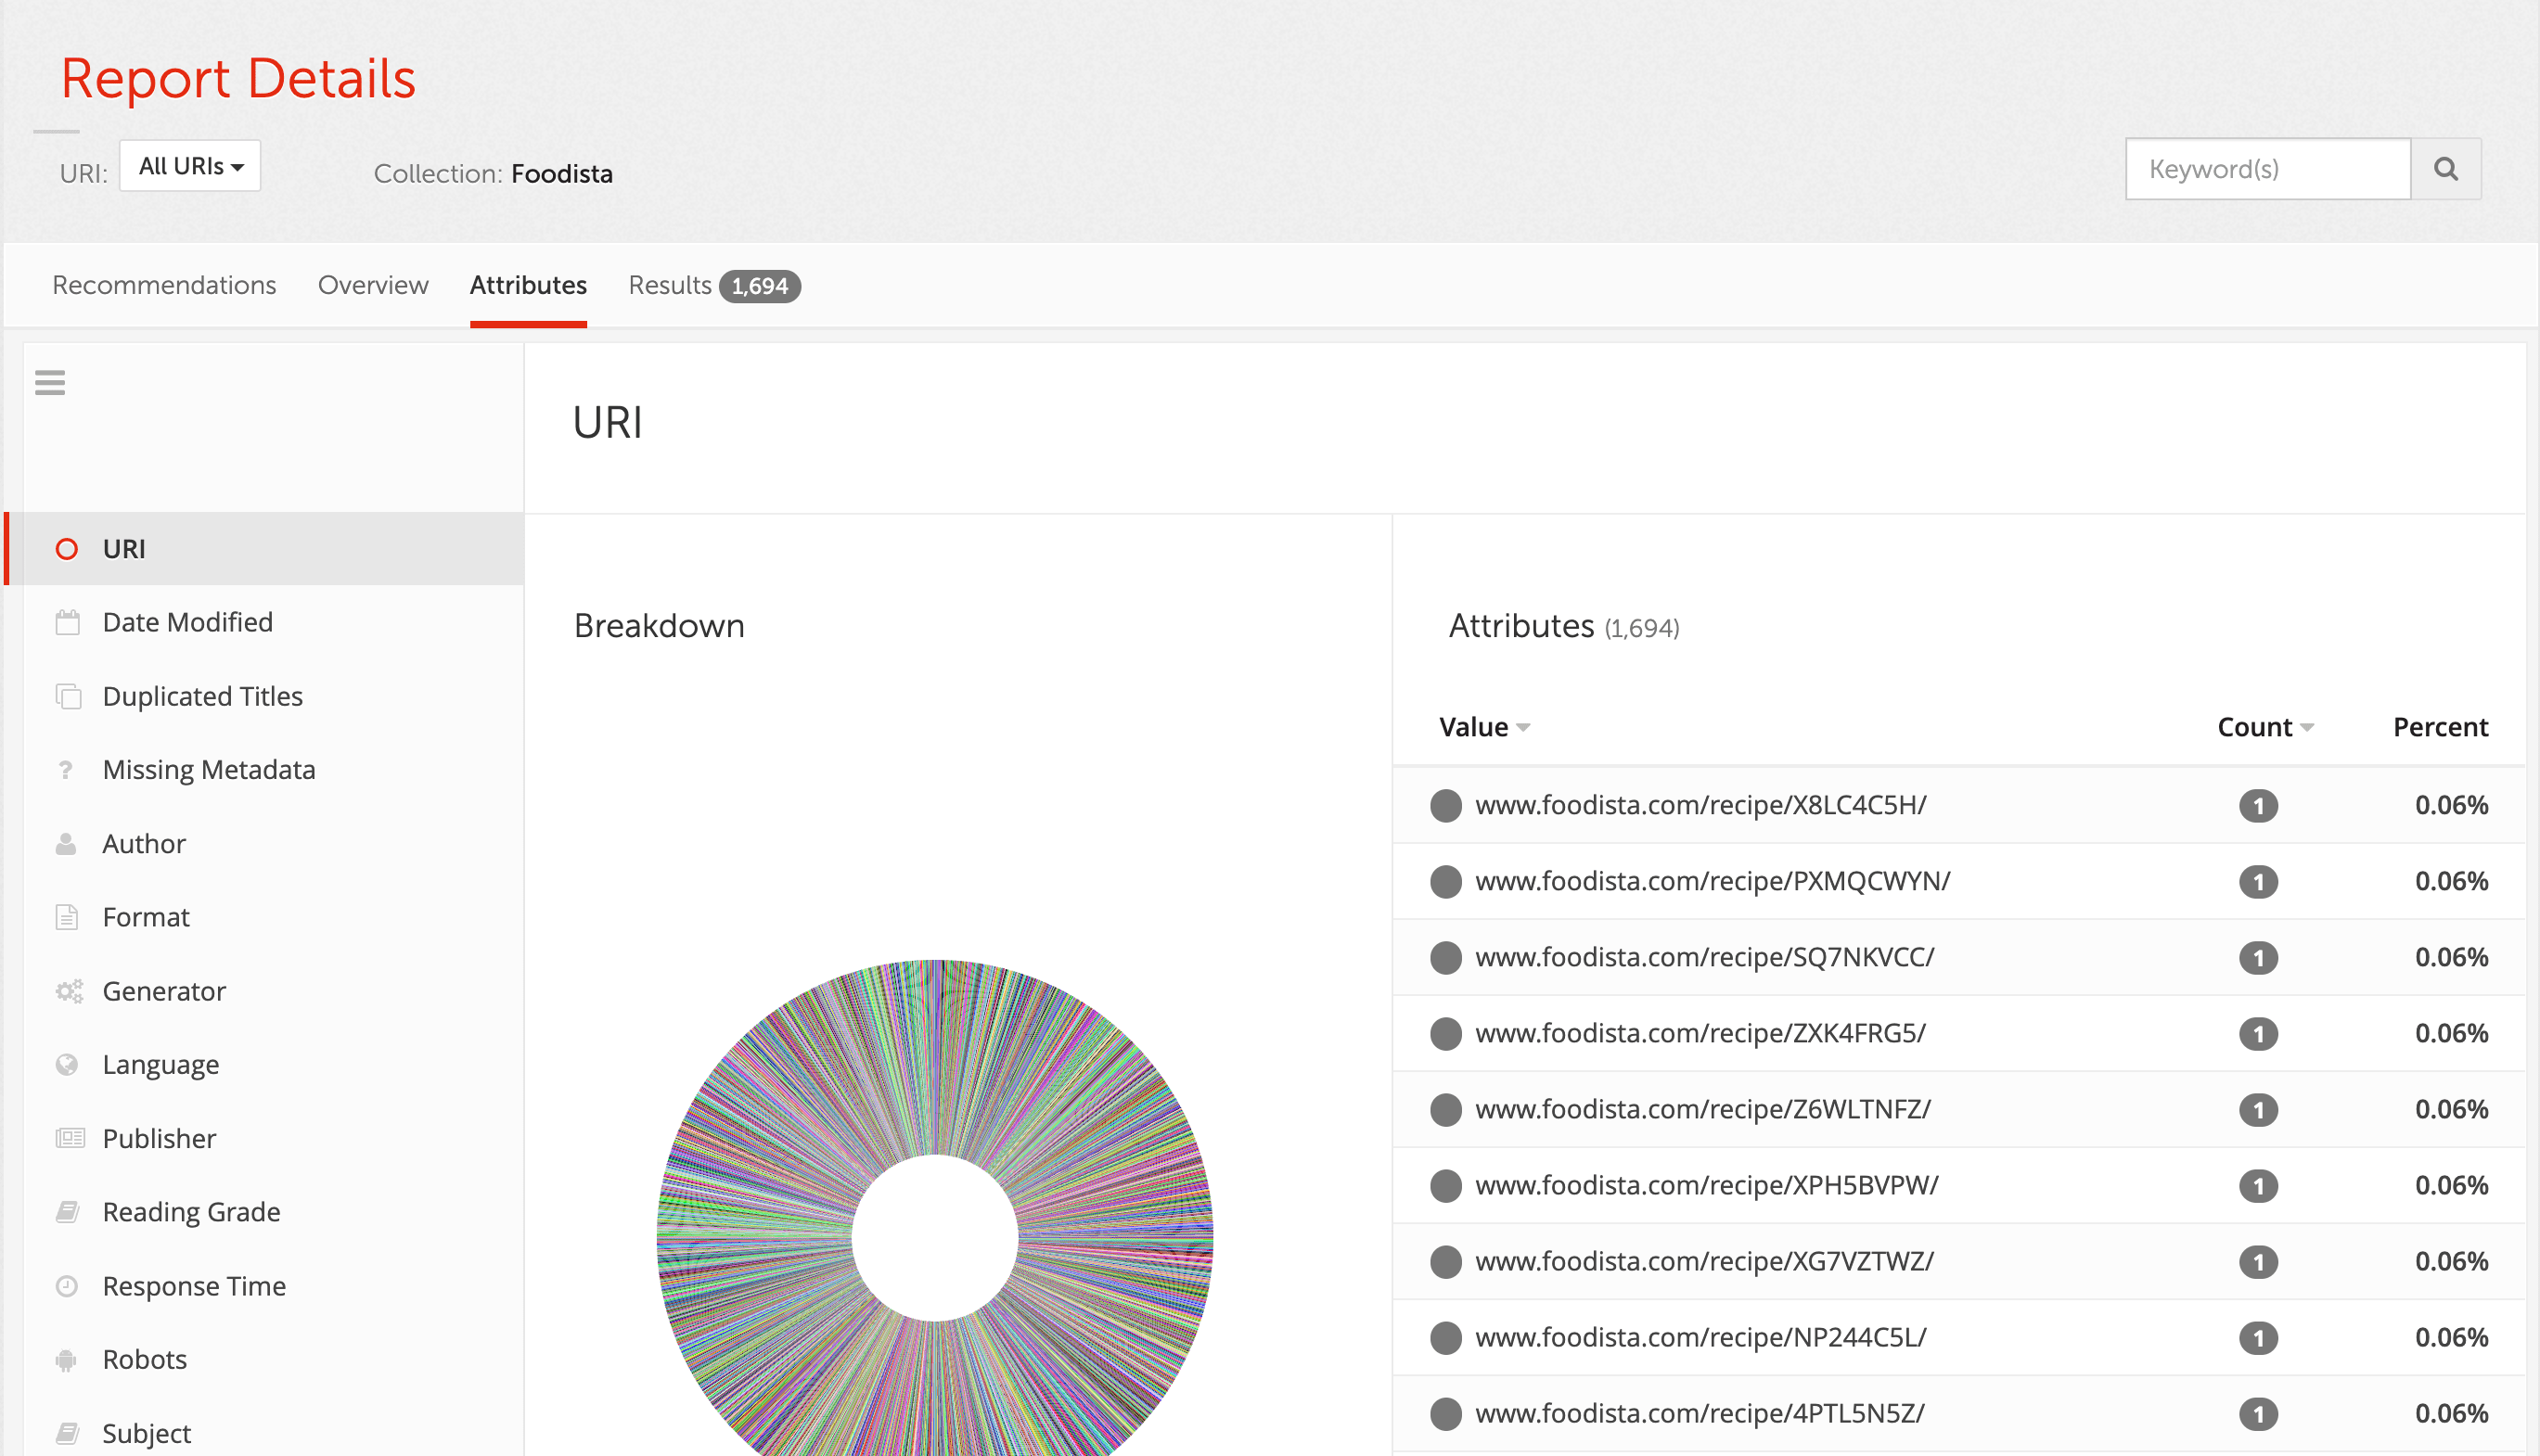
The content auditor - recommendations screen will then load.
-
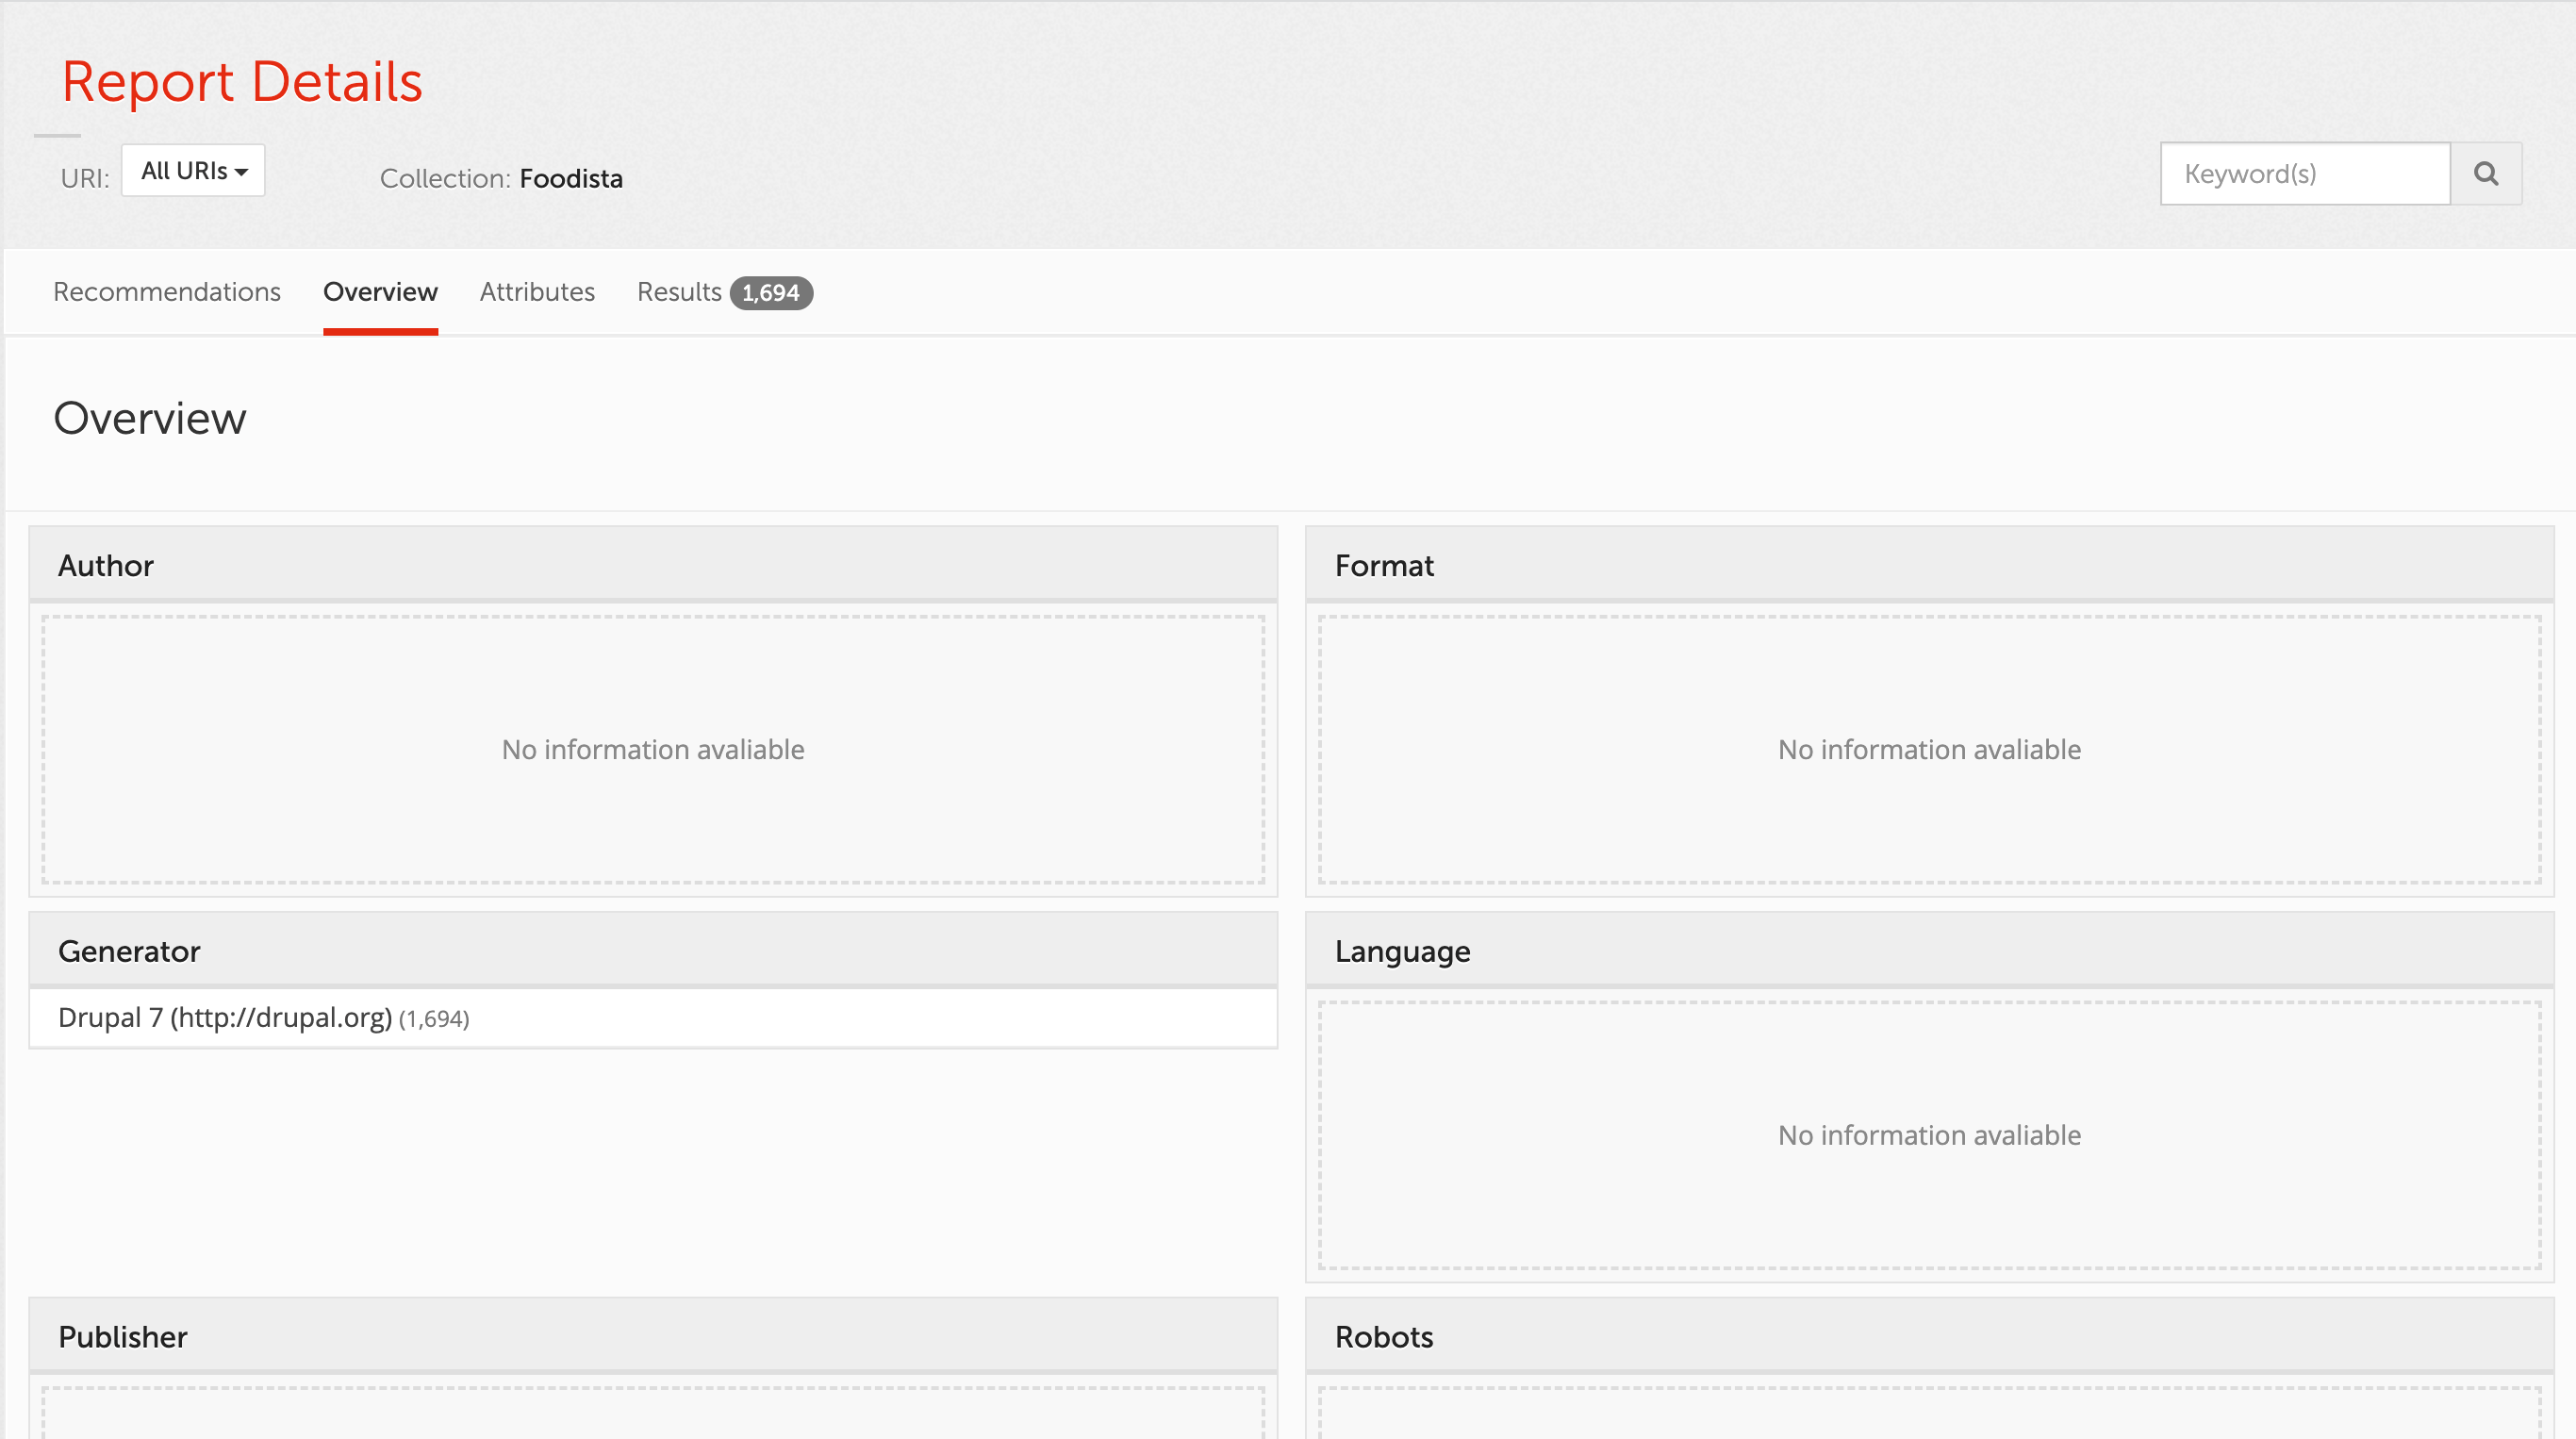
Observe that the report is organized into several sections - recommendations (currently showing), overview (which provides information on the top values for the metadata fields covered by the report), attributes (which breaks down the different metadata fields) and search results (which provides page level information for items that match the current report’s search criteria).
-
Spend a few minutes exploring the different sections of the content auditor report.
Customize the undesirable text
Funnelback uses Wikipedia’s common misspellings list to identify undesirable words. This list can be replaced or augmented with custom lists of terms.
Customization of undesirable text requires a full update of related data sources.
Tutorial: Configuring undesirable text
There are two methods of adding additional words to the undesirable text list. This exercise will use both methods to add to the undesirable text list.
-
From the search dashboard switch to the foodista data source. Click the edit data source configuration item on the settings panel. A configuration key,
filter.jsoup.undesirable_text.[key_name]can be used to add individual values to the undesirable text list.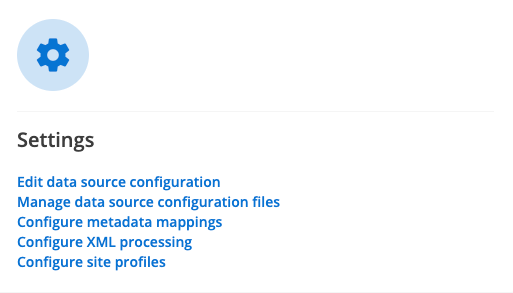
-
Click the add new button and add a configuration option named
filter.jsoup.undesirable_text.abbrev-abtand set this to the value ofabt.
-
Run a full update of the foodista data source.
A full update is required because the undesirable text report is produced using a filter that analyzes the page content. . After the update completes view the content auditor report on the foodista results page. Observe that abt is now included in the list of undesirable text detected for the site. -
Return to the foodista data source. We’ll add some more undesirable text items, but this time in an undesirable text file. Use this method if you have a set of words that you need to detect.
-
Create an undesirable text configuration file for a non-preferred terms list. Select the manage data source configuration files item on the settings panel teh click the add new button. Create an
undesirable-text.non-preferred.cfgfile. You can create multiple lists of undesirable text that can be reported on separately. We’ll create a list with an ID ofnon-preferred: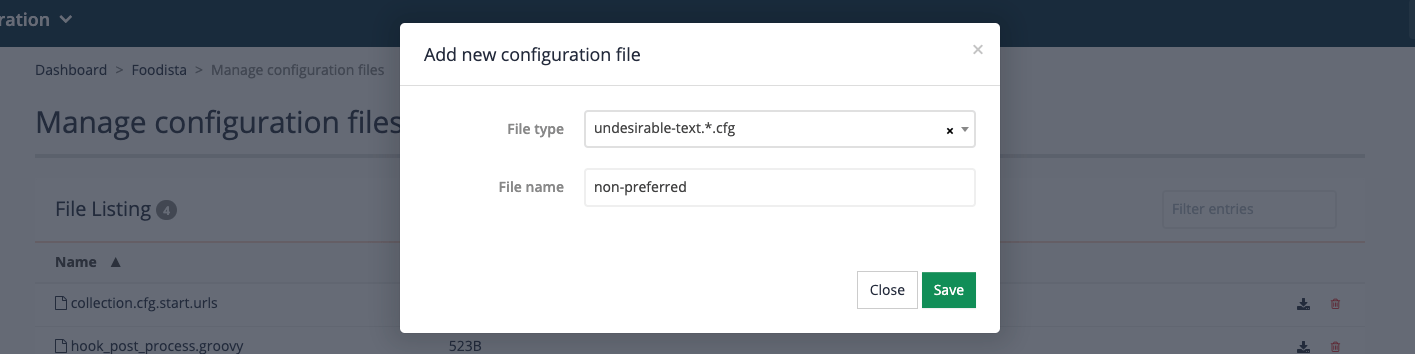
-
Click on the
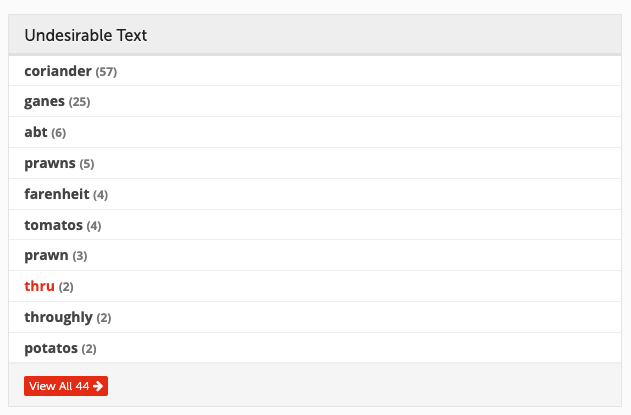
undesirable-text.non-preferred.cfgitem in the file listing to edit the configuration file and enter the following list of words into the editor, then click the save button.prawn prawns corianderThis will configure content auditor to identify pages that contain these words. In this example we might want to identify prawn(s) and coriander as non-preferred or banned words. This would allow for these to be updated to say shrimp, cilantro and about if these were the preferred terms in a site’s content guidelines.
-
Return to the foodista data source management screen and select edit data source configuration from the settings panel. We need to tell content auditor to use the non-preferred word list that we just configured. Add a new configuration key:
-
Parameter key:
filter.jsoup.undesirable_text-source.* -
Key:
npt -
Value:
non-preferred

-
-
Run a full update of the foodista data source.
-
After the update completes return to the content auditor report for the foodista results page and observe that occurrences of the words added to the custom undesirable text file are now included in the words listed as undesirable text. Clicking on one of the terms will filter the report to only pages containing the selected word.
Customize the reading grade chart
The range of acceptable grade levels can be configured with search package configuration settings which control the lower and upper bounds of the reading grades that are rendered in green.
ui.modern.content-auditor.reading-grade.lower-ok-limit and ui.modern.content-auditor.reading-grade.upper-ok-limit can be set to appropriate grade levels.
Customization of the reading grade chart does not require an update of any related data sources.
Tutorial: Set the reading grade limits
-
Log in to the search dashboard where you are doing your training.
See: Training - search dashboard access information if you’re not sure how to access the training. Ignore this step if you’re treating this as a non-interactive tutorial. -
Navigate to the foodista results page.
-
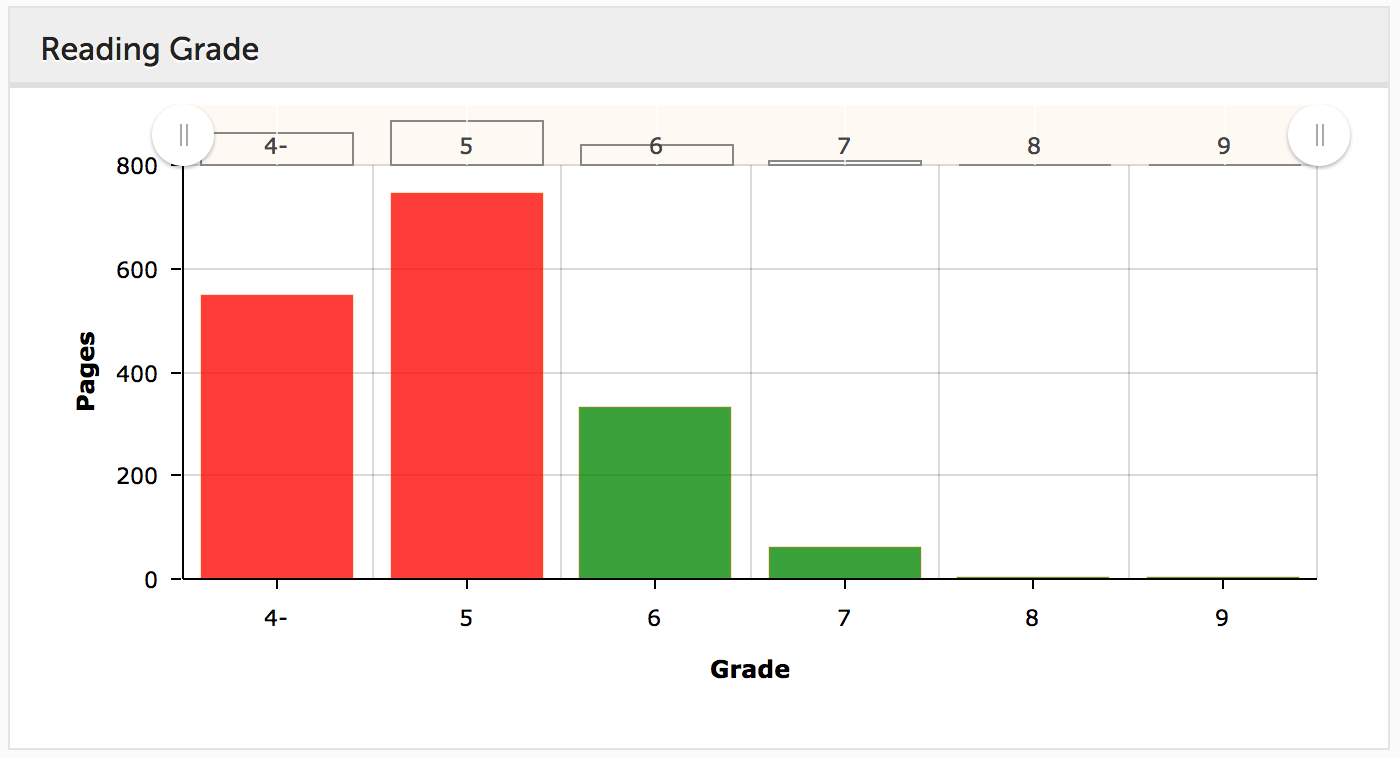
View the content auditor report and observe the acceptable range for reading grade lies between 6 and 9.
-
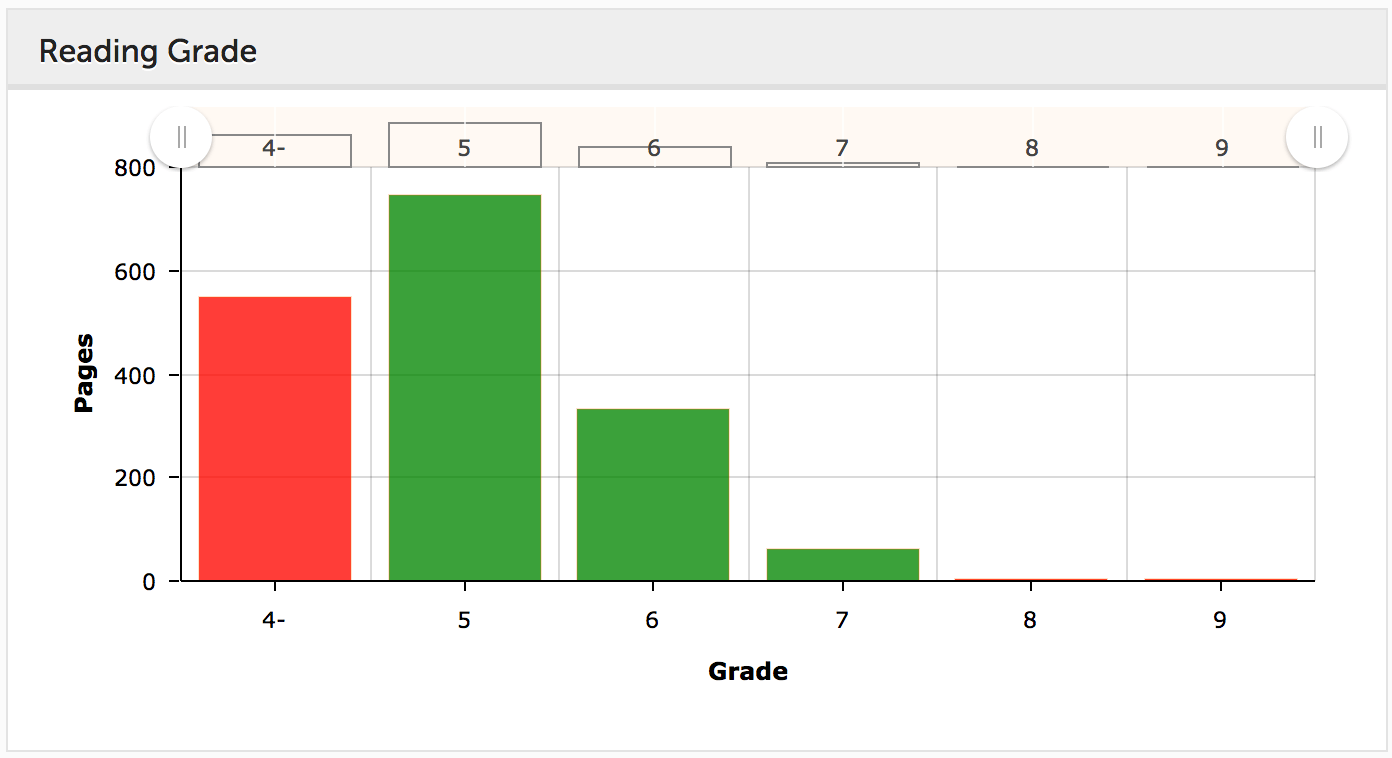
Change the acceptable reading grade levels to grades 5-7. This must be changed in the parent search package. Edit the search package configuration of the foodista search package and add the following settings:
ui.modern.content-auditor.reading-grade.lower-ok-limit=5 ui.modern.content-auditor.reading-grade.upper-ok-limit=7 -
Return to the content auditor report and observe that the reading graph has updated to display the new acceptable range in green. Observe that the changes take place as soon as the configuration changes are saved - no update of the linked foodista data source is required.
Customize overview and attributes metadata
Custom metadata fields can be added to the overview and attributes screens.
This is done by adding ui.modern.content-auditor.facet-metadata.(metadata_name)=(facet_name) settings to the results page configuration for each field that should be displayed.
Customization of the overview and attributes reports does not require an update of the linked data sources, unless the metadata fields are not currently mapped.
Tutorial: Add custom metadata to the overview and attributes screens
-
Log in to the search dashboard where you are doing your training.
See: Training - search dashboard access information if you’re not sure how to access the training. Ignore this step if you’re treating this as a non-interactive tutorial. -
Navigate to the foodista search results page.
-
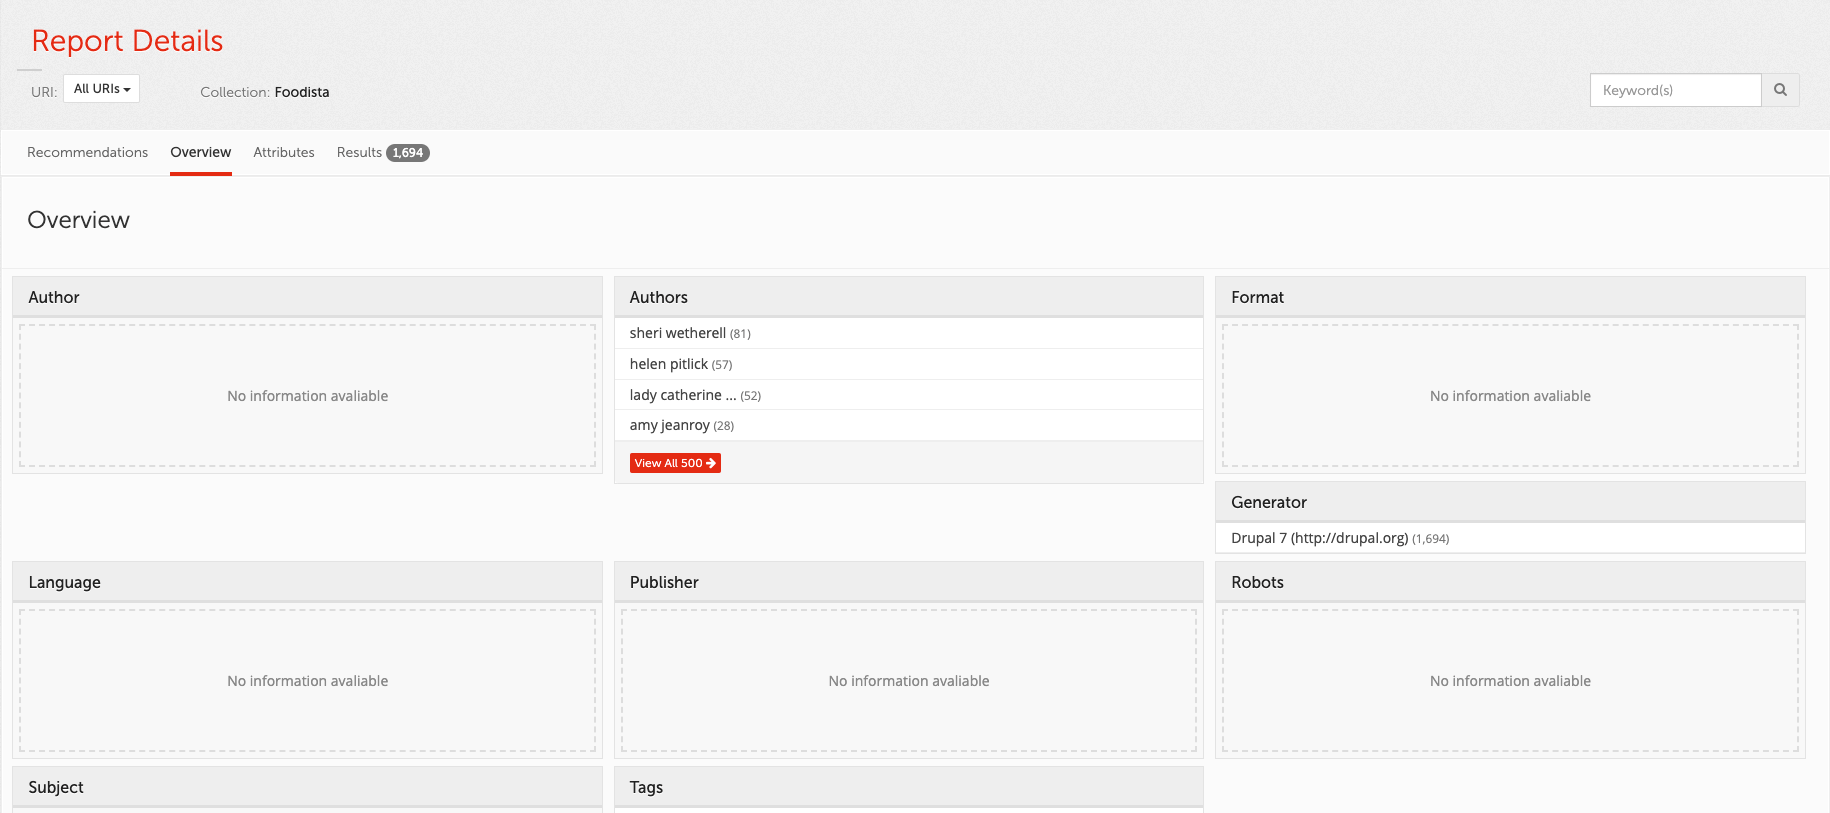
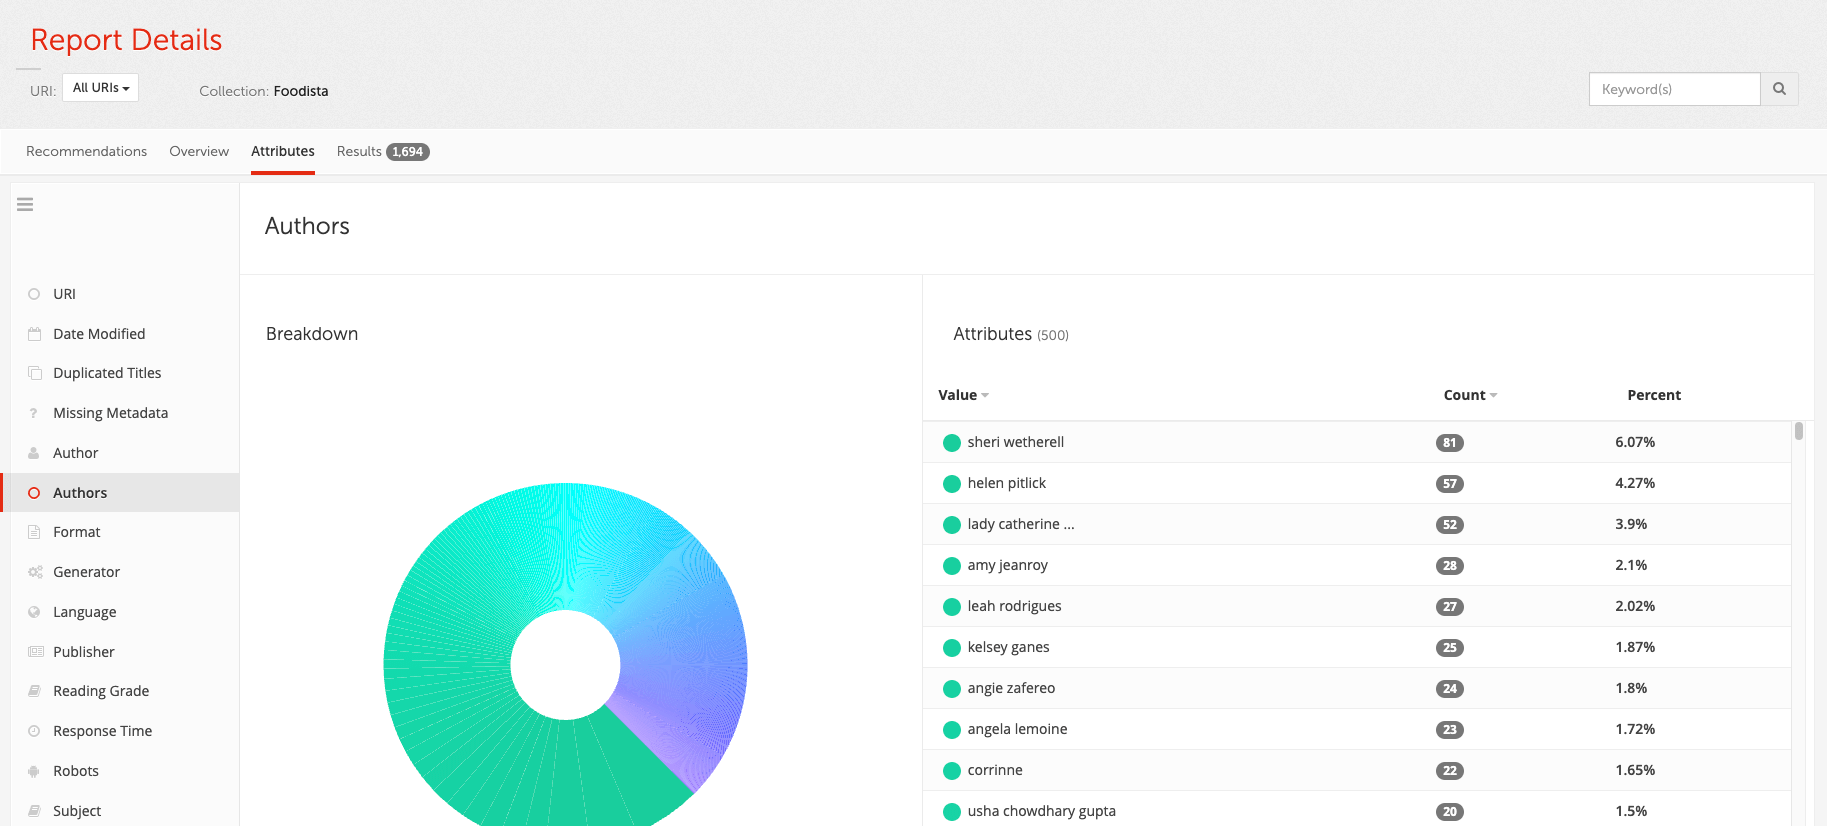
View the content auditor report and observe the overview and attributes screens.
-
Edit the results page configuration and add the following setting then save and publish. This will add an Authors field to the overview and attributes screens.
-
Parameter key:
ui.modern.content-auditor.facet-metadata.* -
Metadata name:
authors -
Value:
Authors
-
-
Return to the content auditor search results and observe that the changes are now reflected in the report.
Customize the search results display
The search results screen can be configured to display the values of arbitrary metadata fields for each result.
Customization of the search results report does not require an update of the linked data sources, unless the metadata fields are not currently mapped.
Tutorial: Add custom metadata columns to the search results
-
Log in to the search dashboard where you are doing your training.
See: Training - search dashboard access information if you’re not sure how to access the training. Ignore this step if you’re treating this as a non-interactive tutorial. -
Navigate to the Foodista search results page.
-
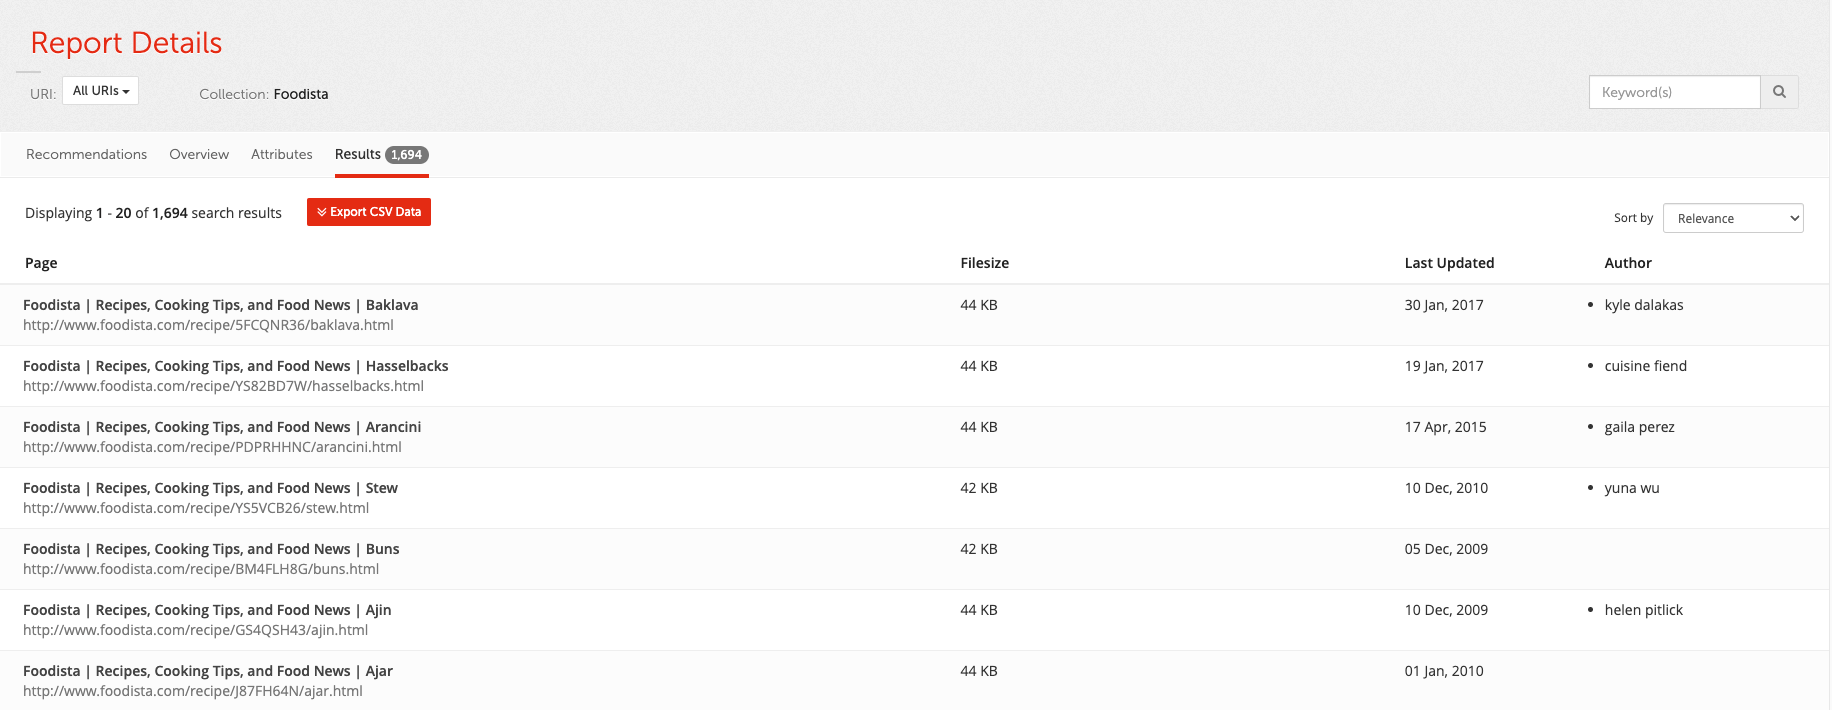
View the content auditor report and select the search results screen

-
Select the edit results page configuration from the customize panel and add the following settings. This will remove the format and subjects columns and add columns that display the author and tags metadata field content.
ui.modern.content-auditor.display-metadata.f= ui.modern.content-auditor.display-metadata.keyword= ui.modern.content-auditor.display-metadata.authors=Author -
Return to the content auditor search results and observe that the changes are now reflected in the report.
Customize the insights dashboard summary tile
The attribute displayed on the content auditor summary tile can be customized by setting a results page configuration parameter.
Customization of the tile source does not require an update of any linked data sources, unless the metadata fields are not currently mapped.
Tutorial: Change the content auditor summary tile
-
Log in to the insights dashboard where you are doing your training.
See: Training - search dashboard access information if you’re not sure how to access the training. Ignore this step if you’re treating this as a non-interactive tutorial. -
Open the insights dashboard for the Foodista search results page observe the content auditor summary tile:

-
Switch to the search dashboard, Foodista search results page manage screen and select edit results page configuration from the customize panel. Observe that there is a configuration option setting the summary tile to the date modified:
ui.modern.content-auditor.preferred-facets=Date Modifiedthis option has already been customized for the Foodista search results page - when setting the tile default it is normal for this setting to be missing from the results page configuration. -
Edit the configuration setting to display
Tagsif available, with second preference forDate Modified. Save and publish the setting.ui.modern.content-auditor.preferred-facets=Tags,Date Modified
-
Reload the insights dashboard and observe that the content auditor is now displaying tags on the summary tile.