Part 2.2: Importing your plugin into IntelliJ
This guide shows how to import a new plugin that was created using a Maven archetype into IntelliJ.
Prerequisites
Before using this guide ensure that you have installed Java, Apache Maven and IntelliJ on your computer as outlined in part 1: setting you your development environment, and have generated a new plugin using a Maven archetype.
Import a new plugin into IntelliJ
-
Open IntelliJ and click the Open button. If you have previously opened a project you may need to select from the menu.
-
Navigate to the folder containing the new plugin that you created in the previous step (
my-plugins-directory/title-prefix). -
If you are prompted select that you wish to import the project as a
mavenproject. -
If you are prompted to select an
SDKchooseJDK 11. This is the Java version installed in a previous step.
| The same process can be used to import an existing plugin project into IntelliJ. |
Importing documentation from Maven
The Funnelback interfaces that you will be developing against include documentation. A key advantage of using an IDE such as IntelliJ is that this documentation is available from within the IDE.
Some additional configuration steps are required in order for the documentation to be available from within IntelliJ:
-
Open the preferences window by selecting from the menu.
-
Search for
mavenin the menu and click on theImportingitem. -
Tick the boxes for
Automatically download:Sources, Documentation and Annotations.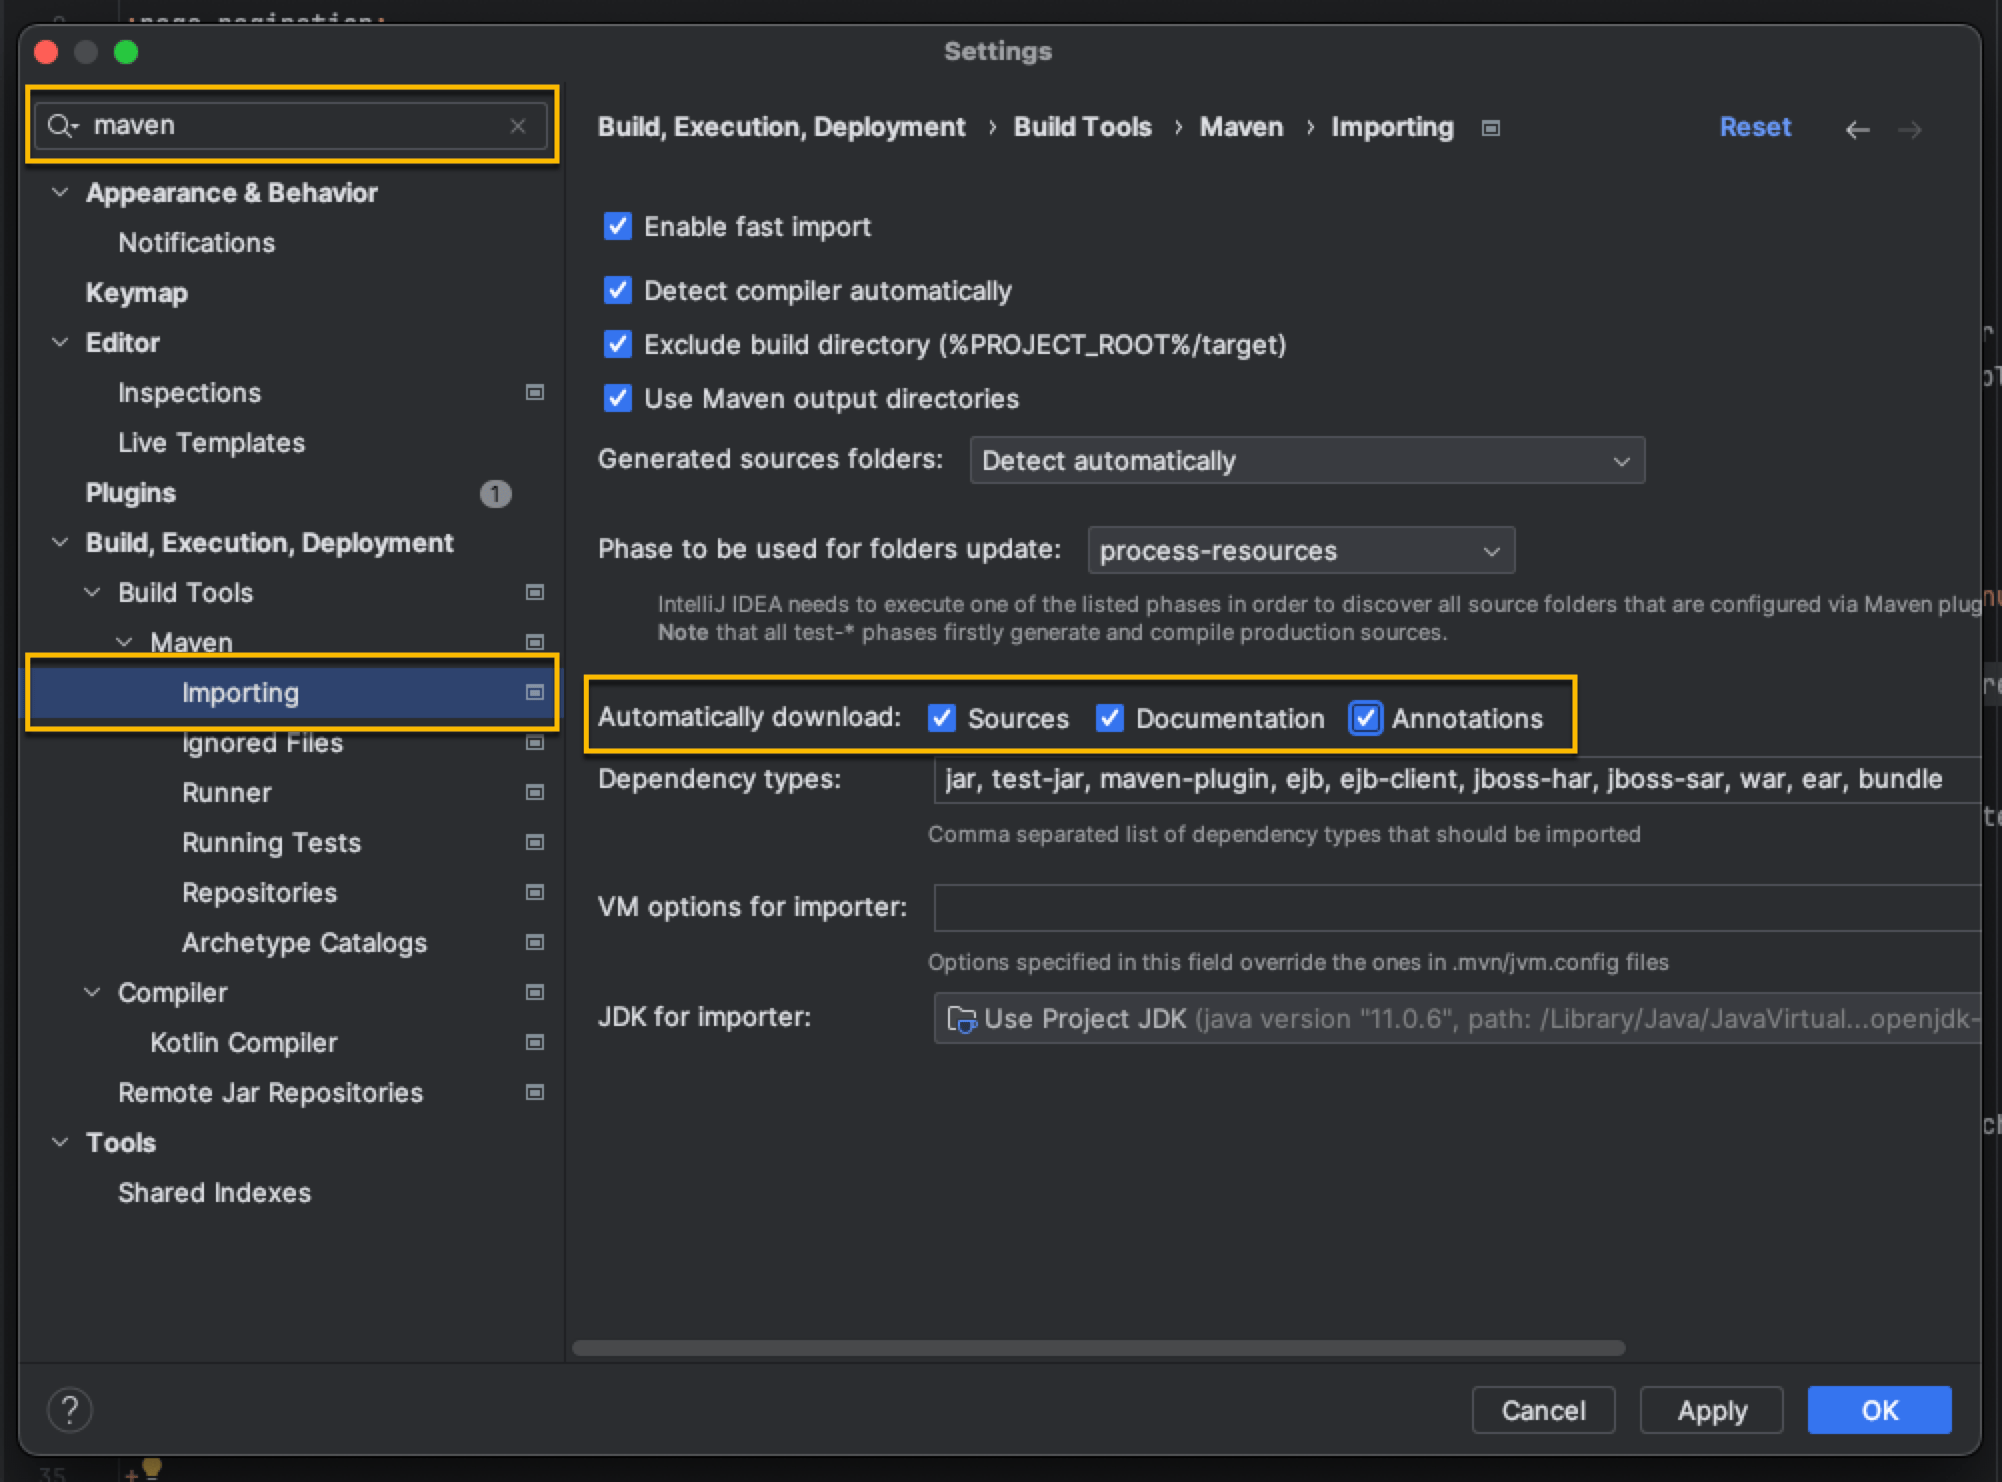
-
Click Apply, then click OK.
Exploring the imported project
The imported project is now ready to use. Expand the project structure by clicking on the Project tab then expanding out the project tree.
There are five main items of interest:
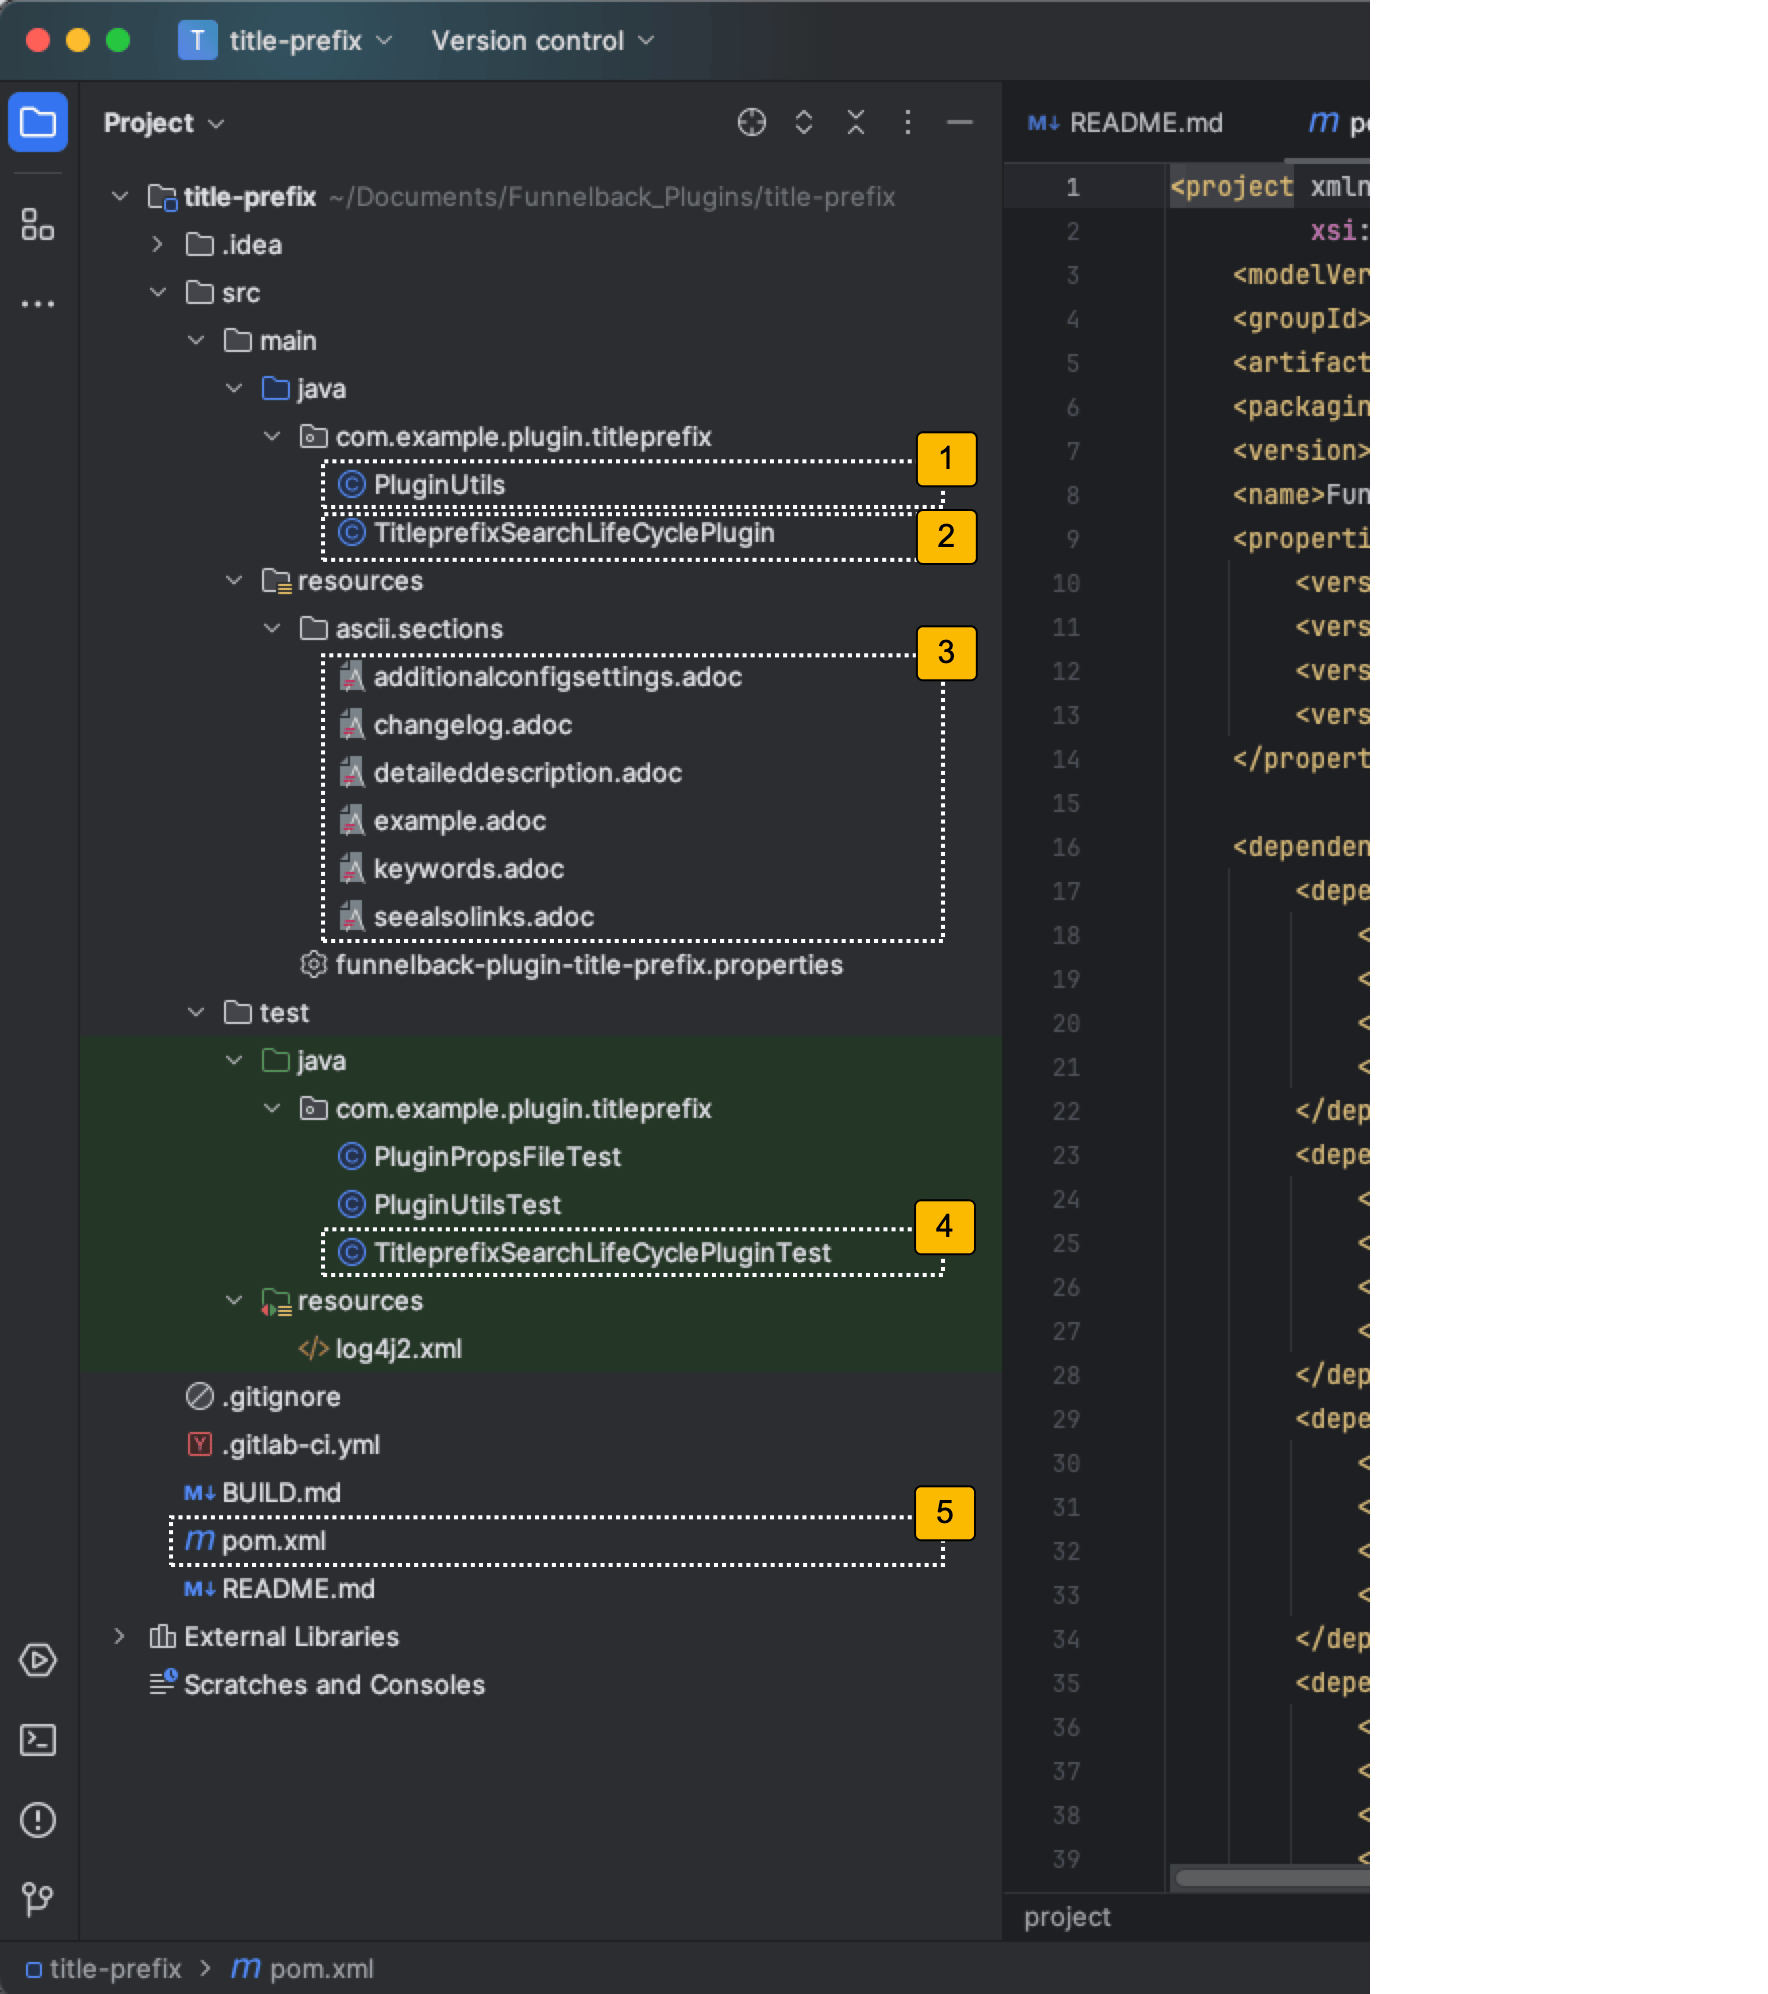
-
PluginUtils: This class defines a set of properties required for the plugin and the plugin documentation. This is also where you define things like metadata fields that the plugin generates. The definitions in here are also used when generating the documentation. -
Other files inside the
src/main/java/<package name>folder: The other files in this folder contain the code that implements the functionality of the plugin. In this example there is only a singleTitlePrefixSearchLifeCyclePluginfile included in this folder as we only chose to implement thesearchLifeCycleinterface when generating the plugin. A file is created here for each interface template that was selected when the plugin was generated from the Maven archetype. -
Files inside the
src/main/resources/ascii.sectionsfolder: This is where you write the free-form parts of the documentation for your plugin. Each file within this folder corresponds to one of the sections within the generated documentation. The documentation must be written in asciidoc format. -
Files inside the
test/java/<package name>folder: This contains code that implements unit tests to make sure the plugin is working correctly. A test file will be generated for each interface that was selected when generating the plugin in the same way as for the main plugin code above. Unit testing of plugins are covered in more detail in the testing section of the tutorial. In this example we only see a single fileTitlePrefixSearchLifeCyclePluginTest, which is where you will write tests for your plugin. -
pom.xml: This file defines a number of parameters that maven uses to package the project. Other libraries required by the plugin will automatically be added to this by IntelliJ.