SEARCH 202 - Implement a new search
Introduction
This course is aimed at frontend and backend developers and takes you through search creation and advanced configuration of Funnelback implementations.
-
A summary: A brief overview of what you will accomplish and learn throughout the exercise.
-
Exercise requirements: A list of requirements, such as files, that are needed to complete the exercise.
The exercises can be read as tutorials or completed interactively. In order to interactively complete the exercises you will need to set up the training searches, or use a training environment. -
Detailed step-by-step instructions: detailed step-by-step instructions to guide you through completing the exercise.
-
Some extended exercises are also provided. These exercises can be attempted if the standard exercises are completed early, or as some review exercises that can be attempted in your own time.
Prerequisites to completing the course:
-
HTML, JavaScript and CSS familiarity.
1. Basics
Every search provided by Funnelback contains a number of basic components that come together to form the search.
1.1. Search packages
A search package is used to provide search across one or more data sources. It packages up the set of data sources into a searchable bundle and provides the different search pages used to display the search results that are retrieved from the index.
| A search package is similar to a meta collection from older versions of Funnelback |
1.2. Data sources
A data source contains configuration and indexes relating to a set of information resources such as web pages, documents or social media posts.
Each data source implements a gatherer (or connector) that is responsible for connecting to the content repository and gathering the information to include in the index.
| A data source is similar to a non-meta collection from older versions of Funnelback. |
1.3. Results pages
A results page contains configuration and templating relating to a search results page provided by Funnelback.
Results page configuration includes:
-
Templating for the search results
-
Display settings that define properties about what is displayed by Funnelback (for example, what metadata fields to return, how to sort the search results).
-
Ranking settings that define how the order of search results will be determined.
-
Feature configuration such as faceted navigation, auto-completion and extra searches that will be used to supplement the search results.
Reporting such as usage analytics, content and accessibility auditing is also produced for each search page
| A results page is similar to a service-enabled profile from older versions of Funnelback. |
2. Create a basic web search
A web search is probably the simplest search that you will create with Funnelback. It is used to provide a search for one or more websites.
In this exercise you will create a very basic search of a couple of websites containing the full text of some online books.
At a minimum, setting up a basic web search requires a search package containing a data source and a results page.
2.1. Step 1: Create a search package for your search
A search package is required for every search that you create. The search package bundles together all the data sources into a single index that you can then search across using results pages.
Tutorial: Create a search package
-
Log in to the search dashboard where you are doing your training.
See: Training - search dashboard access information if you’re not sure how to access the training. Ignore this step if you’re treating this as a non-interactive tutorial. -
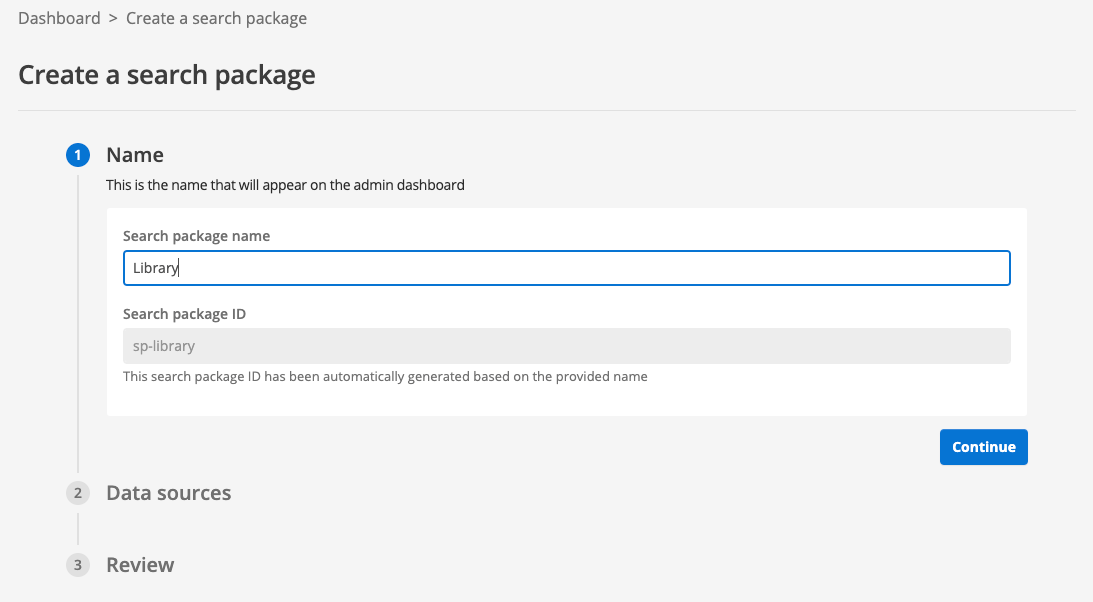
Click the add new search package button. This opens the screen used to create a new search package.

-
When prompted, enter Library as the search package name. Observe that the search package ID is automatically generated from the name that you enter. Click the continue button to proceed to the second step of search package creation.
-
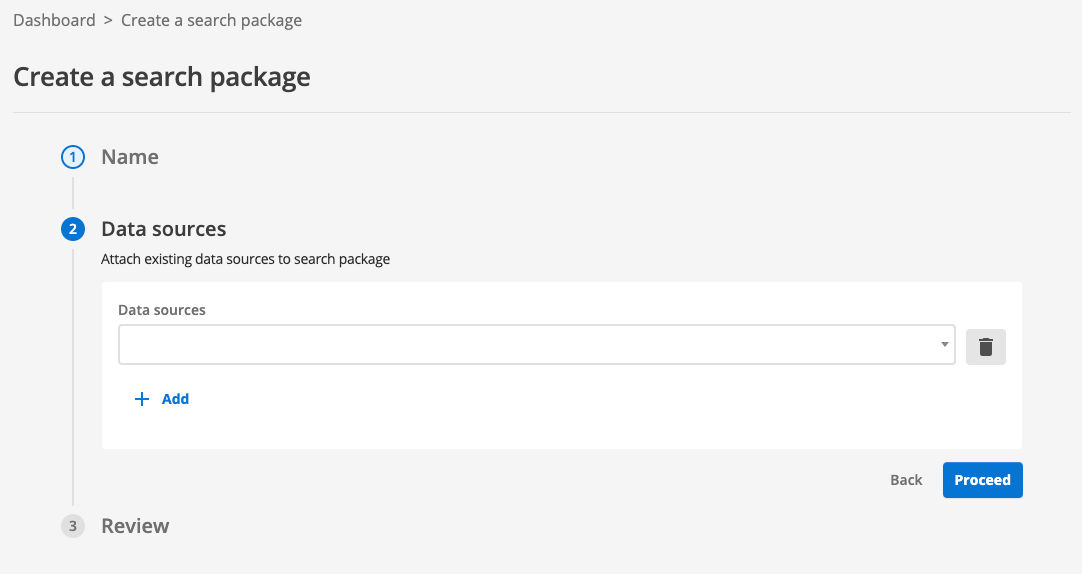
Step 2 of search package creation enables you to (optionally) attach existing data sources to your new search package, which you pick from the drop-down menu. Click the proceed button to skip this step as we will create our data source later.
-
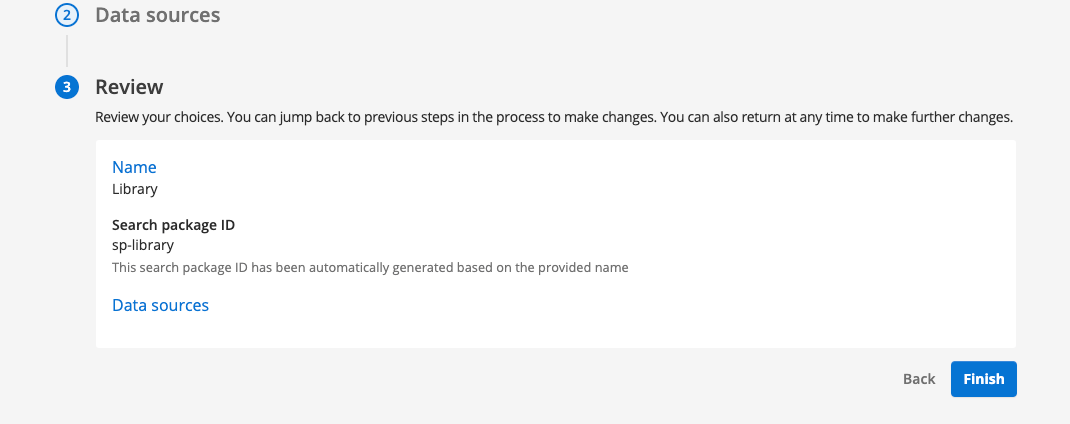
Review the information that you have entered. If you find any mistakes in the information you have entered you can return to a previous step by clicking on the step number. Once you are satisfied with the information in the review panel, click the finish button to create your search package.
-
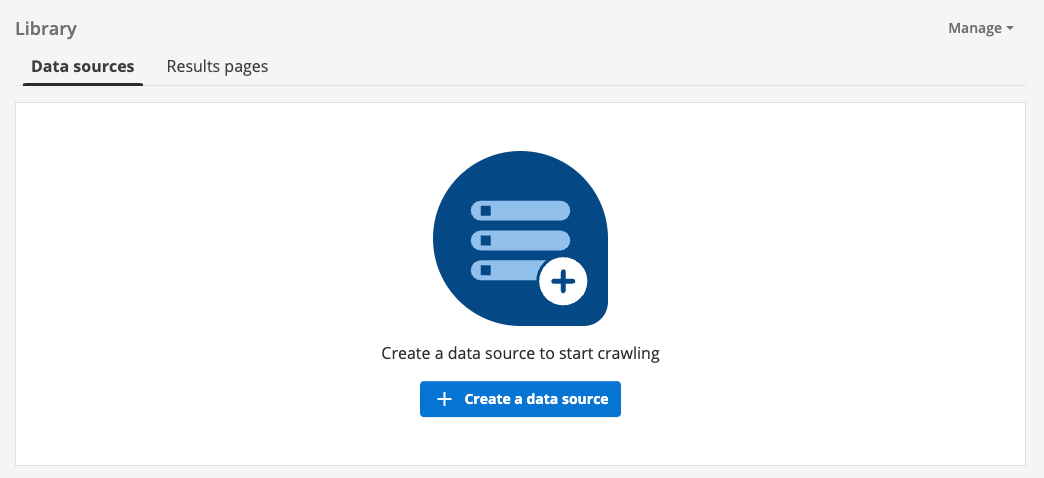
The search package management screen is displayed. Data sources and results pages can be set up from the panel located at the bottom of your page. However, for this exercise we will return to the main search dashboard before setting these up. Return to the search dashboard home page by clicking the dashboard item in the breadcrumb trail, the search dashboard item in the side navigation, or by clicking on the Funnelback logo on the menu bar.
-
You are returned to the search package listing. Scroll down the list of search packages and observe that the Library search package that you just created is now listed with the other search packages.
2.2. Step 2: Create your data sources
Tutorial: Create a web data source
This exercise sets up the data source that will crawl and index a website that contains the complete works of Shakespeare.
A web data source is used to gather and index the content of a website or set of websites. Web data sources contain HTML, PDF and MS Office files that are gathered by crawling a website or set of websites.
A web crawler is a bit like a user that loads a web page and then clicks on every link on the web page in turn, repeating this process until all the links on the website have been visited.
| The web crawler’s view of a website is similar to what you would see if you visited the website in a web browser, but with Javascript disabled. The web crawler doesn’t execute Javascript so cannot crawl a website if it requires Javascript to generate the page. |
This exercise continues on directly from the previous exercise.
-
Log in to the search dashboard where you are doing your training.
See: Training - search dashboard access information if you’re not sure how to access the training. Ignore this step if you’re treating this as a non-interactive tutorial. -
Start the process to create a new data source by clicking on the create a data source button, located on the data sources tab that is displayed for the search package you created in the previous exercise.
-
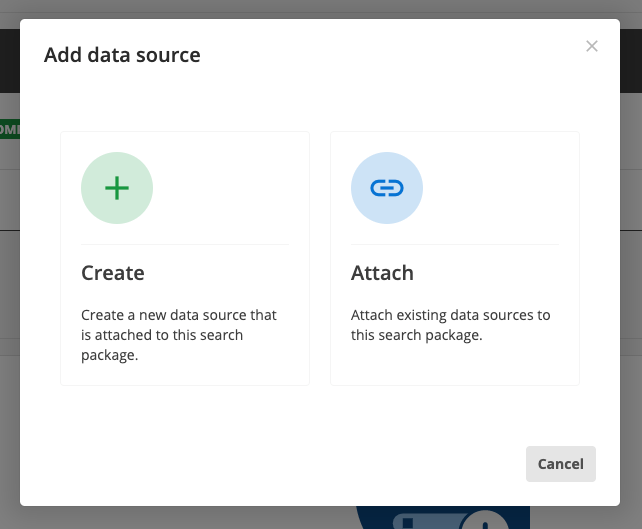
A modal opens providing you with the option to create or attach a data source. The attach option can be used to attach an existing data source to your search package. We are not interested in using any of the existing data sources in our new Library search, so we will create a new data source. Click the create button.
-
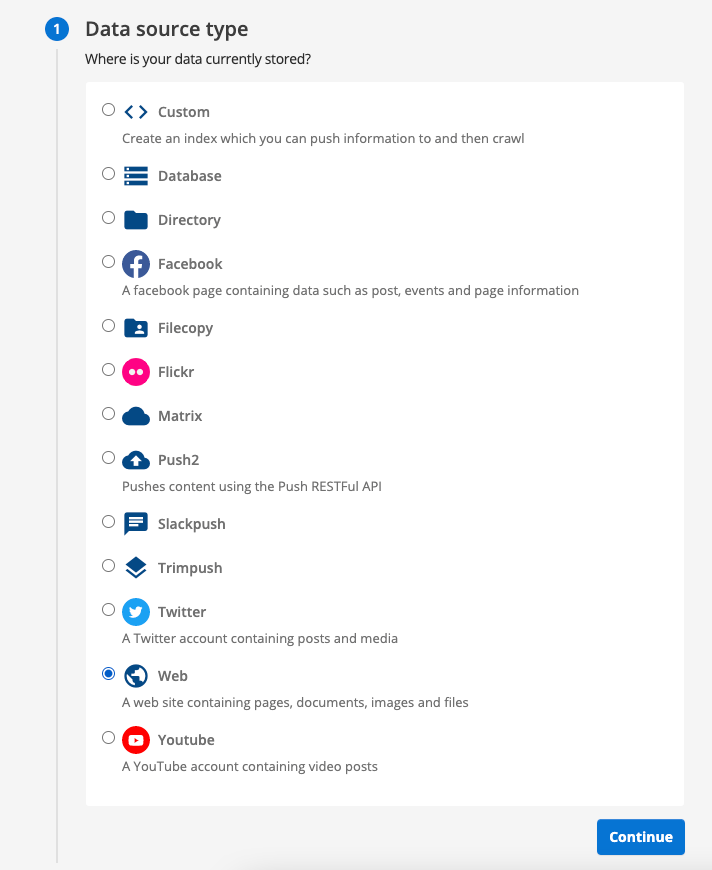
The first step of data source creation requires you to choose your data source type. Select the web radio button then click the continue button.
-
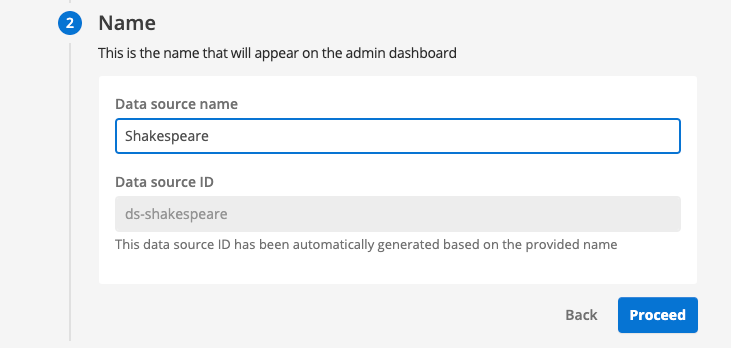
Enter Shakespeare when prompted for a data source name. Observe that the data source ID is automatically generated from your chosen name. Click the proceed button to move to the configuration step.
-
Enter some basic configuration for the data source. At a minimum you need to tell the crawler what should and shouldn’t be included in the crawl.
-
Enter the following into the
What website(s) do you want to crawl?field:https://docs.squiz.net/training-resources/shakespeare/Whatever you enter into this box will be included in your search, if the URL of the page matches.
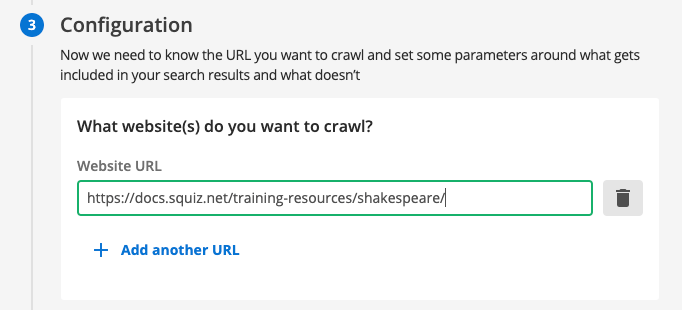
Normally you would just enter your website home page here (for example, https://www.example.com/) - this example is a little more complicated because we are crawling a local copy of the website for training purposes. The two following sections following this can be used to further adjust what is included or excluded from your search:
- What do you want to exclude from your crawl?
-
If any of the items listed here fully or partially match a page URL, then that page will not be included in the search (and links contained in the page won’t be followed).
- Which non-HTML file types do you want to crawl as well?
-
This is a list of non-HTML documents that will be included in the search.
-
Click the proceed button to review the information you have provided. If you find any errors in what you’ve provided you can click on the step number to update the information. Once you are happy with the information in the review panel click the proceed button to create your data source.
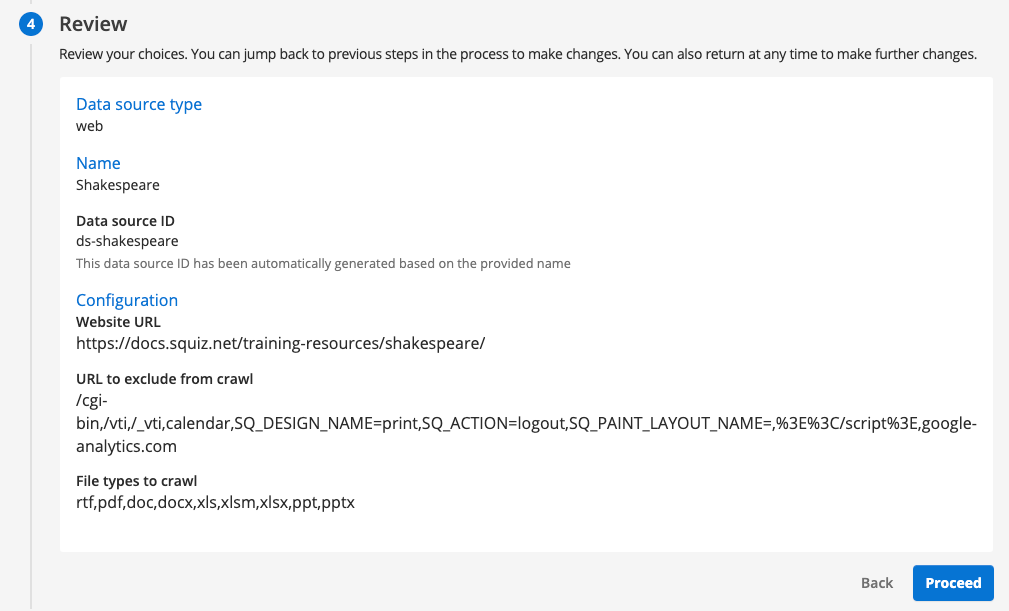
-
You are provided with a final option to update your data source now, or to update it later. Select the option to update now, then click the finish button to complete the data source creation steps.
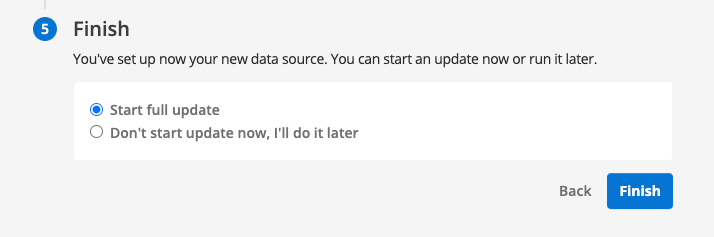
In most cases you will want to update your data source later because you will want to provide additional configuration such as metadata. -
The data source management screen loads. Note that the status of the data source reads queued. This means that an update of the data source has been added to the task queue, but hasn’t yet started. The status will refresh as the update progresses.
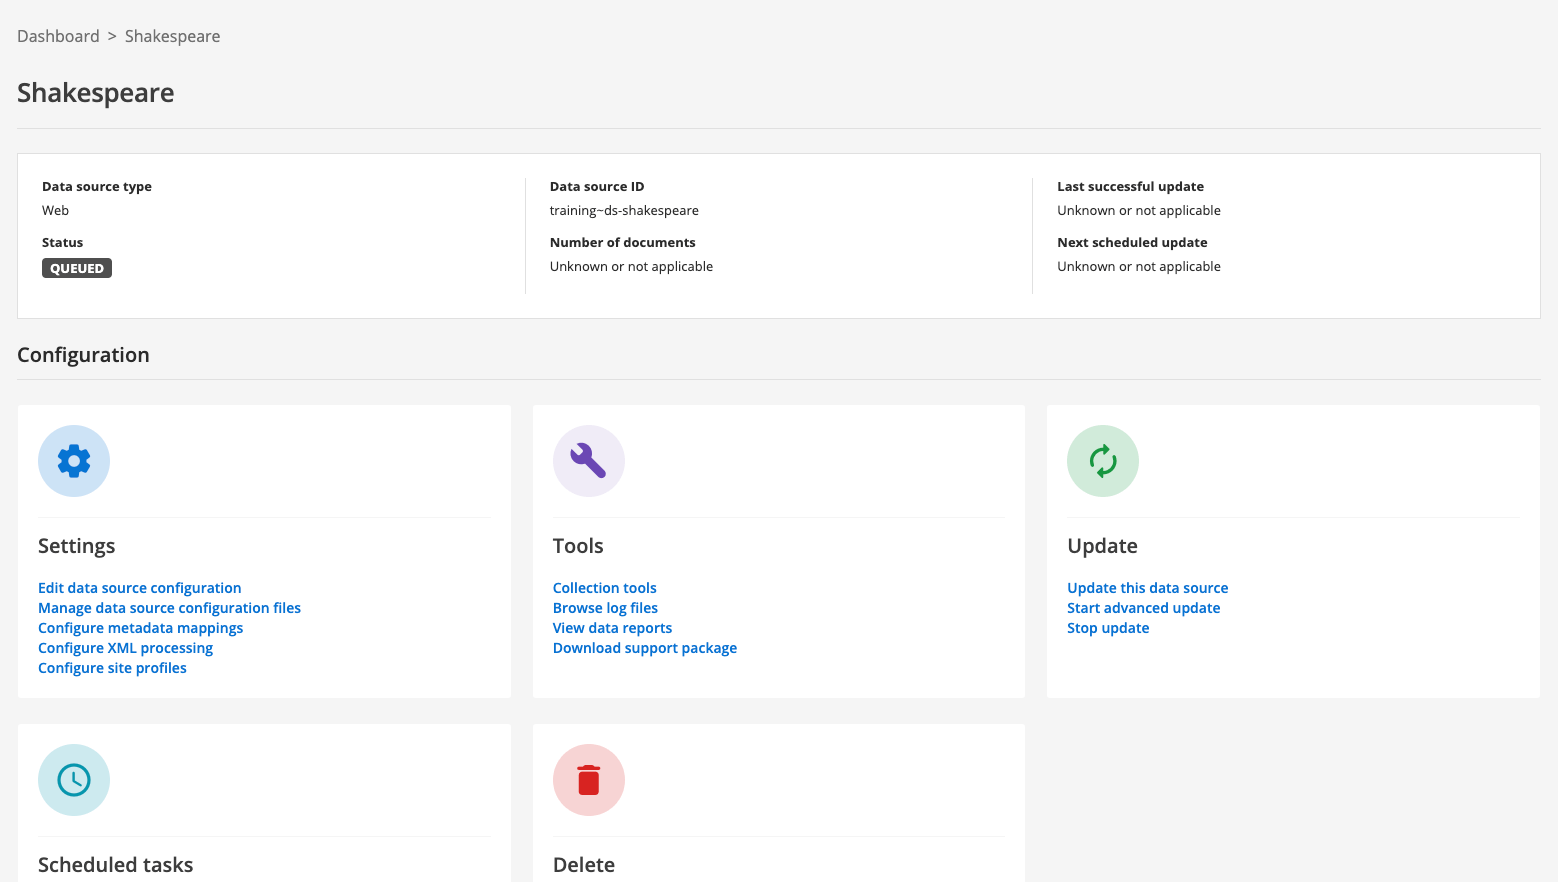
-
After a short time the status message should update to indicate that the update is running (or has finished).
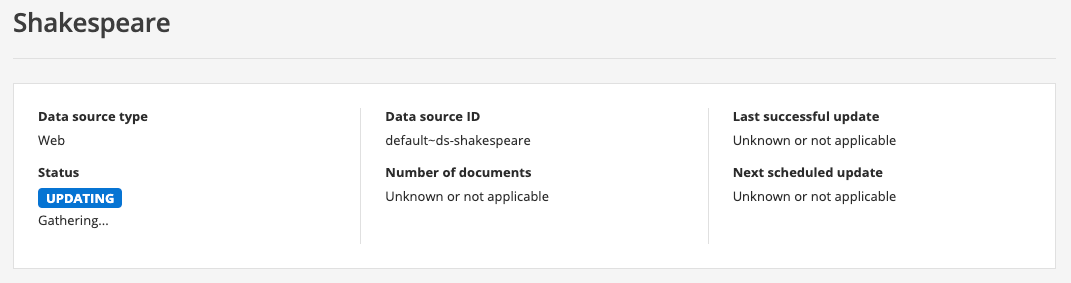
-
Repeat the above steps to create a second data source with the following details:
- Data source type
-
web
- Data source name
-
Austen - What website(s) do you want to crawl?
- What do you want to exclude from your crawl?
-
leave as default value
- Which non-HTML file types do you want to crawl as well?
-
leave as default value
Here we are creating a second data source to independently crawl the austen website. In general, we recommend that you add the website to your existing web data source (especially if you are likely to have cross-linking between the websites) as this results in better ranking quality.
-
When you’ve finished creating the data source, run an update.
2.3. Step 3: Create a results page
Before we delve more into data sources, we’ll take a quick look at results pages, which is the final element required to provide a working search.
Every search package in Funnelback contains one or more results pages which underpin the preview/live templates and configuration and also which can be used to provide access to scoped versions of the search.
Once a results page is created, default display and ranking options can be applied.
Separate results pages should be created:
-
For each search provided by the search package.
-
When separate analytics are desired for the search.
-
When independent templates, best bets, synonyms or curator rules are required for the search.
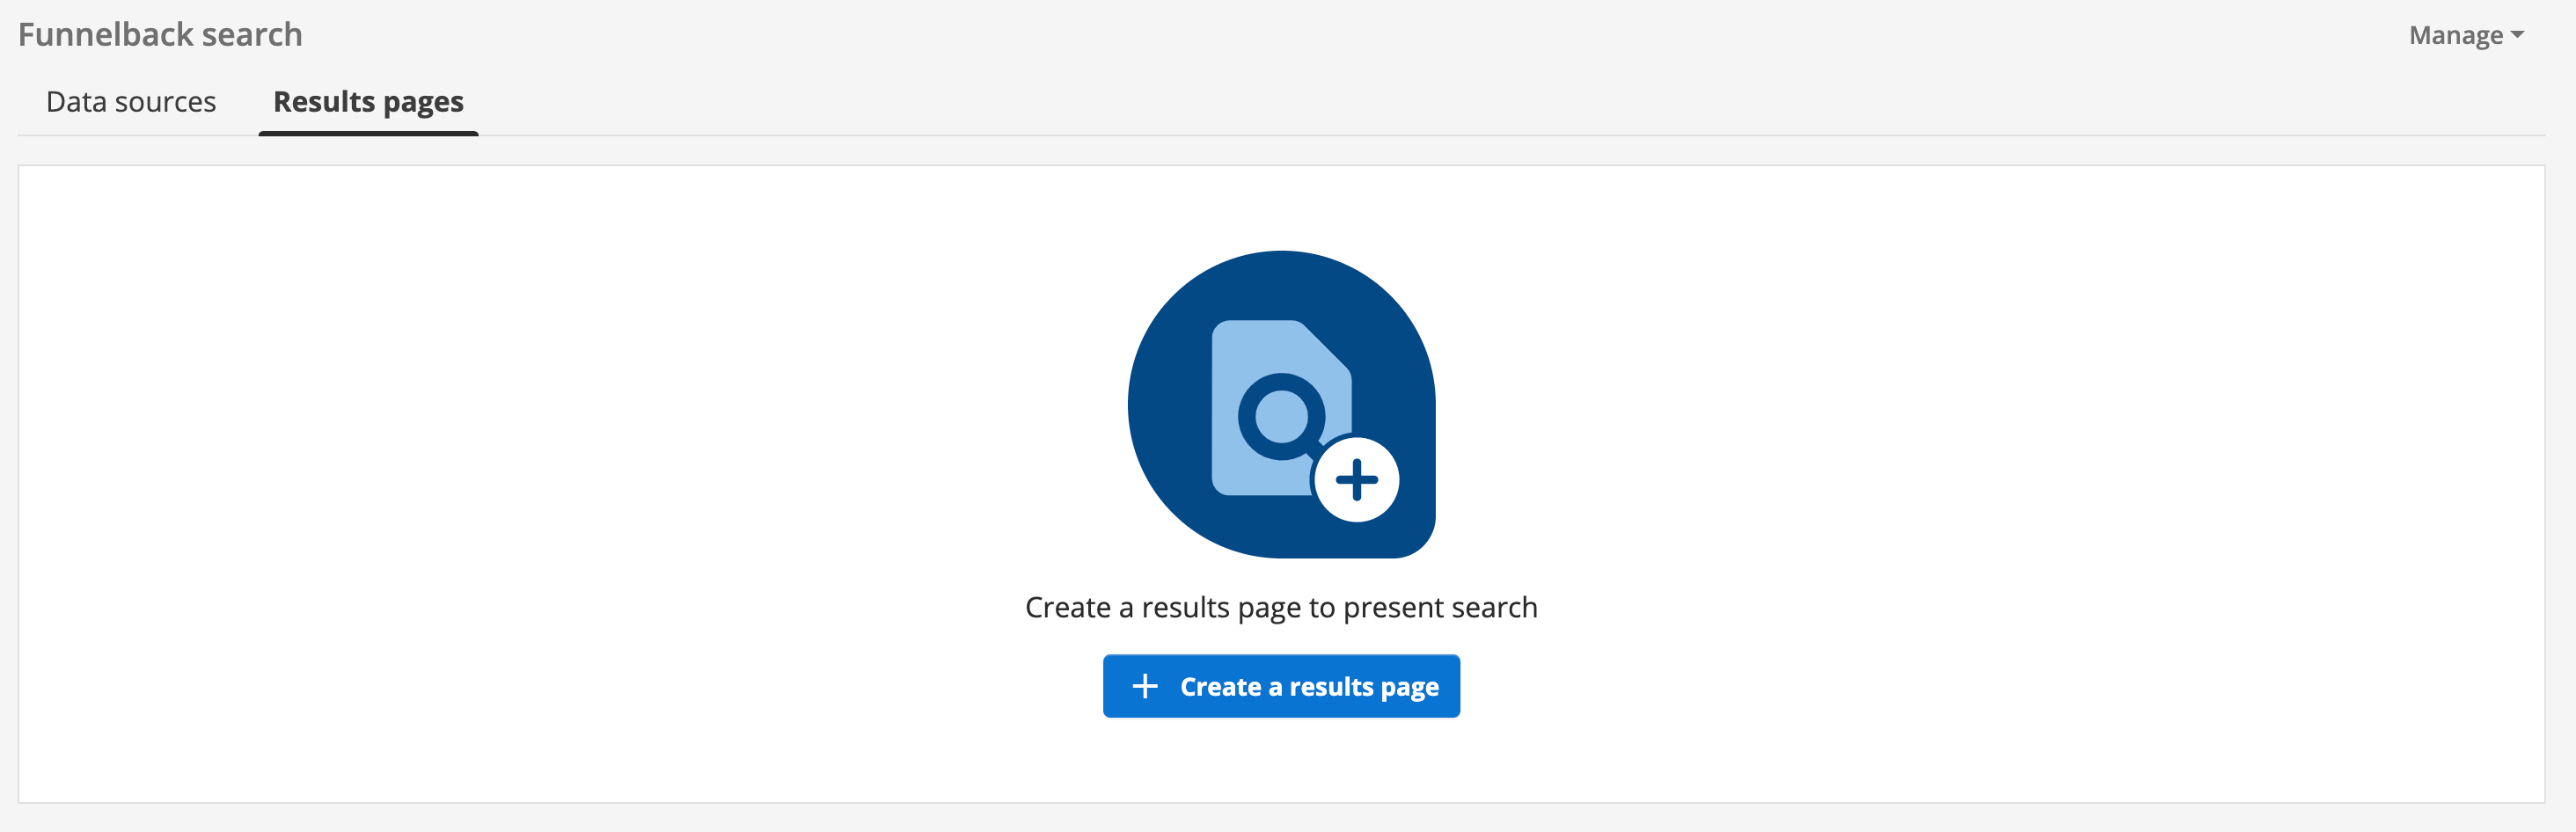
Tutorial: Create a results page
-
Log in to the search dashboard where you are doing your training.
See: Training - search dashboard access information if you’re not sure how to access the training. Ignore this step if you’re treating this as a non-interactive tutorial. -
Locate the library search package that you created in a previous exercise.
-
Click on the results pages tab then click the create a results page button.
-
Enter Book finder as the results page name then click the continue button.
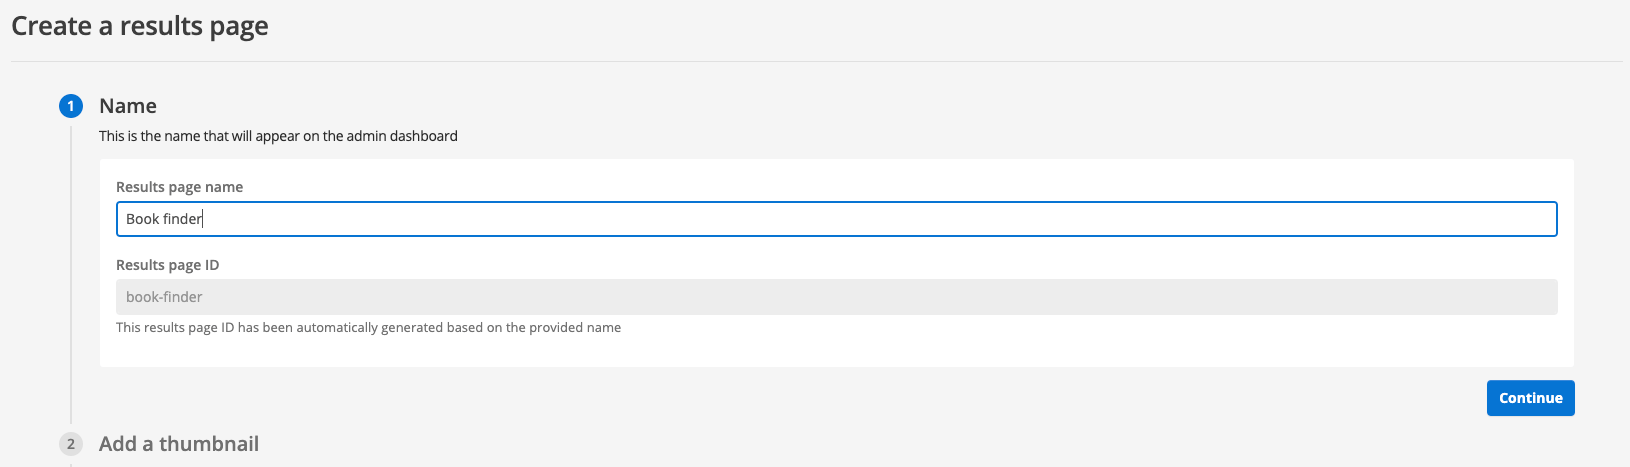
-
You are then provided with an option to add a thumbnail image for the results page - this image is displayed on the results page management screen and insights dashboard. We’ll skip this step now (an image is easily added later). Click the proceed button to move to the next step of the results page creation process.

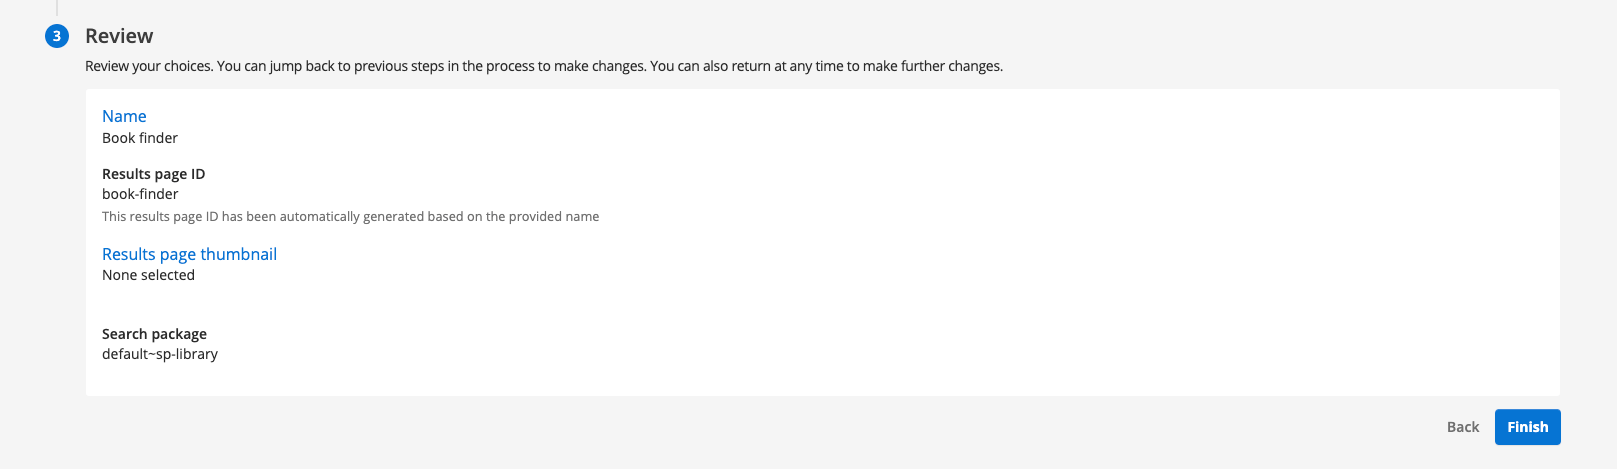
-
Review the settings that you have entered. Once satisfied, click the finish button to create the results page.
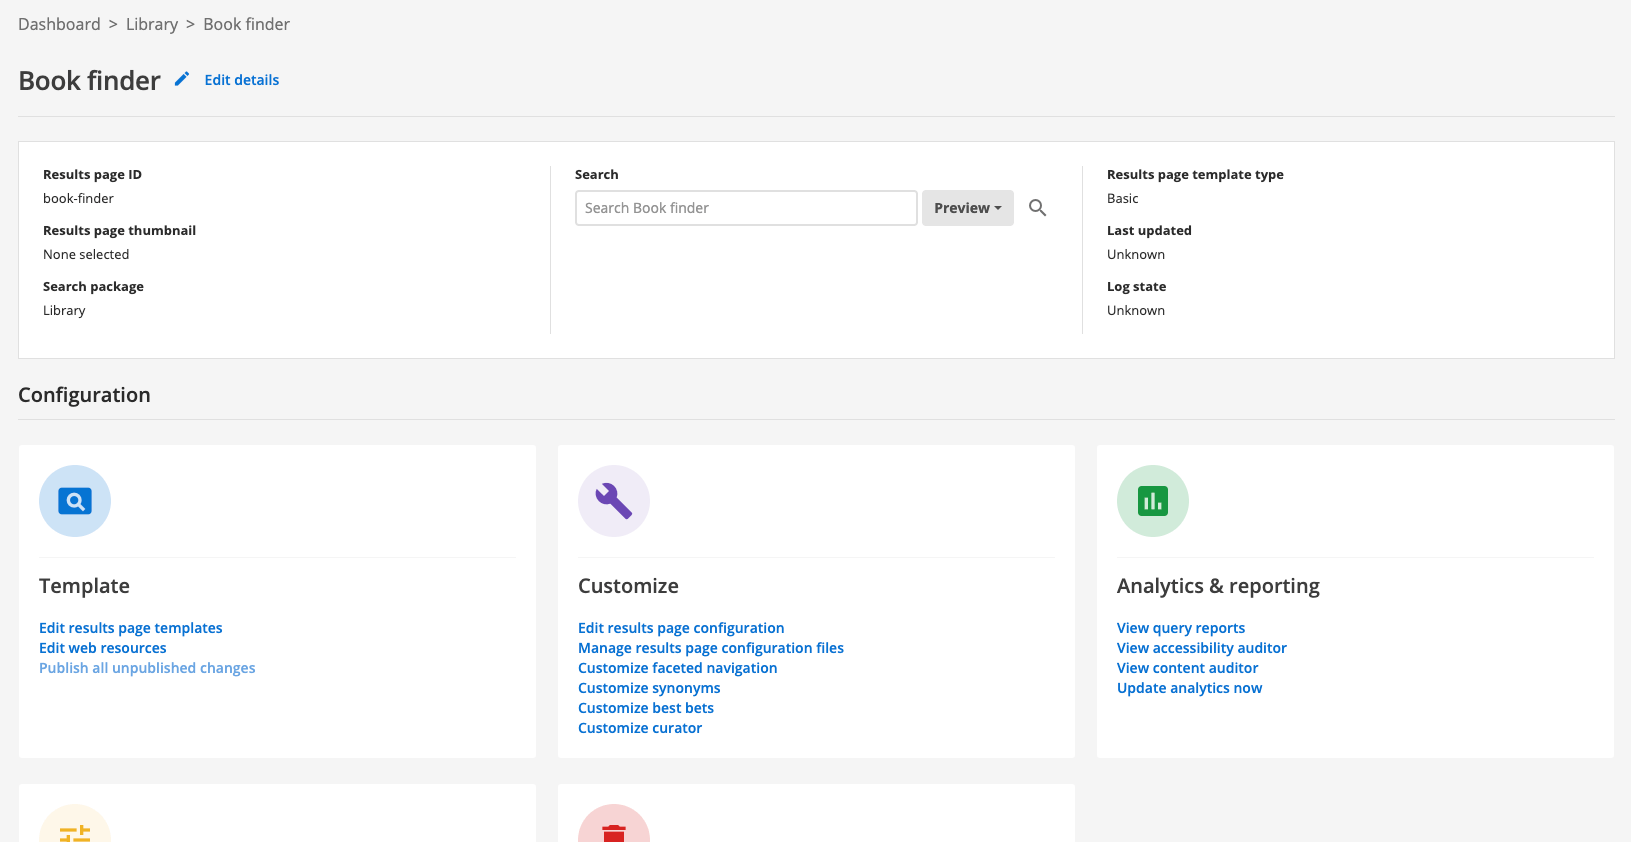
-
You are redirected to the results page management screen where you can perform further setup of your new results page.
3. Web data sources - update cycle
When you start an update, Funnelback commences on a journey that consists of a number of processes or phases.
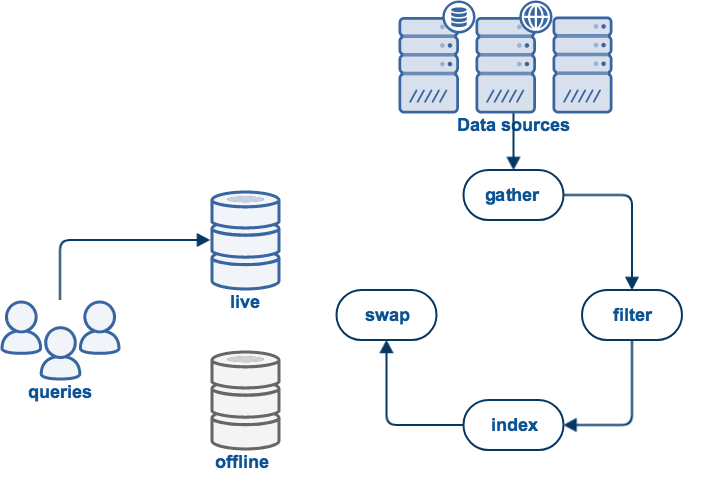
Each of these phases must be completed for a successful update to occur. If something goes wrong an error will be raised and this will result in a failed update.
The exact set of phases will depend on what type of data source is being updated - however all data source generally have the following phases:
-
A gather phase that is the process of Funnelback accessing and storing the source data.
-
A filter phase that transforms the stored data.
-
An index phase that results in a searchable index of the data.
-
A swap phase that makes the updated search live.
3.1. Gathering
The gather phase covers the set of processes involved in retrieving the content from the data source.
The gather process needs to implement any logic required to connect to the data source and fetch the content.
The overall scope of what to gather also needs to be considered.
For a web data source the process of gathering is performed by a web crawler. The web crawler works by accessing a seed URL (or set of URLs). The seed (or start) URLs are the same as the URL(s) you entered in the What website(s) do you want to crawl? step when creating the data source.
The seed URLs are always fetched by the web crawler and stored locally. The crawler then parses the downloaded HTML content and extracts all the links contained within the file. These links are added to a list of URLs (known as the crawl frontier) that the crawler needs to process.
Each URL in the frontier is processed in turn. The crawler needs to decide if this URL should be included in the search - this includes checking a set of include / exclude patterns, robots.txt rules, file type and other attributes about the page. If all the checks are passed the crawler fetches the URL and stores the document locally. Links contained within the HTML are extracted and the process continues until the crawl frontier is empty, or a pre-determined timeout is reached.
The logic implemented by the web crawler includes a lot of additional features designed to optimize the crawl. On subsequent updates this includes the ability to decide if a URL has changed since the last visit by the crawler.
3.1.1. Crawler limitations
The web crawler has some limitations that are important to understand:
-
The web crawler does not process JavaScript. Any content that can’t be accessed when JavaScript is disabled will be hidden from the web crawler.
-
It is possible to crawl some authenticated websites, however this happens as a specified user. If content is personalized, then what is included in the index is what the crawler’s user can see.
-
By default, the crawler will skip documents that are larger than 10MB in size (this value can be adjusted).
3.2. Filtering
Filtering is the process of transforming the downloaded content into text suitable for indexing by Funnelback.
This can cover a number of different scenarios including:
-
file format conversion - converting binary file formats such as PDF and Word documents into text.
-
text mining and entity extraction
-
document geocoding
-
metadata generation
-
content and WCAG checking
-
content cleaning
-
additional or custom transformations defined in a filter plugin.
3.3. Indexing
The indexing phase creates a searchable index from the set of filtered documents downloaded by Funnelback.
The main search index is made up of an index of all words found in the filtered content and where the words occur. Additional indexes are built containing other data pertaining to the documents. These indexes include document metadata, link information, auto-completion and other document attributes (such as the modified date and file size and type).
Once the index is built it can be queried and does not require the source data used to produce the search results.
3.4. Swap views
The swap views phase serves two functions - it provides a sanity check on the index size and performs the operation of making the updated indexes live.
All Funnelback data sources (except push data sources) maintain two copies of the search index known as the live view and the offline view.
When the update is run all processes operate on an offline view of the data source. This offline view is used to store all the content from the new update and build the indexes. Once the indexes are built they are compared to what is currently in the live view - the set of indexes that are currently in a live state and available for querying.
The index sizes are compared. If Funnelback finds that the index has shrunk in size below a definable value (for example, 50%) then the update will fail. This sanity check means that an update won’t succeed if the website was unavailable for a significant duration of the crawl.
An administrator can override this if the size reduction is expected. For example, a new site has been launched, and it’s a fraction of the size of the old site.
Push data sources used an API based mechanism to update and will be covered separately.
4. Checking an update
Funnelback maintains detailed logs for all processes that run during an update.
When there is a problem and an update fails the logs should contain information that allows the cause to be determined.
It is good practice to also check the log files while performing the setup of a new data source - some errors don’t cause an update to fail. A bit of log analysis while building a data source can allow you to identify:
-
pages that should be excluded from the crawl
-
crawler traps
-
documents that are too large
-
documents of other types
Each of the phases above generate their own log files - learning what these are and what to look out for will help you to solve problems much more quickly.
Tutorial: Examine update logs
In this exercise some of the most useful log files generated during an update of a web data source will be examined.
-
Log in to the search dashboard where you are doing your training.
See: Training - search dashboard access information if you’re not sure how to access the training. Ignore this step if you’re treating this as a non-interactive tutorial. -
Locate the austen data source that you created in the previous exercise.
-
Open the manage data source screen (by clicking on the funnelback website title, or selecting the > configuration menu item. The status should now be showing update complete, which indicates that the update completed successfully.

-
View the log files for the update by clicking on the browse log files link in the tools section.
-
Observe the log manager view of the available log files. The files are grouped under several headings including: collection log files, offline log files and live log files.
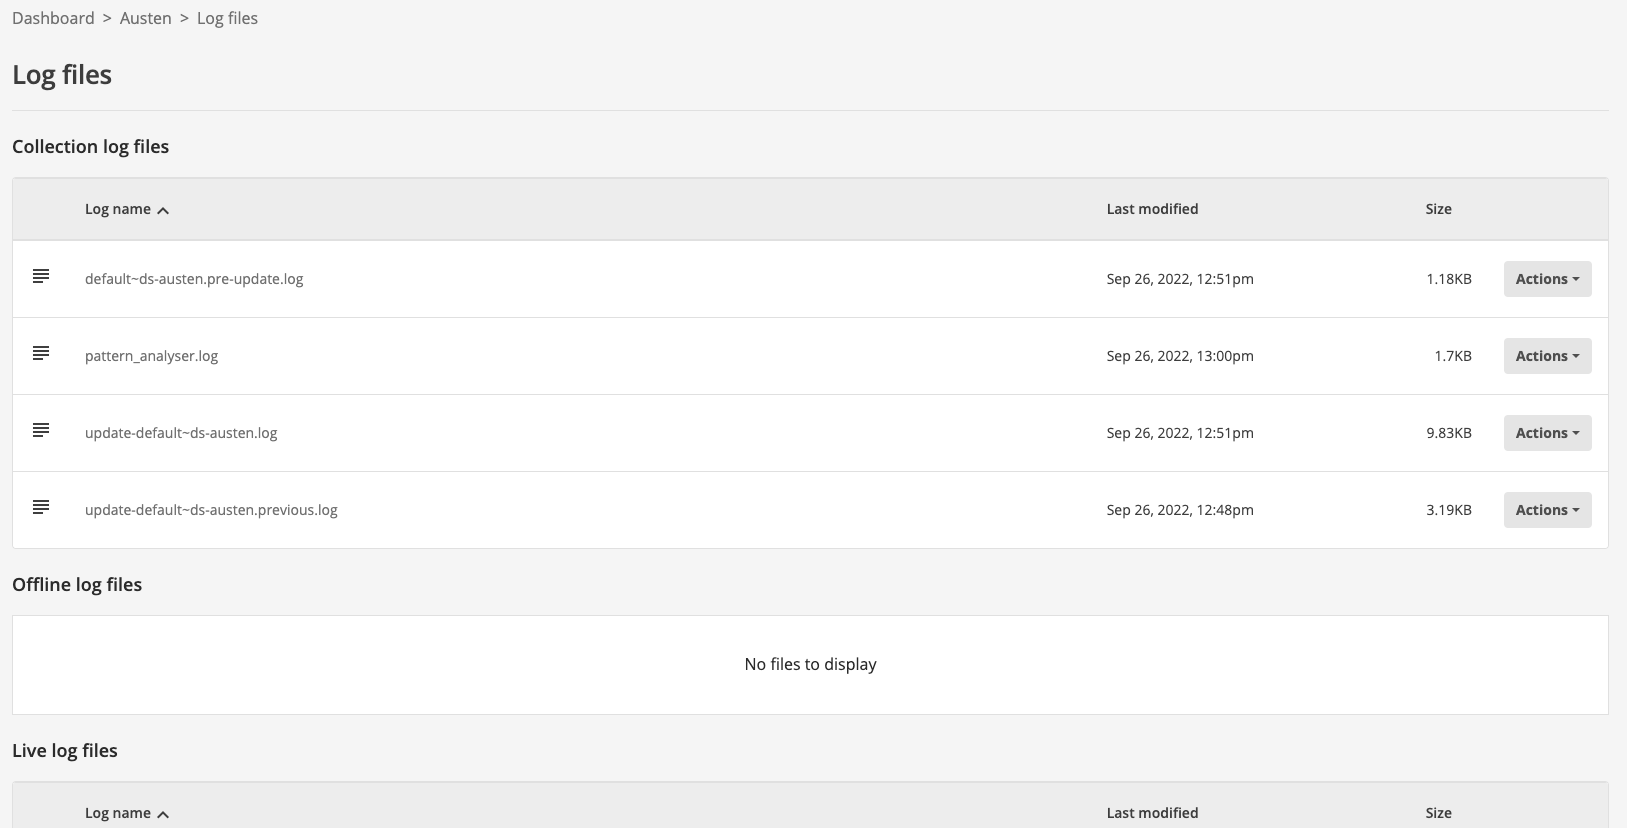
The collection log files section contains the top-level update and report logs for the data source. The top-level update log contains high-level information relating to the data source update.
The live log files section includes all the detailed logs for the currently live view of the search. This is where you will find logs for the last successful update.
The offline log files section includes detailed logs for the offline view of the search. The state of the log files will depend on the data source’s state - it will contain one of the following:
-
Detailed logs for an update that is currently in progress
-
Detailed logs for the previous update (that failed)
-
Detailed logs for the successful update that occurred prior to the currently live update.
-
4.1. Debugging failed updates
An update can fail for numerous reasons. The following provides some high level guidance by providing some common failures and how to debug them.
The first step is to check the data source’s update log and see where and why the update failed. Look for error lines. Common errors include:
-
No documents stored: For some reason Funnelback was unable to access any documents so the whole update failed (as there is nothing to crawl). Look at the offline crawl logs (
crawler.log,crawl.log.X.gz) andurl_errors.logfor more information. The failure could be the result of a timeout, or a password expiring if you are crawling with authentication. -
Failed changeover conditions: After building the index a check is done comparing with the previous index. If the index shrinks below a threshold then the update will fail. This can occur if one of the sites was down when the crawl occurred, or if there were excessive timeouts, or if the site has shrunk (for example, because it has been redeveloped or part of it archived). If a shrink in size is expected you can run an advanced update and swap the views.
-
Failures during filtering: Occasionally the filtering process crashes causing an update to fail. The
crawler.logorgather.logmay provide further information to the cause. -
Lock file exists: The update could not start because a lock file was preventing the update. This could be because another update on the data source was running; or a previous update crashed leaving the lock files in place. The lock can be cleared from the search dashboard by selecting the data source then clicking on the clear locks link that should be showing on the update tab.
-
Failures during indexing: Have a look at the offline index logs (
Step-*.log) for more details.
Tutorial: Debug a failed update
In this exercise we will update the configuration so that the crawler is unable to access the start URL to provide a simple example of debugging an update.
-
Log in to the search dashboard where you are doing your training.
See: Training - search dashboard access information if you’re not sure how to access the training. Ignore this step if you’re treating this as a non-interactive tutorial. -
locate the austen data source.
-
Open the manage data source screen (by clicking on the austen title, or selecting the > configuration menu item. The status should now be showing update complete, which indicates that the update completed successfully.
-
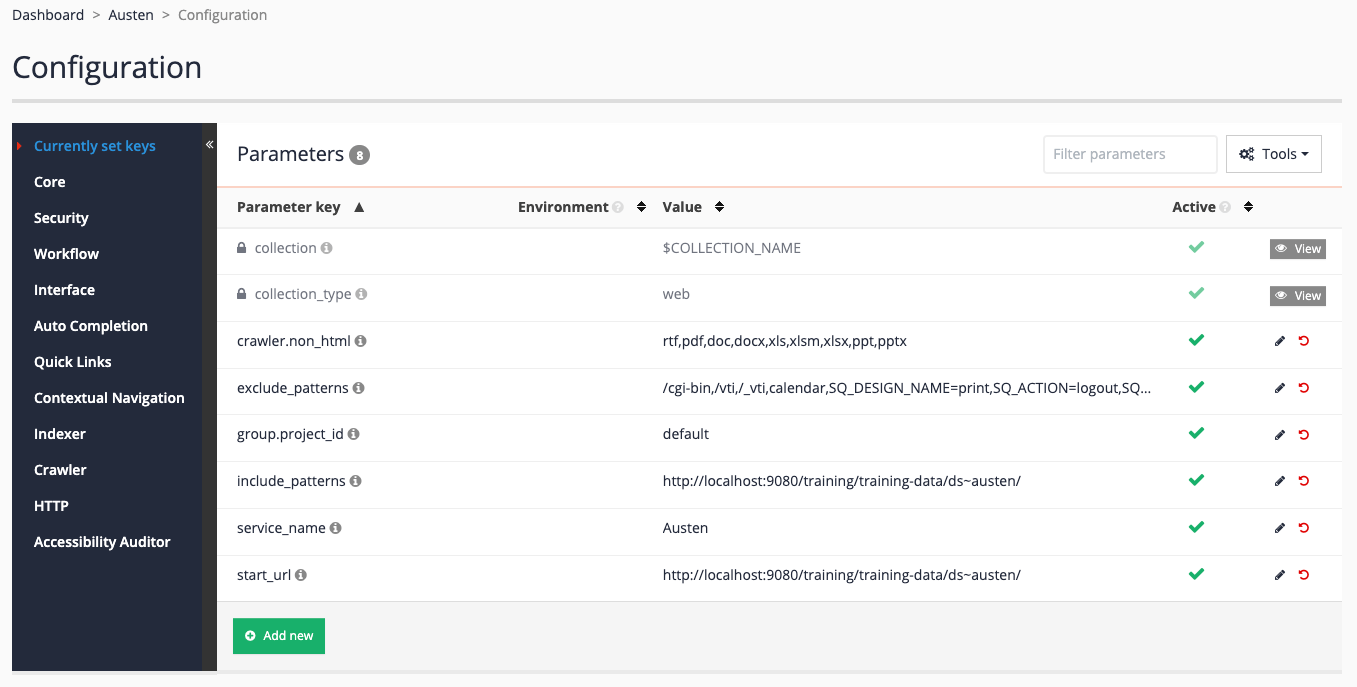
Access the data source configuration by clicking the edit data source configuration option in the settings section.
-
Update the start url by clicking on the
start_urlitem. Update the value tohttps://docs.squiz.net/training-resources/austin/(changeaustentoaustin) then save your changes. We are intentionally using a URL containing a typo in this example so we can examine the resulting errors.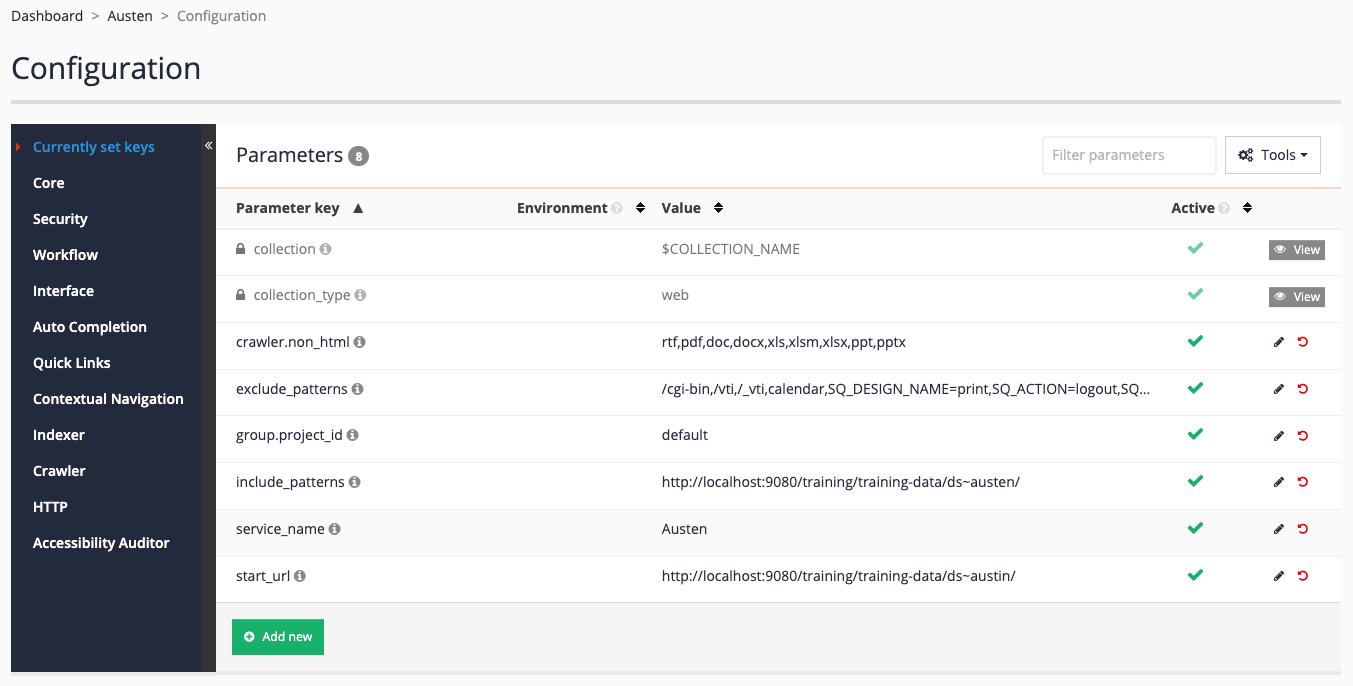
-
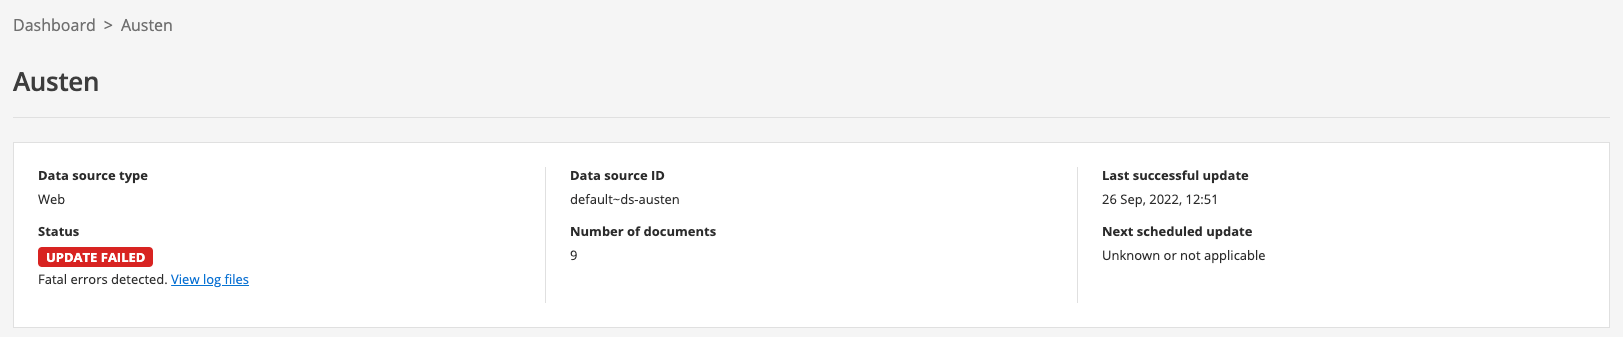
Return to the data source manage screen by clicking Austen in the breadcrumbs, then start an update by clicking on the update data source item in the update section. The update should fail almost immediately, and the status will update to show update failed (note you might need to refresh your browser screen).
-
Access the logs (click on browse log files in the tools section). Inspect the log files for the data source - starting with the
update-training~ds-austen.log. Theupdate-<DATA-SOURCE-ID>.logprovides an overview of the update process and should give you an idea of where the update failed. Observe that there is an error returned by the crawl step. This suggests that we should investigate the crawl logs further.
-
As the data source update failed, the offline view will contain all the log files for the update that failed. Locate the
crawler.logfrom the offline logs section and inspect this. The log reports that no URLs were stored.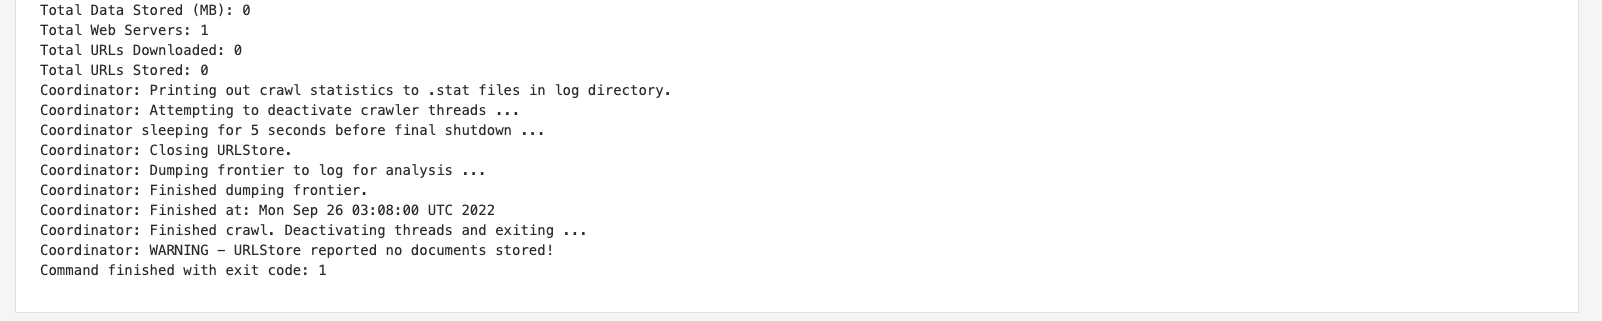
-
Examine the
url_errors.logwhich logs errors that occurred during the crawl. From this log you can see that a 404 not found error was returned when accessinghttp://localhost:9080/training/training-data/ds~austin/which is the seed URL for the crawl. This explains why nothing was indexed because the start page was not found, so the crawl could not progress any further.E https://docs.squiz.net/training-resources/austin/ [404 Not Found] [2022:09:26:03:07:54] -
With this information at hand you can investigate further. In this case the reason the crawl failed was due to the seed URL being incorrectly typed. But you might visit the seed URL from your browser to investigate further.
-
Return to the edit data source configuration screen and correct the start URL.
4.2. Review questions: debugging failed updates
-
What’s the difference between the live and offline logs and when would you look at logs from each of these log folders?
-
Which logs would you look at to solve the following?
-
Find files that were rejected due to size during the last update?
-
Find the cause of an update that failed?
-
Determine why a URL is missing from an index?
-
Identify unwanted items that are being stored?
-
5. Search packages
5.1. Understanding how search packages combine indexes
It is important to understand a few basics about how search packages aggregate content from the different data sources.
-
Metadata classes of all included data sources are combined: this means if you have a class called title in data source A and a class called title in data source B there will be a field called title in the search package that searches the title metadata from both data sources. This means you need to be careful about the names you choose for your metadata classes, ensuring that they only overlap when you intend them to. One technique you can use to avoid this is to namespace your metadata fields to keep them separate. (for example, use something like
websiteTitleinstead oftitlein your website data source). -
Generalized scopes of all included data sources are combined: the same principles as outlined above for metadata apply to gscopes. You can use gscopes to combine or group URLs across data sources by assigning using the same gscope ID in each data source, but only do this when it makes sense - otherwise you may get results that you don’t want if you choose to scope the search results using your defined gscopes.
-
Geospatial and numeric metadata: these are special metadata types and the value of the fields are interpreted in a special way. If you have any of these classes defined in multiple data sources ensure they are of the same type where they are defined.
-
Search packages combine the indexes at query time: this means you can add and remove data sources from the search package and immediately start searching across the indexes.
auto-completion and spelling suggestions for the search package won’t be updated to match the changed search package content until one of the data sources completes a successful update. -
You can scope a query only return information from specific data sources within a search package by supplying the
cliveparameter with a list of data sources to include. -
If combined indexes contain an overlapping set of URLs then duplicates will be present in the search results (as duplicates are not removed at query time).
5.2. Configuring search packages
There are a few things that must be considered when configuring search packages - this is due to the separation between the querying of the search packages and the fact that the indexes for included data sources are not directly part of the search package.
Results pages are used to configure the different searches provided by the search package and configuration for most query-time behaviour needs to be made on the results page. Because results pages part of a search package, they inherit configuration from the search package.
Items that should be configured on a search package include:
-
included data sources (meta components)
-
analytics
-
contextual navigation
-
quick links display
-
content auditor
-
extra searches
Items that should be configured on the results page include:
-
templates
-
synonyms, best bets and curator rules
-
faceted navigation (note: addition of facets based on new metadata fields or generalized scopes require the affected data sources to be updated before the facet will be visible)
-
display options
-
ranking options
-
most auto-completion options
-
search lifecycle plugins
However, because the indexes are still built when the data sources update any changes that affect the update or index build process must be made in the data source configuration. These changes include:
-
metadata field mappings and external metadata
-
gscope mappings
-
indexer options
-
quicklinks generation
-
filters and filter plugins
-
spelling options
Tutorial: Define a scope for a results page
When a new results page is created it has the same content as the parent search package.
Results pages are commonly used to provide a search across a sub-set of content within the search package. To achieve this the results page should be configured to apply a default scope.
In this exercise the Shakespeare search results page will be scoped so that only URLs from the Shakespeare website are returned when the running searches using the Shakespeare search results page.
The Shakespeare search results page is selected by passing a profile parameter set to the results page ID (shakespeare-search) in the search query.
-
Log in to the search dashboard where you are doing your training.
See: Training - search dashboard access information if you’re not sure how to access the training. Ignore this step if you’re treating this as a non-interactive tutorial. -
Locate the library search package.
-
Create another results page, but this time call the results page Shakespeare search.
-
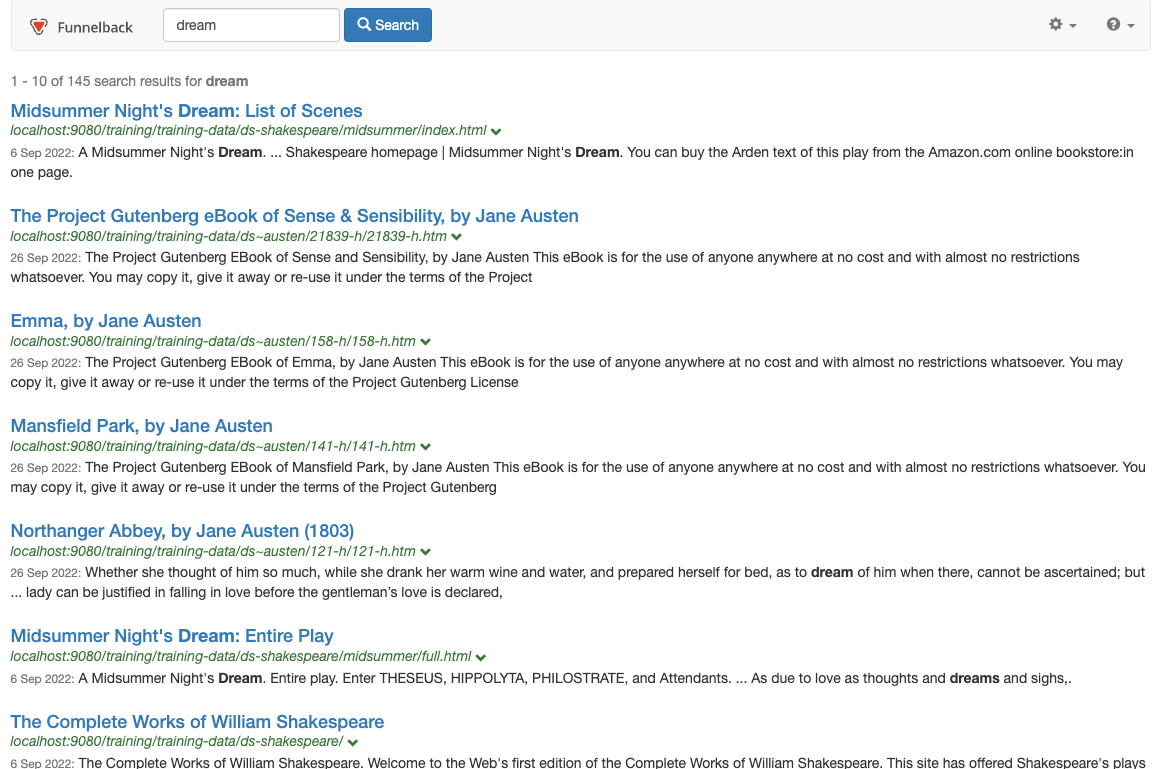
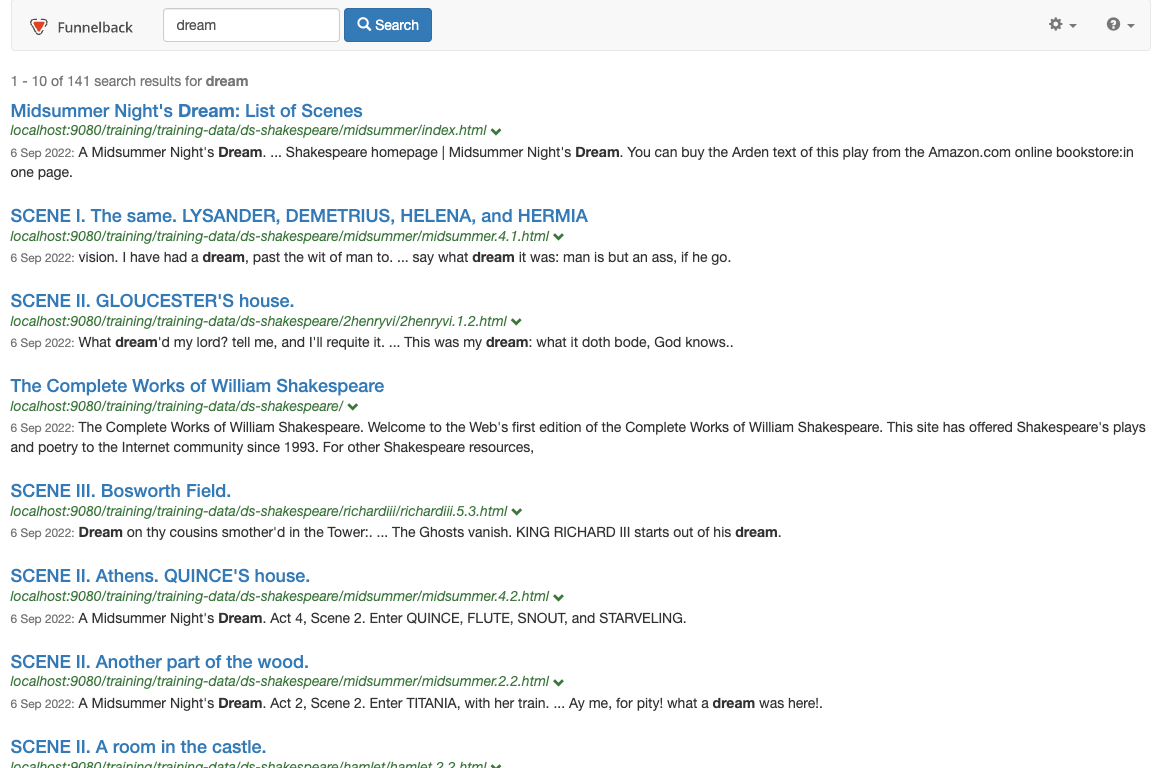
Run a search for dream ensuring the preview option is selected and observe that pages from both the Shakespeare and Austen sites are returned.

-
Select edit results page configuration from the customize section. The index can be scoped by setting an additional query processor option.
Query processor options are settings that can are applied dynamically to a Funnelback search when a query is made to the search index. The options can control display, ranking and scoping of the search results and can be varied for each query that is run. -
Add a query processor option to scope the results page - various options can be used to scope the results page including
scope,xscope,gscope1andclive. Thecliveparameter is a special scoping parameter that can be applied to results page to restrict the results to only include pages from a specified data source or set of data sources. The clive parameter takes a list of data source IDs to include in the scoped set of data. Add acliveparameter to scope the results page to pages from the training~ds-shakespeare data source then click the save button, (but do not publish) the file. You can find the data source ID in the information panel at the top of the results page management screen.-clive=training~ds-shakespeare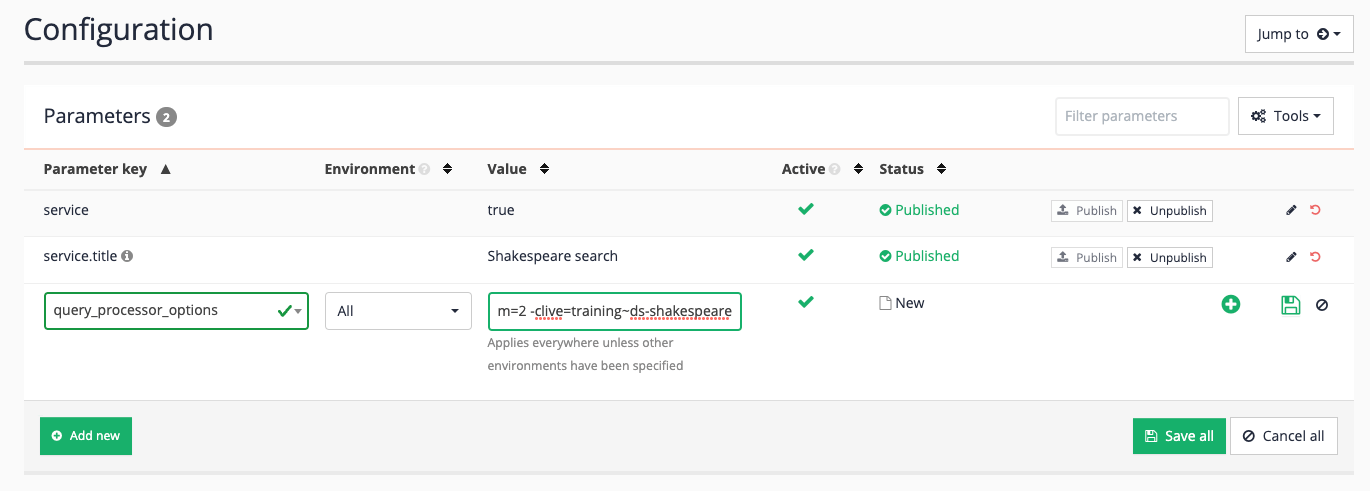
-
Rerun the search for dream against the preview version of the Shakespeare search results page and observe that the results are now restricted to only pages from the Shakespeare site.

-
Rerun the search for dream against the live version of the Shakespeare search results page. Observe that pages are returned from both sites - this is because the query processor options must be published for the changes to take effect on the live version of the results page.
-
Edit results page configuration again, and publish the query processor options to make the setting affect the live version of the results page.
-
Rerun the search for dream against the Shakespeare search results page. Observe that pages are now restricted to Shakespeare site pages.
Tutorial: Set default results page display and ranking options
Display and ranking (and scoping) options can be set independently for each results page.
This allows the same search package to be used to serve search results with quite different ranking/display options or to be scoped to a subset of the search package’s included data. These options are set in the same way as the scoping from the previous exercise by adding options to the query processor options.
-
Log in to the search dashboard where you are doing your training.
See: Training - search dashboard access information if you’re not sure how to access the training. Ignore this step if you’re treating this as a non-interactive tutorial. -
Navigate to the Shakespeare search results page
-
Select edit results page configuration from the customize section that was edited in the previous exercise. Set the results page to return five results per page and sort alphabetically then save and publish the changes.
-clive=training~ds-shakespeare -sort=title -num_ranks=5 -
Rerun the search for dream against the Shakespeare search results page specifying and observe that the results are sorted alphabetically by title and only 5 results are returned per page. Results are all from the Shakespeare website.
6. Working with XML content
Funnelback can index XML documents and there are some additional configuration files that are applicable when indexing XML files.
-
You can map elements in the XML structure to Funnelback metadata classes.
-
You can display cached copies of the document via XSLT processing.
Funnelback can be configured to index XML content, creating an index with searchable, fielded data.
Funnelback metadata classes are used for the storage of XML data – with configuration that maps XML element paths to internal Funnelback metadata classes – the same metadata classes that are used for the storage of HTML page metadata. An element path is a simple XML X-Path.
XML files can be optionally split into records based on an X-Path. This is useful as XML files often contain a number of records that should be treated as individual result items.
Each record is then indexed with the XML fields mapped to internal Funnelback metadata classes as defined in the XML mappings configuration file.
6.1. XML configuration
The data source’s XML configuration defines how Funnelback’s XML parser will process any XML files that are found when indexing.
The XML configuration is made up of two parts:
-
XML special configuration
-
Metadata classes containing XML field mappings
The XML parser is used for the parsing of XML documents and also for indexing of most non-web data. The XML parser is used for:
-
XML, CSV and JSON files,
-
Database, social media, directory, HP CM/RM/TRIM and most custom data sources.
6.2. XML element paths
Funnelback element paths are simple X-Paths that select on fields and attributes.
Absolute and unanchored X-Paths are supported, however for some special XML fields absolute paths are required.
-
If the path begins with
/then the path is absolute (it matches from the top of the XML structure). -
If the path begins with
//it is unanchored (it can be located anywhere in the XML structure).
XML attributes can be used by adding @attribute to the end of the path.
Element paths are case sensitive.
| Attribute values are not supported in element path definitions. |
Example element paths:
| X-Path | Valid Funnelback element path |
|---|---|
|
VALID |
|
VALID |
|
VALID |
|
VALID |
|
NOT VALID |
6.2.1. Interpretation of field content
CDATA tags can be used with fields that contain reserved characters or the characters should be HTML encoded.
Fields containing multiple values should be delimited with a vertical bar character or the field repeated with a single value in each repeated field.
For example: The indexed value of //keywords/keyword and //subject below would be identical.
<keywords>
    <keyword>keyword 1</keyword>
    <keyword>keyword 2</keyword>
    <keyword>keyword 3</keyword>
</keywords>

<subject>keyword 1|keyword 2|keyword 3</subject>
6.3. XML special configuration
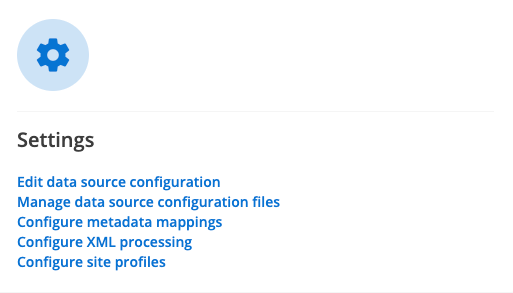
There are a number of special properties that can be configured when working with XML files. These options are defined from the XML configuration screen, by selecting configure XML processing from the settings panel on the data source management screen.
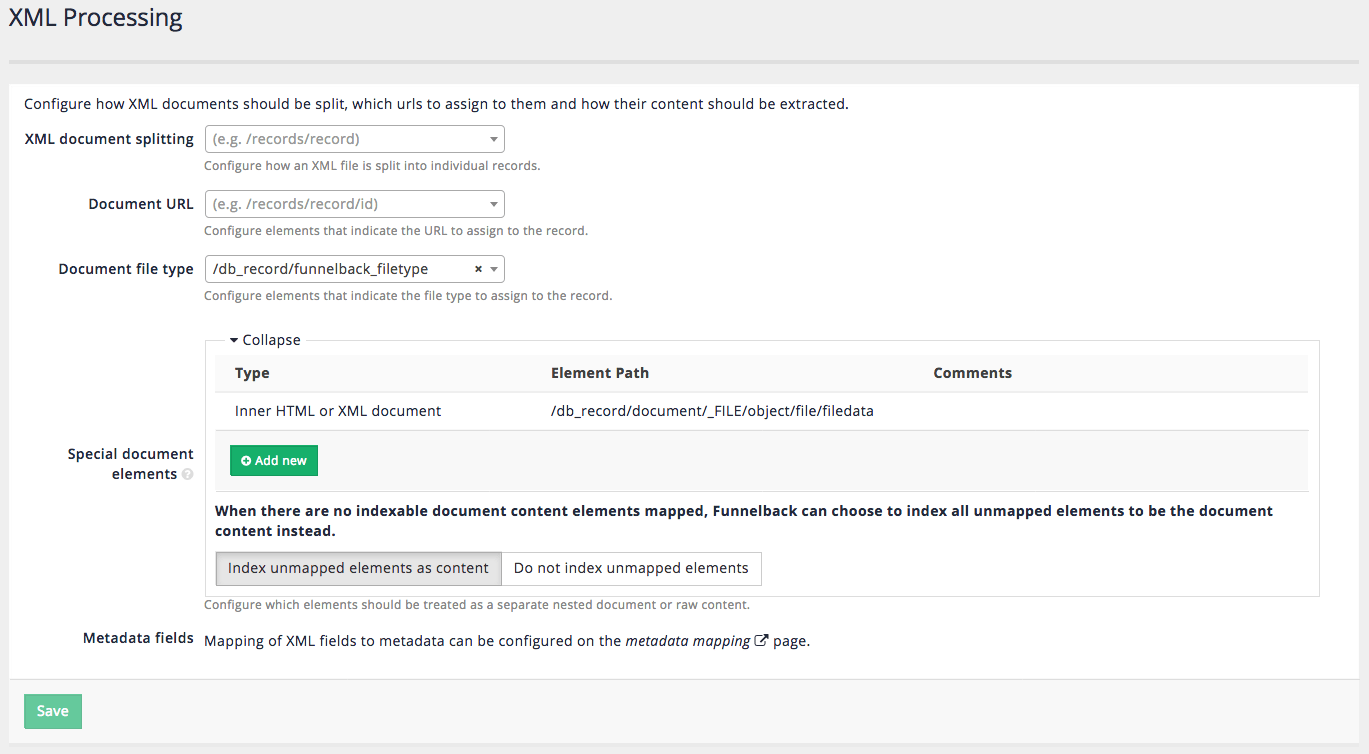
6.3.1. XML document splitting
A single XML file is commonly used to describe many items. Funnelback includes built-in support for splitting an XML file into separate records.
Absolute X-Paths must be used and should reference the root element of the items that should be considered as separate records.
| Splitting an XML document using this option is not available on push data sources. The split XML/HTML document plugin can be used to split documents for push data sources. |
6.3.2. Document URL
The document URL field can be used to identify XML fields containing a unique identifier that will be used by Funnelback as the URL for the document. If the document URL is not set then Funnelback auto-generates a URL based on the URL of the XML document. This URL is used by Funnelback to internally identify the document, but is not a real URL.
|
Setting the document URL to an XML attribute is not supported. Setting a document url is not available for push data sources. |
6.3.3. Document file type
The document file type field can be used to identify an XML field containing a value that indicates the filetype that should be assigned to the record. This is used to associate a file type with the item that is indexed. XML records are commonly used to hold metadata about a record (for example, from a records management system) and this may be all the information that is available to Funnelback when indexing a document from such as system.
6.3.4. Special document elements
The special document elements can be used to tell Funnelback how to handle elements containing content.
Inner HTML or XML documents
The content of the XML field will be treated as a nested document and parsed by Funnelback and must be XML encoded (i.e. with entities) or wrapped in a CDATA declaration to ensure that the main XML document is well-formed.
The indexer will guess the nested document type and select the appropriate parser:
The nested document will be parsed as XML if (once decoded) it is well-formed XML and starts with an XML declaration similar to <?xml version="1.0" encoding="UTF-8" />. If the inner document is identified as XML it will be parsed with the XML parser and any X-Paths of the nested document can also be mapped. Note: the special XML fields configured on the advanced XML processing screen do not apply to the nested document. For example, this means you can’t split a nested document.
The nested document will be parsed as HTML if (once decoded) when it starts with a root <html> tag. Note that if the inner document contains HTML entities but doesn’t start with a root <html> tag, it will not be detected as HTML. If the inner document is identified as HTML and contains metadata then this will be parsed as if it was an HTML document, with embedded metadata and content extracted and associated with the XML records. This means that metadata fields included in the embedded HTML document can be mapped in the metadata mappings along with the XML fields.
The inner document in the example below will not be detected as HTML:
<root>
<name>Example</name>
<inner>This is <strong>an example</strong></inner>
</root>This one will:
<root>
<name>Example</name>
<inner><html>This is <strong>an example</strong></html></inner>
</root>Indexable document content
Any listed X-Paths will be indexed as un-fielded document content - this means that the content of these fields will be treated as general document content but not mapped to any metadata class (similar to the non-metadata field content of an HTML file).
For example, if you have the following XML document:
<?xml version="1.0" encoding="UTF-8"?>
<root>
  <title>Example</title>
  <inner>
  <![CDATA[
  <html>
    <head>
      <meta name="author" content="John Smith">
    </head>
    <body>
      This is an example
    </body>
  </html>
  ]]>
  </inner>
</root>
With an Indexable document content path to //root/inner, the document content will have This is an example; however, the metadata author will not be mapped to "John Smith". To have the metadata mapped as well, the Inner HTML or XML document path should be used instead.
Include unmapped elements as content
If there are no indexable document content paths mapped, Funnelback can optionally choose to how to handle the unmapped fields. When this option is selected then all unmapped XML fields will be considered part of the general document content.
Tutorial: Creating an XML data source
In this exercise you will create a searchable index based off records contained within an XML file.
A web data source is used to create a search of a content sourced by crawling one or more websites. This can include the fetching of one or more specific URLs for indexing.
For this exercise we will use a web data source, though XML content can exist in many different data sources types (for example, custom, database, directory, social media).
The XML file that we will be indexing includes a number of individual records that are contained within a single file, an extract of which is shown below.
<?xml version="1.0" encoding="UTF-8"?>
<tsvdata>
  <row>
    <Airport_ID>1</Airport_ID>
    <Name>Goroka</Name>
    <City>Goroka</City>
    <Country>Papua New Guinea</Country>
    <IATA_FAA>GKA</IATA_FAA>
    <ICAO>AYGA</ICAO>
    <Latitude>-6.081689</Latitude>
    <Longitude>145.391881</Longitude>
    <Altitude>5282</Altitude>
    <Timezone>10</Timezone>
    <DST>U</DST>
    <TZ>Pacific/Port_Moresby</TZ>
    <LATLONG>-6.081689;145.391881</LATLONG>
  </row>
  <row>
    <Airport_ID>2</Airport_ID>
    <Name>Madang</Name>
    <City>Madang</City>
    <Country>Papua New Guinea</Country>
    <IATA_FAA>MAG</IATA_FAA>
    <ICAO>AYMD</ICAO>
    <Latitude>-5.207083</Latitude>
    <Longitude>145.7887</Longitude>
    <Altitude>20</Altitude>
    <Timezone>10</Timezone>
    <DST>U</DST>
    <TZ>Pacific/Port_Moresby</TZ>
    <LATLONG>-5.207083;145.7887</LATLONG>
  </row>
  <row>
    <Airport_ID>3</Airport_ID>
    <Name>Mount Hagen</Name>
    <City>Mount Hagen</City>
    <Country>Papua New Guinea</Country>
    <IATA_FAA>HGU</IATA_FAA>
...
Indexing an XML file like this requires two main steps:
-
Configuring Funnelback to fetch and split the XML file
-
Mapping the XML fields for each record to Funnelback metadata classes.
Exercise steps
-
Log in to the search dashboard where you are doing your training.
See: Training - search dashboard access information if you’re not sure how to access the training. Ignore this step if you’re treating this as a non-interactive tutorial. -
Create a new search package named
Airports. -
Add a web data source to this search package with the following attributes:
- Type
-
web
- Name
-
Airports data - What website(s) do you want to crawl?
-
https://docs.squiz.net/training-resources/airports/airports.xml
-
Update the data source.
-
Create a results page (as part of the Airports search package) named
Airport finder. -
Run a search for !showall using the search preview. Observe that only one result (to the source XML file) is returned.
if you place an exclamation mark before a word in a query this negates the term and the results will include items that don’t contain the word. For example, !showall, used in the example above, means return results that do not contain the word showall.
-
Configure Funnelback to split the XML files into records. To do this we need to inspect the XML file(s) to see what elements are available.
Ideally you will know the structure of the XML file before you start to create your collection. However, if you don’t know this and the XML file isn’t too large you might be able to view it by inspecting the cached version of the file, available from the drop down link at the end of the URL. If the file is too large the browser may not be able to display the file. Inspecting the XML (displayed above) shows that each airport record is contained within the
<row>element that is nested beneath the top level<tsvdata>element. This translates to an X-Path of/tsvdata/row.Navigate to the manage data source screen and select configure XML processing from the settings panel. The XML processing screen is where all the special XML options are set.
-
The XML document splitting field configures the X-Path(s) that are used to split an XML document. Select
/tsvdata/rowfrom the listed fields.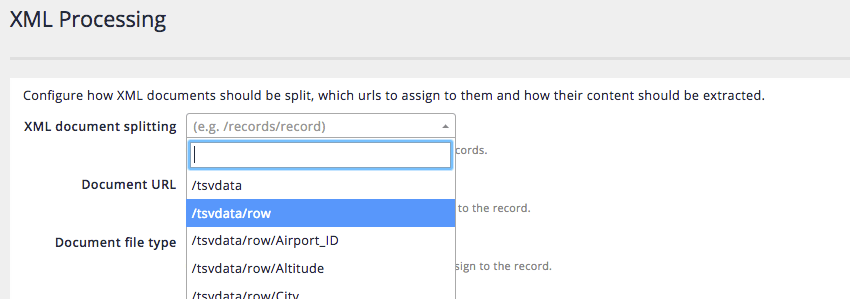
-
If possible also set the document URL to an XML field that contains a unique identifier for the XML record. This could be a real URL, or some other sort of ID. Inspecting the airports XML shows that the Airport_ID can be used to uniquely identify the record. Select
/tsvdata/row/Airport_IDfrom the dropdown for the document URL field.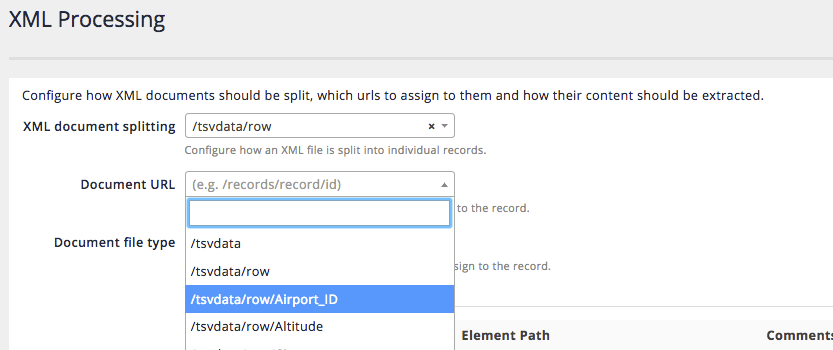
If you don’t set a document URL Funnelback will automatically assign a URL. -
Leave the other fields unchanged then click the save button.
-
The index must be rebuilt for any XML processing changes to be reflected in the search results. Return to the manage data source screen then rebuild the index by selecting start advanced update from the update panel, then selecting rebuild live index.
-
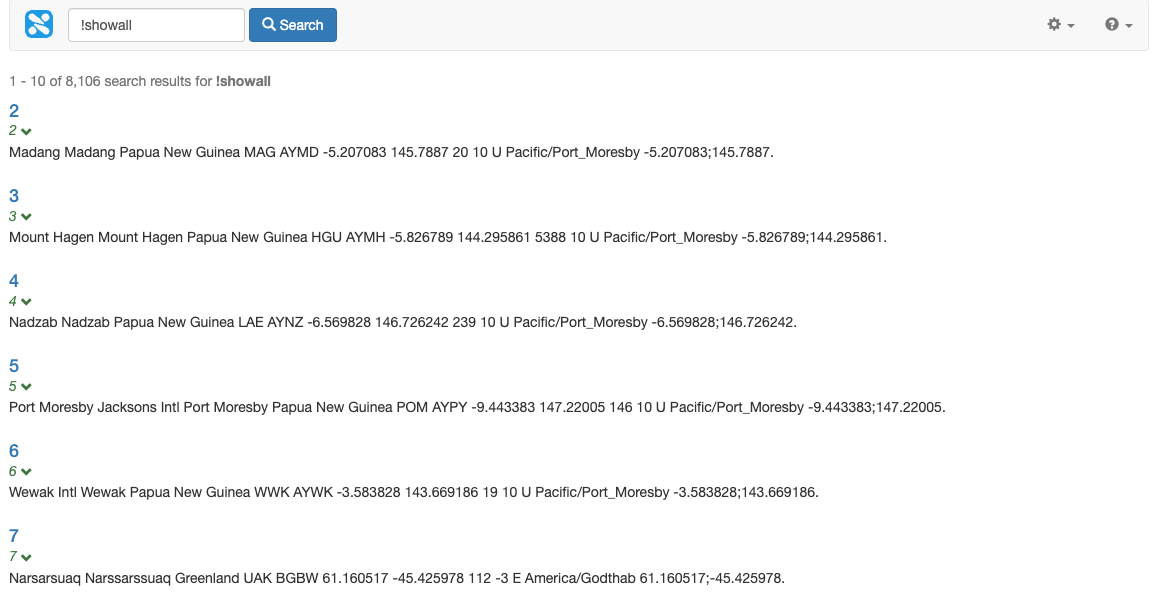
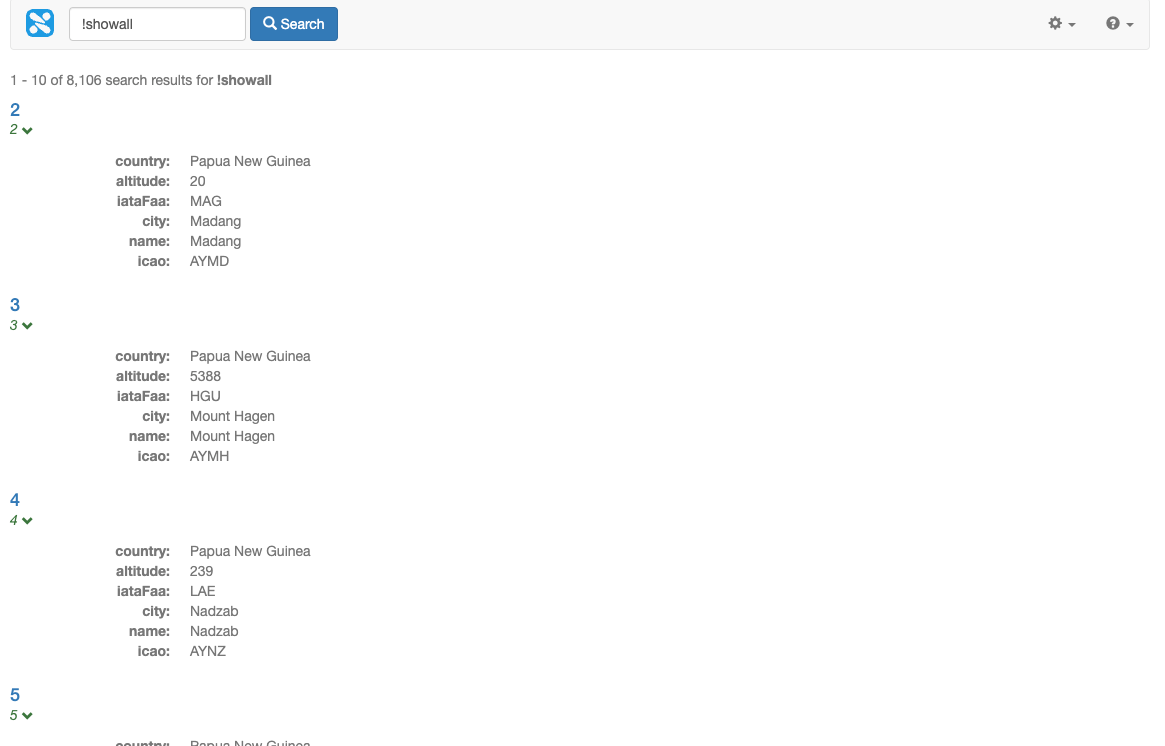
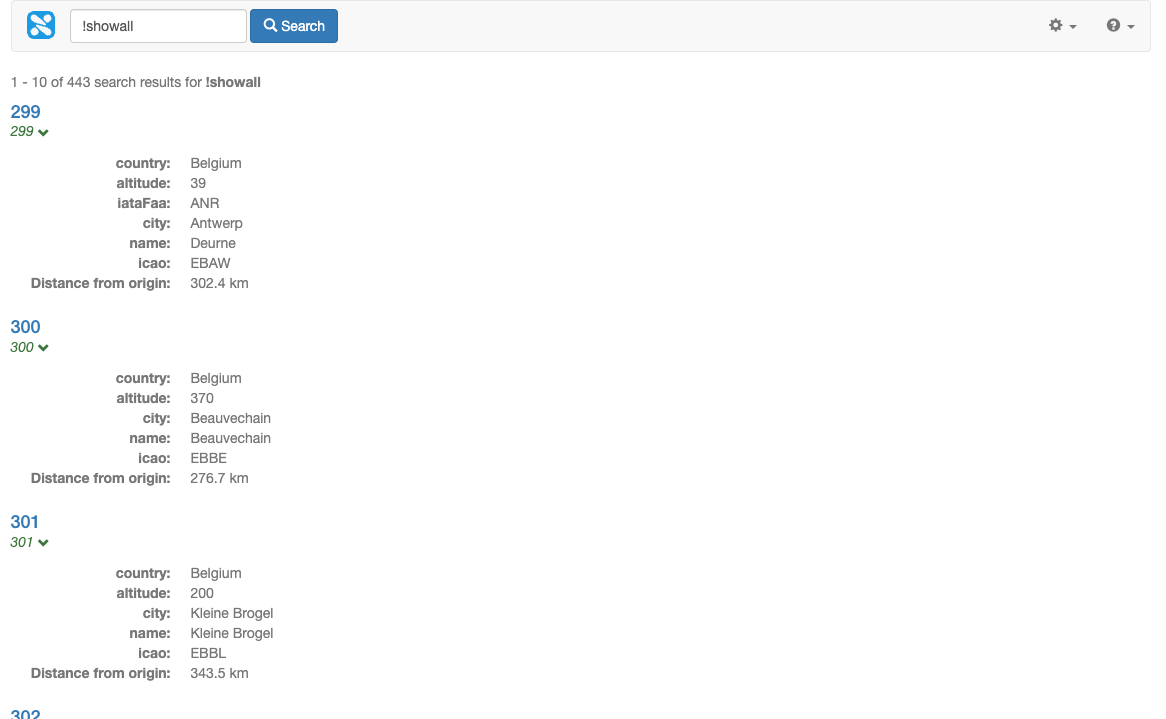
Run a search for !showall using the search preview and confirm that the XML file is now being split into separate items. The search results display currently only shows the URLs of each of the results (which in this case is just an ID number). In order to display sensible results the XML fields must be mapped to metadata and displayed by Funnelback.
-
Map XML fields by selecting configure metadata mappings from the settings panel.
-
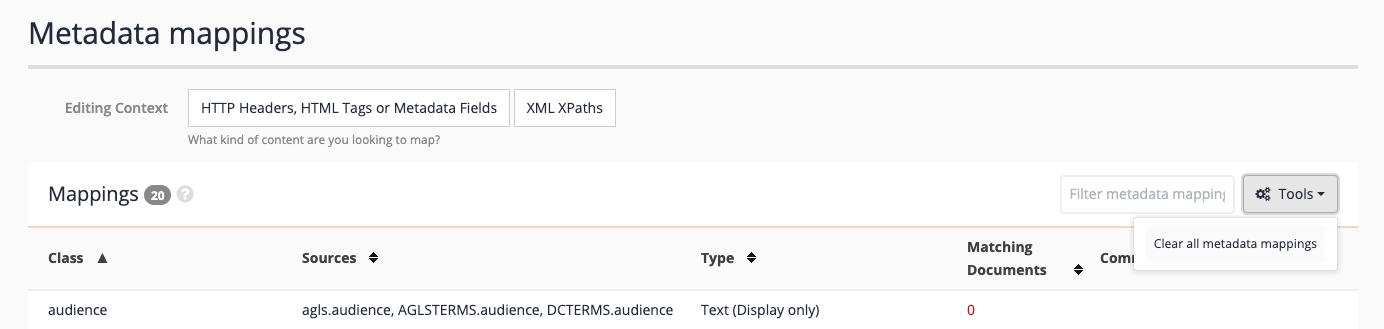
The metadata screen lists a number of pre-configured mappings. Because this is an XML data set, the mappings will be of no use so clear all the mappings by selecting clear all metadata mappings from the tools menu.
-
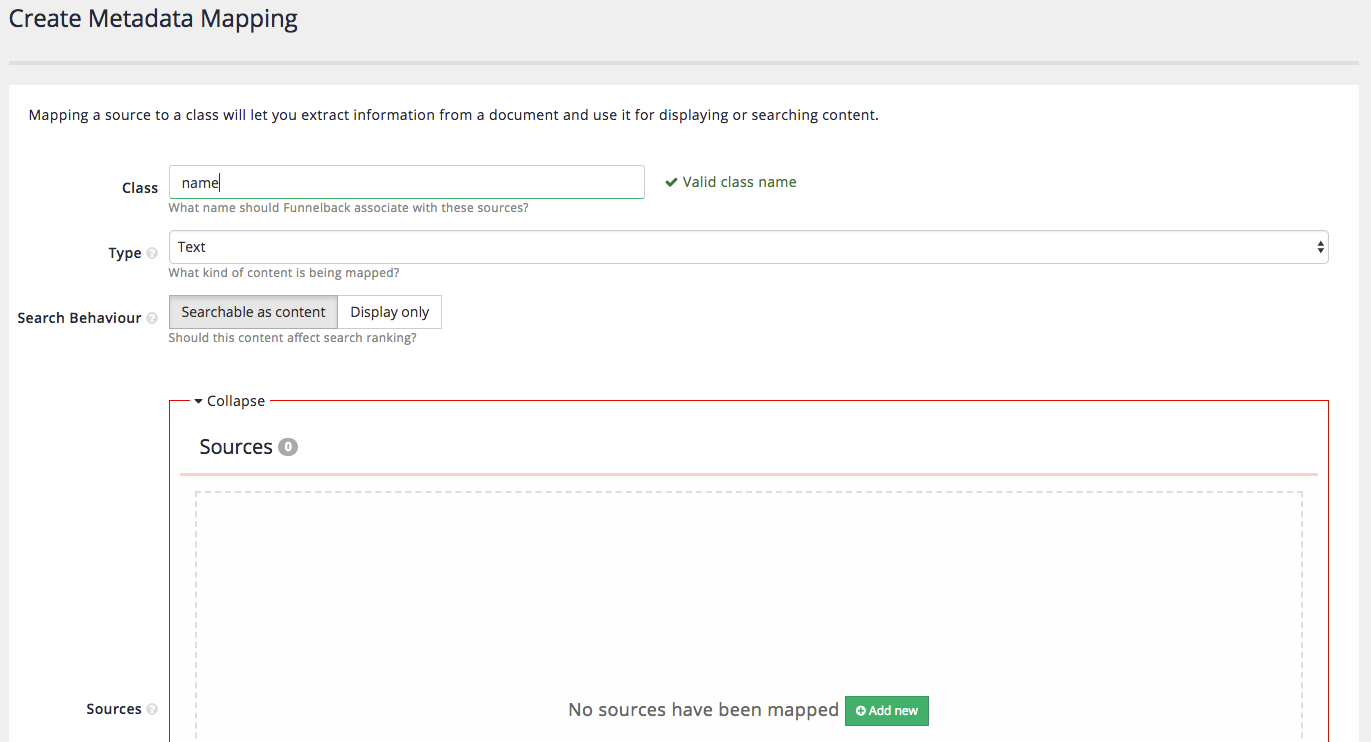
Click the add new button to add a new metadata mapping. Create a class called name that maps the
<Name>xml field. Enter the following into the creation form:- Class
-
name - Type
-
Text
- Search behavior
-
Searchable as content
-
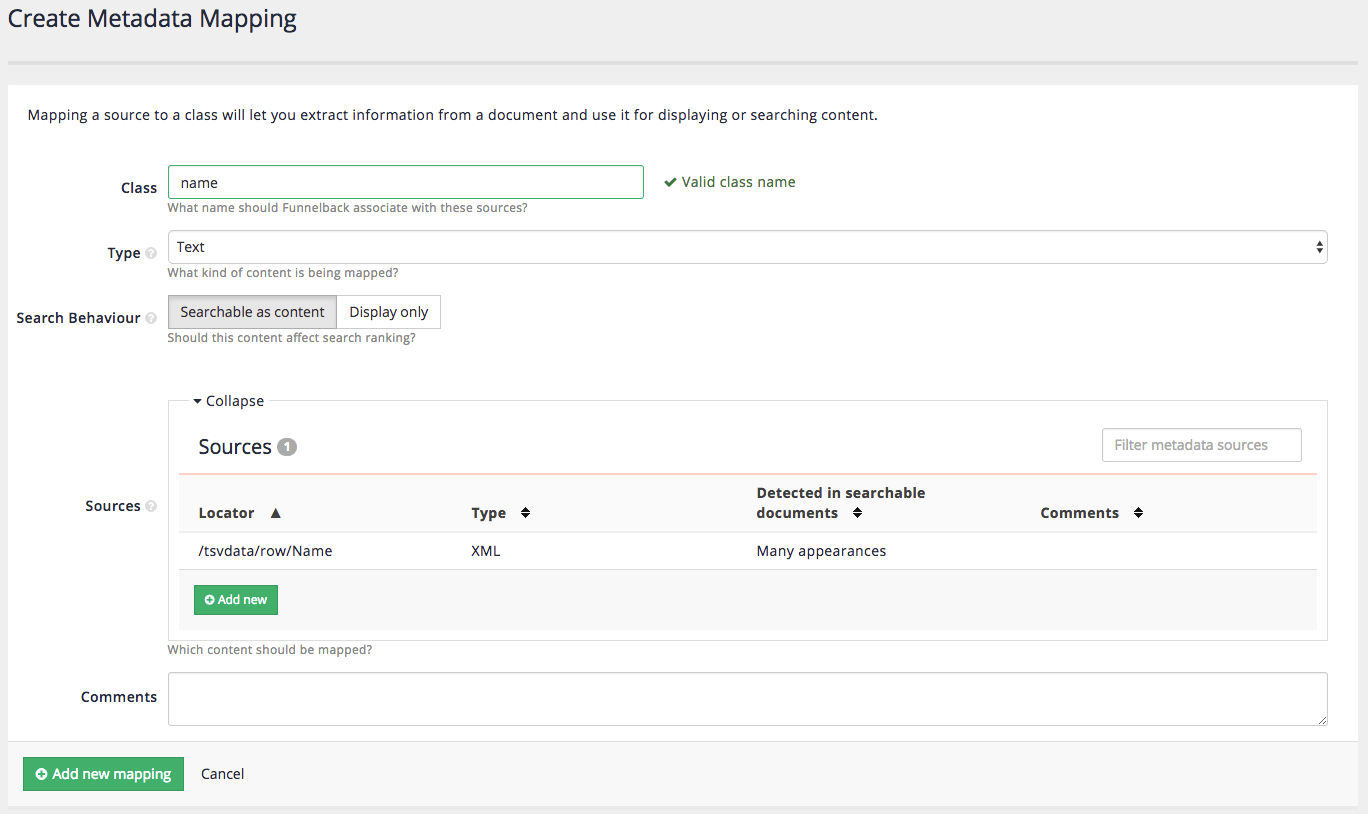
Add a source to the metadata mapping. Click the add new button in the sources box. This opens up a window that displays the metadata sources that were detected when the index was built. Display the detected XML fields by clicking on the XML path button for the type of source, then choose the Name (
/tsvdata/row/Name) field from the list of available choices the click the save button.
-
You are returned to the create mapping screen. Click the add new mapping button to create the mapping.
-
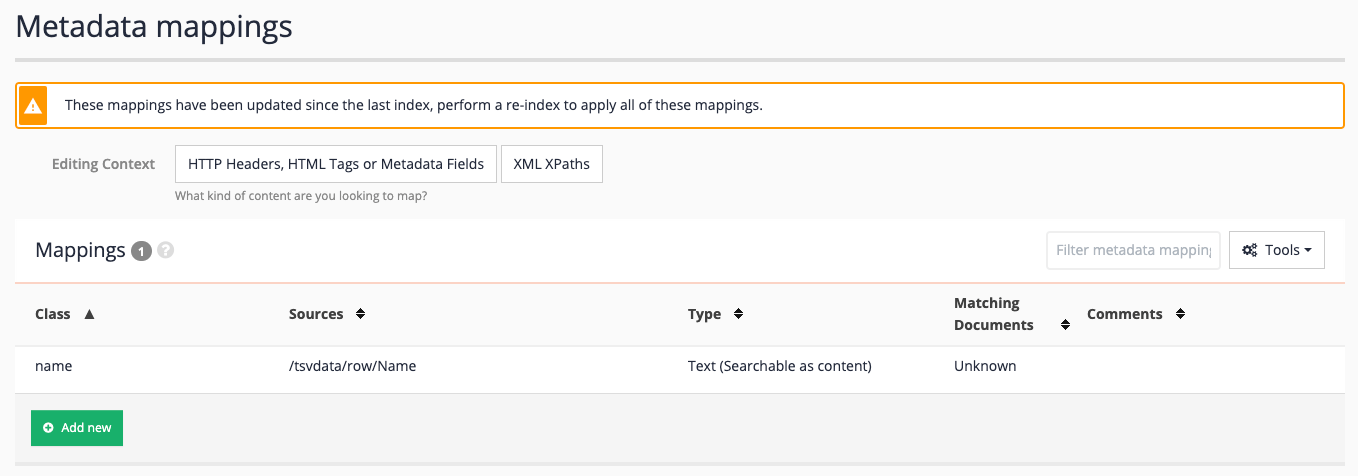
The metadata mappings screen updates to show the newly created mapping for Name.
-
Repeat the above process to add the following mappings. Before adding the mapping switch the editing context to XML - this will mean that XML elements are displayed by default when selecting the sources.

Class name Source Type Search behaviour city/tsvdata/row/Citytext
searchable as content
country/tsvdata/row/Countrytext
searchable as content
iataFaa/tsvdata/row/IATA_FAAtext
searchable as content
icao/tsvdata/row/ICAOtext
searchable as content
altitude/tsvdata/row/Altitudetext
searchable as content
latlong/tsvdata/row/LATLONGtext
display only
latitude/tsvdata/row/Latitudetext
display only
longitude/tsvdata/row/Longitudetext
display only
timezone/tsvdata/row/Timezonetext
display only
dst/tsvdata/row/DSTtext
display only
tz/tsvdata/row/TZtext
display only
-
Note that the metadata mappings screen is displaying a message:
These mappings have been updated since the last index, perform a re-index to apply all of these mappings.
Rebuild the index by navigating to the manage data source screen then selecting start advanced update from the settings panel. Select rebuild live index from the rebuild live index section and click the update button.
-
Display options will need to be configured so that the metadata is returned with the search results. Reminder: this needs to be set up on the airport finder results page. Edit the results page configuration, and add summary fields to include the name, city, country, iataFaa, icao and altitude metadata to the query processor options:
-stem=2 -SF=[name,city,country,iataFaa,icao,altitude] -
Rerun the search for !showall and observe that metadata is now returned for the search result.
-
Inspect the data model. Reminder: edit the url changing
search.htmltosearch.json. Inspect the response element - each result should have fields populated inside thelistMetadatasub elements of the result items. These can then be accessed from your Freemarker template and printed out in the search results.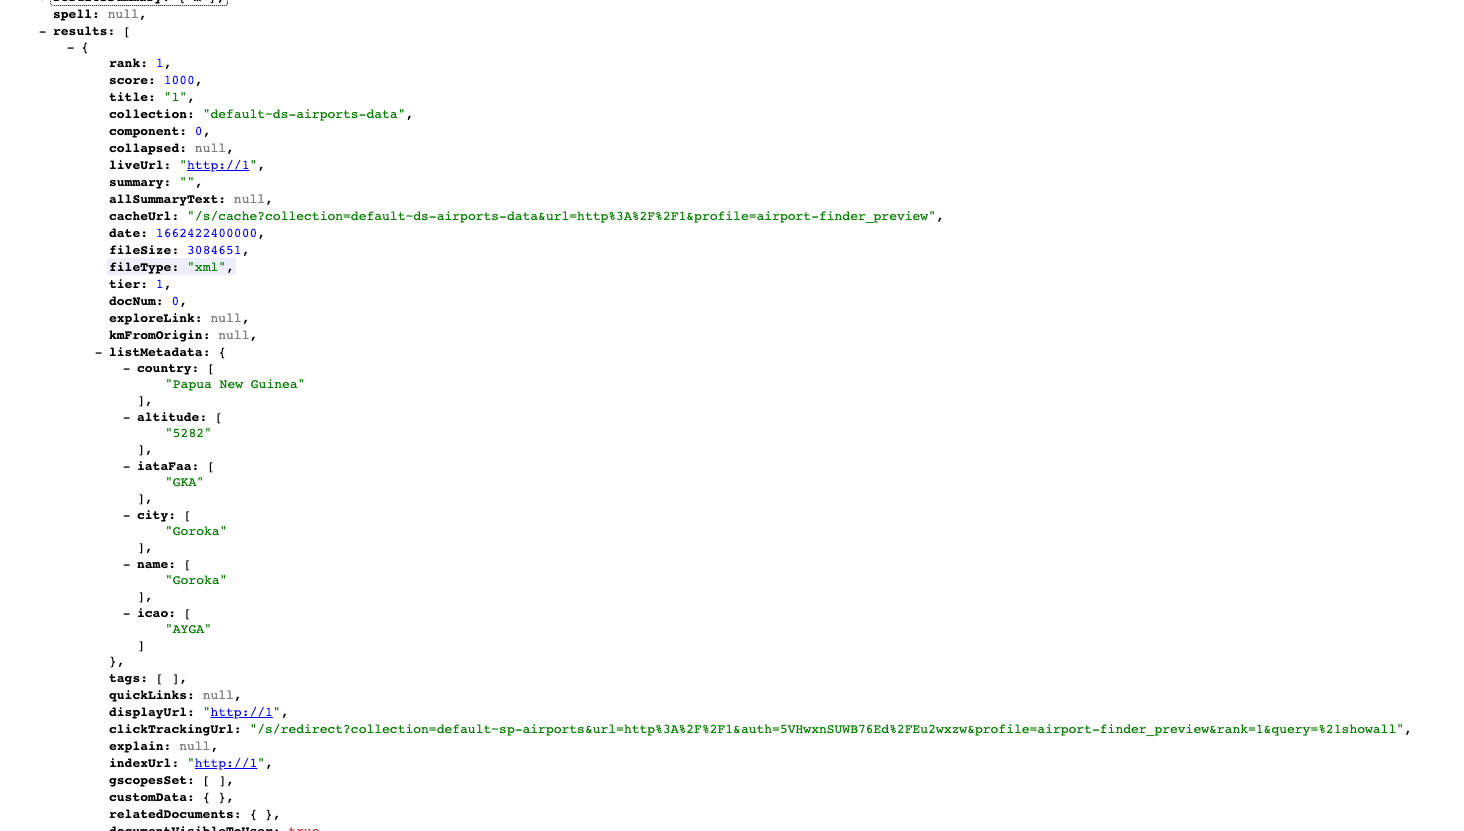
7. Advanced metadata
7.1. Geospatial and numeric metadata
Recall that Funnelback supports five types of metadata classes:
-
Text: The content of this class is a string of text.
-
Geospatial x/y coordinate: The content of this field is a decimal latlong value in the following format:
geo-x;geo-y(for example,2.5233;-0.95) This type should only be used if there is a need to perform a geospatial search (for example, This point is within X km of another point). If the geospatial coordinate is only required for plotting items on a map then a text field is sufficient. -
Number: The content of this field is a numeric value. Funnelback will interpret this as a number. This type should only be used if there is a need to use numeric operators when performing a search (for example,
X > 2050) or to sort the results in numeric order. If the field is only required for display within the search results text field is sufficient. -
Document permissions: The content of this field is a security lock string defining the document permissions. This type should only be used when working with an enterprise collection that includes document level security.
-
Date: A single metadata class supports a date, which is used as the document’s date for the purpose of relevance and date sorting. Additional dates for the purpose of display can be indexed as either a text or number type metadata class, depending on how you wish to use the field.
Funnelback’s text metadata type is sufficient for inclusion of metadata in the index appropriate for the majority of use cases.
The geospatial x/y coordinate and number metadata types are special metadata types that alter the way the indexed metadata value is interpreted, and provide type specific methods for working with the indexed value.
Defining a field as a geospatial x/y coordinate tells Funnelback to interpret the contents of the field as a decimal lat/long coordinate. (for example, -31.95516;115.85766). This is used by Funnelback to assign a geospatial coordinate to an index item (effectively pinning it to a single point on a map). A geospatial metadata field is useful if you wish to add any location-based search constraints such as (show me items within a specified distance to a specified origin point), or sort the results by proximity (closeness) to a specific point.
A geospatial x/y coordinate is not required if you just want to plot the item onto a map in the search results (a text type value will be fine as it’s just a text value you are passing to the mapping API service that will generate the map).
Defining a field as a number tells Funnelback to interpret the contents of the field as a number. This allows range and equality comparisons (==, !=, >=, >, <, <=) to be run against the field. Numeric metadata is only required if you wish to make use of these range comparisons. Numbers for the purpose of display in the search results should be defined as text type metadata.
| Only use geospatial and numeric values if you wish to make use of the special type-specific query operators. Be careful when selecting your class names because these will be merged with the classes from other data sources that are included in the same search package. |
Tutorial: Geospatial and numeric metadata
In this exercise we will extend the metadata that is extracted from the XML example. We will include both a geospatial metadata field and a numeric metadata field. Recall the record format for the XML data:
  <row>
    <Airport_ID>1</Airport_ID>
    <Name>Goroka</Name>
    <City>Goroka</City>
    <Country>Papua New Guinea</Country>
    <IATA_FAA>GKA</IATA_FAA>
    <ICAO>AYGA</ICAO>
    <Latitude>-6.081689</Latitude>
    <Longitude>145.391881</Longitude>
    <Altitude>5282</Altitude>
    <Timezone>10</Timezone>
    <DST>U</DST>
    <TZ>Pacific/Port_Moresby</TZ>
    <LATLONG>-6.081689;145.391881</LATLONG>
  </row>
The <LATLONG> field contains the geospatial metadata that will be associated with the item.
| when working with geospatial metadata Funnelback expects the format of the field to contain a decimal X/Y coordinate in the format above (X coordinate;Y coordinate). If the format of the field doesn’t match (for example, is delimited with a comma) or the X/Y values are supplied separately you will need to clean the XML before Funnelback indexes it (or provide an additional field in the correct format within the source data). |
The <Altitude> field will be used as the source of numeric metadata for the purpose of this exercise.
-
Log in to the search dashboard where you are doing your training.
See: Training - search dashboard access information if you’re not sure how to access the training. Ignore this step if you’re treating this as a non-interactive tutorial. -
Locate the airports search package.
-
Navigate to the manage data source screen for the airports data data source.
-
Edit the metadata mappings. (Settings panel, configure metadata mappings).
-
Modify the mapping for the
<LATLONG>field to set the type as a geospatial coordinate.the <LATLONG>field was mapped previously so edit the existing entry.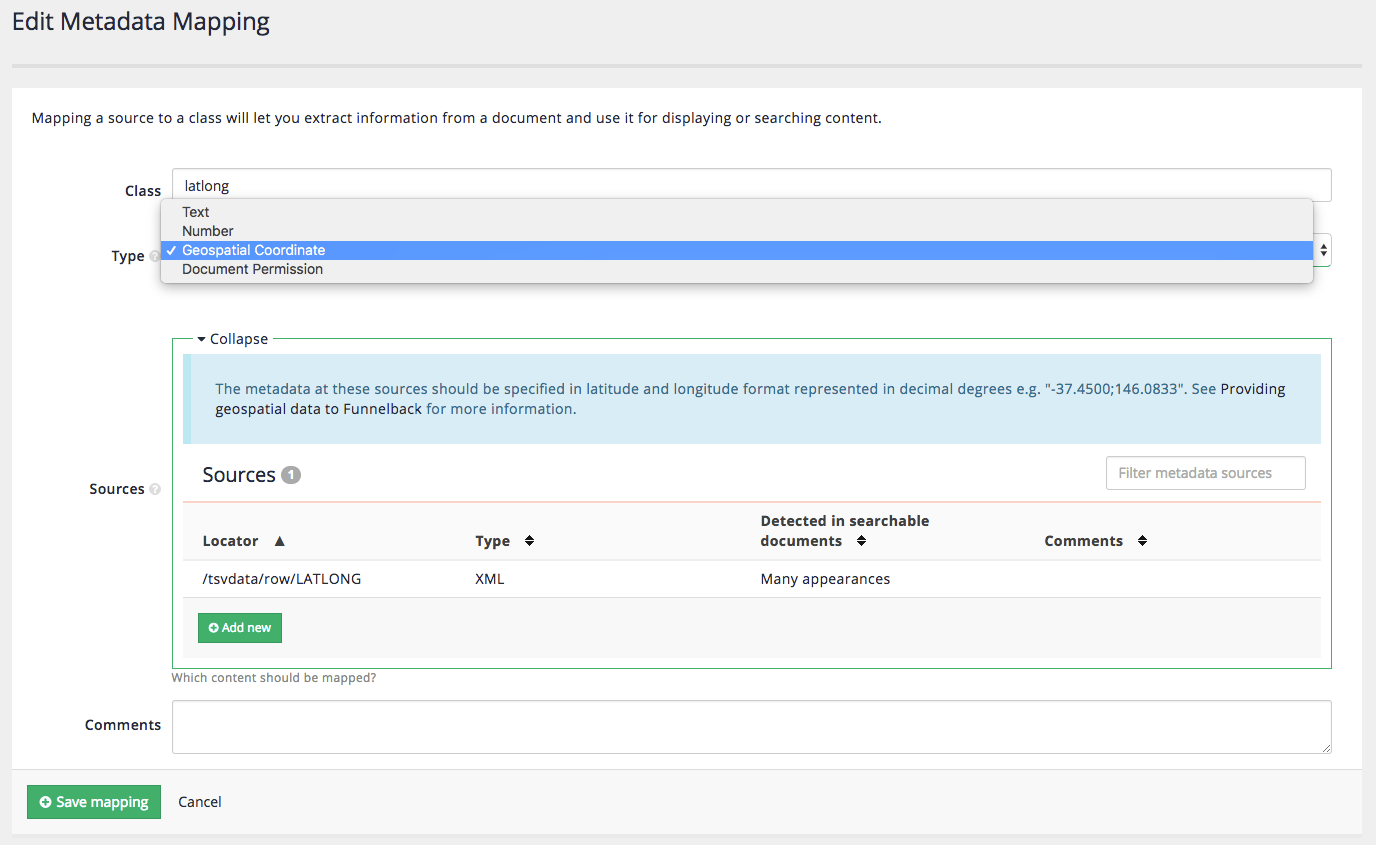
-
Modify the mapping for the
<Altitude field>to be number then save the changes.the <Altitude>field was mapped previously so edit the existing entry.
-
Rebuild the index (as you have changed the metadata configuration). Reminder: Update panel, start advanced update, rebuild live index.
-
Run a search for !showall and inspect the JSON noting that
kmFromOriginelements now appear (due to the elements containing geospatial metadata).
the kmFromOriginfield returns the distance (in km) from an origin point, which is defined by passing in anoriginparameter, set to a geo-coordinate. It’s returningnullbecause we haven’t defined this. -
Return to the HTML results and add numeric constraints to the query to return only airports that are located between 2000 ft and 3000 ft: add
<_altitude=3000&ge_altitude=2000to the URL observing that the number of matching results is reduced and that altitudes of the matching results are all now between 2000 and 3000. -
Remove the numeric parameters and add an origin parameter to the URL:
&origin=48.8588336;2.2769957(this is the lat/long value for Paris, France). Observe that thekmFromOriginfield now contains values.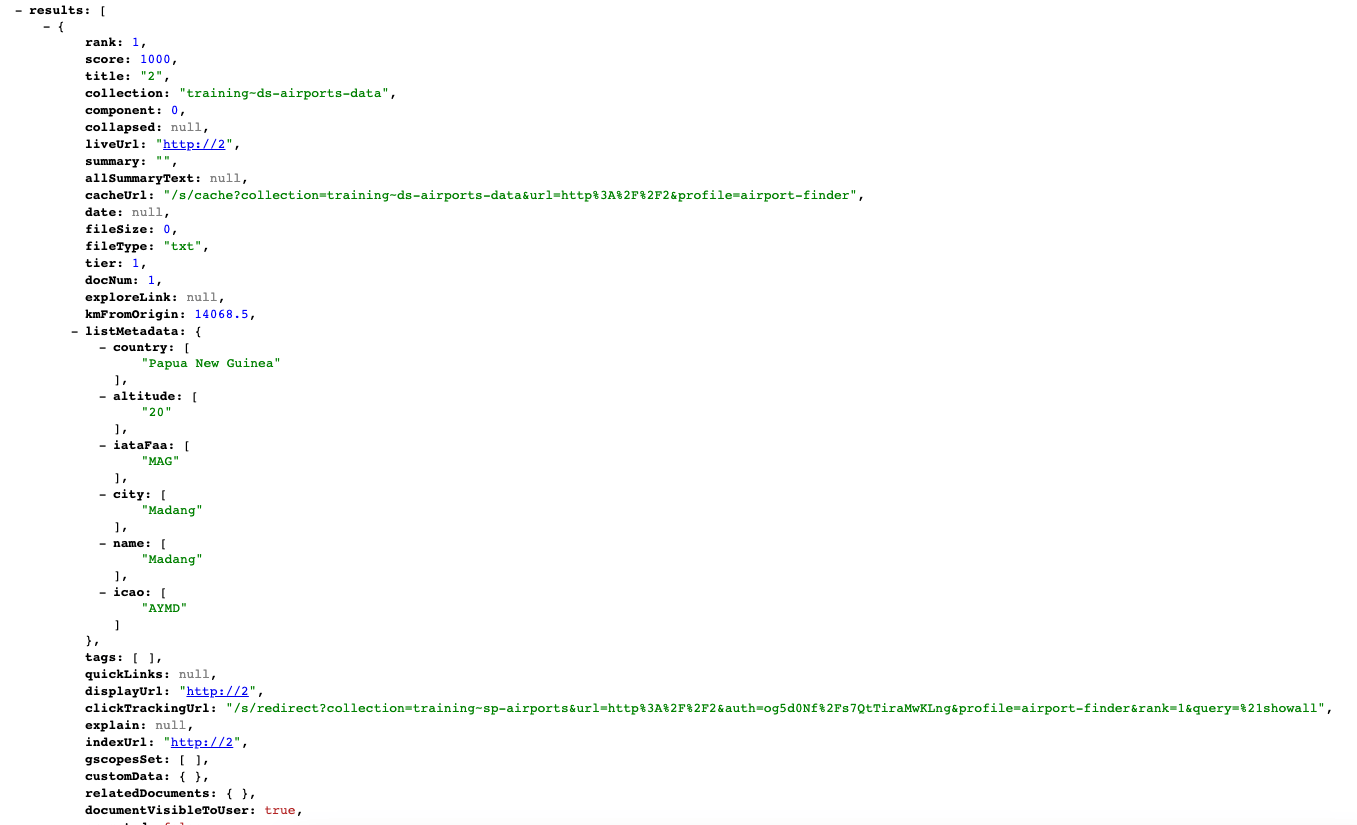
-
Geospatial searches can be limited to a radius measured from the origin (in km). Supply an optional
maxdistparameter and set this to 500km, by adding&maxdist=500to the URL. Note that the number of results has dropped dramatically and are all airports within 500km of Paris.When working with geospatial search you may want to consider setting the origin value by reading the location data from your web browser (which might be based on a mobile phone’s GPS coordinates, or on IP address location). Once you’ve read this value you can pass it to Funnelback along with the other search parameters. 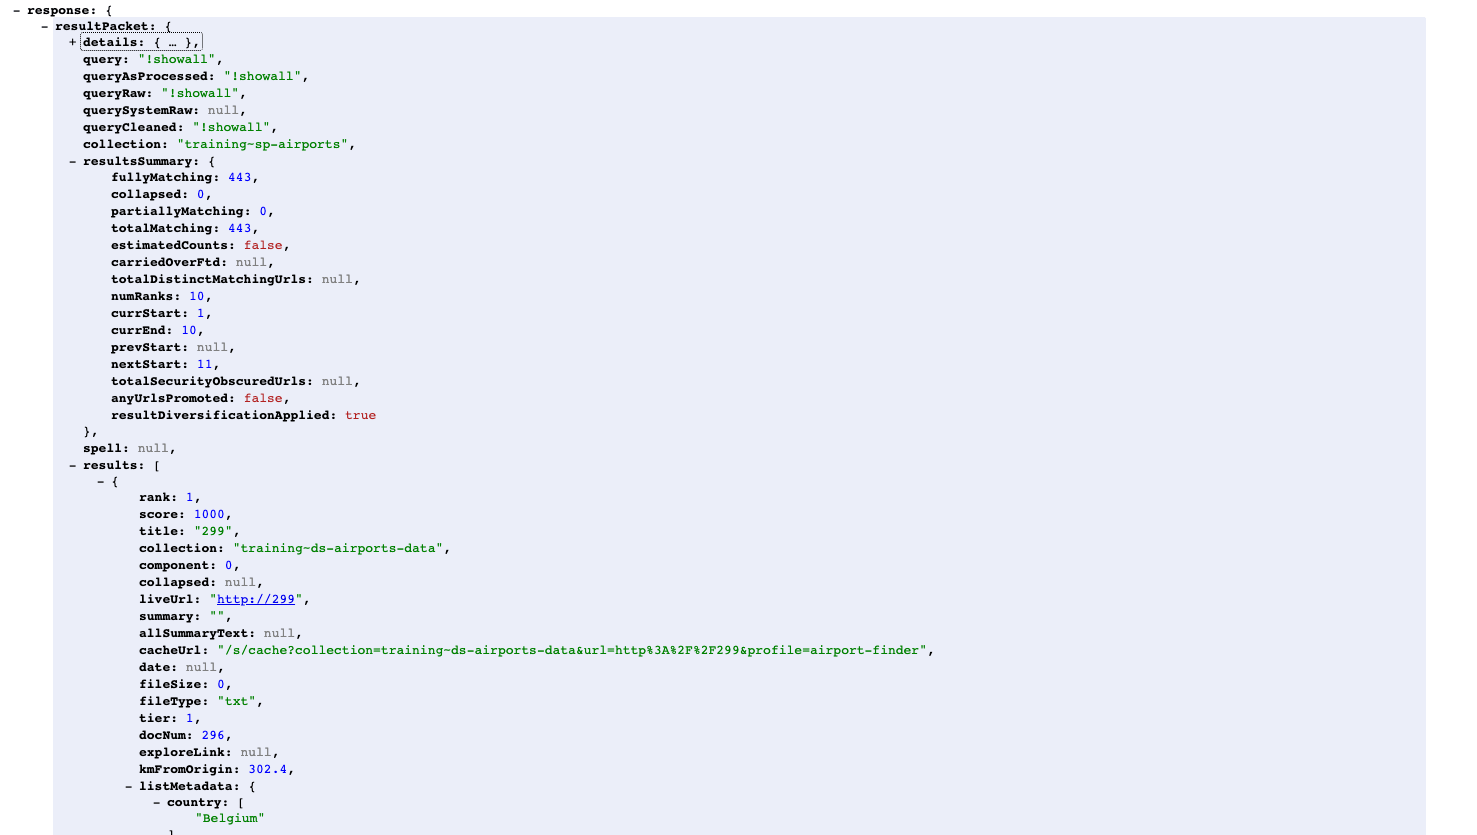
-
Edit the template to print out the
kmFromOriginvalue in the results. Add the following below the metadata (for example, immediately before the</dl>tag at approx line 595) that is printed in the result template:<#if s.result.kmFromOrigin??> <dt>Distance from origin:</dt><dd>${s.result.kmFromOrigin} km</dd> </#if> -
Run the !showall search again and observe the distance is now returned in the results.
-
Sort the results by proximity to the origin by adding
&sort=proxand observe that thekmFromOriginvalues are now sorted by distance (from nearest to farthest).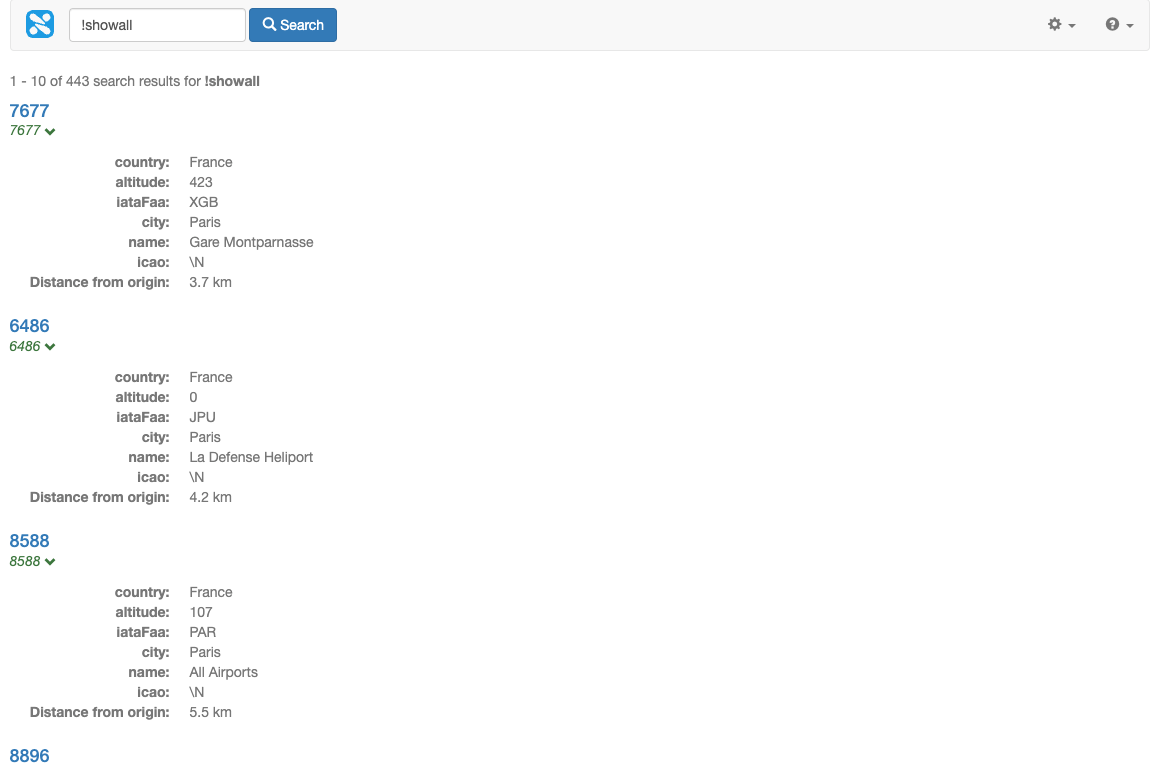
Change the sort to be from farthest to nearest by setting the sort to dprox (descending proximity).
|
Extended exercises: Geospatial search and numeric metadata
-
Modify the search box to include controls to set the origin using the browser’s location support and to adjust the
maxdist. Hint: examine the advanced search form for an example. -
Add sort options to sort the results by proximity to the
origin. -
Modify the search box to set the
origininside a hidden field. -
Modify the template to plot the search results onto a map. See: Using Funnelback search results to populate a map
-
Add sort options to sort the results numerically by
altitude. Observe that the sort order is numeric (1, 2, 10, 11). Update the metadata mappings so that altitude is a standard text metadata field and re-index the live view. Refresh the search results and observe the sort order is now alphabetic (1, 10, 11, 2). This distinction is important if you have a metadata field that you need to sort numerically.
8. Configuring url sets (generalized scopes)
The generalized scopes mechanism in Funnelback allows an administrator to group sets of documents that match a set of URL patterns (for example, */publications/*), or all the URLs returned by a specified query (for example, author:shakespeare).
Once defined these groupings can be used for:
-
Scoped searches (provide a search that only looks within a particular set of documents)
-
Creating additional services (providing a search service with separate templates, analytics and configuration that is limited to a particular set of documents).
-
Faceted navigation categories (Count the number of documents in the result set that match this grouping).
The patterns used to match against the URLs are Perl regular expressions allowing for very complex matching rules to be defined. If you don’t know what a regular expression is don’t worry as simple substring matching will also work.
The specified query can be anything that is definable using the Funnelback query language.
Generalized scopes are a good way of adding some structure to an index that lacks any metadata, by either making use of the URL structure, or by creating groupings based on pre-defined queries.
| Metadata should always be used in preference to generalized scopes where possible as gscopes carry a much higher maintenance overhead. |
URLs can be grouped into multiple sets by having additional patterns defined within the configuration file.
Tutorial: Configuring URL sets that match a URL pattern
The process for creating configuration for generalized scopes is very similar to that for external metadata.
-
Log in to the search dashboard where you are doing your training.
See: Training - search dashboard access information if you’re not sure how to access the training. Ignore this step if you’re treating this as a non-interactive tutorial. -
Navigate to the manage data source screen for the silent films - website data source.
-
Select manage data source configuration files from the settings panel.
-
Create a
gscopes.cfgby clicking the add new button, then selectinggscopes.cfgfrom the file type menu, then clicking the save button.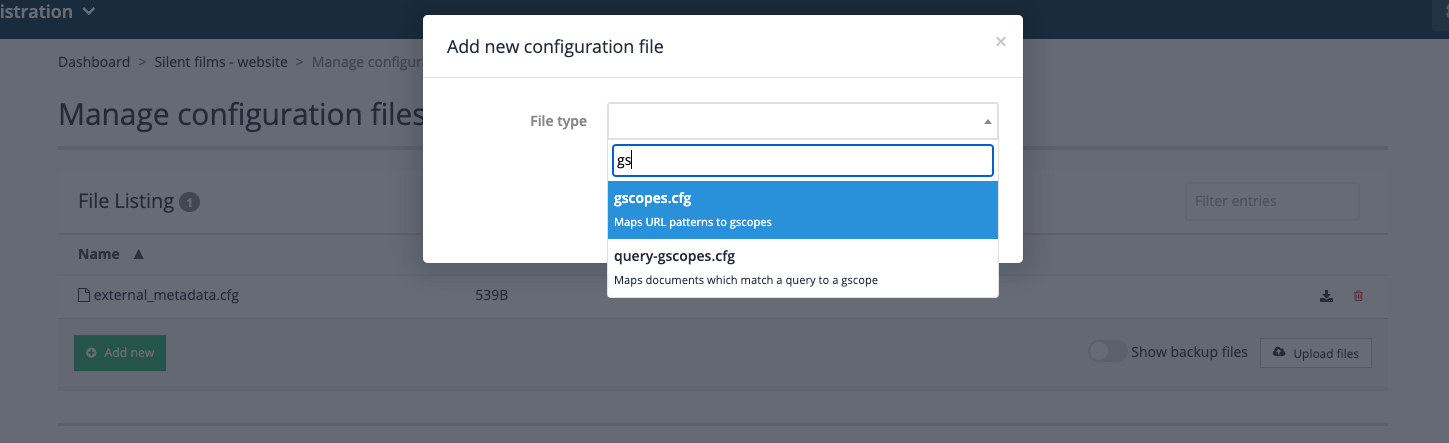
-
Click on the gscopes.cfg item in the file listing. A blank file editor screen will load. We will define URL groupings that groups together a set of pages about Charlie Chaplin.
When defining gscopes there is often many different ways of achieving the same result.
The following pattern tells Funnelback to create a set of URLs with a gscope ID of
charliethat is made up of any URL containing the substring/details/CC_:charlie /details/CC_The following would probably also achieve the same result. This tells Funnelback to tag the listed URLs with a gscope ID of charlie.
the match is still a substring but this time the match is much more precise so each item is likely to only match a single URL. Observe also that it is possible to assign the same gscope ID to many patterns: charlie https://archive.org/details/CC_1916_05_15_TheFloorwalker charlie https://archive.org/details/CC_1916_07_10_TheVagabond charlie https://archive.org/details/CC_1914_03_26_CruelCruelLove charlie https://archive.org/details/CC_1914_02_02_MakingALiving charlie https://archive.org/details/CC_1914_09_07_TheRounders charlie https://archive.org/details/CC_1914_05_07_ABusyDay charlie https://archive.org/details/CC_1914_07_09_LaffingGas charlie https://archive.org/details/CC_1916_09_04_TheCount charlie https://archive.org/details/CC_1915_02_01_HisNewJob charlie https://archive.org/details/CC_1914_06_13_MabelsBusyDay charlie https://archive.org/details/CC_1914_11_07_MusicalTramps charlie https://archive.org/details/CC_1916_12_04_TheRink charlie https://archive.org/details/CC_1914_12_05_AFairExchange charlie https://archive.org/details/CC_1914_06_01_TheFatalMallet charlie https://archive.org/details/CC_1914_06_11_TheKnockout charlie https://archive.org/details/CC_1914_03_02_FilmJohnny charlie https://archive.org/details/CC_1914_04_27_CaughtinaCaberet charlie https://archive.org/details/CC_1914_10_10_TheRivalMashers charlie https://archive.org/details/CC_1914_11_09_HisTrystingPlace charlie https://archive.org/details/CC_1914_08_27_TheMasquerader charlie https://archive.org/details/CC_1916_05_27_Police charlie https://archive.org/details/CC_1916_10_02_ThePawnshop charlie https://archive.org/details/CC_1915_10_04_CharlieShanghaied charlie https://archive.org/details/CC_1916_06_12_TheFireman charlie https://archive.org/details/CC_1914_02_28_BetweenShowers charlie https://archive.org/details/CC_1918_09_29_TheBond charlie https://archive.org/details/CC_1918_xx_xx_TripleTrouble charlie https://archive.org/details/CC_1914_08_31_TheGoodforNothing charlie https://archive.org/details/CC_1914_04_20_TwentyMinutesofLove charlie https://archive.org/details/CC_1914_03_16_HisFavoritePasttime charlie https://archive.org/details/CC_1917_10_22_TheAdventurer charlie https://archive.org/details/CC_1914_06_20_CharlottEtLeMannequin charlie https://archive.org/details/CC_1917_06_17_TheImmigrant charlie https://archive.org/details/CC_1916_11_13_BehindtheScreen charlie https://archive.org/details/CC_1914_08_10_FaceOnTheBarroomFloor charlie https://archive.org/details/CC_1914_10_29_CharlottMabelAuxCourses charlie https://archive.org/details/CC_1914_10_26_DoughandDynamite charlie https://archive.org/details/CC_1914_12_07_HisPrehistoricpast charlie https://archive.org/details/CC_1914_02_09_MabelsStrangePredicament charlie https://archive.org/details/CC_1914_11_14_TilliesPuncturedRomance charlie https://archive.org/details/CC_1915_12_18_ABurlesqueOnCarmen charlie https://archive.org/details/CC_1914_08_01_CharolotGargonDeTheater charlie https://archive.org/details/CC_1917_04_16_TheCure charlie https://archive.org/details/CC_1916_08_07_One_A_M charlie https://archive.org/details/CC_1914_08_13_CharliesRecreation charlie https://archive.org/details/CC_1914_02_07_KidsAutoRaceAtVenice charlie https://archive.org/details/CC_1914_04_04_TheLandladysPetFinally, the following regular expression would also achieve the same result.
charlie archive.org/details/CC_.*$This may seem a bit confusing, but you need to keep in mind that the defined pattern can be as general or specific as you like - the trade-off is on what will match. The pattern needs to be specific enough to match the items you want but exclude those that shouldn’t be matched.
Copy and paste the following into your
gscopes.cfgand click the save button. This will set up two URL sets - the first (charlie) matching a subset of pages about Charlie Chaplin and the second (buster) matching a set of pages about Buster Keaton.charlie /details/CC_ buster archive.org/details/Cops1922 buster archive.org/details/Neighbors1920 buster archive.org/details/DayDreams1922 buster archive.org/details/OneWeek1920 buster archive.org/details/Convict13_201409 buster archive.org/details/HardLuck_201401 buster archive.org/details/ThePlayHouse1921 buster archive.org/details/College_201405 buster archive.org/details/TheScarecrow1920 buster archive.org/details/MyWifesRelations1922 buster archive.org/details/TheHighSign_201502 buster archive.org/details/CutTheGoat1921 buster archive.org/details/TheFrozenNorth1922 buster archive.org/details/BusterKeatonsThePaleface -
Rebuild the index (Select start advanced update from the update panel, then select reapply gscopes to live view and click the update button) to apply these generalized scopes to the index.
-
Confirm that the gscopes are applied. Run a search for day dreams and view the JSON/XML data model. Locate the results and observe the values of the
gscopesSetfield. Items that match one of the Buster Keaton films listed above should have a value ofbusterset.If you see gscopes set that look like FUN followed by a random string of letters and numbers, these are gscopes that are defined by Funnelback when you create faceted navigation based on queries. -
Use gscopes to scope the search. Run a search for !showeverything. Add
&gscope1=charlieto the URL and press enter. Observe that all the results are now restricted to films featuring Charlie Chaplin (and more specifically all the URLs contain/details/CC_as a substring). Change the URL to have&gscope1=busterand rerun the search. This time all the results returned should be links to films featuring Buster Keaton. Advanced scoping, combining gscopes is also possible using reverse polish notation when configuring query processor options. See the documentation above for more information.
Tutorial: Configuring URL sets that match a Funnelback query
-
Log in to the search dashboard where you are doing your training.
See: Training - search dashboard access information if you’re not sure how to access the training. Ignore this step if you’re treating this as a non-interactive tutorial. -
Navigate to the manage data source screen for the silent films - website data source.
-
Select manage data source configuration files from the settings panel.
-
Create a
query-gscopes.cfgby clicking the add new button, then selectingquery-gscopes.cfgfrom the file type menu, then clicking the save button. -
A blank file editor screen will load. We will define a URL set containing all silent movies about christmas.
The following pattern tells Funnelback to create a set of URLs with a gscope ID of
XMASthat is made up of the set of URLs returned when searching for christmas:XMAS christmasThe query is specified using Funnelback’s query language and supports any advanced operators that can be passed in via the search box.
-
Rebuild the index (Select start advanced update from the update panel, then select reapply gscopes to live view and click the update button) to apply these generalized scopes to the index.
-
Confirm that the gscopes are applied. Run a search for christmas and view the JSON/XML data model. Locate the results and observe the values of the
gscopesSetfield. The returned items should have a value ofXMASset. -
Use gscopes to scope the search. Run a search for !showeverything. Add
&gscope1=XMASto the URL and press enter. Observe that all the results are now restricted to the films about christmas. Replacegscope1=XMASwithgscope1=xmasand observe that the gscope value is case-sensitive.
Extended exercises and questions: URL sets (gscopes)
-
Redo the first gscopes exercise, but with the alternate pattern sets defined in step 4 of the exercise. Compare the results and observe that a similar result is achieved with the three different pattern sets.
-
Create a generalised scope that contains all documents where the director is Alfred Hitchcock
-
Why is using gscopes to apply keywords higher maintenance than using a metadata field?
-
Construct a reverse-polish gscope expression that includes charlie OR christmas but not buster. Hint: Gscope expressions
9. Social media data sources
Funnelback has the ability to index content from the following social media services:
-
YouTube
-
Facebook
-
Flickr
-
Twitter
-
Instagram (via the Instagram gatherer plugin)
Additional services can be added by implementing a custom gatherer plugin.
There are a number of pre-requisites that must be satisfied before social media services can be indexed. These vary depending on the type of service, but generally involve having an account, channel/service identifier and API key for access to the service.
Tutorial: Download and index a YouTube channel
-
Log in to the search dashboard where you are doing your training.
See: Training - search dashboard access information if you’re not sure how to access the training. Ignore this step if you’re treating this as a non-interactive tutorial. -
Create a new search package called Squiz. Skip the step where you are asked about adding data sources.
-
Once the search package is created scroll to the components section and click the create a data source button.
-
Create a data source with the following properties:
-
Data source type:
youtube -
Data source name:
Squiz videos -
YouTube API key:
AIzaSyDBFGGkZfR79YsdSpw3jNzfRUgsvXVrVKo -
Channel IDs?:
UC19PRS-wlngHv06TRnEQxDA -
Include channel’s liked videos?: no
-
Playlist IDs?:
PLMOOwxQHsNyl—x_Nsyooa_gFFjOI3bUR
-
-
Update the data source by selecting update data source from the update panel.
-
Inspect the metadata mappings (settings panel, configure metadata mappings) and observe that a set of YouTube specific fields are automatically mapped.
-
Return to the Squiz search package and create a new results page called Squiz video search
-
Add some display options to display the YouTube metadata. Add the following to the query processor options (customize panel, edit results page configuration):
-SF=[c,t,viewCount,likeCount,dislikeCount,duration,imageSmall]
-
Update the search template (select edit results page templates from the templates panel). Replace the contents of the
<@s.Results>tag (approx line 495) with the following code:<#if s.result.class.simpleName == "TierBar"> <#-- A tier bar --> <#if s.result.matched != s.result.outOf> <li class="search-tier"><h3 class="text-muted">Results that match ${s.result.matched} of ${s.result.outOf} words</h3></li> <#else> <li class="search-tier"><h3 class="hidden">Fully-matching results</h3></li> </#if> <#-- Print event tier bars if they exist --> <#if s.result.eventDate??> <h2 class="fb-title">Events on ${s.result.eventDate?date}</h2> </#if> <#else> <li data-fb-result="${s.result.indexUrl}" class="result<#if !s.result.documentVisibleToUser>-undisclosed</#if> clearfix"> <h4 <#if !s.result.documentVisibleToUser>style="margin-bottom:4px"</#if>> <#if s.result.listMetadata["imageSmall"]?first??> <img class="img-thumbnail pull-left" style="margin-right:0.5em;" src="${s.result.listMetadata["imageSmall"]?first?replace("\\|.*$","","r")}" /> </#if> <#if question.currentProfileConfig.get("ui.modern.session")?boolean><a href="#" data-ng-click="toggle()" data-cart-link data-css="pushpin|remove" title="{{label}}"><small class="glyphicon glyphicon-{{css}}"></small></a></#if> <a href="${s.result.clickTrackingUrl}" title="${s.result.liveUrl}"> <@s.boldicize><@s.Truncate length=70>${s.result.title}</@s.Truncate></@s.boldicize> </a> <#if s.result.fileType!?matches("(doc|docx|ppt|pptx|rtf|xls|xlsx|xlsm|pdf)", "r")> <small class="text-muted">${s.result.fileType?upper_case} (${filesize(s.result.fileSize!0)})</small> </#if> <#if question.currentProfileConfig.get("ui.modern.session")?boolean && session?? && session.getClickHistory(s.result.indexUrl)??><small class="text-warning"><span class="glyphicon glyphicon-time"></span> <a title="Click history" href="#" class="text-warning" data-ng-click="toggleHistory()">Last visited ${prettyTime(session.getClickHistory(s.result.indexUrl).clickDate)}</a></small></#if> </h4> <p> <#if s.result.date??><small class="text-muted">${s.result.date?date?string("d MMM yyyy")}:</small></#if> <span class="search-summary"><@s.boldicize><#noautoesc>${s.result.listMetadata["c"]?first!"No description available."}</#noautoesc></@s.boldicize></span> </p> <p> <span class="glyphicon glyphicon-time"></span> ${s.result.listMetadata["duration"]?first!"N/A"} Views: ${s.result.listMetadata["viewCount"]?first!"N/A"} <span class="glyphicon glyphicon-thumbs-up"></span> ${s.result.listMetadata["likeCount"]?first!"N/A"} </p> </li> </#if> -
Run a search for !showall and observe the YouTube results:
Extended exercises: social media
-
Find a random YouTube channel and determine the channel ID. Add this as a second channel ID and update the collection.
-
Set up a new social media data source using one of the other templates (such as Facebook or Twitter). To do this you will need an appropriate API key for the repository and a channel to consume.
10. Introduction to Funnelback plugins
Funnelback plugins provide custom functionality that have been vetted and reviewed to be shared and reused between different search packages, data sources and results pages.
Custom functionality is implemented as one or more plugins which can be enabled by a Funnelback implementer. Plugins are a way for the community to contribute common solutions to re-occurring problems, or for highly unique solutions to be implemented for a particular problem.
10.1. Types of plugins
Plugins provide functionality that includes:
-
modification of the data model as a query is run
-
filters that can be added to a data source filter chains to modify or analyze content prior to indexing
-
custom gatherers for fetching content from unsupported data source types
Many plugins have been created and the plugin framework allows you to write additional plugins to implement additional functionality.
10.2. Accessing plugins
Available plugins are listed on the extensions screen, which can be accessed from the navigation panel within the search dashboard.
The extension screen lists all the installed plugins and provides options to view plugin information, view plugin documentation and apply the plugin.
Once applied, a plugin must be configured as outlined in the corresponding plugin documentation.
The next few sections introduce you to using plugins that are available in the plugins library. Writing of additional plugins will be covered separately.
Tutorial: Introduction to plugins
This exercise shows you where you can find and enable Funnelback plugins.
-
Log in to the search dashboard where you are doing your training.
See: Training - search dashboard access information if you’re not sure how to access the training. Ignore this step if you’re treating this as a non-interactive tutorial. -
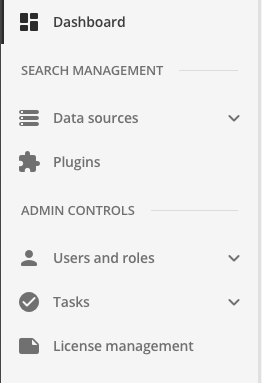
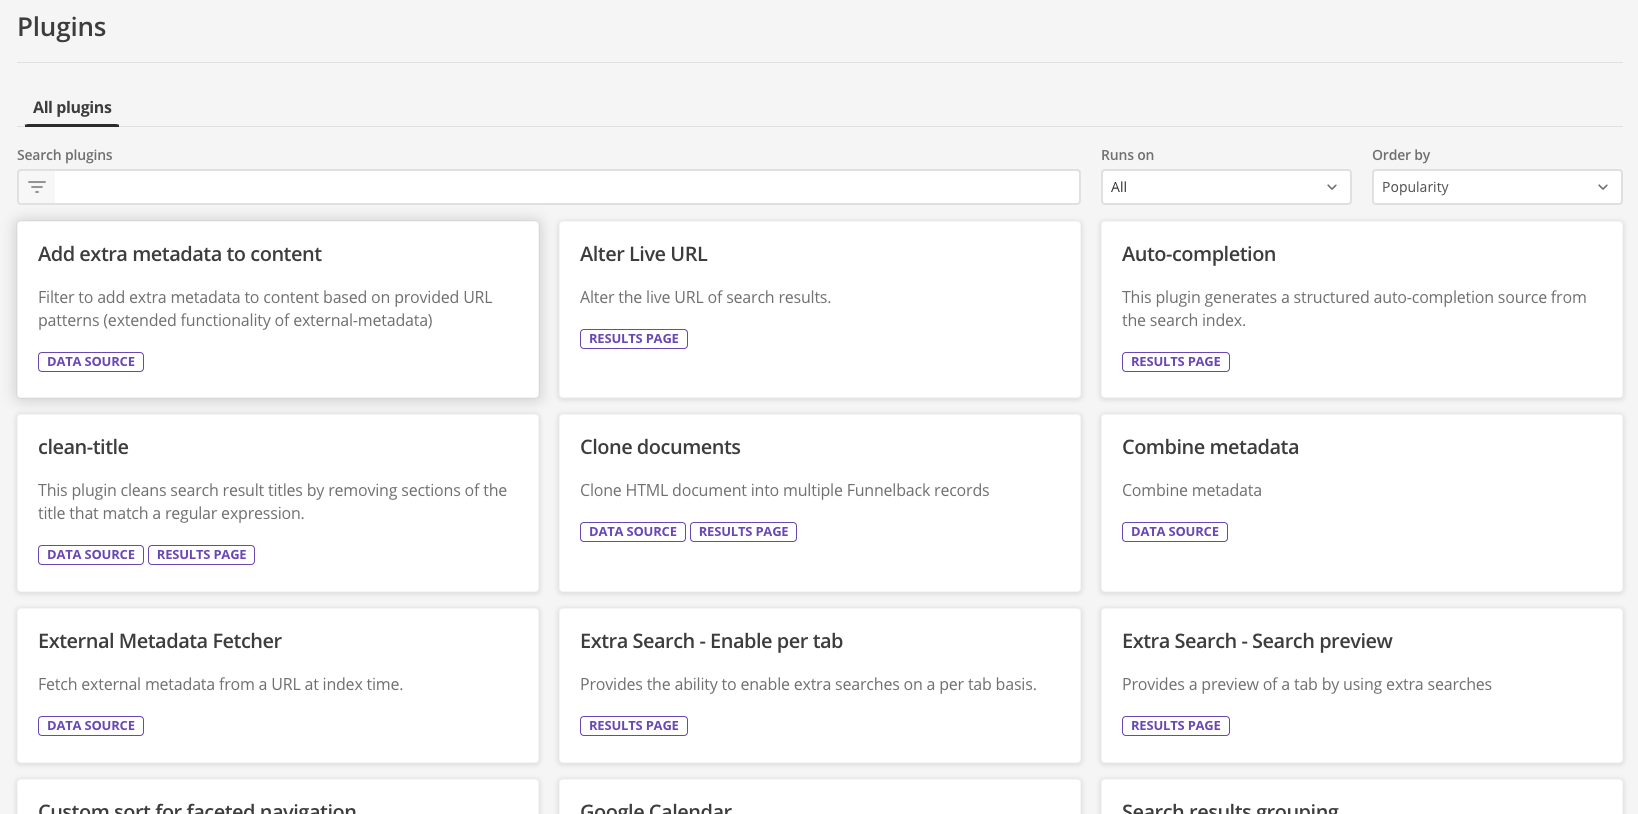
Click the plugins item on the navigation panel.
-
This opens the plugins screen, which lists all the currently available plugins. The list of available plugins will increase as new plugins are released.
-
Have a quick scroll through the available plugins to get a feel for the different types of plugins and how they extend the available functionality.
-
Type facet into the search plugins box and observe that the tiles update to only display plugins relating to faceted navigation.
-
Clear the search box and then choose data source from the runs on menu. Observe that the listed plugins are now filtered to include only those that can be applied to a data source.
-
Change the sort order to be reverse alphabetic by selecting name Z-A from the order by menu.
Popularity is based on how often a plugin is used on your Funnelback instance. For the training VM the display will look like an alphabetic sort because plugins are not actually in use on your training environment.
11. Manipulating search result content
Funnelback offers a number of options for manipulating the content of search results.
There are three main places where search result content can be manipulated. Which one to choose will depend on how the modifications need to affect the results. The options are (in order of difficulty to implement):
-
Modify the content as it is being displayed to the end user.
-
Modify the content after it is returned from the indexes, but before it is displayed to the end user.
-
Modify the content before it is indexed.
11.1. Modify the content as it is displayed to the user
This is the easiest of the manipulation techniques to implement and involves transforming the content as it is displayed.
This is achieved in the presentation layer and is very easy to implement and test with the results being visible as soon as the changes are saved. Most of the time this means using the Freemarker template. If the raw data model is being accessed the code that interprets the data model will be responsible for implementing this class of manipulation.
A few examples of content modification at display time include:
-
Editing a value as its printed (for example, trimming a site name off the end of a title)
-
Transforming the value (for example, converting a title to uppercase, calculating a percentage from a number)
Freemarker provides libraries of built-in functions that facilitate easy manipulation of data model variables from within the Freemarker template.
| If you’re integrating directly with Funnelback’s JSON or XML then you can make the equivalent display-time modifications in your templates. |
Tutorial: Use Freemarker to manipulate data as it is displayed
In this exercise we’ll clean up the search result hyperlinks to remove the site name.
-
Log in to the search dashboard where you are doing your training.
See: Training - search dashboard access information if you’re not sure how to access the training. Ignore this step if you’re treating this as a non-interactive tutorial. -
Run a search against the silent films search results page for buster and observe that the text for each result link ends with
: Free Download & Streaming : Internet Archive. -
Edit the template for the silent films results page navigating to the silent films search results page, selecting edit results page templates from the template panel.
-
Locate the results block in the template, and specifically the variable printed inside the result link. In this case it is the
${s.result.title}variable.
-
Edit the
${s.result.title}variable to use the Freemarker replace function to remove the: Free Download & Streaming : Internet Archivefrom each title. Update the variable to${s.result.title?replace(" : Free Download & Streaming : Internet Archive","")}then save and publish the template. -
Repeat the search against the silent films search results page for buster and observe that
: Free Download & Streaming : Internet Archiveno longer appears at the end of each link. If the text is still appearing check your replace parameter carefully and make sure you haven’t got any incorrect quotes or dashes as the replace matches characters exactly. -
The function calls can also be chained - for example adding
?upper_caseto the end of${s.result.title?replace(" : Free Download & Streaming : Internet Archive","")?upper_case}will remove: Free Download & Streaming : Internet Archiveand then uppercase the remaining title text. -
View the data model for the search results (update your URL to be
search.jsoninstead ofsearch.html) and observe that the titles still show the text that you removed. This demonstrates that the change you have applied above changes the text when the template generates the HTML, but the underlying data model is unaffected. -
Undo the change you made to your template (to replace the end of the title) then save your template.
11.2. Modify the content after it is returned from the index, but before it is displayed
This technique involves manipulating the data model that is returned.
There are two options for this type of modification:
-
Using a search lifecycle plugin from the plugin library
-
Writing your own plugin that implements the search lifecycle interface
Content modification using this technique is made before the data is consumed by the presentation layer - so the raw XML or JSON response is what is manipulated.
Writing your own plugin requires an understanding of Funnelback’s query processing pipeline, which follows the lifecycle of a query from when it’s submitted by a user to when the results are returned to the user. Writing plugins is covered in a separate course.
Tutorial: Use a plugin to manipulate search result titles as they are displayed
In this exercise we’ll make the same modification as in the previous exercise - to remove the : Free Download & Streaming : Internet Archive text from each title.
-
Log in to the search dashboard where you are doing your training.
See: Training - search dashboard access information if you’re not sure how to access the training. Ignore this step if you’re treating this as a non-interactive tutorial. -
Navigate to the manage results page screen for the silent films search results page.
-
Run a search against the silent films search results page for buster and observe that the text for each result link ends with
: Free Download & Streaming : Internet Archive. This is the same as you saw in the previous exercise. We’ll now configure a plugin to remove the text. -
Navigate back to the search dashboard, then click the plugins item in the navigation. This opens up the plugins management screen.
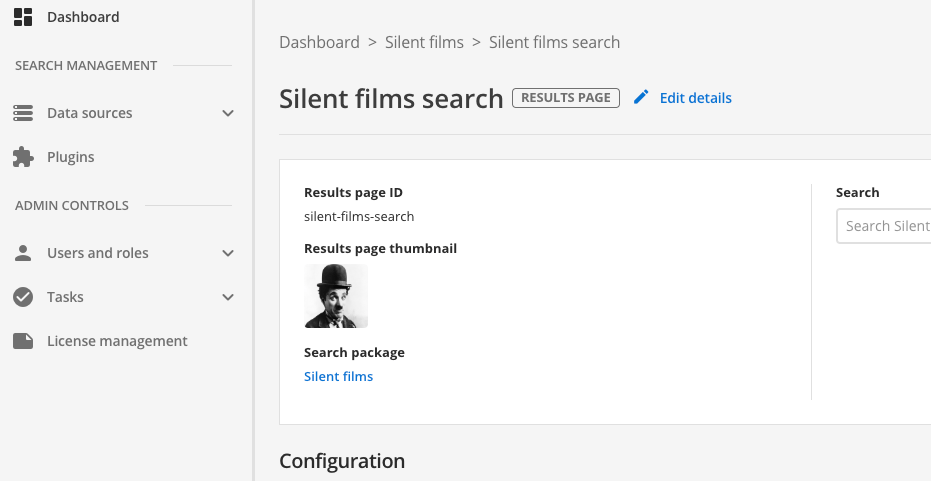
-
The extensions screen lists all the available plugins.
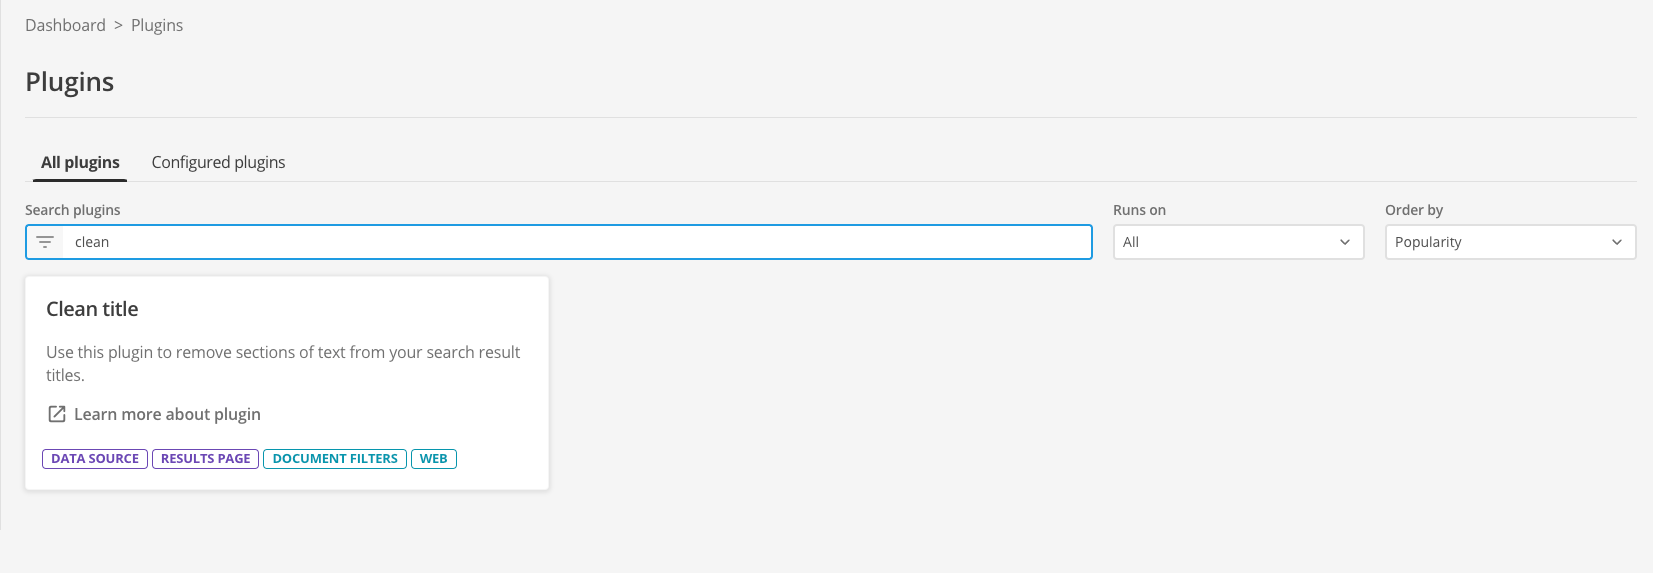
-
Locate the clean title plugin in the list. The tile presents some background information on the plugin, and provides a link to the documentation for the plugin
-
Click the learn more about plugin link. This opens the plugin documentation in a new browser tab. Have a quick read of the documentation then switch back to the tab containing the configuration screen. Don’t close the documentation tab as you’ll want to refer to this to configure the plugin.
-
Click on the plugin tile. This opens the wizard which guides you through the steps required to configure your plugin. The view documentation button can be used to access the plugin documentation if you need more information.
-
The location step is where you choose where to enable the plugin. If the plugin works on both data sources and results pages you will need to make a choice where you want the plugin enabled by selecting the appropriate radio button. You are then presented with a select list, where you select the results page or data source where you would like to enable the plugin. In this exercise we will enable the plugin on the results page. Select the results page radio button, then select Silent films search from the list.
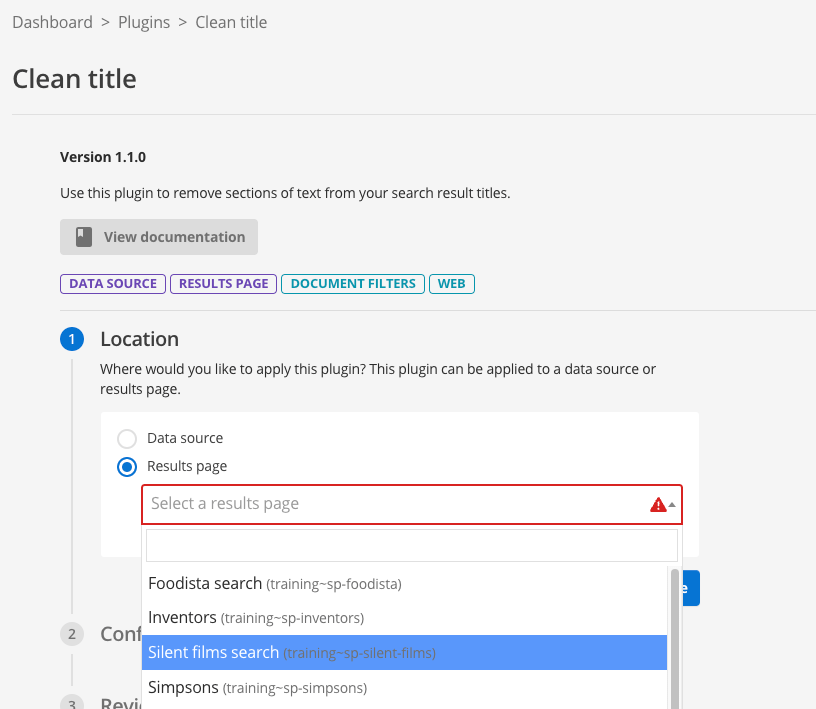
-
In the configuration keys step you are presented with the various fields that you can configure for the plugin you’ve selected..
-
Add a new parameter with parameter 1 set to
titleand the value set to: Free Download & Streaming : Internet Archive, then press the proceed button. This configures the plugin with a rule called title to remove the string of text. The plugin supports multiple clean title rules. You define these in the same way, but with a different identifier (parameter 1).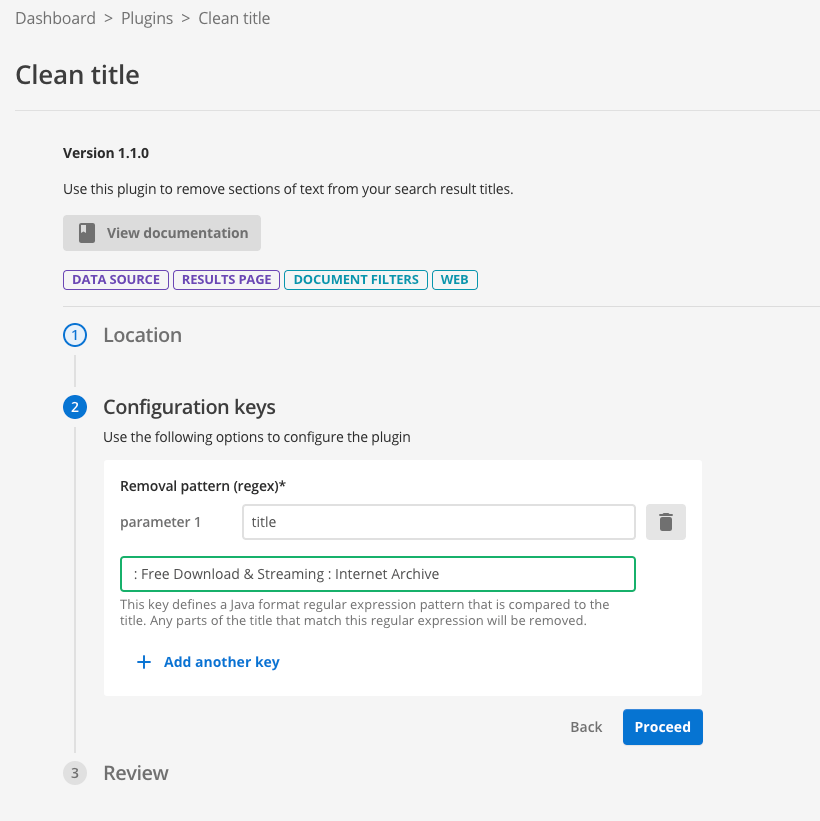
-
You will be presented with a summary outlining what you’ve configured for the plugin. Review the summary then click the finish button to commit the plugin configuration to your results page.
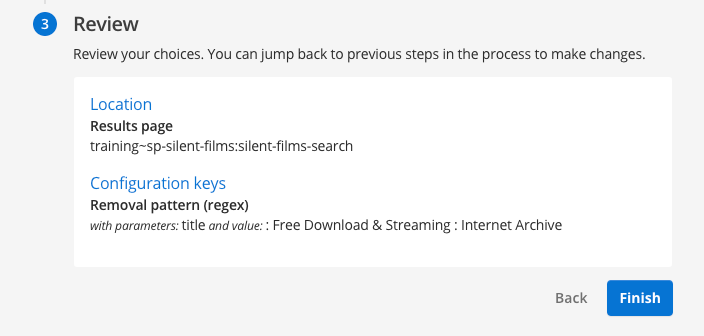
-
You will be directed to the results page management screen, where you can test out your plugin before you publish the changes. Run a search for buster (against the preview version of the results page) and observe that the titles have been cleaned.
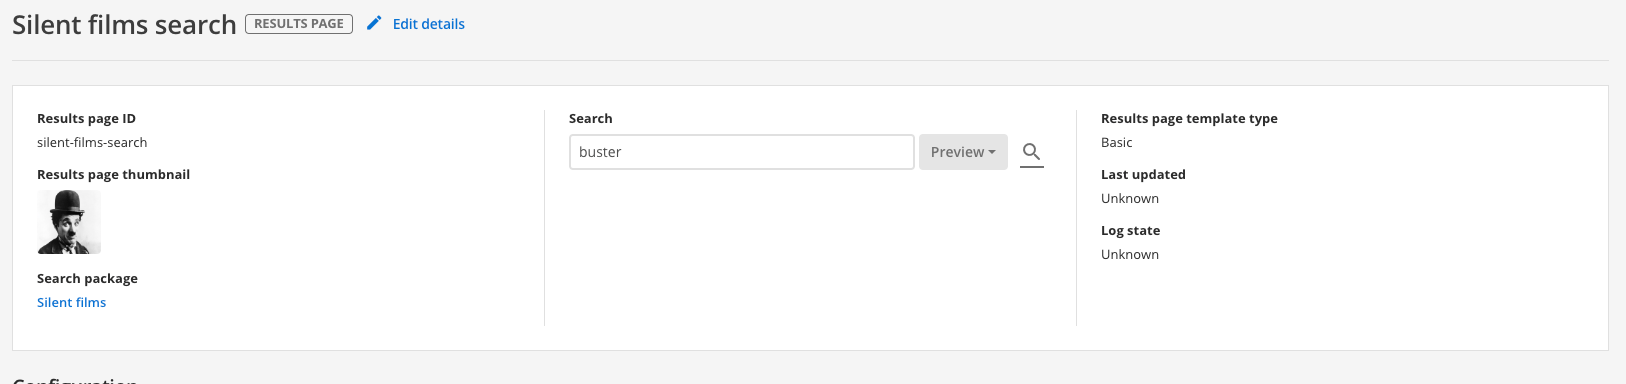
-
Run the same search (against the live version of the results page) and observe that the titles still display text that you configured the plugin to clean. This is because the plugin configuration hasn’t been published.
-
Return to the results page management screen and publish the plugin. Scroll down to the plugins heading then select publish from the menu for the clean title plugin. Observe that the menu also provides options to disable, delete and unpublish your plugin.
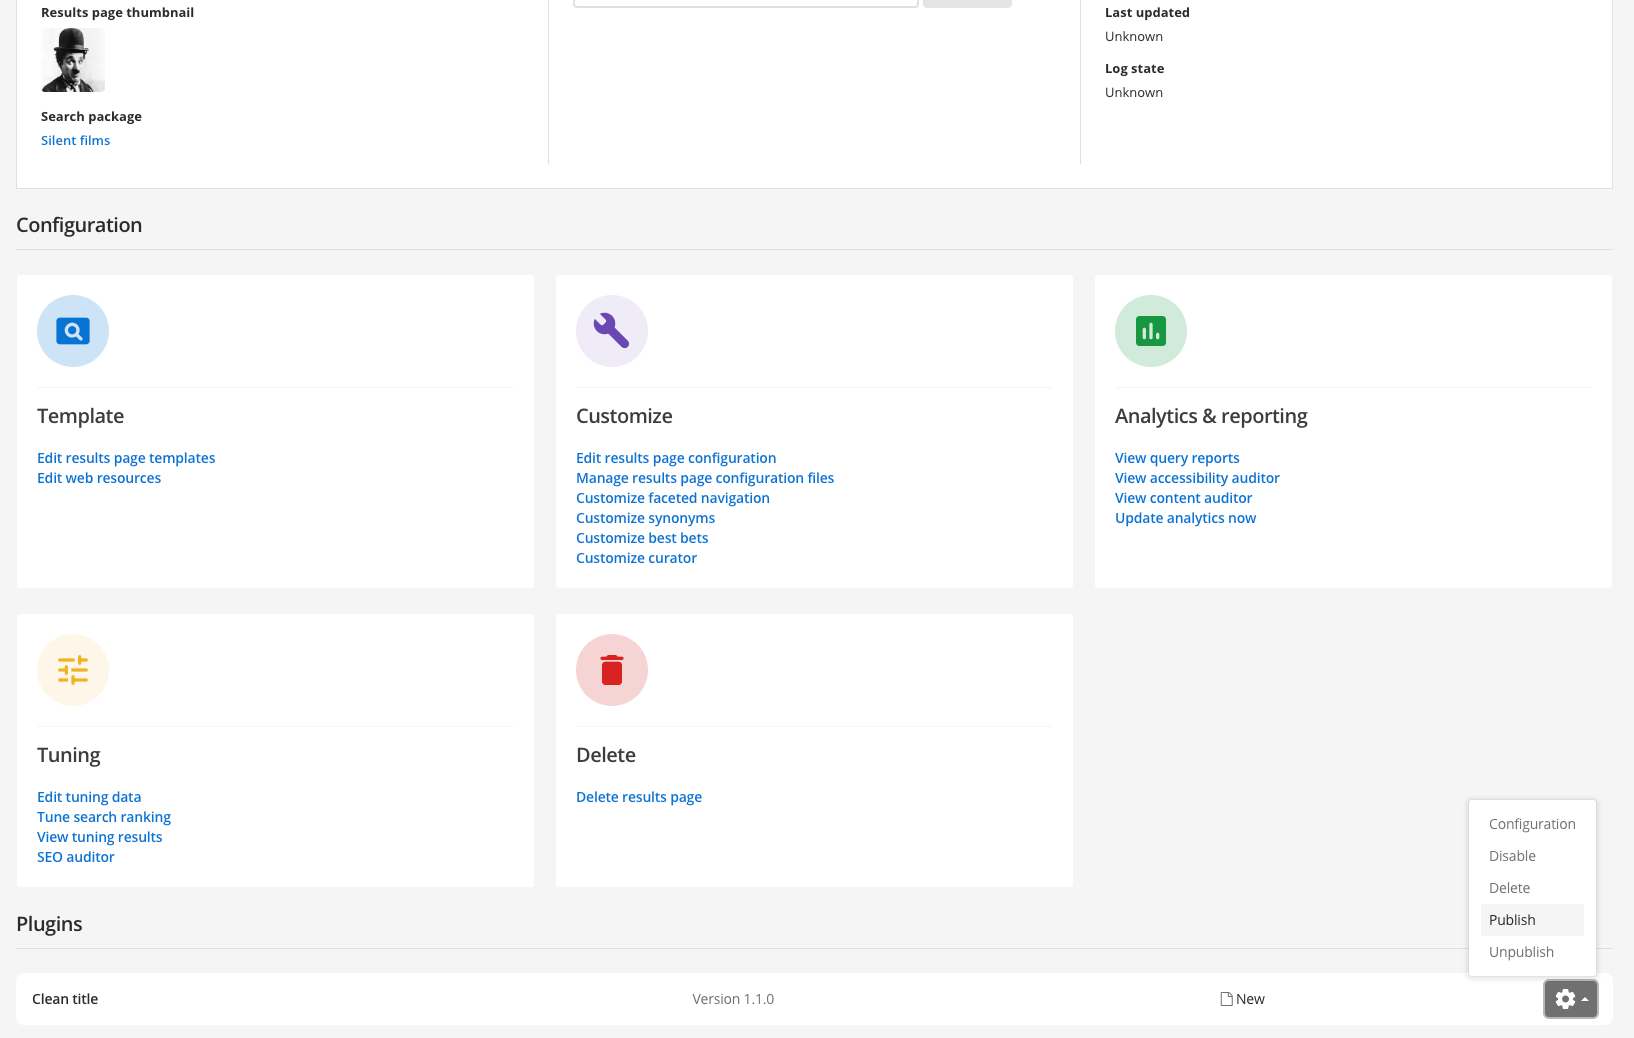
-
Rerun the search (against the live version of the results page) and observe that the titles are now cleaned.
11.3. Modify the content after it is gathered, but before it is indexed (document filtering)
This technique takes the data that is downloaded by Funnelback and modifies this data before it is stored to disk for indexing. This process is known as document filtering. Many core Funnelback functions depend on filtering, and you can add additional filters as required.
This is the most robust way of manipulating the content as it happens much closer to the source. However, it is more difficult to make these modifications as the data needs to be re-gathered, modified and then re-indexed for a change to be applied.
There are three options available within Funnelback for this type of modification:
-
Using a built-in filter (such as the metadata scraper)
-
Using a filter (or jsoup filter) plugin from the plugin library
-
Writing your own plugin that implements the filter interface
Content modification using this technique is made before the data is indexed meaning the changes are captured within the search index.
This has the following benefits:
-
Search lookup and ranking will take into account any modifications
-
Features such as faceted navigation and sorting will work correctly
11.3.1. Filtering vs query-time modification
Consider a website where titles in one section have a common prefix, but this isn’t uniform across the site.
If you clean your titles by removing common start characters, but these don’t apply to every page then if you choose to sort your results by title the sort will be incorrect if you apply one of the previous modification techniques (updating at query time, or updating in the template). This is because Funnelback sorts the results when the query is made and if you change the title that you are sorting on after the sorting happens then the order might be incorrect.
A similar problem occurs if your filter injects metadata into the document - if you try to do this at query time you can’t search on this additional metadata because it doesn’t exist in the index.
Writing your own plugin requires an understanding of Funnelback’s filter framework. Writing plugins is covered in a separate course.
11.3.2. How does filtering work?
This is achieved using a series of document filters which work together to transform the document. The raw document is the input to the filter process and filtered text is the output. Each filter transforms the document in some way. For example, extracting the text from a PDF which is then passed on to the next filter which might alter the title or other metadata stored within the document.
Filters operate on the data that is downloaded by Funnelback and any changes made by filters affect the index.
All Funnelback data source types can use filters, however the method of applying them differs for push data sources.
There are two sources of filters:
-
A small set of built-in filters are included with Funnelback. These filters include Tika, which converts binary documents such as PDFs into indexable text, and the metadata scraper which can be used to extract and insert additional metadata into a document.
-
Filters provided by enabling a plugin that implements one of the filtering interfaces. Once a plugin is enabled, the filter that it provides works in exactly the same way as a built-in filter.
|
A full update is required after making any changes to filters as documents that are copied during an incremental update are not re-filtered. For push collections all existing documents in the index will need to be re-added to the index so that the content is re-filtered. Full updates are started from the advanced update screen. |
11.3.3. The filter chain
During the filter phase the document passes through a series of general document filters with the modified output being passed through to the next filter. The series of filters is referred to as the filter chain.
There are a number of preset filters that are used to perform tasks such as extracting text from a binary document, and cleaning the titles.
A typical filter process is shown below. A binary document is converted to text using the Tika filters. This extracts the document text and outputs the document as HTML. This HTML is then passed through the JSoup filter which runs a separate chain of JSoup filters which allow targeted modification of the HTML content and structure. Finally, a plugin filter performs a number of modifications to the content.
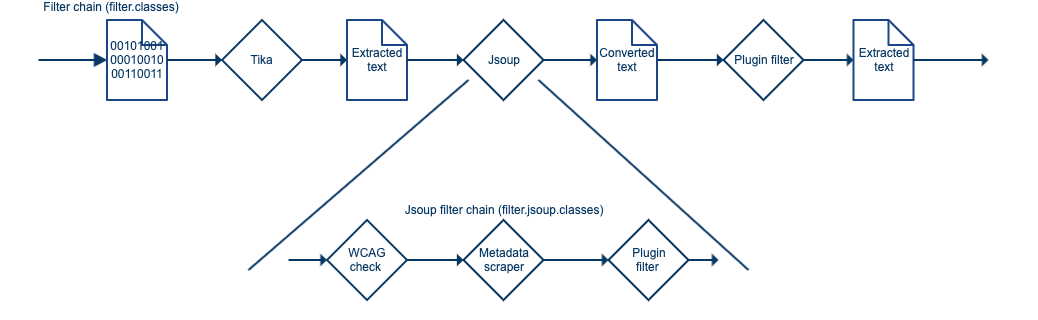
JSoup filters should be used for HTML documents when making modifications to the document structure, or performing operations that select and transform the document’s DOM. Custom JSoup filter plugins can be written to perform operations such as:
-
Cleaning titles
-
Analyzing content
-
Extracting metadata from content
The filter chain is made up of chains (ANDs) and choices (ORs) - separated using two types of delimiters. These control if the content passes through a single filter from a set of filters (a choice, indicated by commas), or through each filter (a chain, indicated by colons).
The set of filters below would be processed as follows: The content would pass through either Filter3, Filter2 or Filter1 before passing through Filter4 and Filter5.
Filter1,Filter2,Filter3:Filter4:Filter5There are some caveats when specifying filter chains which are covered in more detail in the documentation.
There is also support for creating additional general document filters which are implemented when writing a plugin. Plugin document filters receive the document’s URL and text as an input and must return the transformed document text ready to pass on to the next filter. The plugin document filter and can do pretty much anything to the content, and is written in Java.
Plugin document filters should be used when a JSoup filter (or plugin jsoup filter) is not appropriate. Plugin document filters offer more flexibility but are more expensive to run. Plugin document filters can be used for operations such as:
-
Manipulating complete documents as binary or string data
-
Splitting a document into multiple documents
-
Modifying the document type or URL
-
Removing documents
-
Transforming HTML or JSON documents
-
Implementing document conversion for binary documents
-
Processing/analysis of documents where structure is not relevant
11.3.4. General document filters
General document filters make up the main filter chain within Funnelback. A number of built-in filters ship with Funnelback and the main filter chain includes the following filters by default:
-
TikaFilterProvider: converts binary documents to text using Tika
-
ExternalFilterProvider: uses external programs to convert documents. In practice this is rarely used.
-
JSoupProcessingFilterProvider: converts the document to and from a JSoup object and runs an extra chain of JSoup filters.
-
DocumentFixerFilterProvider: analyzes the document title and attempts to replace it if the title is not considered a good title.
There are a number of other built-in filters that can be added to the filter chain, the most useful being:
-
MetadataNormaliser: used to normalize and replace metadata fields.
-
JSONToXML and ForceJSONMime: Enables Funnelback to index JSON data.
-
CSVToXML and ForceCSVMime: Enables Funnelback to index CSV data.
-
InjectNoIndexFilterProvider: automatically inserts noindex tags based on CSS selectors.
Plugin document filters that operate on the document content can also be implemented. However, for html documents most filtering needs are best served by writing a JSoup filter. General document filters are appropriate when filtering is required on non-html documents, or to process the document as a whole piece of unstructured content.
The documentation includes some detailed examples of general document filters.
The following tutorial demonstrates usage of a document filter, to convert CSV to XML, which can then be natively indexed by Funnelback.
Tutorial: Download and index a CSV file
-
Log in to the search dashboard where you are doing your training.
See: Training - search dashboard access information if you’re not sure how to access the training. Ignore this step if you’re treating this as a non-interactive tutorial. -
Create a new search package called Nobel Prize. Skip the step where you are asked about adding data sources.
-
Once the search package is created scroll to Components section and click the create a data source button.
-
Create a data source with the following properties:
-
Data source type:
web -
Data source name:
Nobel Prize winners -
What website do you want to crawl?:
https://docs.squiz.net/training-resources/nobel/nobel.csv -
What filetypes do you want to index?:
csv
-
-
Because we are indexing a CSV file we need to add the CSV to XML filter. Click the edit data source configuration item from the settings panel. Click the add new button and add the filter.classes setting.
-
The filters listed don’t really apply to our search so delete them and replace with the
CSVToXMLfilter. This filter converts CSV into XML, which Funnelback can then index. -
Because our CSV file has a header row you need to also add the following setting: filter.csv-to-xml.has-header and set this to true.
-
Run an update of the data source by clicking the update this data source button.
-
Configure the XML field to metadata class mappings.
Before you add your mappings clear the existing mappings by selecting from the menu. Click the configure metadata mappings item from the settings panel, then add the following metadata class mappings:
Class name Source Type Search behaviour year/csvFields/Yeartext
searchable as content
category/csvFields/Categorytext
searchable as content
name/csvFields/Nametext
searchable as content
birthDate/csvFields/Birthdatetext
display only
birthPlace/csvFields/Birth_Placetext
searchable as content
country/csvFields/Countrytext
searchable as content
residence/csvFields/Residencetext
searchable as content
roleAffiliate/csvFields/Role_Affiliatetext
searchable as content
fieldLanguage/csvFields/Field_Languagetext
searchable as content
prizeName/csvFields/Prize_Nametext
searchable as content
motivation/csvFields/Motivationtext
searchable as content
-
Apply the metadata to the index by running an advanced update to rebuild the live index.
-
Return to the search package and add a results page named Nobel Prize winners search
-
Edit the default template to return metadata for each search result. Replace the contents of the
<@s.Results>tag with the following then save and publish the template:<@s.Results> <#if s.result.class.simpleName != "TierBar"> <li data-fb-result=${s.result.indexUrl}> <h4>${s.result.listMetadata["prizeName"]?first!} (${s.result.listMetadata["year"]?first!})</h4> <ul> <li>Winner: ${s.result.listMetadata["name"]?first!}</li> <li>Born: ${s.result.listMetadata["birthDate"]?first!}, ${s.result.listMetadata["birthPlace"]?first!}, ${s.result.listMetadata["country"]?first!}</li> <li>Role / affiliate: ${s.result.listMetadata["roleAffiliate"]?first!}</li> <li>Prize category: ${s.result.listMetadata["category"]?first!}</li> <li>Motivation: ${s.result.listMetadata["motivation"]?first!}</li> </ul> </li> </#if> </@s.Results> -
Configure the display options so that relevant metadata is returned with the search results. Click the edit results page configuration item from the customize panel then add the following to the query_processor_options setting:
-SF=[year,category,name,birthDate,birthPlace,country,residence,roleAffiliate,fieldLanguage,prizeName,motivation] -
Run a search for nobel to confirm that the CSV has been indexed as individual records and that the metadata is correctly returned.
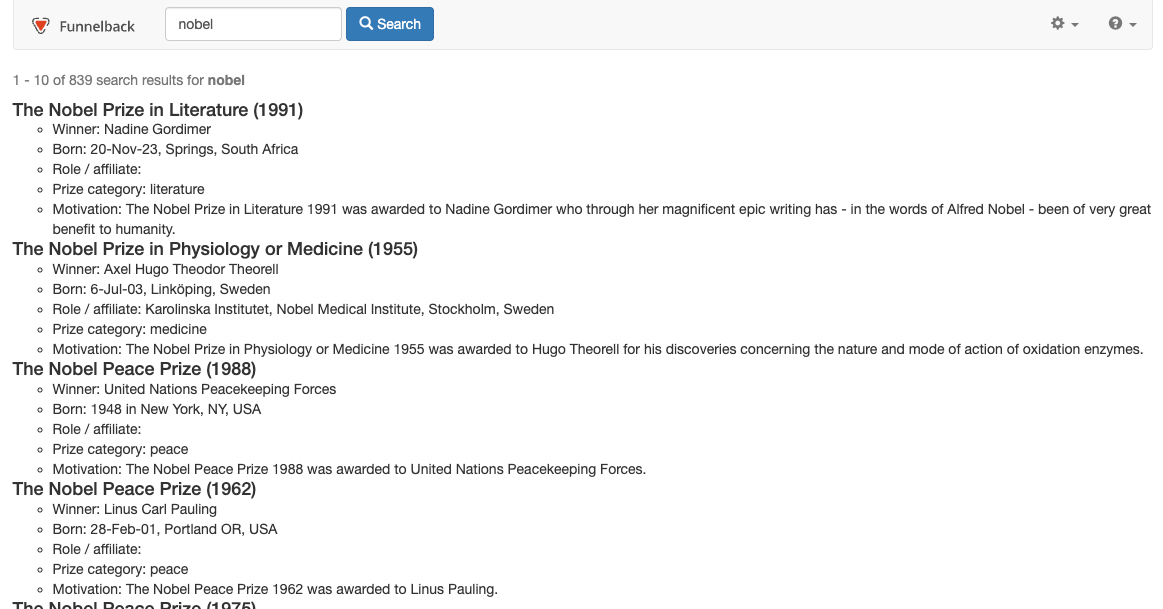
11.3.5. HTML document (JSoup) filtering
HTML document (JSoup) filtering allows for a series of micro-filters to be written that can perform targeted modification of the HTML document structure and content.
The main JSoup filter, which is included in the filter chain takes the HTML document and converts it into a structured DOM object that the JSoup filters can then work with using DOM traversal and CSS style selectors, which select on things such as element name, class, ID.
A series of JSoup filters can then be chained together to perform a series of operations on the structured object - this includes modifying content, injecting/deleting elements and restructuring the HTML/XML.
The structured object is serialised at the end of the JSoup filter chain returning the text of the whole data structure to the next filter in the main filter chain.
Funnelback runs a set of Jsoup filters to support content auditor by default.
Funnelback also includes a built-in Jsoup filter:
-
MetadataScraper: used to extract content from an HTML document and insert it as metadata.
Tutorial: Using the metadata scraper
In this exercise the metadata scraper built-in filter will be used to extract some page content for additional metadata.
| Scraping of content is not generally recommended as it depends on the underlying code structure. Any change to the code structure has the potential to cause the filter to break. Where possible avoid scraping and make any changes at the content source. |
-
The source data must be analyzed before any filter rules can be written - this informs what filtering is possible and how it may be implemented. Examine an episode page from the source data used by the simpsons - website data source. Examine the episode page for Dancin' Homer and observe that there is potential useful metadata contained in the vitals box located as a menu on the right hand side of the content. Inspect the source code and locate the HTML code to determine if the code can be selected. Check a few other episode pages on the site and see if the code structure is consistent.
-
The vitals information is contained within the following HTML code:
<div class="sidebar vitals"> <h2>Vitals</h2> <p class="half">PCode<br> 7F05</p> <p class="half">Index<br> 2×5</p> <p class="half">Aired<br> 8 Nov, 1990</p> <p class="half">Airing (UK)<br> unknown</p> <p>Written by<br> Ken Levine<br>David Isaacs </p> <p>Directed by<br> Mark Kirkland <p>Starring<br>Dan Castellaneta<br>Julie Kavner<br>Nancy Cartwright<br>Yeardley Smith<br>Harry Shearer</p><p>Also Starring<br>Hank Azaria<br>Pamela Hayden<br>Daryl L. Coley<br>Ken Levine</p><p>Special Guest Voice<br>Tony Bennett as Himself<br>Tom Poston as Capitol City Goofball </div>There appears to be enough information and consistency available within the markup to write JSoup selectors to target the content. The elements can be selected using a JSoup CSS selector
div.vitals p. Once selected the content can be extracted and written out as metadata. -
Log in to the search dashboard where you are doing your training.
See: Training - search dashboard access information if you’re not sure how to access the training. Ignore this step if you’re treating this as a non-interactive tutorial. -
Locate the simpsons - website data source and manage the configuration.
-
Create a metadata scraper configuration file. Click the manage data source configuration files item on the settings panel. Click the add new button and create a metadata_scraper.json configuration file.
[
  {
    "urlRegex": ".*",  (1)
    "metadataName": "simpsons.pcode",  (2)
    "elementSelector": "div.vitals p",  (3)
    "applyIfNoMatch": false,
    "extractionType": "html", (4)
    "processMode": "regex", (5)
    "value": "(?is)^Pcode\\s*?<br>(.*)\\s*", (6)
    "description": "Program code"
  }
]
1 Apply this rule to every URL crawled ( .*matches everything).2 Write out a <meta name="simpsons.pcode">metadata field if anything is extracted3 Sets the Jsoup element selector. This will result in the content of each of the <p>tags contained within the<div>ofclass=vitalsbeing processed.4 Extracts the content of the selected element as html. When extracting as html this means the extracted content of each p tag will include any HTML tags. 5 Process the extracted content using the regular expression indicated in the valuefield.6 Regular expression that filters the extracted content. The regex capture groups are stored as the values of the metadata field indicated in the metadataName. This rule, when applied to the example HTML code above, will extract the PCode value and write it to a metadata field<meta name="simpsons.pcode" content="7F05"> -
Edit the date source configuration and add the
filter.jsoup.classeskey, adding theMetadataScraperto the end of the filter chain.
-
Run a full update of the data source (filter changes always require a full update to ensure everything is re-filtered).
-
Once the update is complete, check the
gather.logfor the update (from the live log files because the update was successful) and check for any errors. -
Search for the Homer the heretic and view the cached version for the episode guide.
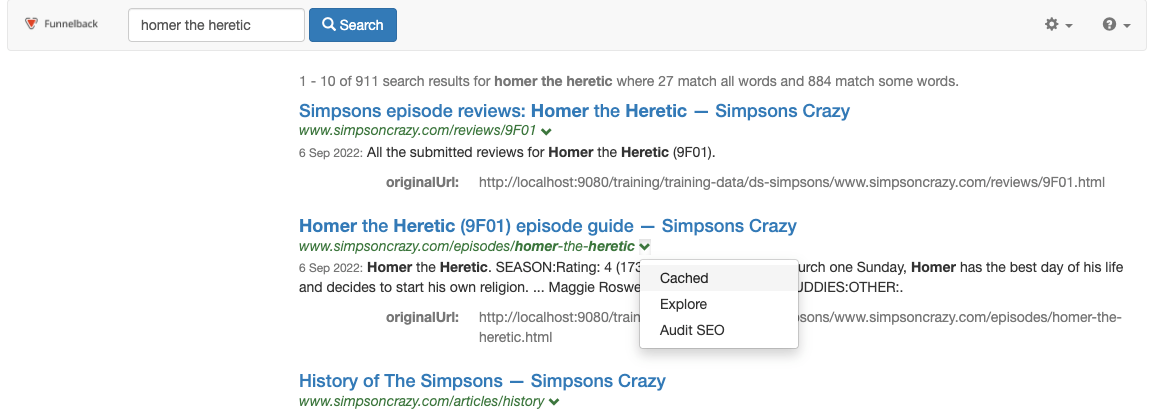
-
View the page source and observe that a metadata field has been written (by the JSoup filter) into the source document. Remember that the filter is modifying the content that is stored by Funnelback, which is reflected in what is inside the cached version (it won’t modify the source web page). This additional metadata can be mapped to a metadata class for use in search, faceted navigation etc. in the same way as other document metadata.
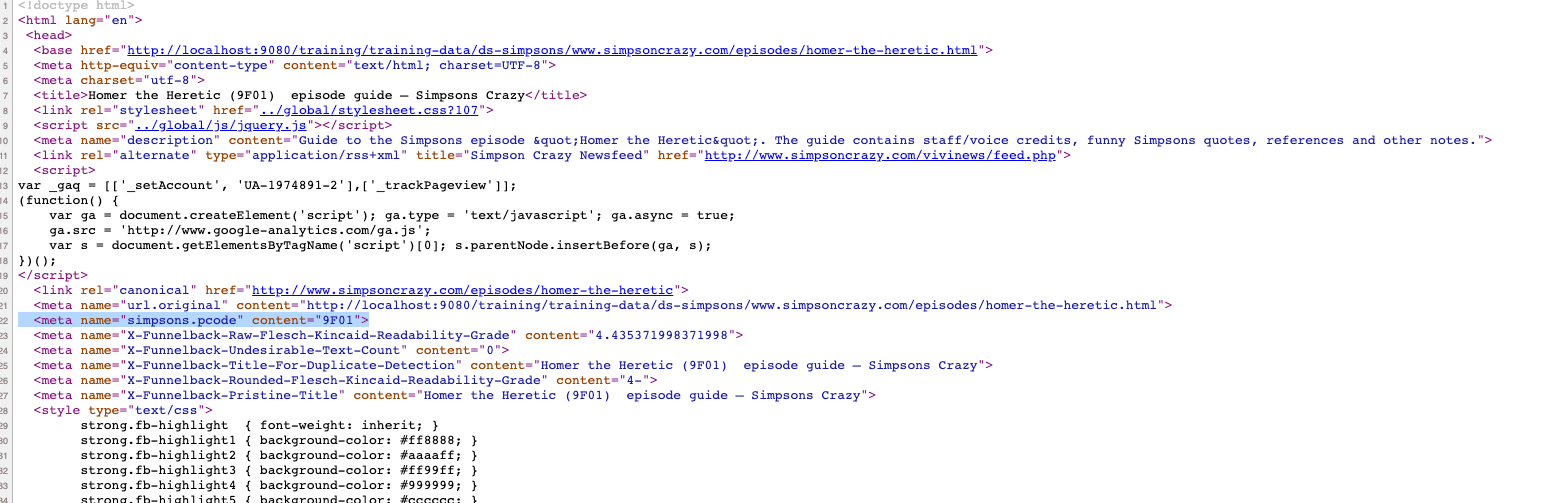
Jsoup filters will write additional metadata into the HTML document source that is stored by Funnelback and the cache version can be used to verify that the metadata is written. For document filters the metadata is not written into the HTML source, but into a special metadata object that is indexed along with the HTML source. Metadata added via document filters will not be visible when viewing the cached version.
Extended exercise: Using the metadata scraper
-
Add additional metadata scraper rules to extract additional fields from the vitals table above.
-
Map the additional metadata and return the information in the search results.
12. Removing items from the index
It is not uncommon to find items being returned in the search results that are not useful search results.
Removing these, improves the findability of other items in the index and provides a better overall search experience for end users.
There are a few different techniques that can be used to remove unwanted items from the index.
12.1. Prevent access to the item
Prevent the item from being gathered by Funnelback by preventing Funnelback from accessing it. This is something that needs to be controlled in the data source and the available methods are dependent on the data source. The advantage of this technique is that it can apply beyond Funnelback.
For example:
-
For web data sources utilize
robots.txtand robots meta tags todisallowaccess for Funnelback or other crawlers, or instruct a crawler to follow links but not index a page (or vice versa). -
Change document permissions so that Funnelback is not allowed to access the document (for example, for a file system data source only grant read permissions for Funnelback’s crawl user to those documents that you wish to be included (and hence discovered) in the search).
12.2. Exclude the item
The simplest method of excluding an item from within Funnelback is to adjust the gatherer so that the item is not gathered.
The exact method of doing this varies from gatherer to gatherer. For example:
-
Web data sources: use include and exclude patterns and
crawler.reject_filessetting to prevent unwanted URL patterns and file extensions from being gathered. -
Database data source: adjust the SQL query to ensure the unwanted items are not returned by the query.
-
File system data sources: use the exclude patterns to prevent unwanted files from being gathered.
| The use of exclude patterns in a web data source needs to be carefully considered to assess if it will prevent Funnelback from crawling content that should be in the index. For example, excluding a home page in a web crawl will prevent Funnelback from crawling any pages linked to by the home page (unless they are linked from somewhere else) as Funnelback needs to crawl a page to extract links to sub-pages. In this case you should make use of robots meta tags (with noindex,follow values) or by killing the URLs at index time (see below). |
12.3. Killing urls / url patterns
It is also possible to remove items from the search index after the index is created.
This can be used to solve the home page problem mentioned above - including the home page in the crawl (so that sub-pages can be crawled and indexed) but removing the actual home page afterwards.
Examples of items that are commonly removed:
-
Home pages
-
Site maps
-
A-Z listings
-
'Index' listing pages
Removing items from the index is as simple as listing the URLs in a configuration file. After the index is built a process runs that will remove any items that are listed in the kill configuration.
For normal data source types, there are two configuration files that control URL removal:
-
kill_exact.cfg: URLs exactly matching those listed in this file will be removed from the index. The match is based on theindexUrl(as seen in the data model). -
kill_partial.cfg: URLs with the start of the URL matching those listed in the file will be removed from the index. Again the match is based on theindexUrl(as seen in the data model).
For push indexes, URLs can be removed using the push API.
Tutorial: Remove URLs from an index
In this exercise we will remove some specific pages from a search index.
-
Run a search for shakespeare against the book finder results page. Observe the home page results result (The Complete Works of William Shakespeare, URL:
https://docs.squiz.net/training-resources/shakespeare/) is returned in the search results. -
Open the search dashboard and switch to the shakespeare data source.
-
Click the manage data source configuration files item from the settings panel, then create a new
kill_exact.cfg. This configuration file removes URLs that exactly match what is listed within the file. -
The editor window will load for creating a new
kill_exact.cfgfile. The format of this file is one URL per line. If you don’t include a protocol then http is assumed. Add the following tokill_exact.cfgthen save the file:https://docs.squiz.net/training-resources/shakespeare/ -
As we are making a change that affects the makeup of the index we will need to rebuild the index. Rebuild the index by running an advanced update to re-index the live view.
-
Repeat the search for shakespeare and observe that the Complete Works of William Shakespeare result no longer appears in the results.
-
Run a search for hamlet and observe that a number of results are returned, corresponding to different sections of the play. We will now define a kill pattern to remove all of the hamlet items. Observe that all the items we want to kill start with a common URL base.
-
Return to the search dashboard and create a new
kill_partial.cfg. -
Add the following to the file and then save it:
https://docs.squiz.net/training-resources/shakespeare/hamlet/ -
Rebuild the index then repeat the search for hamlet. Observe that all the results relating to chapters of Hamlet are now purged from the search results.
You can view information on the number of documents killed from the index by viewing the Step-ExactMatchKill.log and Step-PartialMatchKill.log log files, from the log viewer on the shakespeare data source.
|
12.4. Extended exercise: removing items from the index
Configuration files that are managed via the edit configuration files button can also be edited via WebDAV. This currently includes spelling, kill, server-alias, cookies, hook scripts, meta-names, custom_gather, workflow and reporting-blacklist configuration files.
-
Delete the two kill config files you created in the last exercise then rebuild the index. Observe that the blog pages and items you killed are returned to the results listings.
-
In your favourite text editor create a
kill_exact.cfgandkill_partial.cfgcontaining the URLs you used in the previous exercise. Save these somewhere easy to access (such as your documents folder or on the desktop). -
Using your WebDAV editor, connect to the Funnelback server as you did in the previous WebDAV exercise
-
change to the default~ds-shakespeare data source and then browse to the conf folder.
-
Upload the two kill configuration files you’ve saved locally by dragging them into the conf folder in your WebDAV client.
-
Once the files are uploaded return to the search dashboard and return to the configuration file listing screen that is displayed when you click the manage data source configuration files. Observe that the files you just uploaded are displayed.
-
Rebuild the index and the URLs should once again be killed from the index.
13. Alternate output formats
Funnelback includes XML and JSON endpoints that return the raw Funnelback data model in these formats.
These can be useful when interacting with Funnelback, however the data model is complex and contains a lot of data (meaning the response packets can be quite large).
Funnelback also provides an endpoint that is designed to stream all the results back to the user in a single call. The all results endpoint can be used to return all matching Funnelback results in JSON or CSV format. This endpoint only returns the results section of the data model and only minimal modifications can be made to the return format.
Funnelback’s HTML endpoint utilizes Freemarker to template the results. This is traditionally used to format the search results as HTML. However, this templating is extremely flexible and can be adapted to return any text-based format - such as CSV, RSS or even custom XML/JSON formats.
This is useful if you need to export search results, or use Funnelback’s index as a data source to be consumed by another service.
13.1. Returning search results (only) as CSV or custom JSON
The all results endpoint is ideal for providing a CSV export or custom JSON of search results.
A number of parameters can be supplied to the endpoint that control the fields returned and the field labels used.
The all results endpoint returns the result level data for all the matching results to a query. This is ideal for search results export. If data model elements from outside the results element are required (for example, faceted navigation counts, search result counts, query) then a Freemarker template will be required to create the custom output.
Tutorial: Return search results as CSV
In this exercise the all results endpoint will be configured to return the search results as CSV.
-
Decide what fields you want to return as the columns of your CSV. Any of the fields with the search result part of the data model can be returned. For the airport finder results page we decide to return only the following fields, which are all sourced from the indexed metadata:
"Name","City","Country","IATA/FAA","ICAO","Altitude" -
A URL will need to be constructed that defines the fields that are required. Several parameters will be required to set the fields and field names to use:
-
collection: Required. Set this to the search package ID. -
profile: Set this to the results page ID. -
fields: Required. Defines the fields that will be returned by the all results endpoint as a comma separated list of fields. Nested items in the results part of the data model require an xpath style value. For example,listMetadata/authorwill return theauthorfield from the listMetadata sub-element. -
fieldnames: Optional list of field names to use. These will be presented as the column values (CSV) or element keys (JSON). If omitted then the raw values from fields will be used (for example,listMetadata/author). -
SF: Required if any metadata elements are being returned. Ensure this is configured to return all the metadata fields that are required for the output. -
SM: Required if any metadata elements or the automatically generated results summary are being returned.
-
-
Decide what fields need to be returned. For the airport finder results page we will return six columns: Name, City, Country, IATA/FAA, ICAO and Altitude. Open the search dashboard, change to the airports data data source and view the metadata mappings. Make a note of the metadata class names for these fields.
-
Define the query string parameters. To return the six fields will require the following parameters:
-
collection=default~sp-airports -
profile=airport-finder -
fields=listMetadata/name,listMetadata/city,listMetadata/country,listMetadata/iataFaa,listMetadata/icao,listMetadata/altitude -
fieldnames=Name,City,Country,IATA/FAA,ICAO,Altitude -
SM=meta -
SF=[name,city,country,iataFaa,icao,altitude]
-
-
Construct a URL from this information and view the response from the all results JSON endpoint. Note that you need to URL encode your parameter values. This illustrates the custom JSON that can be returned using the all results endpoint:

-
Access the corresponding all results CSV endpoint. When you click the link a CSV file should be downloaded to your computer. Open this file after you’ve downloaded it.
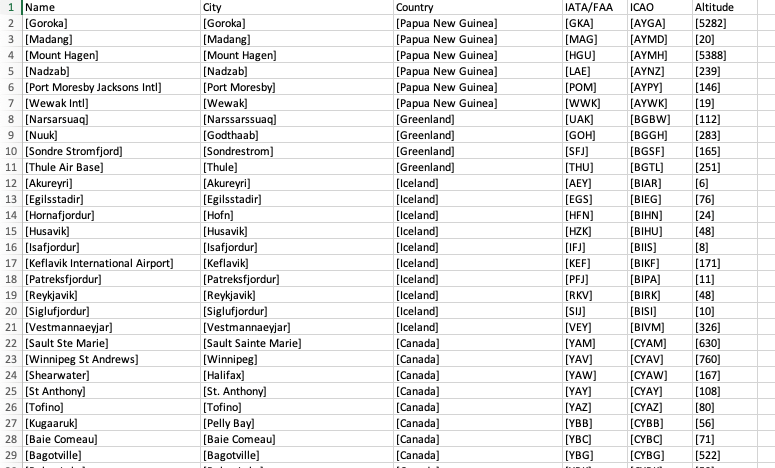
The values of the metadata within the CSV will be surrounded with square brackets as the listMetadataelement is an array/list of values. You will need to convert these values as desired. This can easily be done using macros within programs such as Microsoft Excel or Google Sheets. -
The file will have been saved with a file name similar to
all-results.csv. The file name can be defined by adding an additional parameter,fileName, to the URL. Modify the previous URL and add&fileName=airports.csvto the URL then press enter. The file should download and this time be saved asairports.csv. -
Open the search dashboard and change to the airport finder results page.
-
Edit the default template (select the
simple.ftlfrom the edit results page templates listing on the template panel). Add a button above the search results that allows the results to be downloaded as CSV. Add the following code immediately before the<ol>tag with an ID ofsearch-results(approx. line 505):<p><a class="btn btn-success" href="/s/all-results.csv?collection=${question.collection.id}&query=${question.query}&profile=${question.profile}&fields=listMetadata/name,listMetadata/city,listMetadata/country,listMetadata/iataFaa,listMetadata/icao,listMetadata/altitude&fieldnames=Name,City,Country,IATA/FAA,ICAO,Altitude&SF=[name,city,country,iataFaa,icao,altitude]&SM=meta&fileName=airports.csv">Download results as CSV</a></p> -
Run a search for denmark and observe that a download results as CSV button appears above the 28 search results.
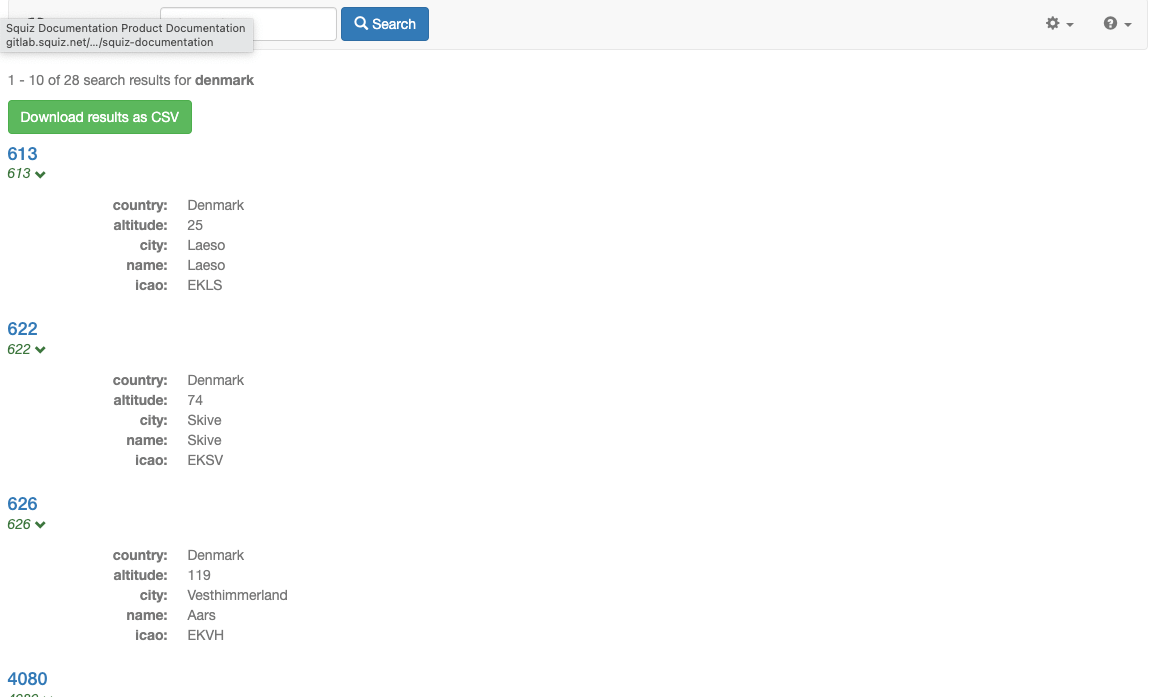
-
Click the download as csv button and the csv file will download. Open the CSV file and confirm that all the results matching the query are included in the CSV data (matching the 28 results specified by the results summary).
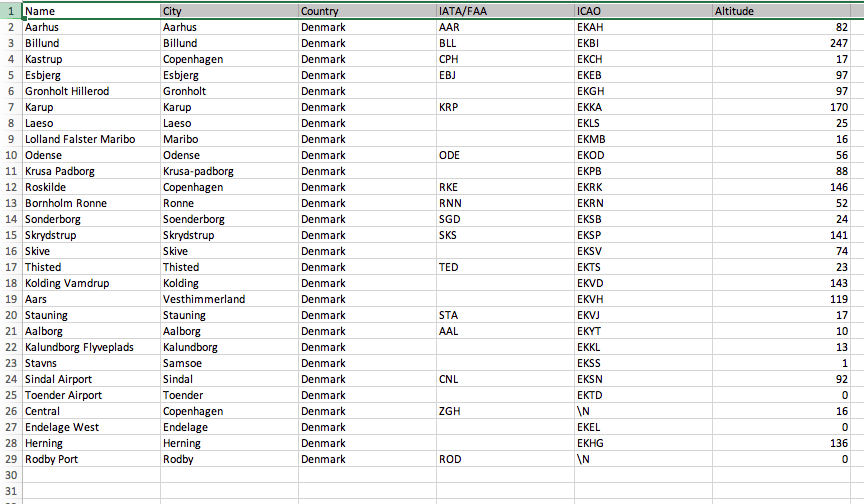
14. Using Freemarker templates to return other text-based formats
Funnelback’s HTML endpoint can be used to define a template that returns the search results in any arbitrary text-based format.
This is commonly used for returning custom JSON or XML but can also be used to return other known formats such as tab delimited data or GeoJSON.
|
If you are creating a template for a result format that you wish to be automatically downloaded (instead of displayed in the browser) you can set an additional HTTP response header for the template to ensure that the browser downloads the file. This header can also be used to define the filename. If a file name isn’t set the download will save the file using the browser’s default naming. The name of the file can be set by setting the This will tell Funnelback to send a custom HTTP header ( |
Tutorial: Return search results as GeoJSON
In this exercise a Freemarker template will be created that formats the set of search results as a GeoJSON feed.
-
Log in to the search dashboard where you are doing your training.
See: Training - search dashboard access information if you’re not sure how to access the training. Ignore this step if you’re treating this as a non-interactive tutorial. -
Change to the airport finder results page.
-
Create a new custom template. Click the edit results page templates item on the template panel, then click the add new button.
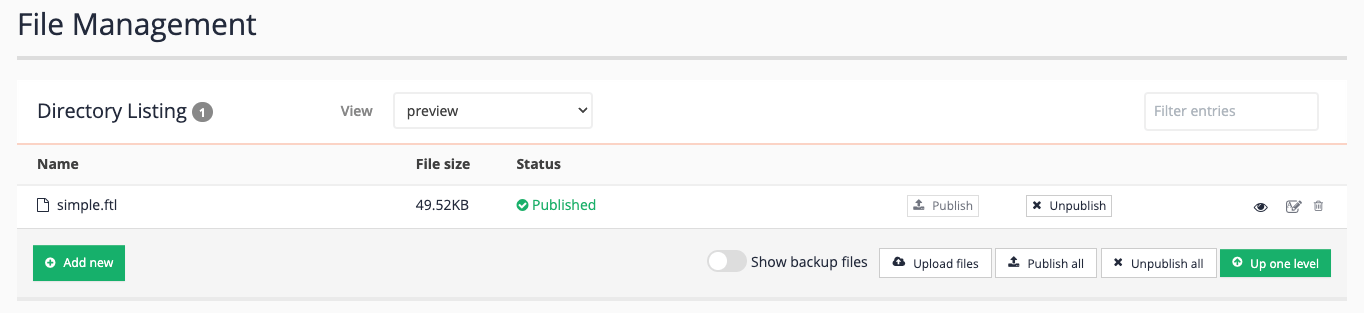
-
Enter
geojson.ftlas the name of the file once the new file editor loads.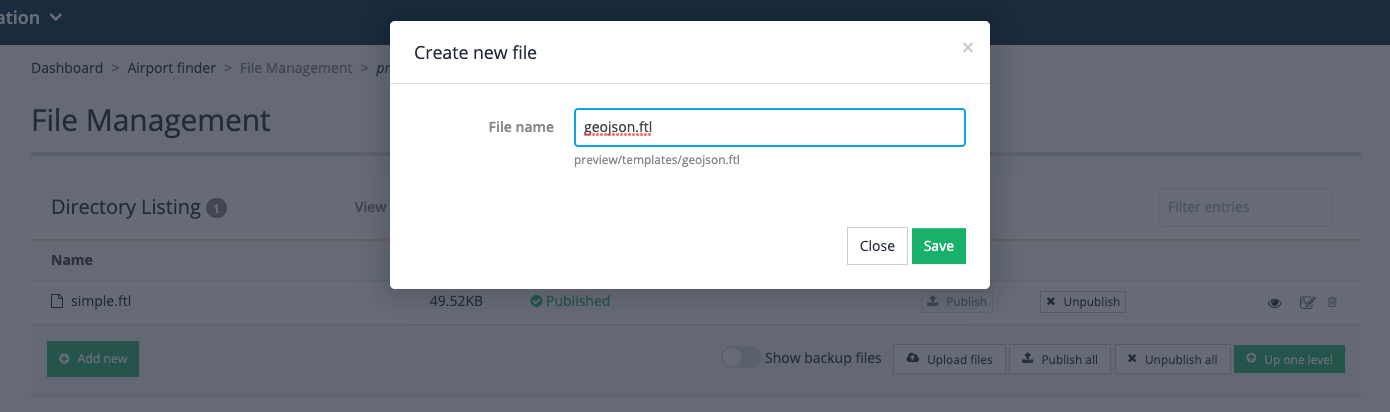
-
Create template code to format the results as GeoJSON. Copy the code below into your template editor and hit save.
<#ftl encoding="utf-8" output_format="JSON"/> <#import "/web/templates/modernui/funnelback_classic.ftl" as s/> <#import "/web/templates/modernui/funnelback.ftl" as fb/> <#compress> <#-- geojson.ftl Outputs Funnelback response in GeoJSON format. --> <#-- Read the metadata field to source the latLong value from from the map.geospatialClass collection.cfg option --> <#--<#assign latLong=question.currentProfileConfig.get("map.geospatialClass")/>--> <#-- Hard code using the latLong metadata field for this example --> <#assign latLong="latlong"/> <@s.AfterSearchOnly> <#-- NO RESULTS --> <@s.IfDefCGI name="callback">${question.inputParameters["callback"]?first!}(</@s.IfDefCGI> { <#if response.resultPacket.resultsSummary.totalMatching != 0> <#-- RESULTS --> "type": "FeatureCollection", "features": [ <@s.Results> <#if s.result.class.simpleName != "TierBar"> <#if s.result.listMetadata[latLong]?? && s.result.listMetadata[latLong]?first!?matches("-?\\d+\\.\\d+;-?\\d+\\.\\d+")> <#-- has geo-coord and it's formatted correctly - update to the meta class containing the geospatial coordinate --> <#-- EACH RESULT --> { "type": "Feature", "geometry": { "type": "Point", "coordinates": [${s.result.listMetadata[latLong]?first!?replace(".*\\;","","r")},${s.result.listMetadata[latLong]?first!?replace("\\;.*","","r")}] }, "properties": { <#-- Fill out with all the custom metadata you wish to expose (for example, for use in the map display --> "rank": "${s.result.rank?string}", "title": "${s.result.title!"No title"}", <#if s.result.date??>"date": "${s.result.date?string["dd MMM YYYY"]}",</#if> "summary": "${s.result.summary!}", "fileSize": "${s.result.fileSize!}", "fileType": "${s.result.fileType!}", "exploreLink": "${s.result.exploreLink!}", <#if s.result.kmFromOrigin?? && question.inputParameters["origin"]??>"kmFromOrigin": "${s.result.kmFromOrigin?string("0.###")}",</#if> <#-- MORE METADATA FIELDS... --> "listMetadata": { <#list s.result.listMetadata?keys as metaDataKey> "${metaDataKey}": "${s.result.listMetadata[metaDataKey]?join(",")}"<#if metaDataKey_has_next>,</#if> </#list> }, "displayUrl": "${s.result.liveUrl!}", "cacheUrl": "${s.result.cacheUrl!}", "clickTrackingUrl": "${s.result.clickTrackingUrl!}" } }<#if s.result.rank < response.resultPacket.resultsSummary.currEnd>,</#if> </#if> <#-- has geo-coord --> </#if> </@s.Results> ] </#if> }<@s.IfDefCGI name="callback">)</@s.IfDefCGI> </@s.AfterSearchOnly> </#compress>As you can see from the code above the template is bare bones and only handles the case of formatting search results after the search has run plus a minimal amount of wrapping code required by the GeoJSON format. Each result is templated as a feature element in the JSON data.
Also observe that the template defines a JSON output format (
<#ftl encoding="utf-8" output_format="JSON"/>) to ensure that only valid JSON is produced. -
Run a search using the geojson template - click on the search icon (eye icon third from the right) that appears in the available actions within the file listing.

-
A blank screen will display - Funnelback has loaded with the template by no query is supplied. Specify a query by adding
&query=!showallto the end of the URL. A fairly empty JSON response is returned to the screen. The response may look like unformatted text, depending on the JSON plugin you have installed. The response is quite empty because the template requires the latlong metadata field to be returned in the response and the collection isn’t currently configured to return this.
-
Return to the search dashboard and add
latlongto the list of summary fields set in the results page configuration. (Update the-SFparameter to includelatlong). Refresh the results and observe that you are now seeing data points returned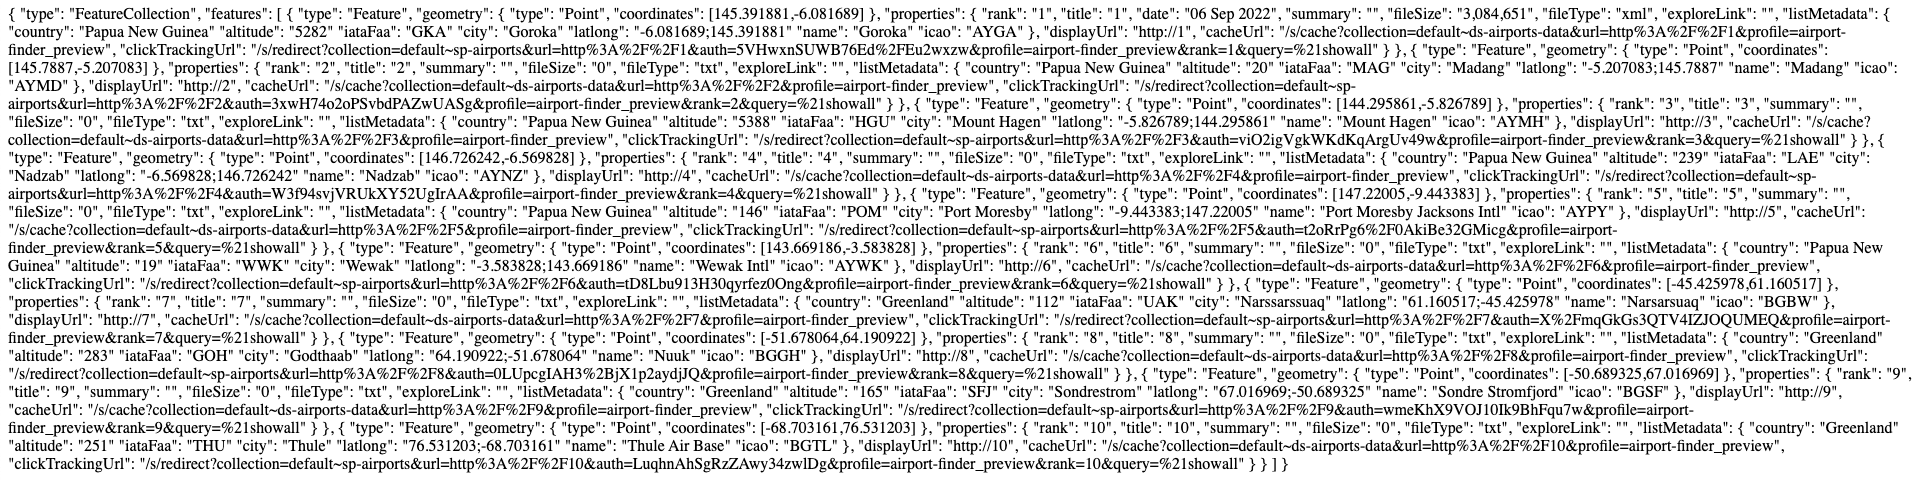
-
The template is now configured to return the text in the GeoJSON format. To ensure that your browser correctly detects the JSON we should also configure the GeoJSON template to return the correct MIME type in the HTTP headers. The correct MIME type to return for JSON is
application/json- Funnelback templates are returned astext/htmlby default (which is why the browser renders the text). Return to the administration interface and edit the profile configuration (customize panel, edit results page configuration).If you are returning JSON as JSONP response you should use a text/javascriptmime type as the JSON is wrapped in a Javascript callback. .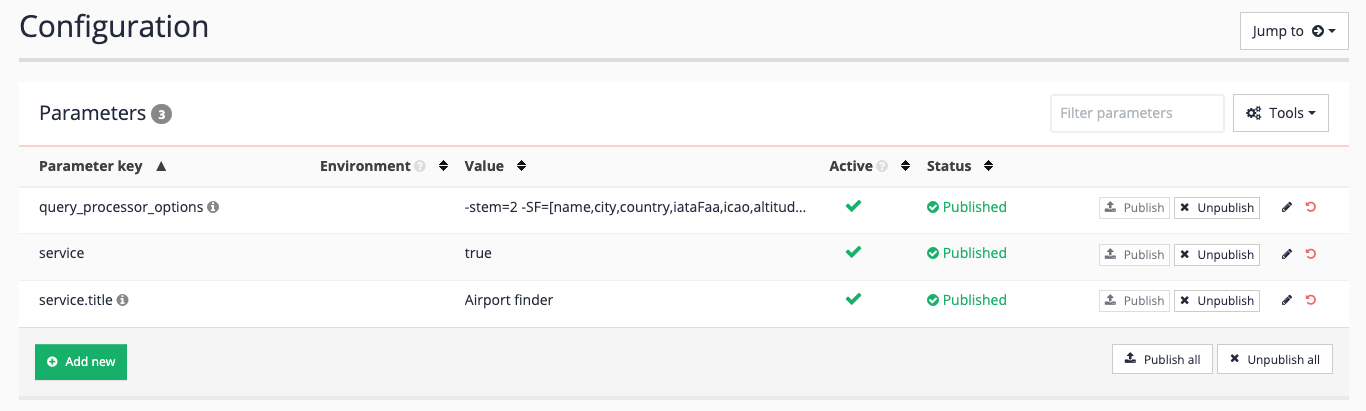
-
Add the following setting to the profile configuration then save and then publish. This option configures Funnelback to return the
text/javascriptcontent type header when using thegeojson.ftltemplate. We are doing this because the template is configured to support a callback function to enable JSONP.-
Parameter key:
ui.modern.form.*.content_type -
Form name:
geojson -
Value:
text/javascript
the content type option is set per-template name at the profile level - the above option would apply to a template called geojson.ftlbut only when the matching profile is set as part of the query.ui.modern.form.TEMPLATE.content_typewould set the content type for a template namedTEMPLATE.ftl. -
-
Rerun the search using the geojson template. This time the browser correctly detect and format the response as JSON in the browser window.
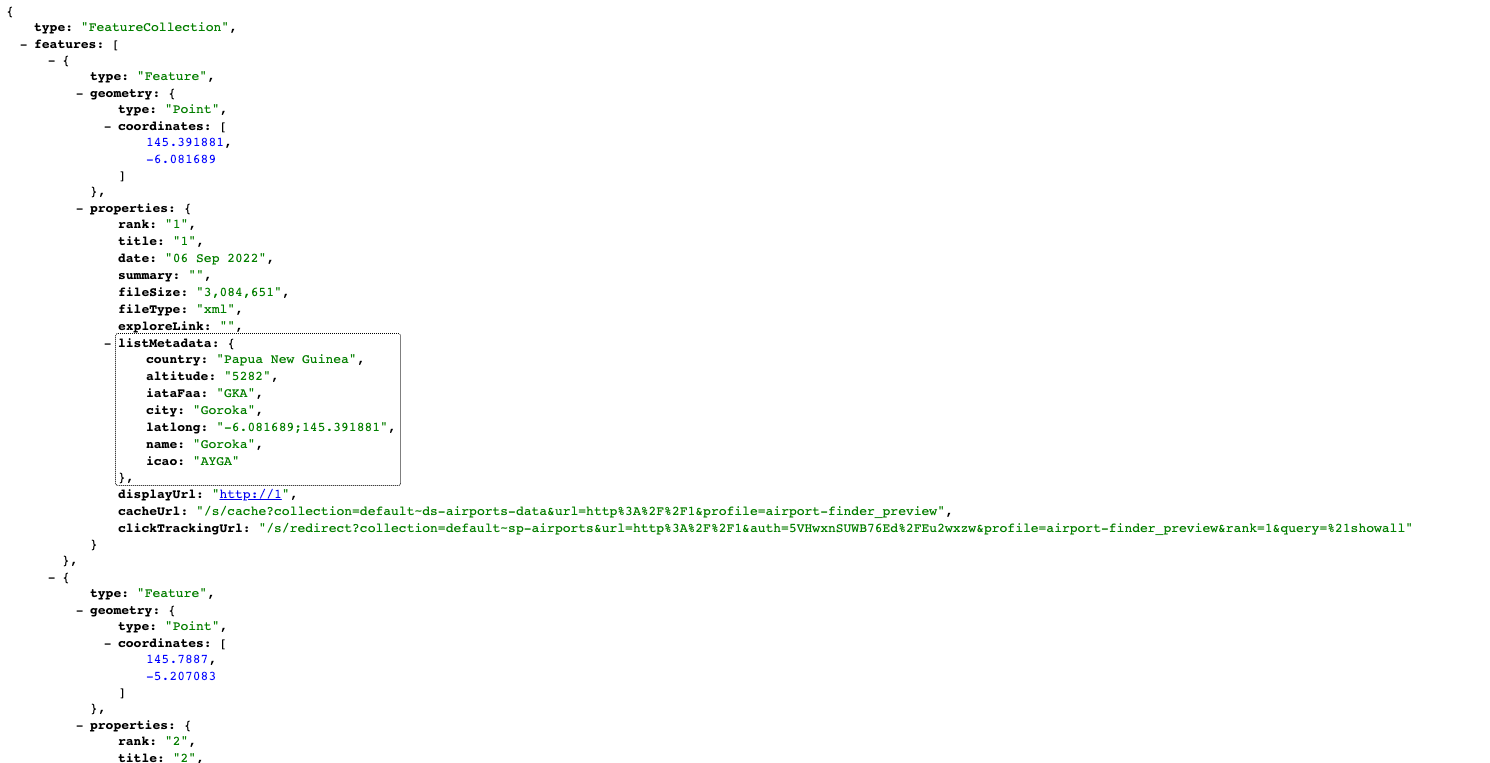
-
Observe that the GeoJSON response only contains 10 results - this is because it is templating what is returned by Funnelback, and that defaults to the first 10 results. In order to return more results an additional parameter needs to be supplied that tells Funnelback how many results to return. For example, try adding
&num_ranks=30to the URL and observe that 30 results are now returned. If you wish to return all the results when accessing the template you will need to set thenum_ranksvalue either to a number equivalent to the number of documents in your index, or link it from another template where you can read the number of results.
Extended exercise: Plot search results on a map
Use the code for the Funnelback mapping widget to add a search-powered map to your search results page that uses a GeoJSON feed to supply the data points.
15. Extra searches
Funnelback has the ability to run a series of extra searches in parallel with the main search, with the extra results data added to the data model for use in the search results display.
An extra search could be used on an all-of-university search to pull in additional results for staff members and videos and display these alongside the results from the main search. The formatting of the extra results can be controlled per extra search, so for the university example staff results might be presented in a box to the right of the results with any matching video results returned in a JavaScript carousel.
The extra searches can be run against any search package or data source that exists on the Funnelback server, and it is possible via the to modify the extra search data model using plugins in a similar manner to the data model for the main search.
15.1. Extra searches vs search packages
The functionality provided by extra searches can sometimes be confused with that provided by search packages. While both will bring in results from different data sources, the main difference is that an extra search is a completely separated set of search results from the main result set.
-
A search package searches across multiple data sources and merges all the results into a single set of results.
-
An extra search on a results page runs a secondary search providing an additional set of search results and corresponding data model object. This data model object contains a separate question and response object, just as for the main search.
A similar outcome could be achieved by running a secondary search via Ajax from the search results page to populate a secondary set of result such as a video carousel. Note however that the use of extra search within Funnelback is more efficient than making an independent request via a method such as Ajax.
| It is good practice to limit the number of extra searches run for any query otherwise performance of the search will be adversely affected. For good performance limit the number of extra searches to a maximum of 2 or 3. |
Tutorial: Configure an extra search
In this exercise an extra search will be configured for the Library search package. The extra search will return any related results from the silent films - website data source and present these alongside the main results.
| Extra searches currently have to be configured at the search package level. |
-
Log in to the search dashboard where you are doing your training.
See: Training - search dashboard access information if you’re not sure how to access the training. Ignore this step if you’re treating this as a non-interactive tutorial. -
Switch to the Library search package management page.
-
Select the edit search package configuration from the settings panel, then add the following configuration options.
-
ui.modern.extra_searches: This defines the extra searches that should be run when executing a search on any results page that belongs to the search package. This is a comma-separated list of extra search IDs to run. Set this to
silent-films, which is defined in the following two configuration options. Each ID defined in this list must have two corresponding entries defining the source and query processor options. -
ui.modern.extra_searches.*.source: Defines the data source where the extra search will source the extra search results. Set this to
training~ds-silent-films, and also make sure you set the extra search ID tosilent-films. This sets up the extra searches for the silent-films extra search to source the related results from thetraining~ds-silent-films(silent films - website) data source. -
ui.modern.extra_searches.*.query_processor_options: Sets display and ranking options that will be applied (merged with any that are defined in the results page configuration) when running the extra search
-num_ranks=3 -SF=[image,t](extra search ID =silent-films)
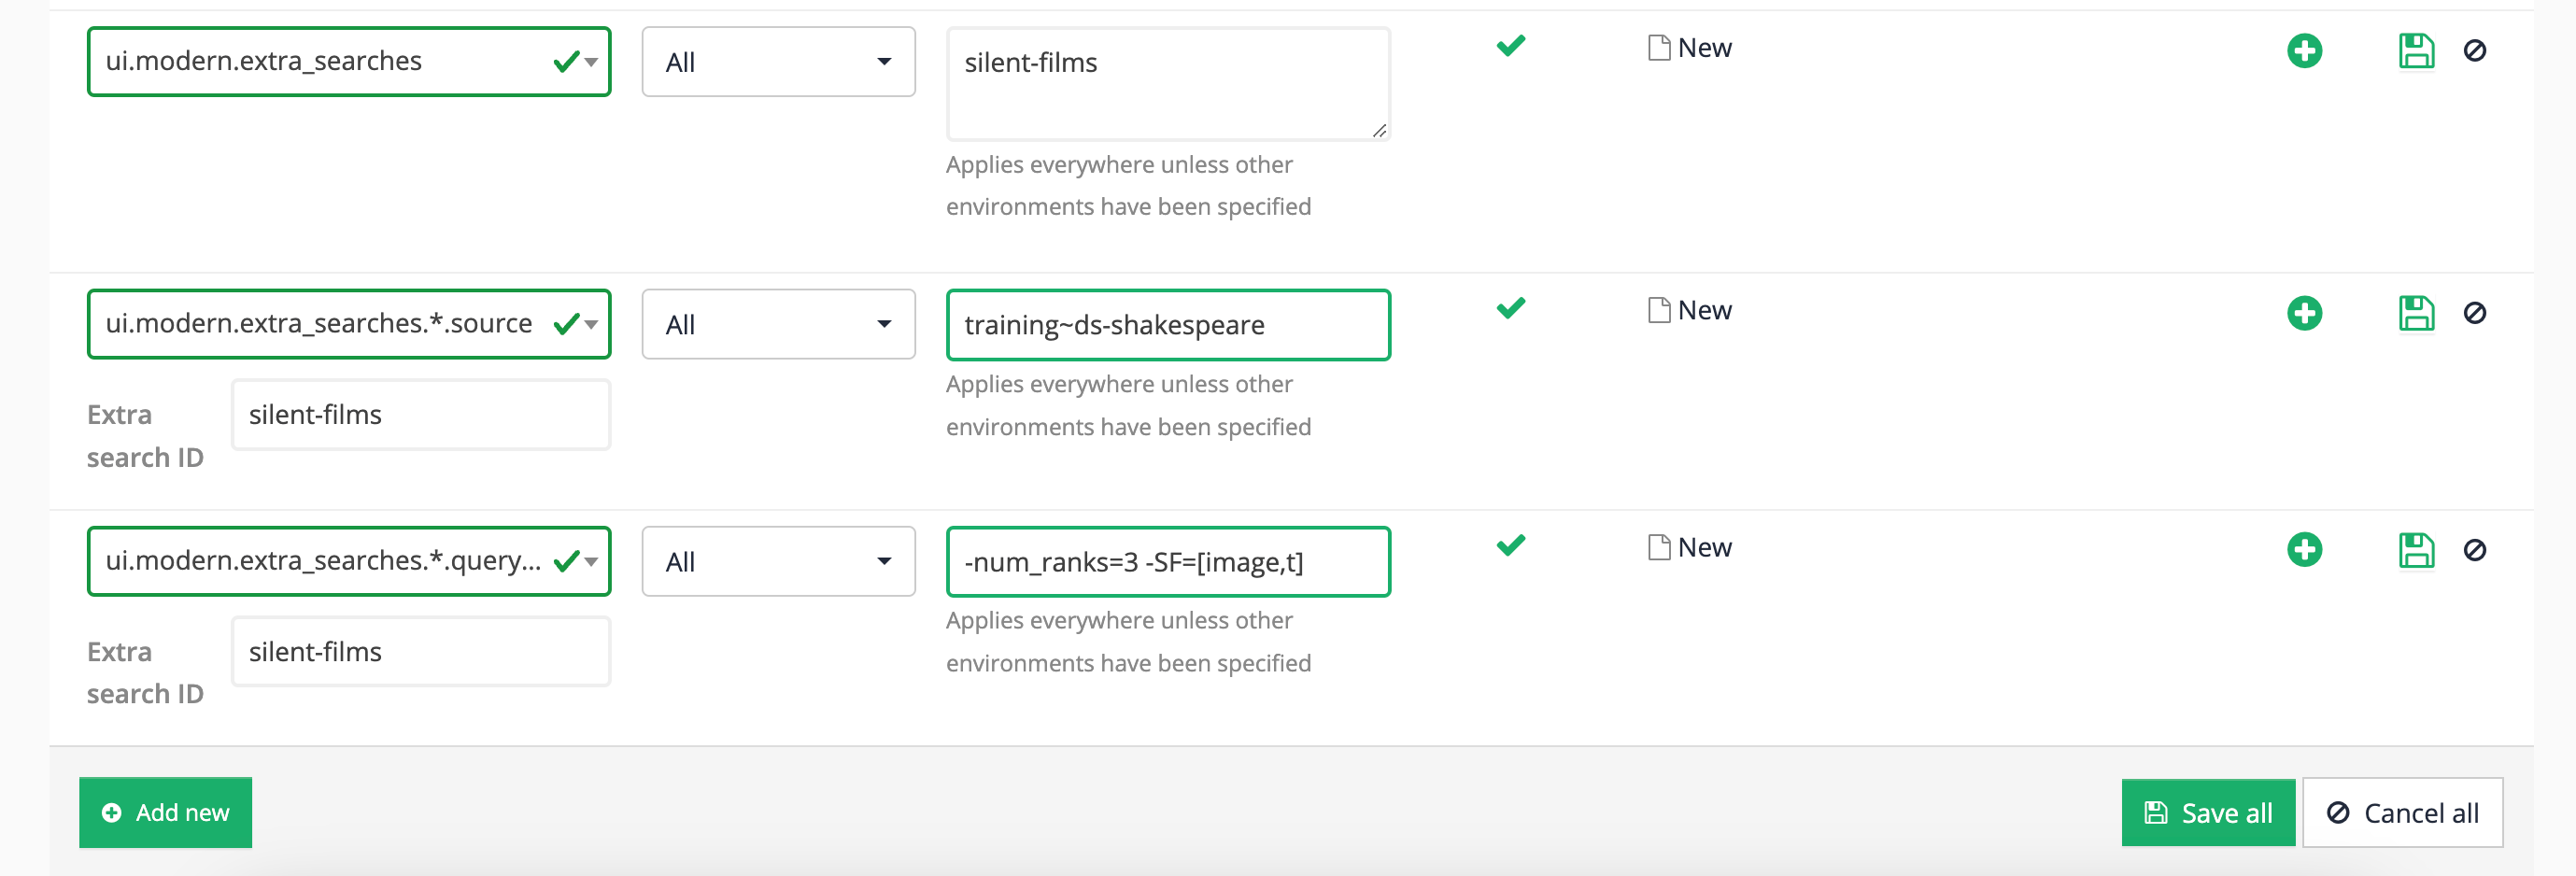
-
-
Run a search on the shakespeare search results page for taming of the shrew and observe the JSON or XML response now includes data beneath the
extraSearchesnode. Within this is an element corresponding to each extra search that is run, and beneath that is aquestionandresponseelement which mirrors that of the main search.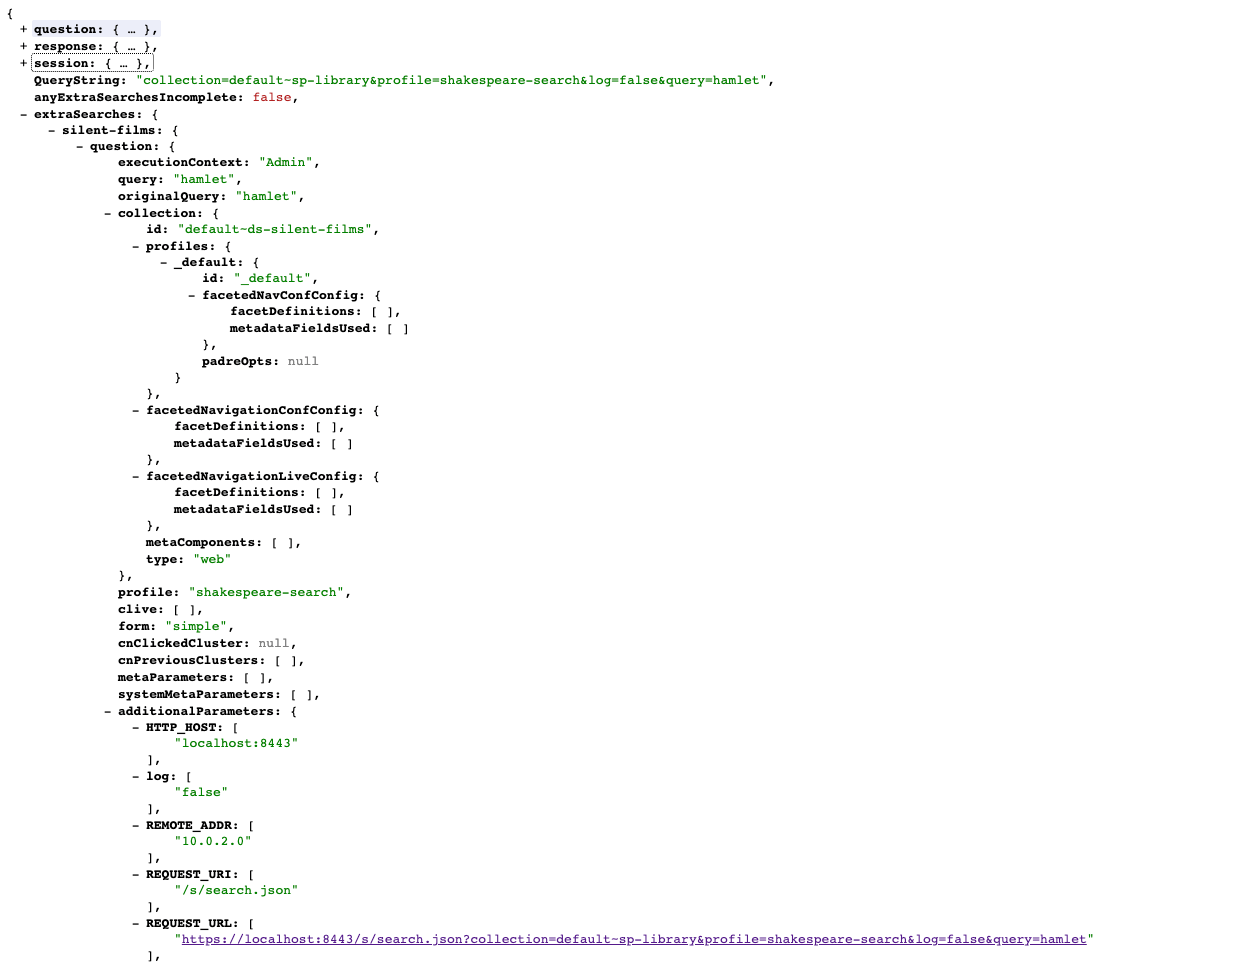
-
Make use of the extra search results within your template by adding an
<@ExtraResults>block. The code nested within theExtraResultsblock is identical to what you would use in your standard results, but the code is drawn from the extra search item within the data model. For example, Print the title for each extra search result. Edit the default template (select edit results page templates from the template panel) and insert the following immediately after the</@s.ContextualNavigation>tag (approx. line 644) then save the template.<@fb.ExtraResults name="silent-films"> <div class="well"> <h3>Related videos</h3> <div class="row"> <@s.Results> <#if s.result.class.simpleName != "TierBar"> <div class="col-md-3"> <a href="${s.result.liveUrl}"> <#if s.result.listMetadata["image"]??> <div class="row"><img class="img-thumbnail pull-left" style="margin-right:0.5em;" src="${s.result.listMetadata["image"]?first!}" alt="${s.result.listMetadata["image"]?first!}" title="${s.result.listMetadata["image"]?first!}"/></div><div class="row" style="margin-right: 2em;"><strong>${s.result.listMetadata["t"]?first!}</strong></div> <#else> <strong>${s.result.listMetadata["t"]?first!}</strong> </#if> </a> </div> </#if> </@s.Results> </div> </div> </@fb.ExtraResults> -
Rerun the search and this time view the HTML results, observing the related videos appearing below the related searches panel.
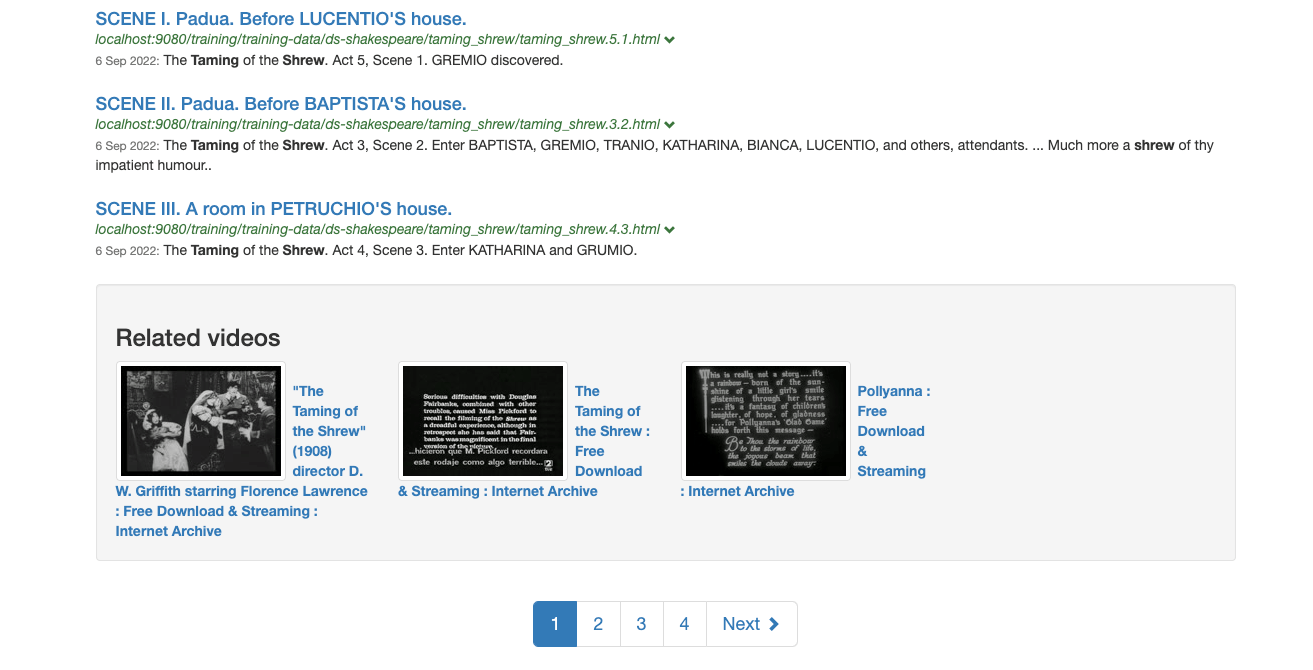
-
Run a search for twelfth night and confirm that the related videos are related to the search for dashboard.
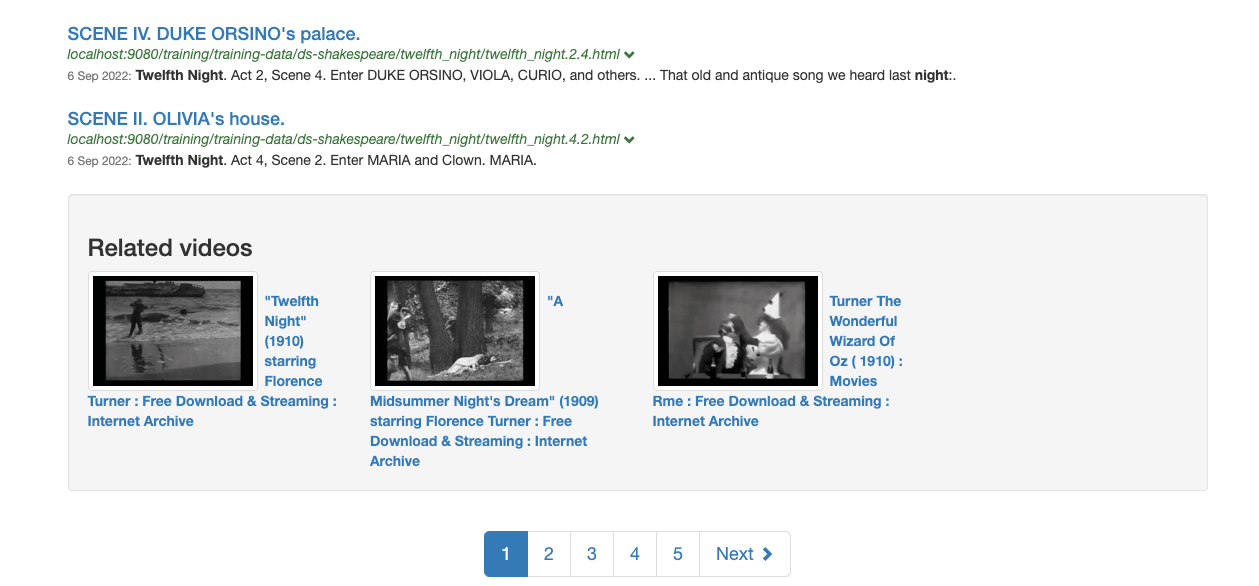
16. Configuring ranking
16.1. Ranking options
Funnelback’s ranking algorithm determines what results are retrieved from the index and what how the order of relevance is determined.
The ranking of results is a complex problem, influenced by a multitude of document attributes. It’s not just about how many times a word appears within a document’s content.
-
Ranking options are a subset of the query processor options which also control other aspects of query-time behaviour (such as display settings).
-
Ranking options are applied at query time - this means that different results pages can have different ranking settings applied, on an identical index. Ranking options can also be changed via CGI parameters at the time the query is submitted.
16.2. Automated tuning
Tuning is a process that can be used to determine which attributes of a document are indicative of relevance and adjust the ranking algorithm to match these attributes.
The default settings in Funnelback are designed to provide relevant results for the majority of websites. Funnelback uses a ranking algorithm, influenced by many weighted factors, that scores each document in the index when a search is run. These individual weightings can be adjusted and tuning is the recommended way to achieve this.
The actual attributes that inform relevance will vary from site to site and can depend on the way in which the content is written and structured on the website, how often content is updated and even the technologies used to deliver the website.
For example the following are examples of concepts that can inform on relevance:
-
How many times the search keywords appear within the document content
-
If the keywords appear in the URL
-
If the keywords appear in the page title, or headings
-
How large the document is
-
How recently the document has been updated
-
How deep the document is within the website’s structure
Tuning allows for the automatic detection of attributes that influence ranking in the data that is being tuned. The tuning process requires training data from the content owners. This training data is made up of a list of possible searches - keywords with what is deemed to be the URL of the best answer for the keyword, as determined by the content owners.
A training set of 50-100 queries is a good size for most search implementations. Too few queries will not provide adequate broad coverage and skew the optimal ranking settings suggested by tuning. Too many queries will place considerable load on the server for a sustained length of time as the tuning tool runs each query with different combinations of ranking settings. It is not uncommon to run in excess of 1 million queries when running tuning.
Funnelback uses this list of searches to optimize the ranking algorithm, by running each of the searches with different combinations of ranking settings and analysing the results for the settings that provide the closest match to the training data.
| Tuning does not guarantee that any of the searches provided in the training data will return as the top result. It’s purpose is to optimize the algorithm by detecting important traits found within the content, which should result in improved results for all searches. |
The tuning tool consists of two components - the training data editor and the components to run tuning.
Any user with access to the insights dashboard has the ability to edit the tuning data.
Only an administrator can run tuning and apply the optimal settings to a search.
| The running of tuning is restricted to administrators as the tuning process can place a heavy load on the server and the running of tuning needs to be managed. |
16.2.1. Editing training data for tuning
The training data editor is accessed from the insights dashboard by clicking on the tuning tile, or by selecting tuning from the left hand menu.
A blank training data editor is displayed if tuning has not previously been configured.
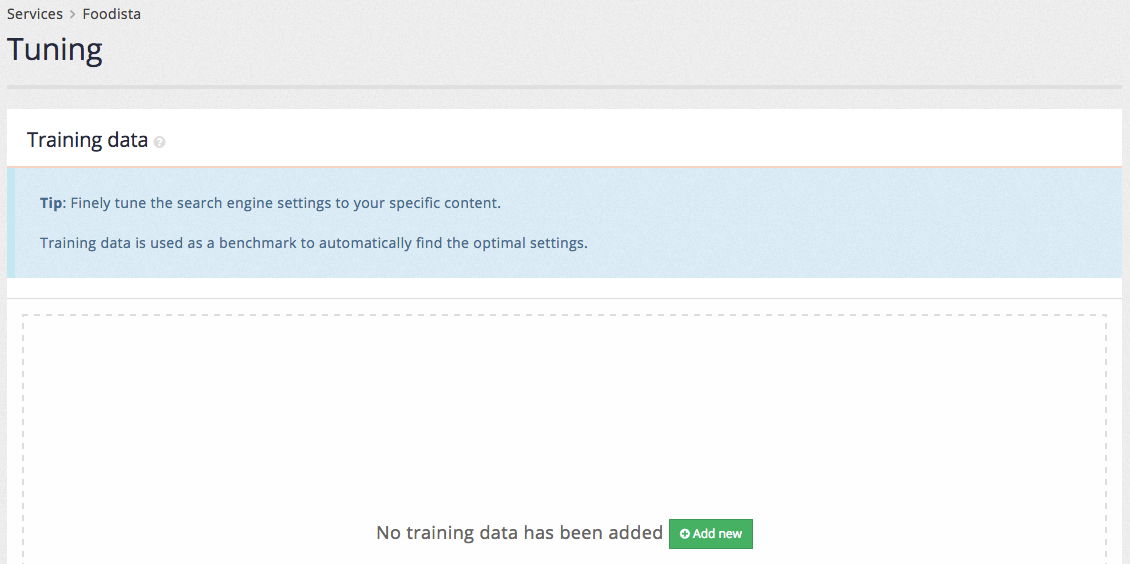
Clicking the add new button opens the editor screen.
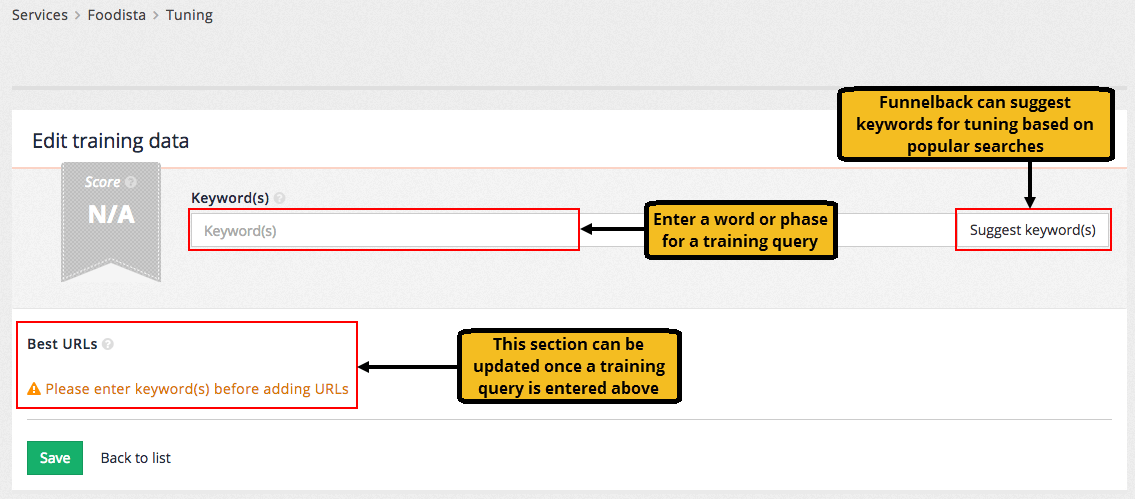
The tuning requires 50-100 examples of desirable searches. Each desirable search requires the search query and one or more URLs that represent the best answer for the query.
Two methods are available for specifying the query:
-
Enter the query directly into the keyword(s) field, or
-
Click the suggest keyword(s) button the click on one of the suggestions that appear in a panel below the keyword(s) form field. The suggestions are randomised based on popular queries in the analytics. Clicking the button multiple times will generate different lists of suggestions.
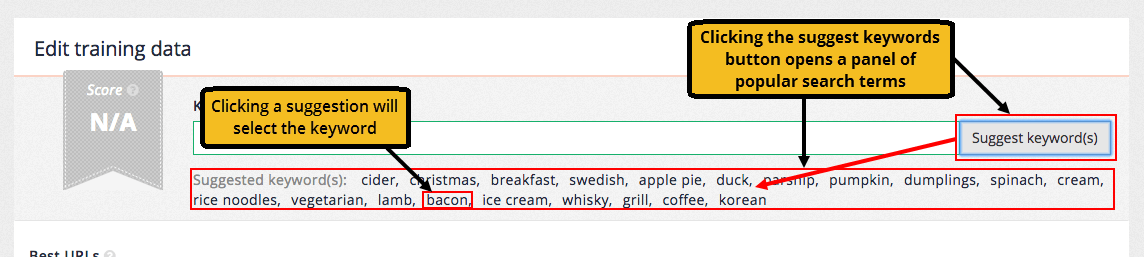
Once a query has been input the URLs of the best answer(s) can be specified.
URLs for the best answers are added by either clicking the suggest URL to add or manually add a URL buttons.
Clicking the suggest URLs to add button opens a panel of the top results (based on current rankings).
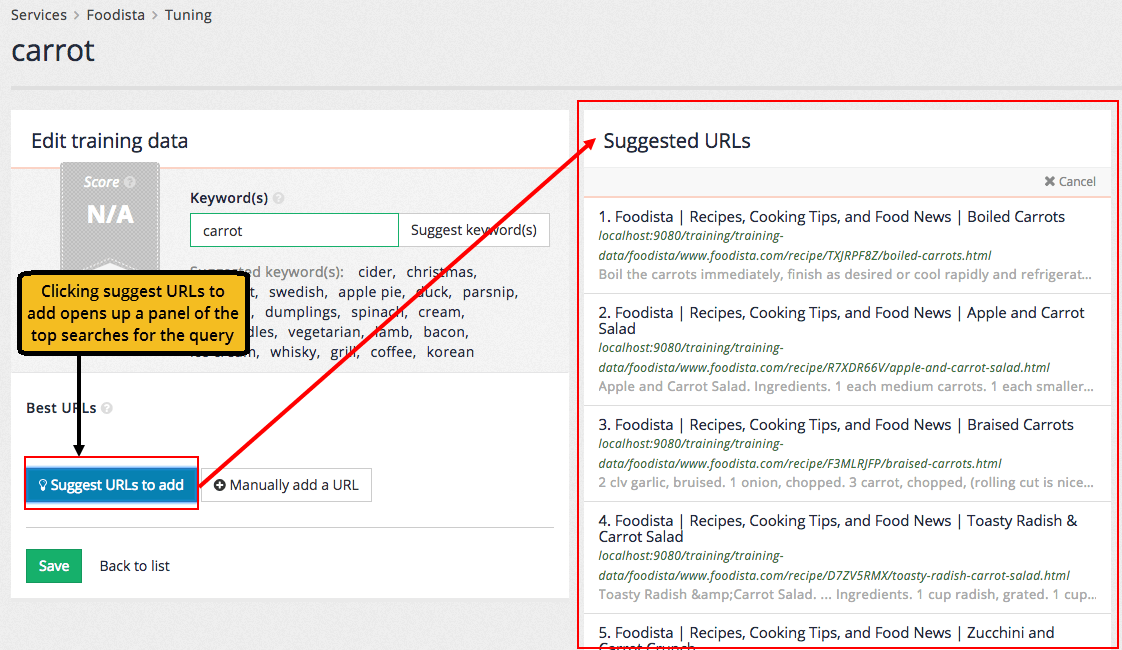
Clicking on a suggested URL adds the URL as a best answer.
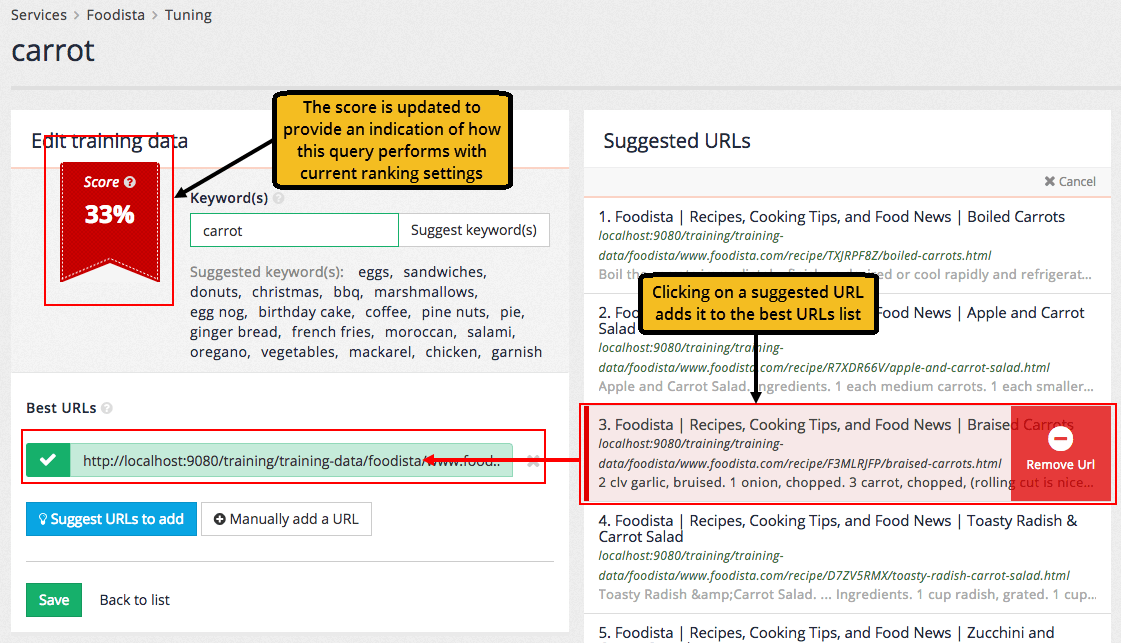
Additional URLs can be optionally added to the best URLs list - however the focus should be on providing additional query/best URL combinations over a single query with multiple best URLs.
A manual URL can be entered by clicking the manually add a URL button. Manually added URLs are checked as they are entered.
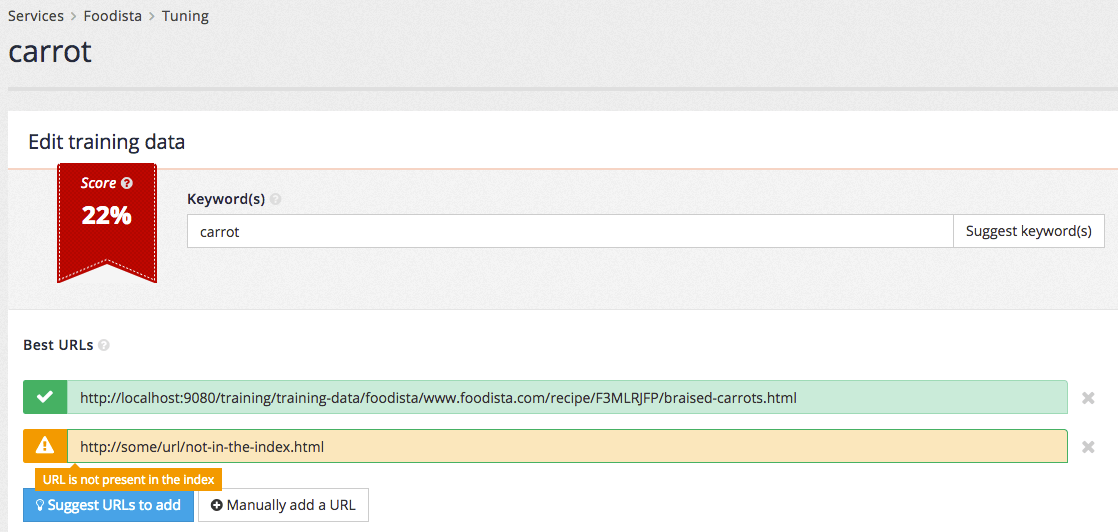
Clicking the save button adds the query to the training data. The tuning screen updates to show the available training data. Hovering over the error status icon shows that there is an invalid URL (the URL that was manually added above is not present in the search index).
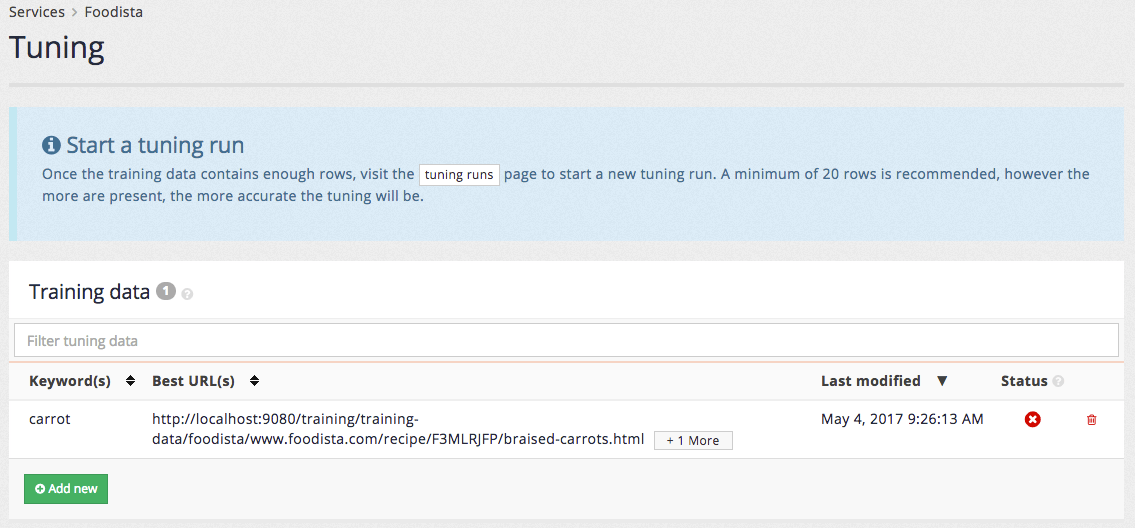
Once all the training data has been added tuning can be run.
Tuning is run from the tuning history page. This is accessed by clicking the history sub-item in the menu, or by clicking the tuning runs button that appears in the start a tuning run message.
The tuning history shows the previous tuning history for the service and also allows users with sufficient permissions to start the tuning process.
| Recall that only certain users are granted the permissions required to run tuning. |
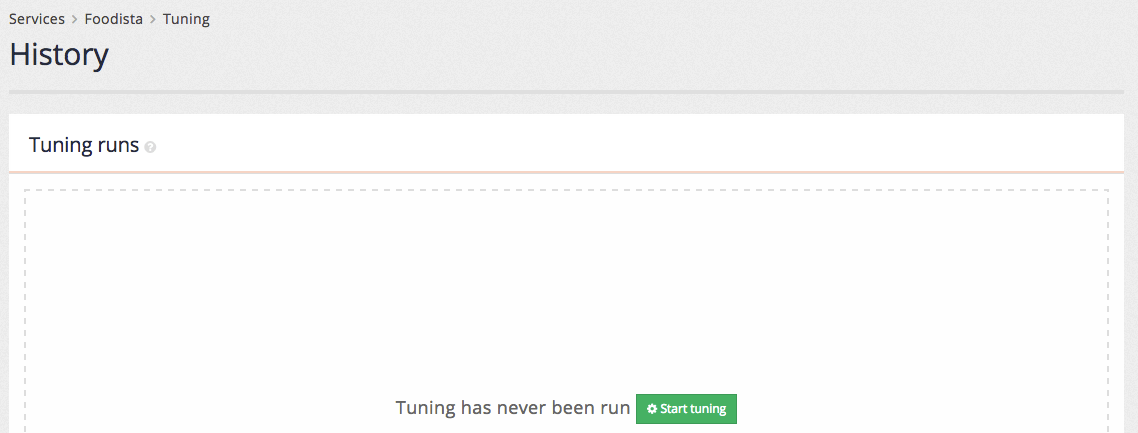
Clicking the start tuning button initiates the tuning run and the history table provides updates on the possible improvement found during the process. These numbers will change as more combinations of ranking settings are tested.
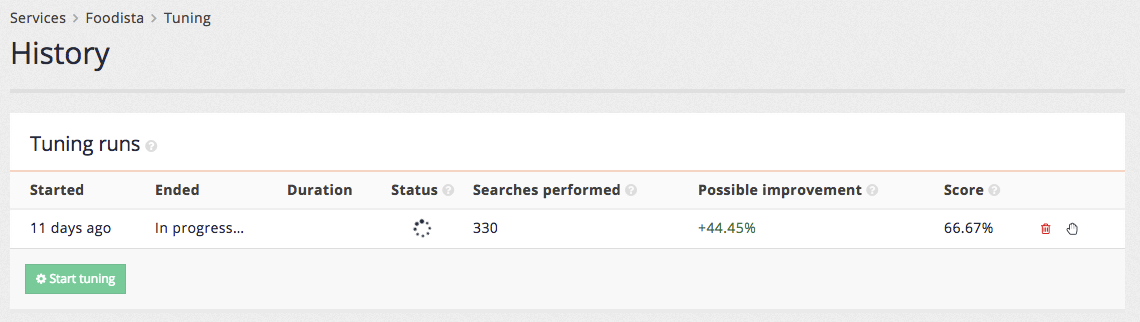
When the tuning run completes a score over time graph will be updated and the tuning runs table will hold the final values for the tuning run.
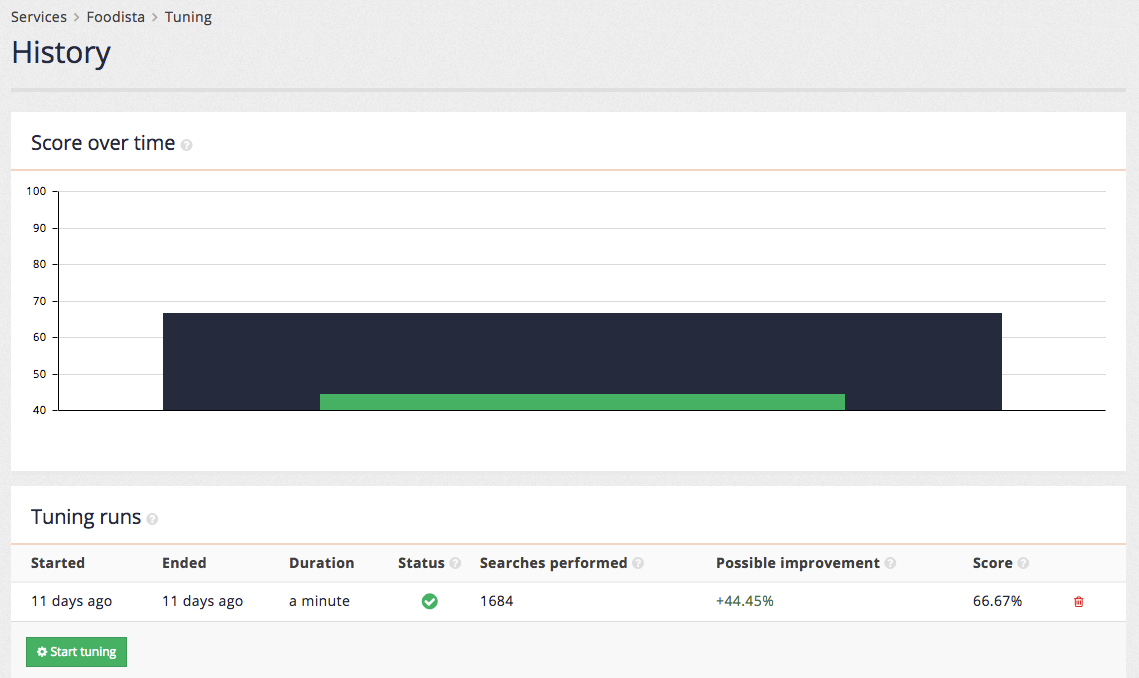
Once tuning has been run a few times additional data is added to both the score over time chart and tuning runs table.
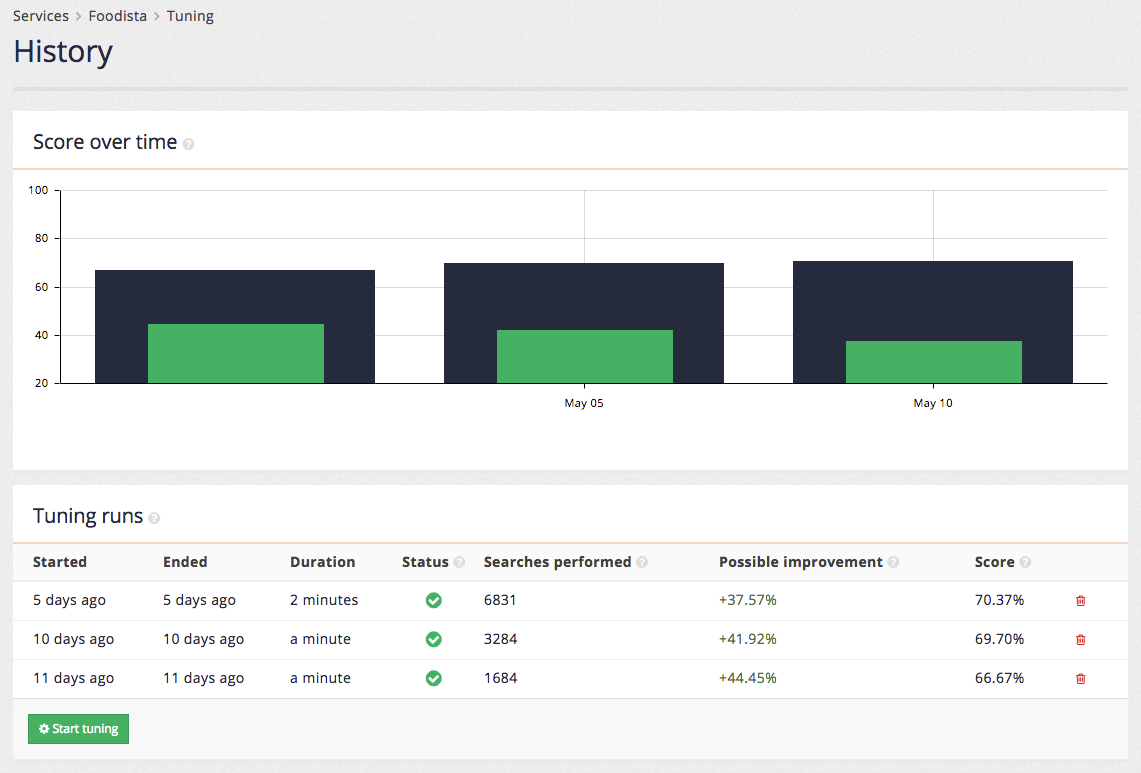
The tuning tile on the insights dashboard main page also updates to provide information on the most recent tuning run.
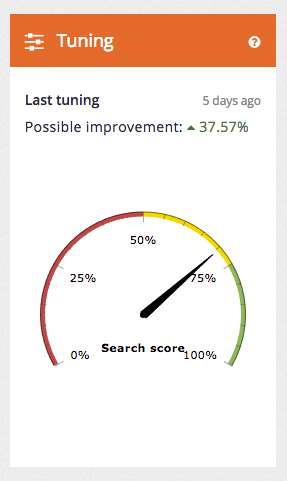
| The improved ranking is not automatically applied to the search. An administrator must log in to apply the optimal settings as found by the tuning process. |
Tutorial: Edit tuning data
-
Access the insights dashboard and select the foodista search results page tile. Select tuning from the left hand menu, or click on the tuning tile.
-
Alternatively, from the search dashboard open the foodista search results page management screen, and access the tuning section by selecting edit tuning data from the tuning panel.
-
The insights dashboard tuning screen opens. Click on the add new button to open up the tuning editor screen.
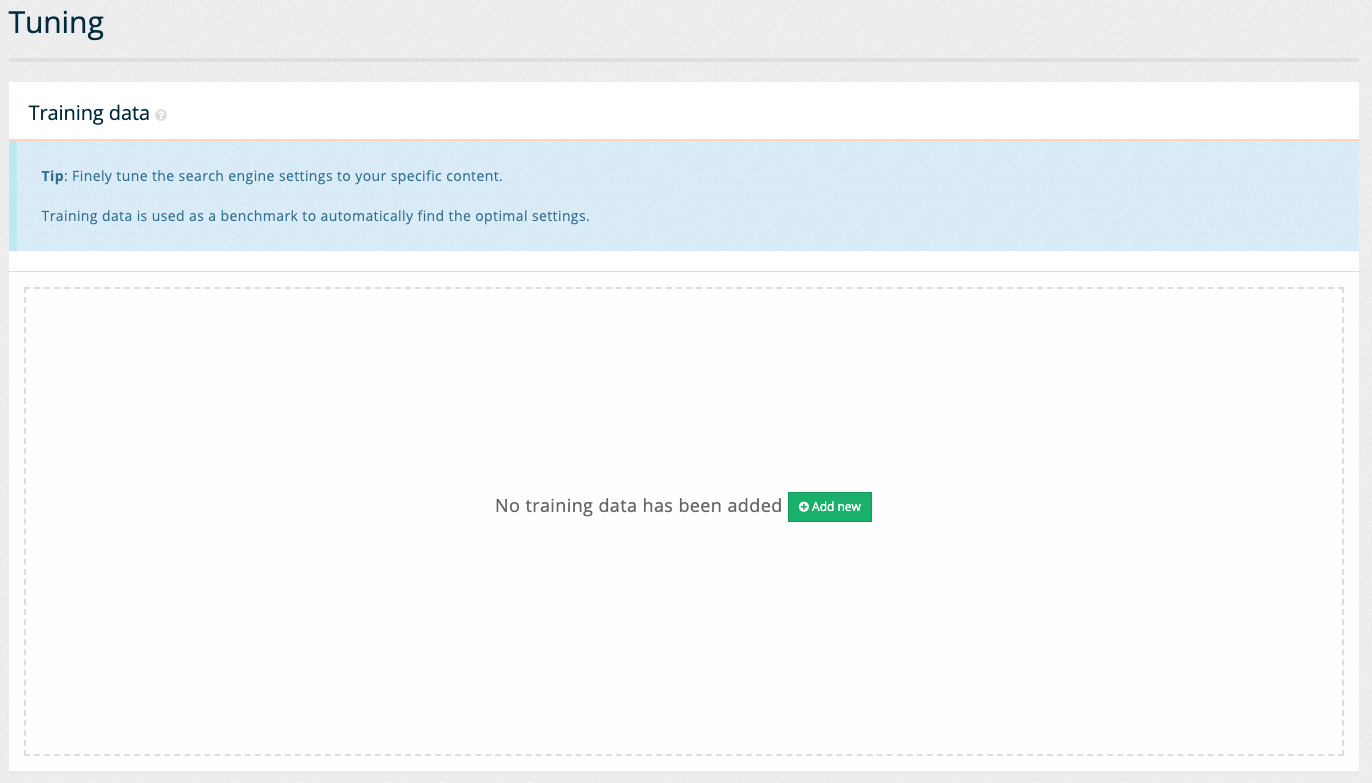
-
An empty edit screen loads where you can start defining the training data. Enter a query by adding a word or phrase to the keyword(s) field. Edit the value in the keyword(s) field and enter the word
carrot.You can also use the suggest keyword(s) button to receive a list of keywords that you can choose from. 
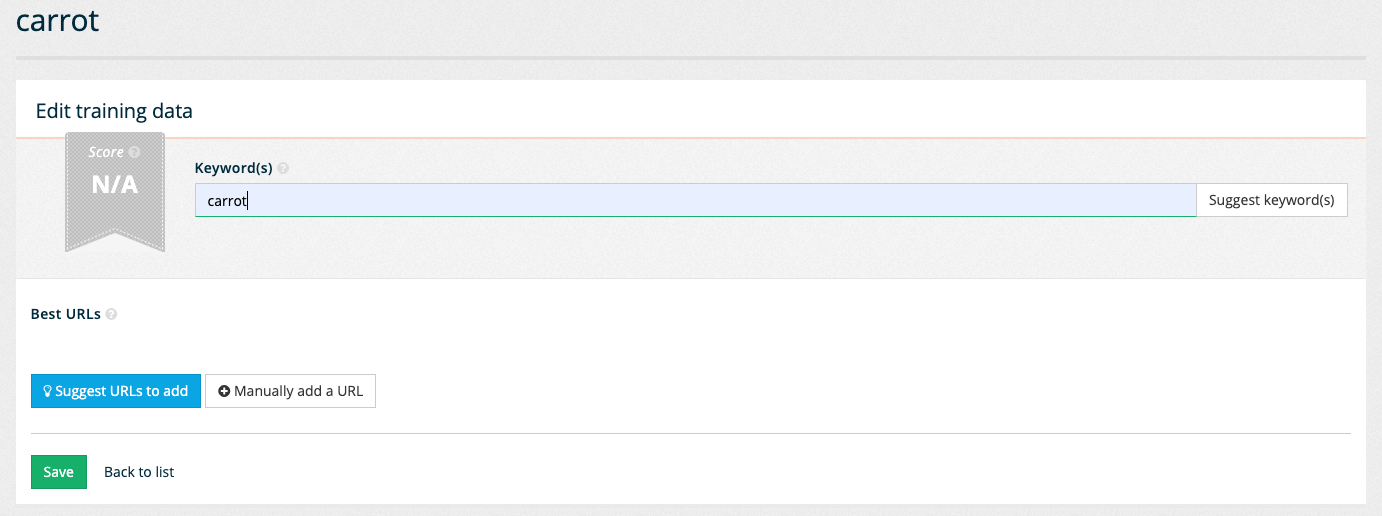
-
Observe that the best URLs panel updates with two buttons allowing the best answers to be defined. Click on the suggest URLs to add button to open a list containing of pages to choose from. Select the page that provides the best answer for a query of carrot. Note that scrolling to the bottom of the suggested URLs allows further suggestions to be loaded. Click on one of the suggested URLs, such as the light carrot and raisin muffins at rank 5, to set it as the best answer for the search. Observe that the selected URL appears beneath the Best URLs heading.
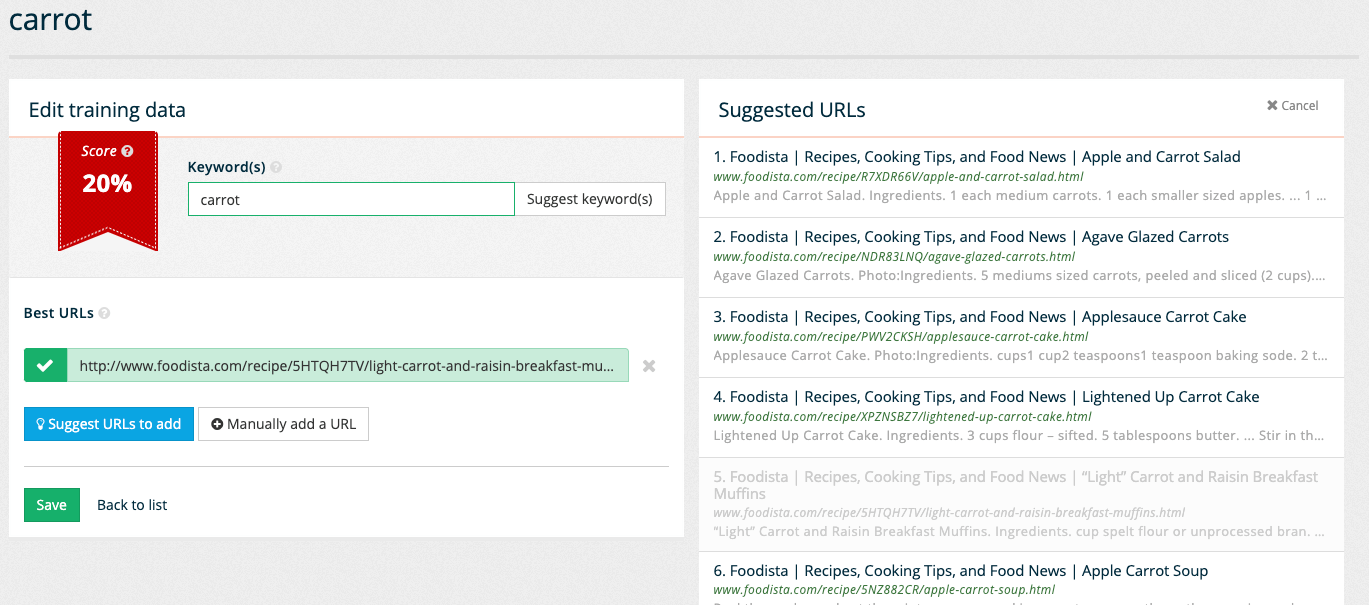
-
Save the sample search by clicking on the save button. The training data overview screen reloads showing the suggestion that was just saved.
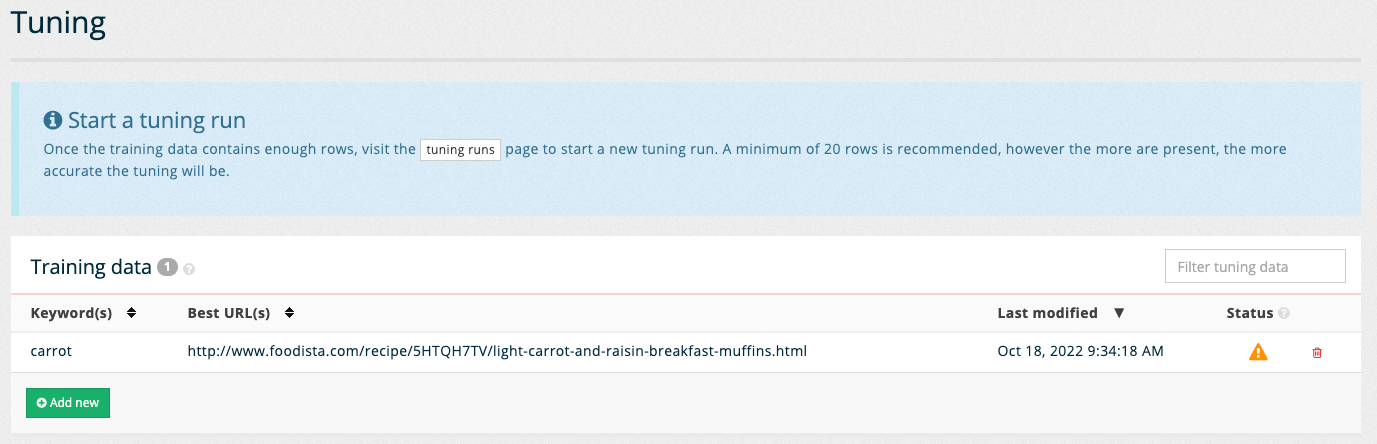
-
Run tuning by switching to the history screen. The history screen is accessed by selecting history from the left hand menu, or by clicking on the tuning runs button contained within the information message at the top of the screen.

-
The history screen is empty because tuning has not been run on this results page. Start the tuning by clicking the start tuning button. The screen refreshes with a table showing the update status. The table shows the number of searches performed and possible improvement (and current score) for the optimal set of raking settings (based on the combinations that have been tried so far during this tuning run.

-
When the tuning run completes the display updates with a score over time chart that shows the current (in green) and optimized scores (in blue) over time.

-
Open the insights dashboard screen by clicking the Foodista dashboard item in the left hand menu and observe the tuning tile shows the current performance.
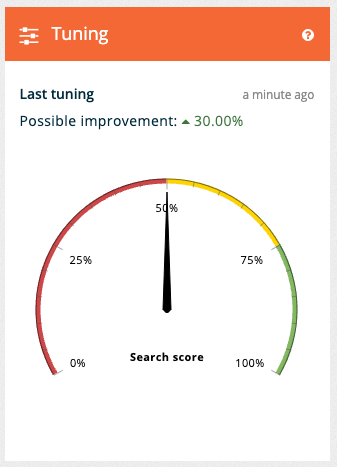
Tutorial: Apply tuning settings
-
To apply the optimal tuning settings return to the search dashboard, and manage the foodista search results page. Select view tuning results from the tuning panel.
-
The tuning results screen will be displayed showing the optimal set of ranking settings found for the training data set.
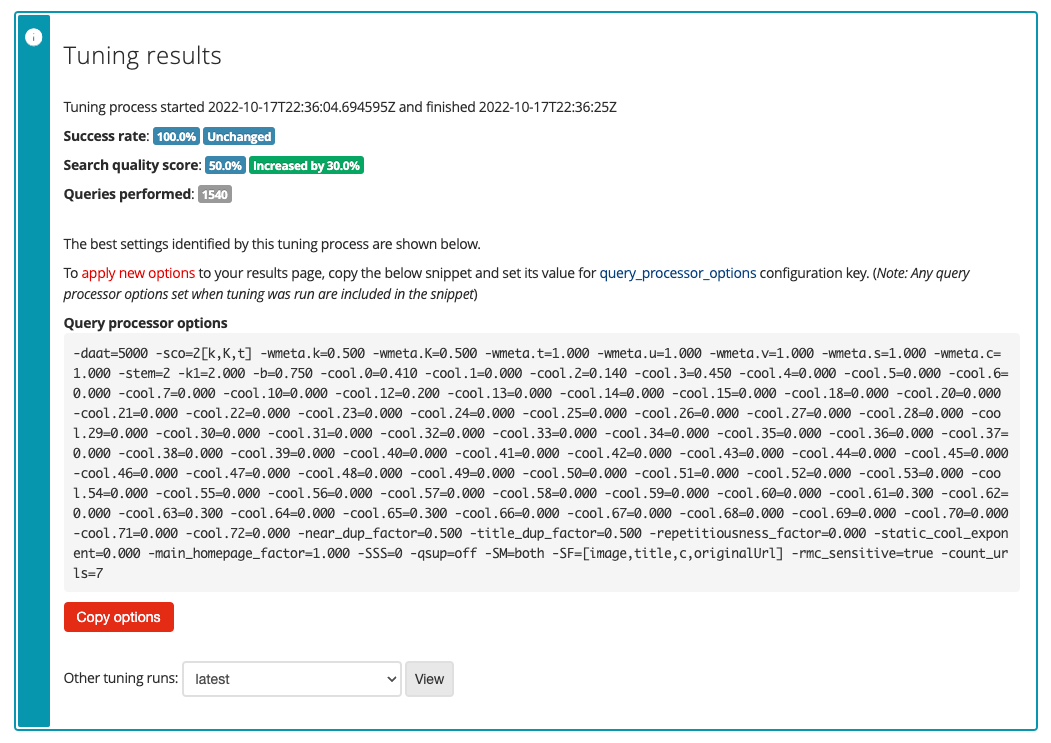
-
To apply these tuning options click the copy options button. These options need to be added to the query processor options for the results page. Open the Foodista results page management screen and click the edit results page configuration item from the customize panel.
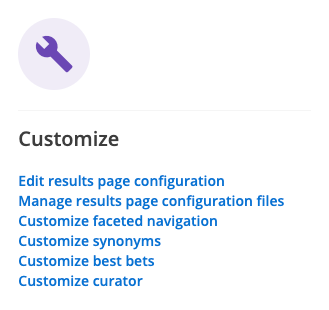
-
Click the add new button and add a query_processor_options key, adding the tuning settings to the
-stem=2item that is set by default, then click the save button (but don’t publish your changes yet).
-
Return to the results page management screen for the Foodista results page and run a search for carrot against the live version of the results page. This will run the search with current ranking settings.
-
Observe the results noting the first few results.
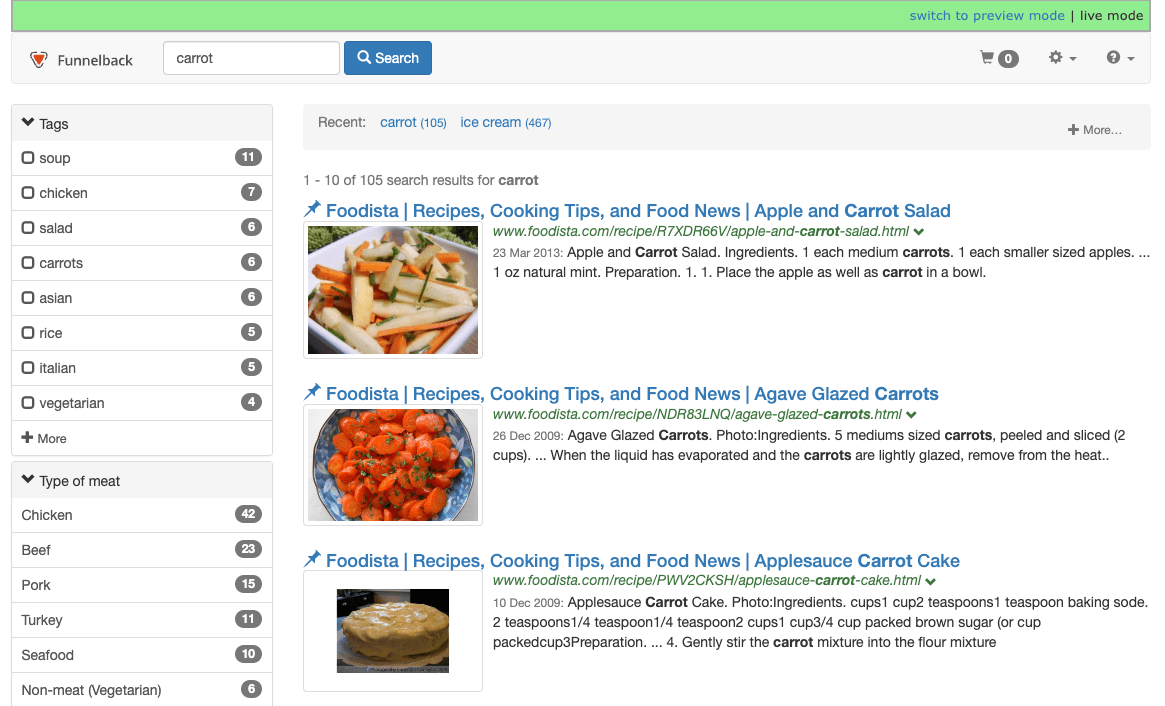
-
Click the switch to preview mode link on the green toolbar to run the same search but against the preview version of the results page. Alternatively, return to the foodista results page management screen and rerun the search for carrot, this time against the preview version of the results page. This will run the search with the tuned ranking settings.
-
Observe the results noting the first few results and that the URL you selected previously has moved up in the results.
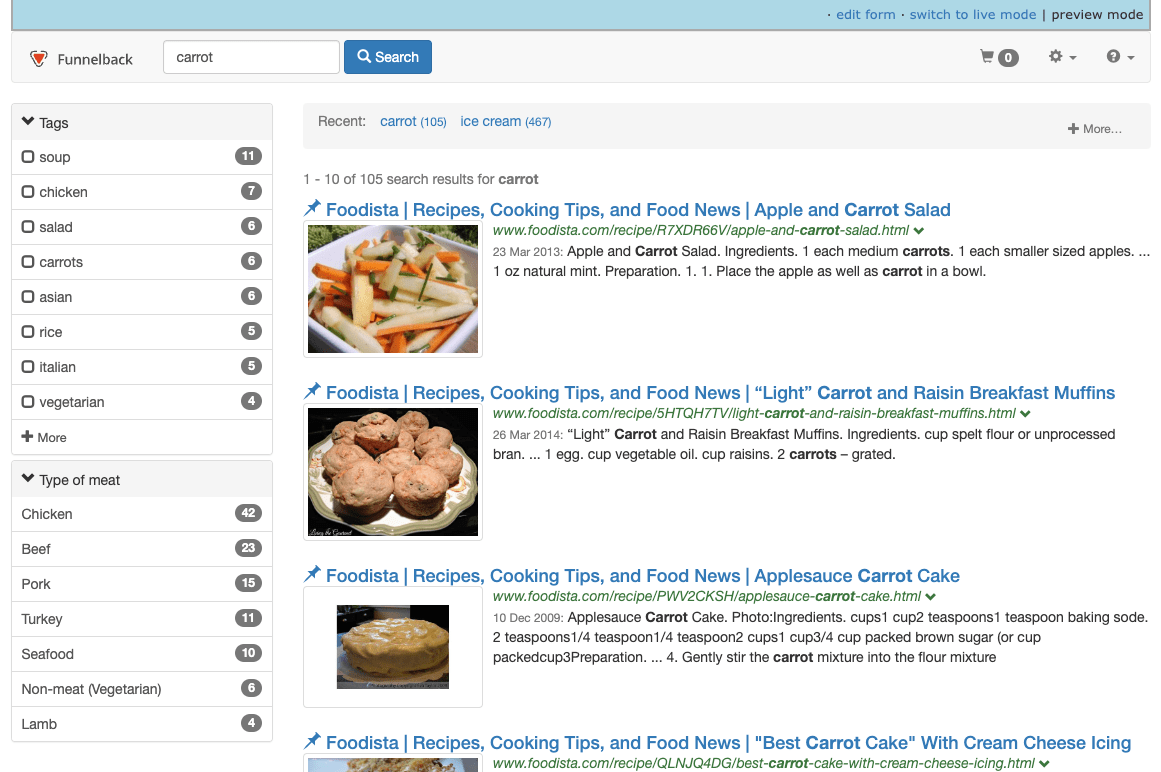
-
To make the ranking settings live return to foodista results page management screen and edit the results page configuration. Publish the
query_processor_optionssetting. Retest the live search to ensure that the settings have been applied successfully.
16.3. Setting ranking indicators
Funnelback has an extensive set of ranking parameters that influence how the ranking algorithm operates.
This allows for customization of the influence provided by 73 different ranking indicators.
| Automated tuning should be used (where possible) to set ranking influences as manually altering influences can result in fixing of a specific problem at the expense of the rest of the content. |
The main ranking indicators are:
-
Content: This is controlled by the
cool.0parameter and is used to indicate the influence provided by the document’s content score. -
On-site links: This is controlled by the
cool.1parameter and is used to indicate the influence provided by the links within the site. This considers the number and text of incoming links to the document from other pages within the same site. -
Off-site links: This is controlled by the
cool.2parameter and is used to indicate the influence provided by the links outside the site. This considers the number and text of incoming links to the document from external sites in the index. -
Length of URL: This is controlled by the
cool.3parameter and is used to indicate the influence provided by the length of the document’s URL. Shorter URLs generally indicate a more important page. -
External evidence: This is controlled by the
cool.4parameter and is used to indicate the influence provided via external evidence (see query independent evidence below). -
Recency: This is controlled by the
cool.5parameter and is used to indicate the influence provided by the age of the document. Newer documents are generally more important than older documents.
A full list of all the cooler ranking options is provided in the documentation link below.
16.4. Applying ranking options
Ranking options are applied in one of three ways:
-
Set as a default for the results page by adding the ranking option to the
query_processor_optionsparameter result spage configuration. -
Set at query time by adding the ranking option as a CGI parameter. This is a good method for testing but should be avoided in production unless the ranking factor needs to be dynamically set for each query, or set by a search form control such as a slider.
Many ranking options can be set simultaneously, with the ranking algorithm automatically normalizing the supplied ranking factors. For example:
query_processor_options=-stem=2 -cool.1=0.7 -cool.5=0.3 -cool.21=0.24Automated tuning is the recommended way of setting these ranking parameters as it uses an optimization process to determine the optimal set of factors. Manual tuning can result in an overall poorer end result as improving one particular search might impact negatively on a lot of other searches.
Tutorial: Manually set ranking parameters
-
Run a search against the foodista results page for sugar. Observe the order of search results.
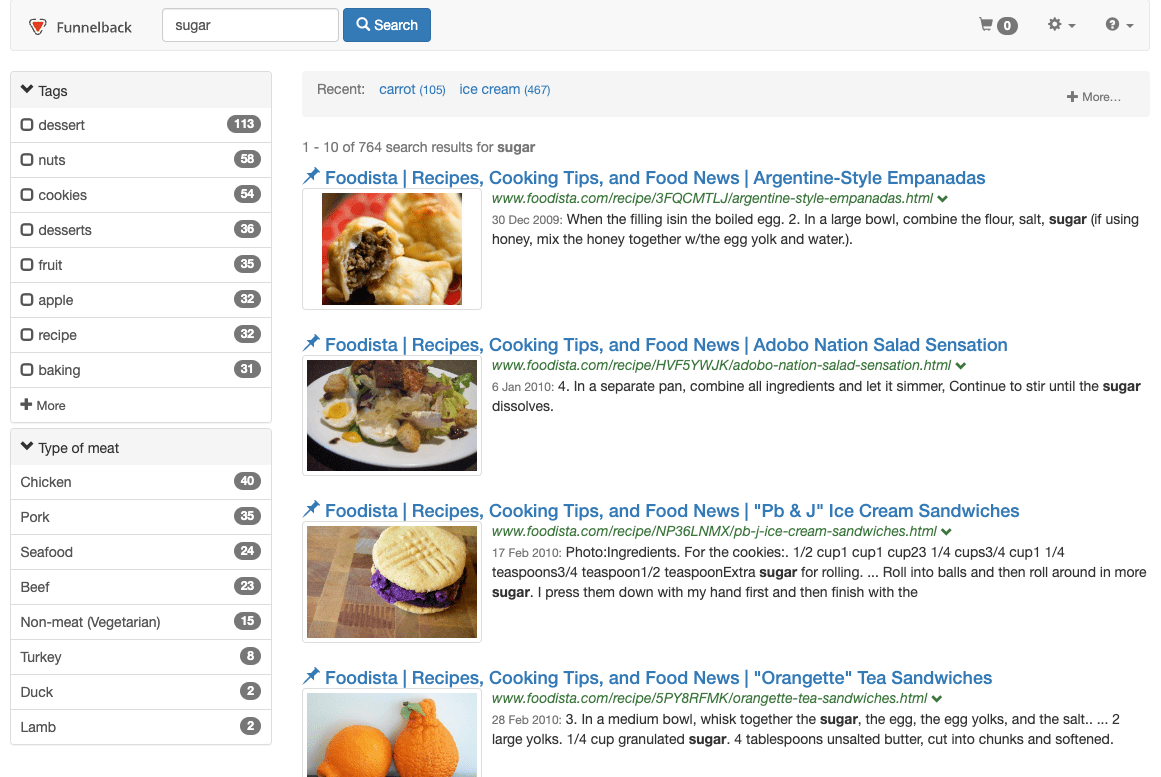
-
Provide maximum influence to document recency by setting
cool.5=1.0. This can be added as a CGI parameter, or in the query processor options of the results page configuration. Add&cool.5=1.0to the URL and observe the change in result ordering. Observe that despite the order changing to increase the influence of date, the results are not returned sorted by date (because there are still other factors that influence the ranking).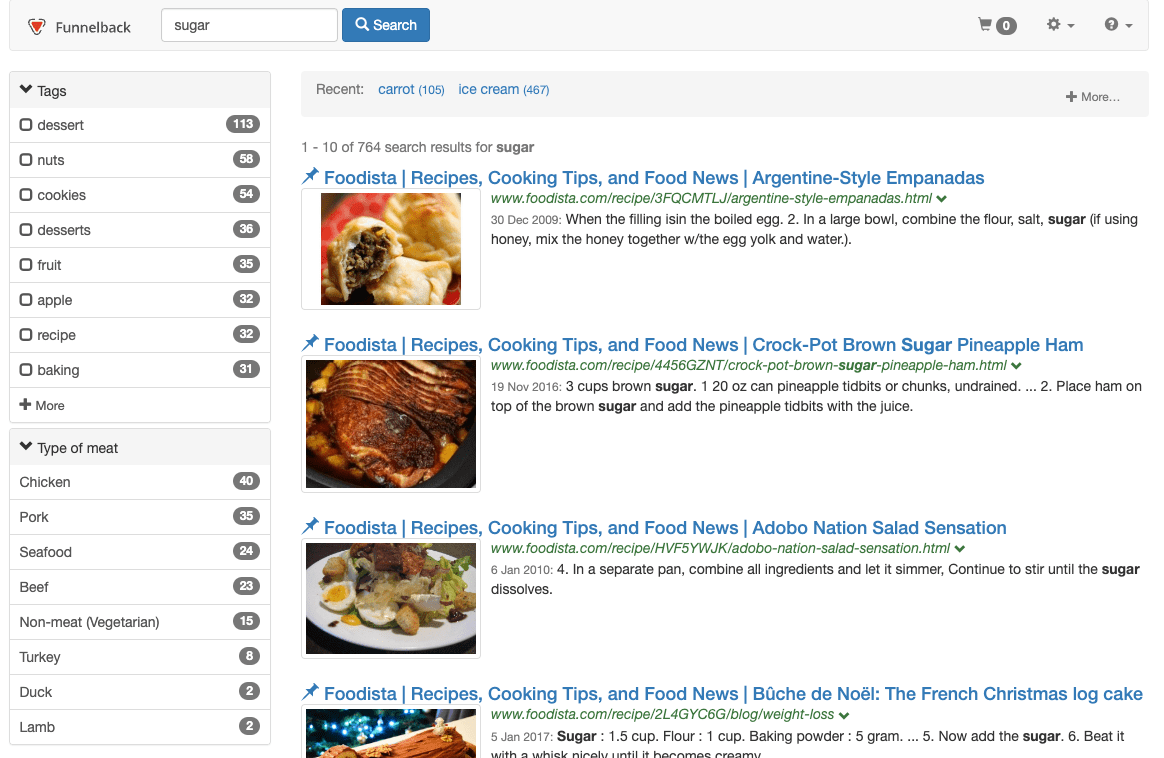
If your requirement was to just sort your results by date the best way of achieving this would be to switch from sorting by ranking to sorting by date. -
Open the results page management screen for the foodista results page.
-
Select edit results page configuration from the customize panel. Locate the query processor options setting and set
-cool.5=1.0to the query processor options, then save and publish the setting.this may already have been set by tuning so you might need to edit an existing value. 
-
Rerun the first search against the foodista results page and observe that the result ordering reflects the search that was run when recency was up-weighted. This is because the
cool.5setting has been set as a default for the results page. It can still be overridden by settingcool.5in the URL string, but will be set to 1.0 when it’s not specified elsewhere.
16.5. Data source component weighting
If you have more than one data source included in a search package it is often beneficial to weight the data sources differently. This can be for a number of reasons, the main ones being:
-
Some data sources are simply more important than others. For example, a university’s main website is likely to be more important than a department’s website.
-
Some data source types naturally rank better than others. For example, web data sources generally rank better than other data source types as there is a significant amount of additional ranking information that can be inferred from attributes such as the number of incoming links, the text used in these links and page titles. XML and database data sources generally have few attributes beyond the record content that can be used to assist with ranking.
Data source component weighting is controlled using the cool.21 parameter, and the relative data source weights are set in the search package configuration.
Tutorial: Apply data source relative weighting to a search package
-
From the search dashboard open the library search package management screen.
-
Click the edit search package configuration option from the settings panel.
-
In this example we’ll configure our library search package to push results from the Jane Austen data source up in the rankings, and push down the Shakespeare results. Add (and save, but don’t publish) two
meta.components.*.weightsettings for the two different data sources:Parameter key Data source Value meta.components.*.weightdefault~ds-austen0.9meta.components.*.weightdefault~ds-shakespeare0.3
Data sources have a default weight of 0.5. A value between 0.5 and 1.0 will add an up-weight to results from the data source. A value between 0.0 and 0.5 will result in a down-weight. You only need to add settings for the data sources that you wish to change from the default. .Run a search for queen and observe the search results order. This is the order that the search results return without any influence set for the weights you’ve just configured.

-
Edit the URL and add the following parameter:
&cool.21=1.0- this sets the maximum influence that can be provided by the data source relative weightings you’ve configured. Observe the effect on the search results order.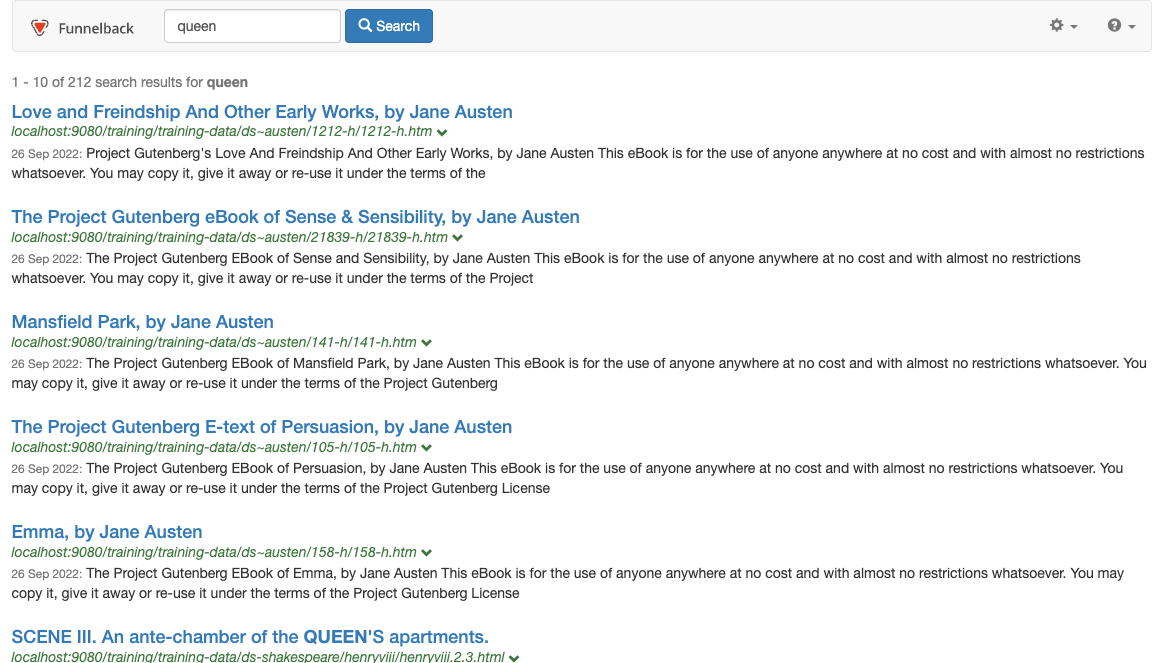
-
Adjust the influence by changing the value of the
cool.21parameter and observe the effect on the results. When you’ve found a value that you’re happy with you can apply this as the default for your results page by setting it in the results page configuration. -
Set the influence as a results page default by adding
-cool.21=0.9to thequery_processor_optionsin the results page configuration. -
Rerun the query, removing the
cool.21value from the URL and observe that your default setting is now applied.
16.6. Result diversification
There are a number of ranking options that are designed to increase the diversity of the result set. These options can be used to reduce the likelihood of result sets being flooded by results from the same website, data source, etc.
16.6.1. Same site suppression
Each website has a unique information profile and some sites naturally rank better than others. Search engine optimization (SEO) techniques assist with improving a website’s natural ranking.
Same site suppression can be used to down-weight consecutive results from the same website resulting in a more mixed/diverse set of search results.
Same site suppression is configured by setting the following query processor options:
-
SSS: controls the depth of comparison (in the URL) used to determining what a site is. This corresponds to the depth of the URL (or the number of sub-folders in a URL).
-
Range: 0-10
-
SSS=0: no suppression
-
SSS=2: default (site name + first level folder)
-
SSS=10: special meaning for big web applications.
-
-
SameSiteSuppressionExponent: Controls the down-weight penalty applied. Larger values result in greater down-weight.
-
Range: 0.0 - unlimited (default = 0.5)
-
Recommended value: between 0.2 and 0.7
-
-
SameSiteSuppressionOffset: Controls how many documents are displayed beyond the first document from the same site before any down-weight is applied.
-
Range: 0-1000 (default = 0)
-
-
sss_defeat_pattern: URLs matching the simple string pattern are excluded from same site suppression.
16.6.2. Same meta suppression
Down-weights subsequent results that contain the same value in a specified metadata field. Same meta suppression is controlled by the following ranking options:
-
same_meta_suppression: Controls the down-weight penalty applied for consecutive documents that have the same metadata field value.
-
Range: 0.0-1.0 (default = 0.0)
-
-
meta_suppression_field: Controls the metadata field used for the comparison. Note: only a single metadata field can be specified.
16.6.3. Same collection (data source) suppression
Down-weights subsequent results that come from the same data source. This provides similar functionality to the data source relative weighting above and could be used in conjunction with it to provide an increased influence. Same collection suppression is controlled by the following ranking options:
-
same_collection_suppression: Controls the down-weight penalty applied for consecutive documents that are sourced from the same data source.
-
Range: 0.0-1.0 (default = 0.0)
-
16.6.4. Same title suppression
Down-weights subsequent results that contain the same title. Same title suppression is controlled by the following ranking options:
-
title_dup_factor: Controls the down-weight penalty applied for consecutive documents that have the same title value.
-
Range: 0.0-1.0 (default = 0.5)
-
Tutorial: Same site suppression
-
Run a search against the simpsons results page for homer. Observe the order of the search results noting that the results are spread quite well with consecutive results coming from different folders. Funnelback uses same site suppression to achieve this and the default setting (
SSS=2, which corresponds to hostname and first folder) is applied to mix up the results a bit.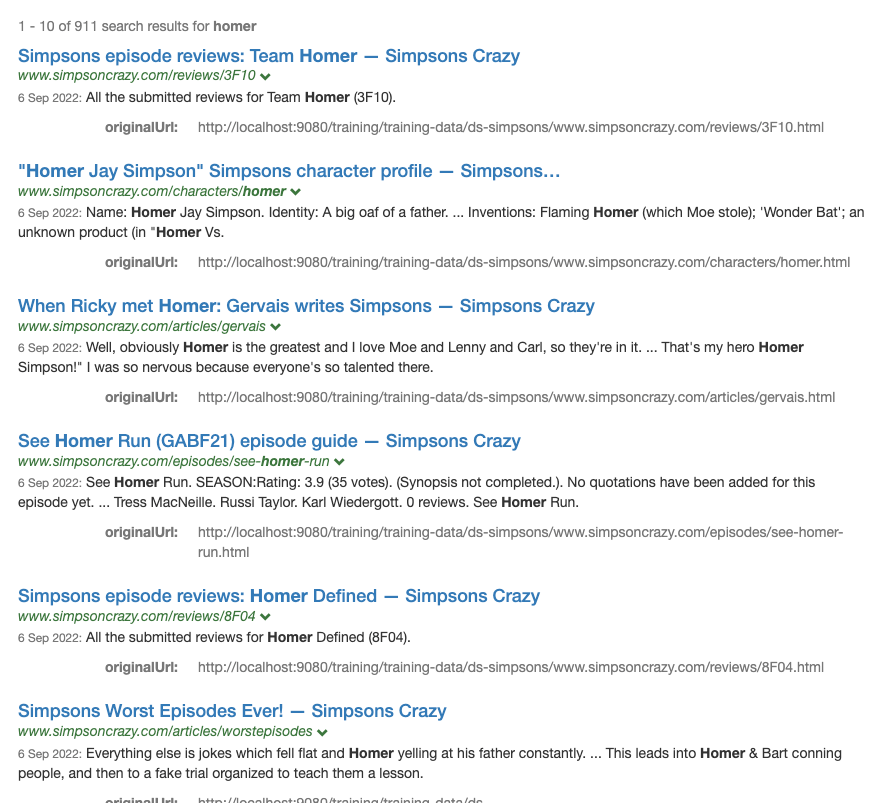
-
Turn off same site suppression by adding
&SSS=0to the URL observing the effect on the search result ordering.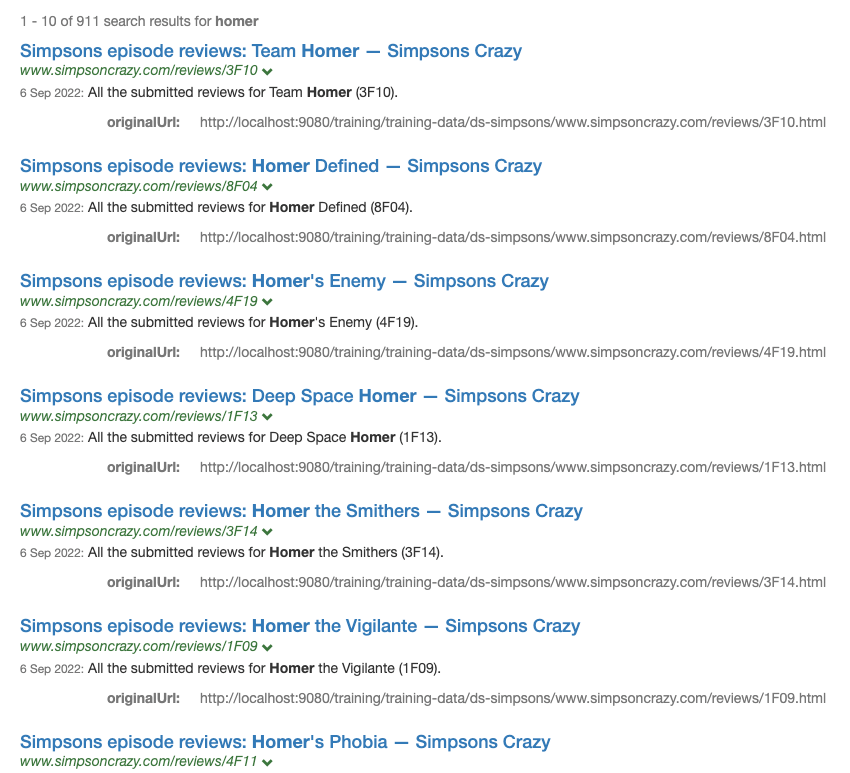
-
Remove the
SSS=0parameter from the URL to re-enable the default suppression and addSameSiteSuppressionOffset=2to change the suppression behaviour so that it kicks in after a few results. This causes several reviews items to remain unaffected by any penalty that is a result of being from the same section as the previous result.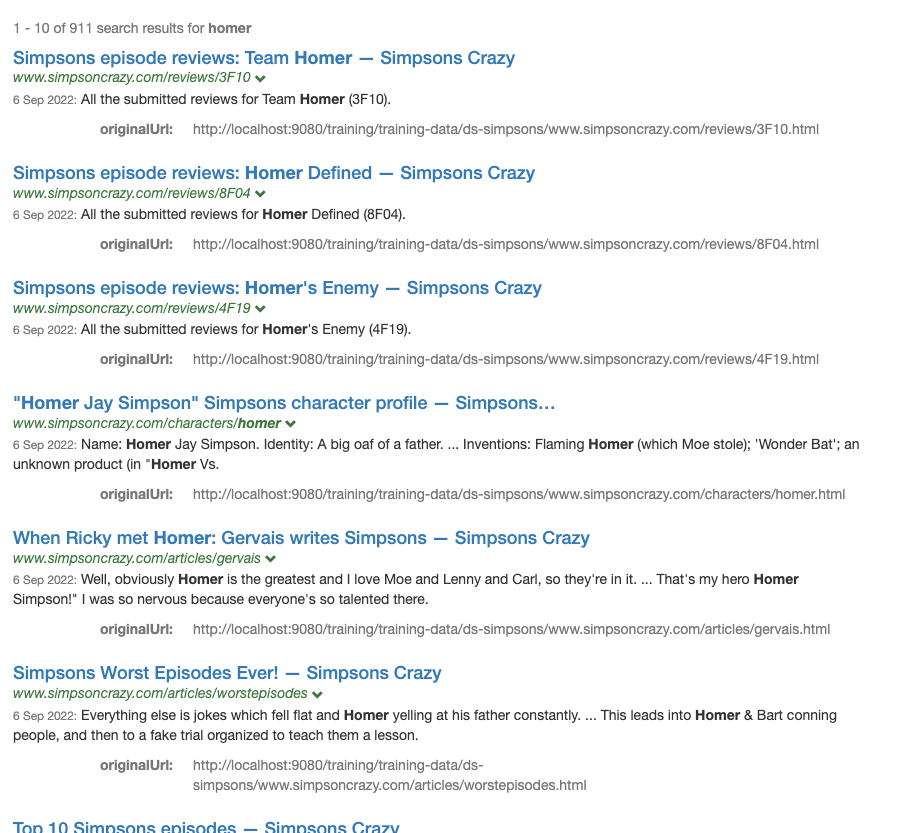
16.6.5. Result collapsing
While not a ranking option, result collapsing can be used to effectively diversify the result set by grouping similar result items together into a single result.
Results are considered to be similar if:
-
They share near-identical content
-
They have identical values in one or a set of metadata fields.
Result collapsing requires configuration that affects both the indexing and query time behaviour of Funnelback.
Tutorial: Configure result collapsing
-
Log in to the search dashboard and change to the Nobel Prize winners data source
-
Configure three keys to collapse results on - year of prize, prize name and a combination of prize name and country. Edit the data source configuration settings then select the indexer item from the left hand menu.
-
Update the result collapsing fields to add collapsing on year, prize name and prize name+country.
[$],[H],[year],[prizeName],[prizeName,country]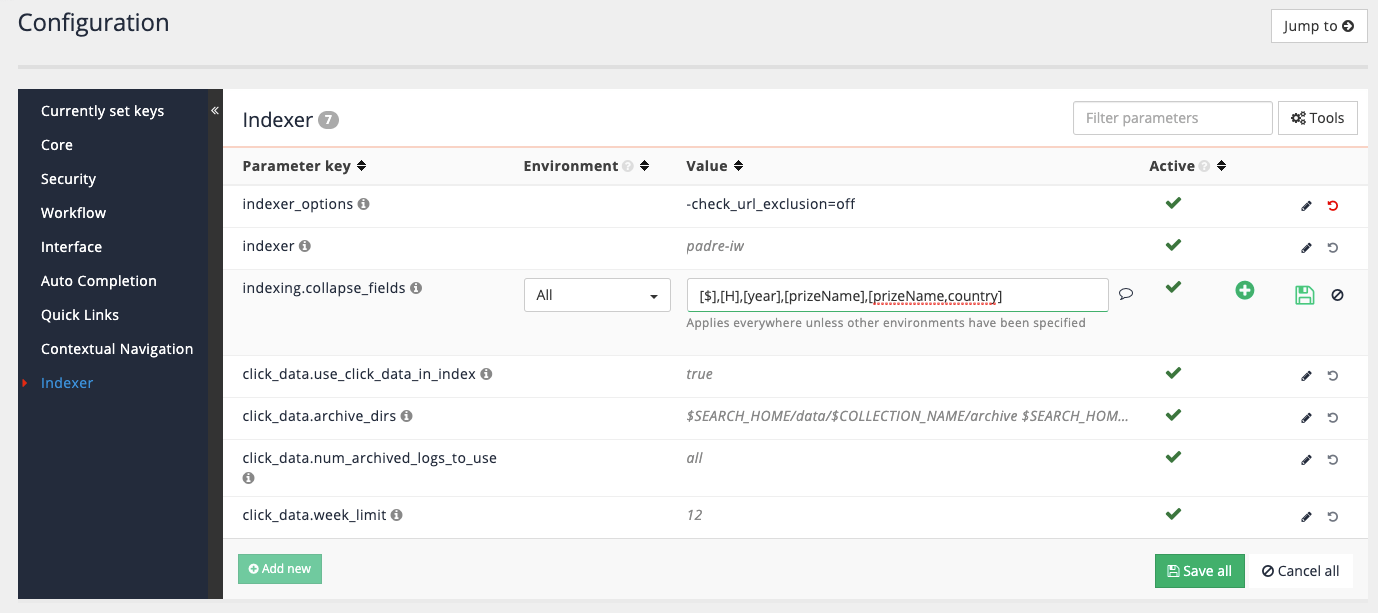
$is a special value that collapses on the document content (can be useful for collapsing different versions or duplicates of the same document).Hcontains an MD5 sum of the document content which is used for collapsing of duplicate content. -
Rebuild the index by selecting rebuild the live index from the advanced update options.
-
Ensure the template is configured to displayed collapsed results. Switch to the Nobel Prize winners search results page, then edit the results page template. Locate the section of the results template where each result is printed and add the following code just below the closing
</ul>tag for each result (approx line 500). This checks to see if the result element contains any collapsed results and prints a message.<#if s.result.collapsed??> <div class="search-collapsed"><small><span class="glyphicon glyphicon-expand text-muted"></span> <@fb.Collapsed /></small></div> </#if>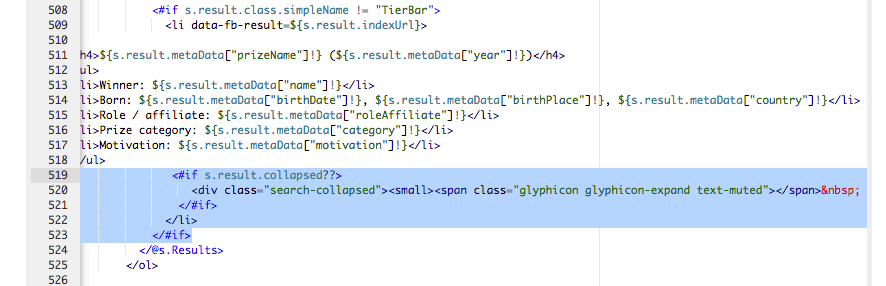
-
Test the result collapsing by running a query for prize and adding the following to the URL:
&collapsing=on&collapsing_sig=[year]. (http://localhost:9080/s/search.html?collection=default\~sp-nobel-prize&profile=nobel-prize-winners-search&query=prize&collapsing=on&collapsing_sig=%5Byear%5D) Observe that results contain an additional link indicating the number of very similar results and the result summary includes a message indicating that collapsed results are included.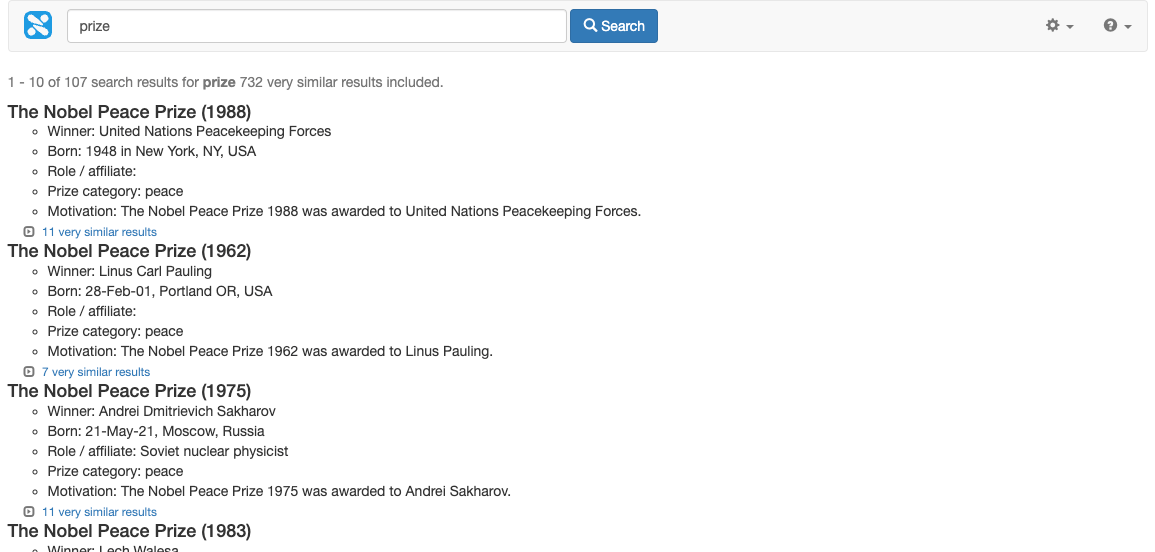
-
Clicking on this link will return all the similar results in a single page.

-
Return to the previous search listing by pressing the back button and inspect the JSON (or XML) view of the search observing that the result summary contains a collapsed count and that each result item contains a collapsed field. This collapsed field indicates the number of matching items and the key on which the match was performed and can also include some matching results with metadata. Observe that there is a results sub-item, and it’s currently empty:
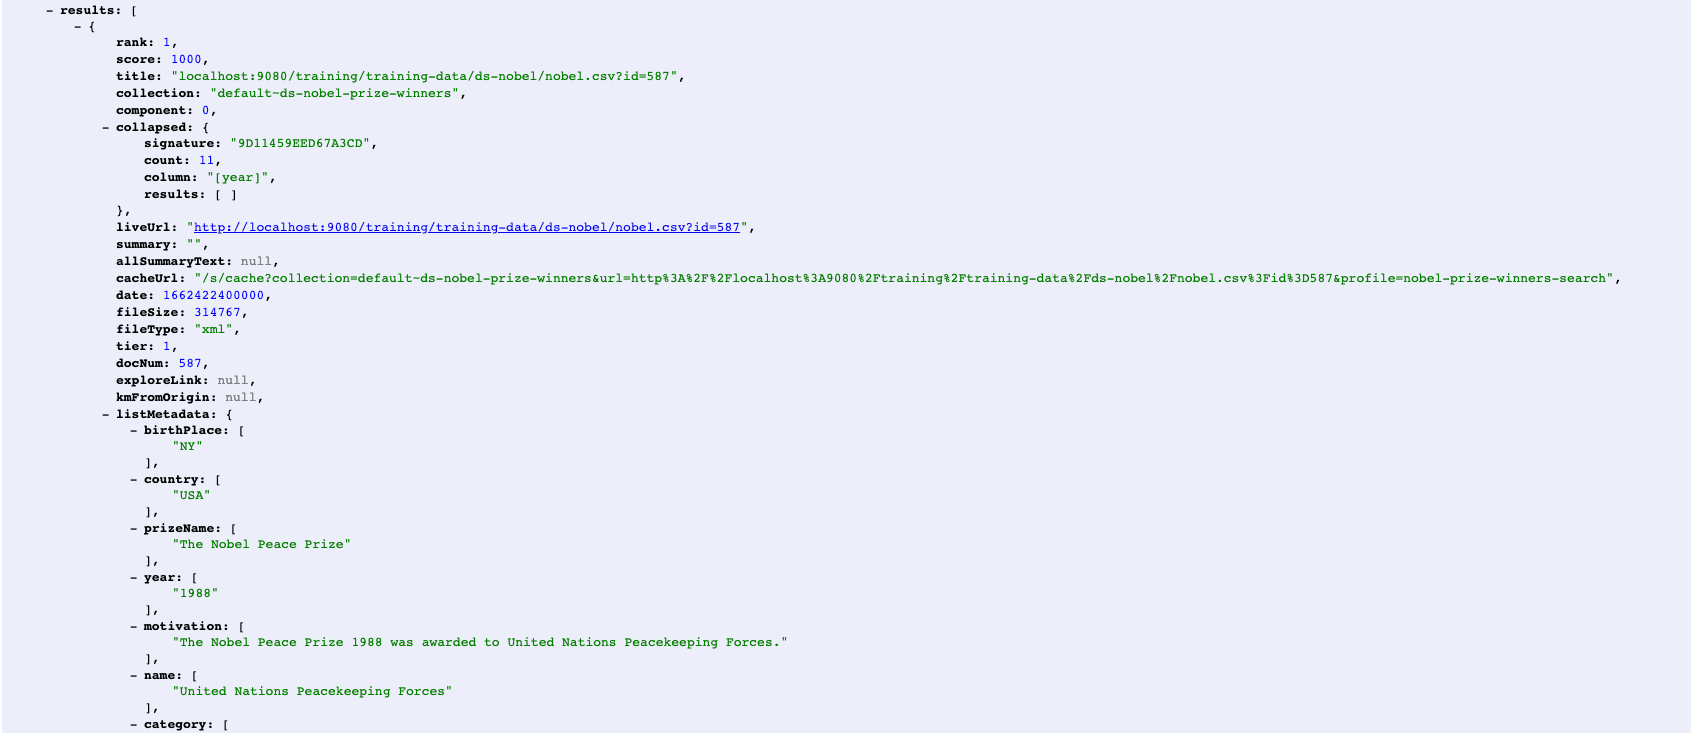
-
Return some results into the collapsed sub-item by adding the following to the URL:
&collapsing_num_ranks=3&collapsing_SF=[prizeName,name](http://localhost:9080/s/search.json?collection=training\~sp-nobel-prize&profile=nobel-prize-winners-search&query=prize&collapsing=on&collapsing_sig=%5Byear%5D&collapsing_num_ranks=3&collapsing_SF=%5BprizeName)The first option,
collapsing_num_ranks=3tells Funnelback to return 3 collapsed item results along with the main result. These can be presented in the result template as sub-result items. The second option,collapsing_SF=[prizeName,name]controls which metadata fields are returned in the collapsed result items.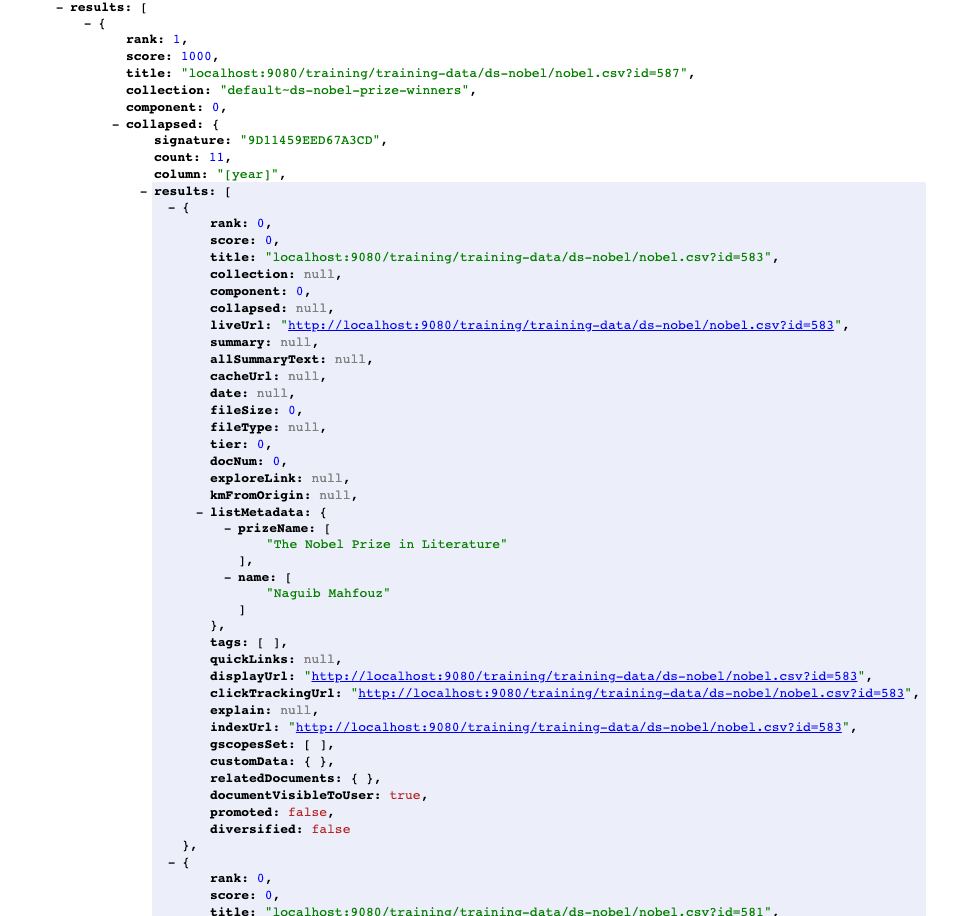
-
Modify the search results template to display these collapsed results as a preview below the main result. Edit your search result template and locate the following block of code:
<#if s.result.collapsed??> <div class="search-collapsed"><small><span class="glyphicon glyphicon-expand text-muted"></span> <@fb.Collapsed /></small></div> </#if>and replace it with the following:
<#if s.result.collapsed??> <div style="margin-left:2em; border:1px dashed black; padding:0.5em;"> <h5>Preview of very similar results</h5> <#list s.result.collapsed.results as r> (1) <p><a href="${r.indexUrl}">${r.listMetadata["prizeName"]?first!} (${r.listMetadata["year"]?first!}): ${r.listMetadata["name"]?first!}</a></p> </#list> <div class="search-collapsed"><small><span class="glyphicon glyphicon-expand text-muted"></span> <@fb.Collapsed /></small></div> </div> </#if>1 Iterates over the results sub-item and displays a link containing the metadata values for each item. -
Access the search results, this time viewing the HTML version of the search results and observe that the items returned in the JSON are now displayed below the search results. (http://localhost:9080/s/search.html?collection=training\~sp-nobel-prize&profile=nobel-prize-winners-search&query=prize&collapsing=on&collapsing_sig=%5BprizeName%5D&collapsing_num_ranks=3&collapsing_SF=%5BprizeName)
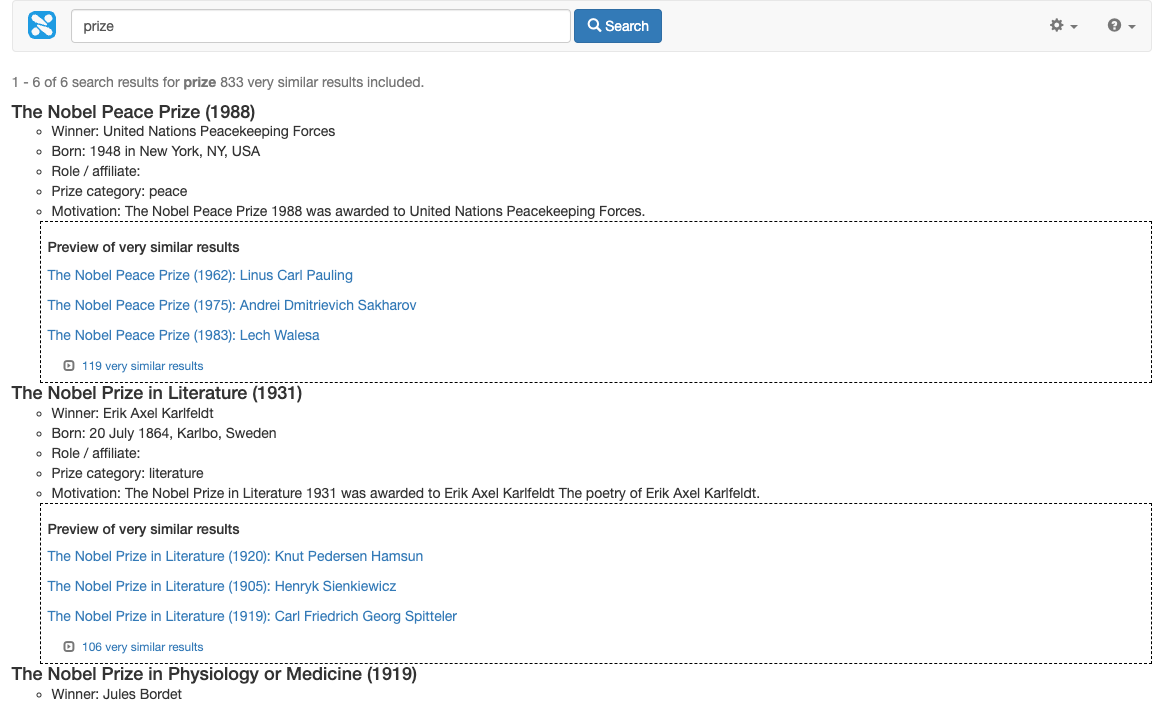
-
Return to the initial search collapsing on year (http://localhost:9080/s/search.html?collection=training\~sp-nobel-prize&profile=nobel-prize-winners-search&query=prize&collapsing=on&collapsing_sig=%5Byear%5D) and change the collapsing_sig parameter to collapse on
prizeName: (http://localhost:9080/s/search.html?collection=training\~sp-nobel-prize&profile=nobel-prize-winners-search&query=prize&collapsing=on&collapsing_sig=%5BprizeName%5D). Observe that the results are now collapsed by prize name.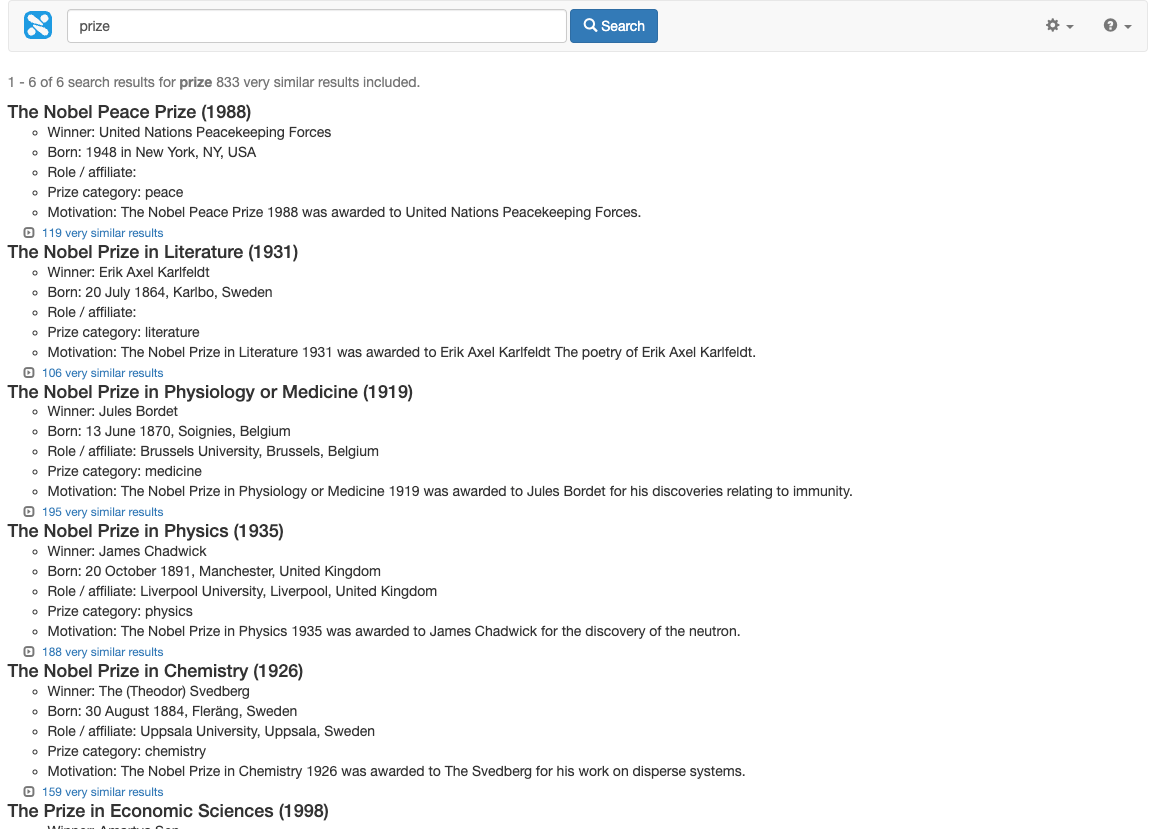
-
Finally, change the collapsing signature to collapse on
[prizeName,country](http://localhost:9080/s/search.html?collection=training\~sp-nobel-prize&profile=nobel-prize-winners-search&query=prize&collapsing=on&collapsing_sig=%5BprizeName,country%5D). This time the results are collapsed grouping all the results for a particular prize category won by a specific country. For example, result item 1 below groups all the results where the Nobel Peace Prize was won by someone from the USA.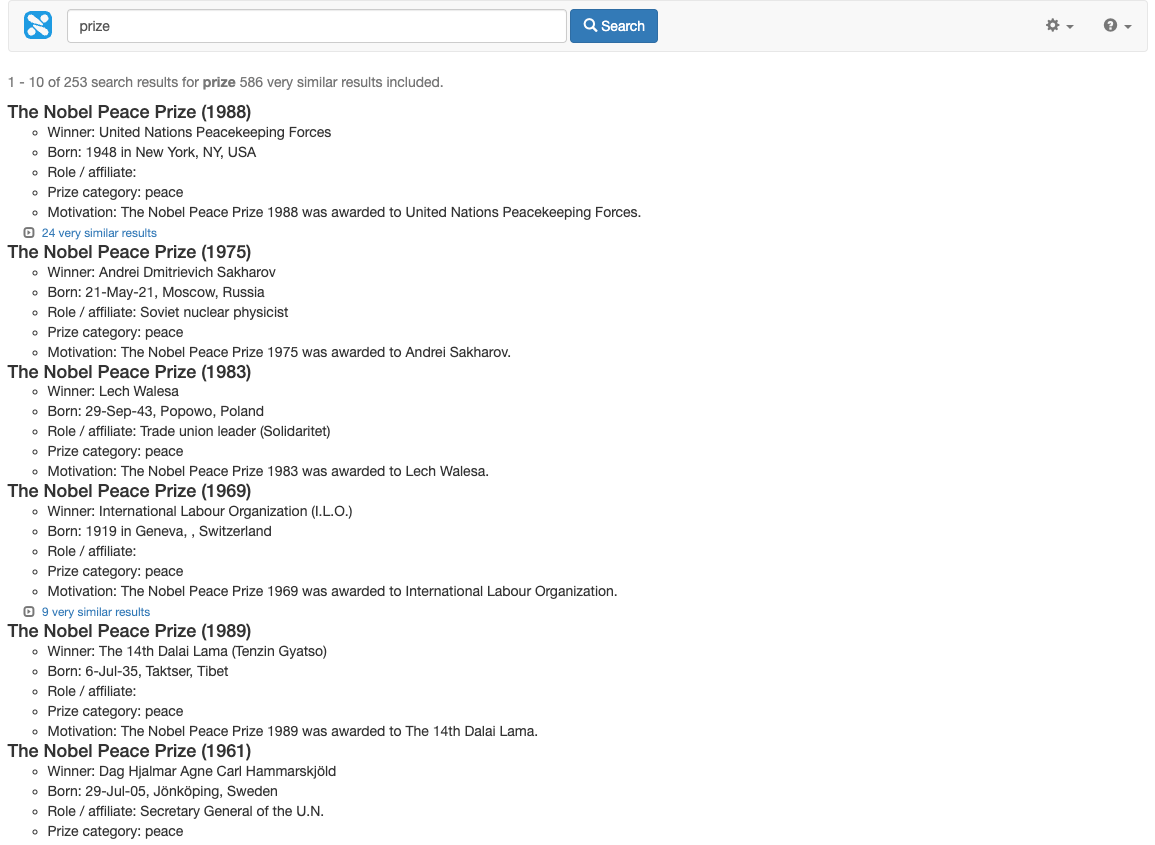
-
Click on the 24 very similar results link and confirm that the 25 results returned are all for the Nobel Peace Prize and that each recipient was born in the USA.
There are 25 results because this search returns the parent result in addition to the 24 results that were grouped under the parent. 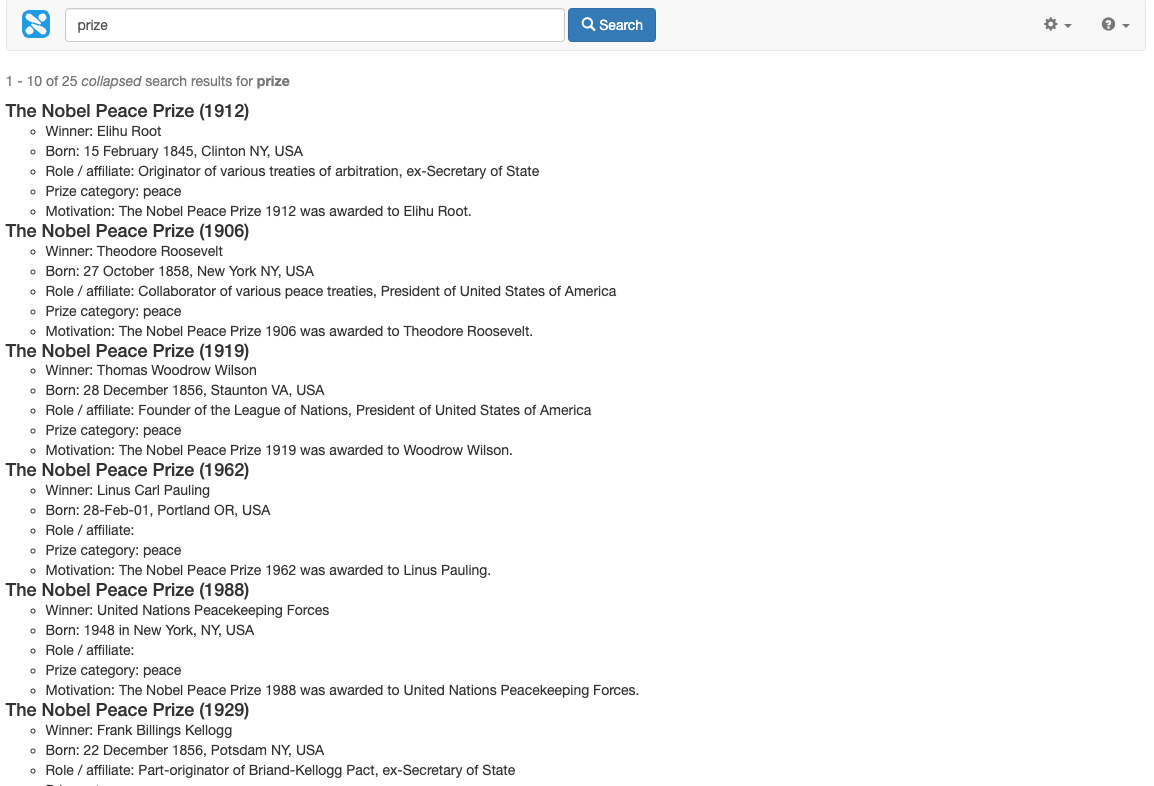
-
The values for
collapsing,collapsing_sig,collapsing_SFandcollapsing_num_rankscan be set as defaults in the same way as other display and ranking options, in the results page configuration.
16.7. Metadata weighting
It is often desirable to up- (or down-) weight a search result when search keywords appear in specified metadata fields.
The following ranking options can be used to apply metadata weighting:
-
sco=2: Setting the-sco=2ranking option allows specification of the metadata fields that will be considered as part of the ranking algorithm. By default, link text, clicked queries and titles are included. The list of metadata fields to use with sco2 is defined within square brackets when setting the value. For example,-sco=2[k,K,t,customField1,customField2]tells Funnelback to apply scoring to the default fields as well ascustomField1andcustomField2. Default:-sco=2[k,K,t] -
wmeta: Once the scoring mode to is set to 2, any defined fields can have individual weightings applied. Each defined value can have a wmeta value defined specifying the weighting to apply to the metadata field. The weighting is a value between 0.0 and 1.0. A weighting of 0.5 is the default and a value >0.5 will apply an upweight. A value <0.5 will apply a downweight. For example,-wmeta.t=0.6applies a slight upweighting to the t metadata field while-wmeta.customField1=0.2applies a strong downweighting tocustomField1.
Tutorial: Custom metadata weighting
-
Switch to the foodista results page and perform a search for pork (http://localhost:9080/s/search.html?collection=training~sp-foodista&query=pork).
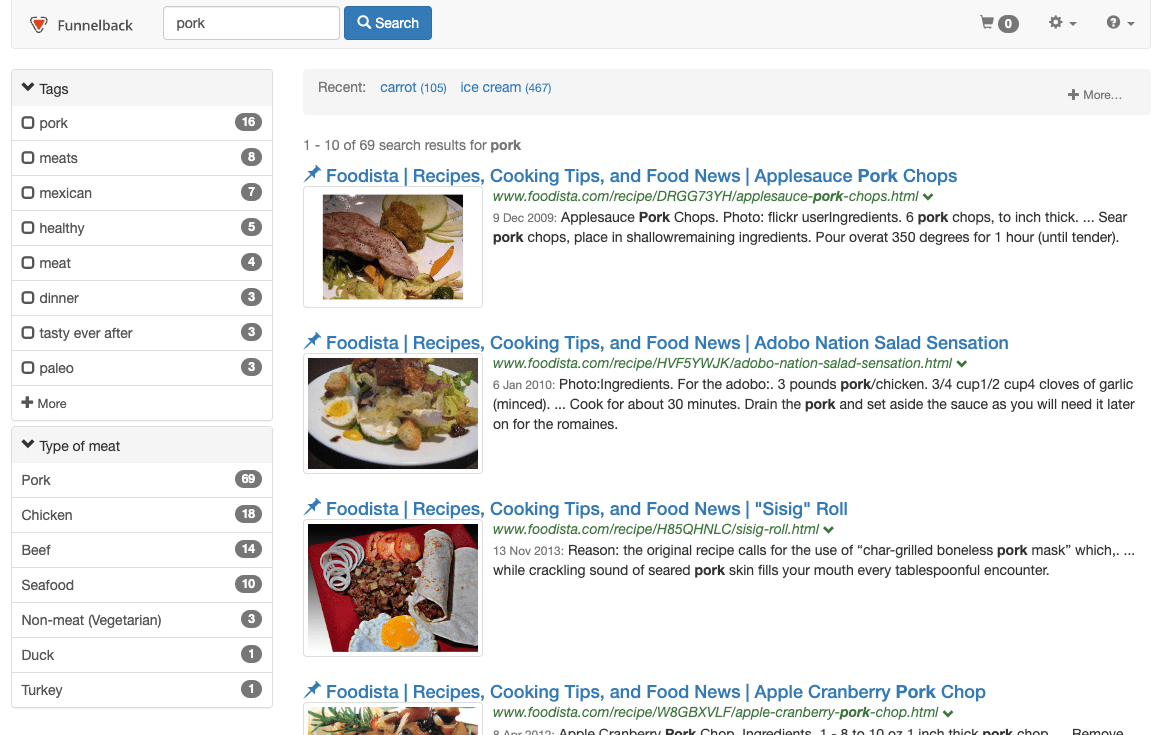
-
Change the settings so that the maximum up-weight is provided if the search query terms appear within the tags field. Remove the influence provided by the title metadata. Set the query processor options to the following (other query processor options may have been set for previous exercises so remove them and add the following):
-stem=2 -SF=[image,title,c,originalUrl] -sco=2[k,K,t,tags] -wmeta.tags=1.0 -wmeta.t=0.0or as CGI parameters (http://localhost:9080/s/search.html?collection=training~sp-foodista&query=pork&sco=2%5bt%2Ck%2CK%2Ctags%5d&wmeta.tags=1.0&wmeta.t=0.0). Observe the effect on the ranking of the results
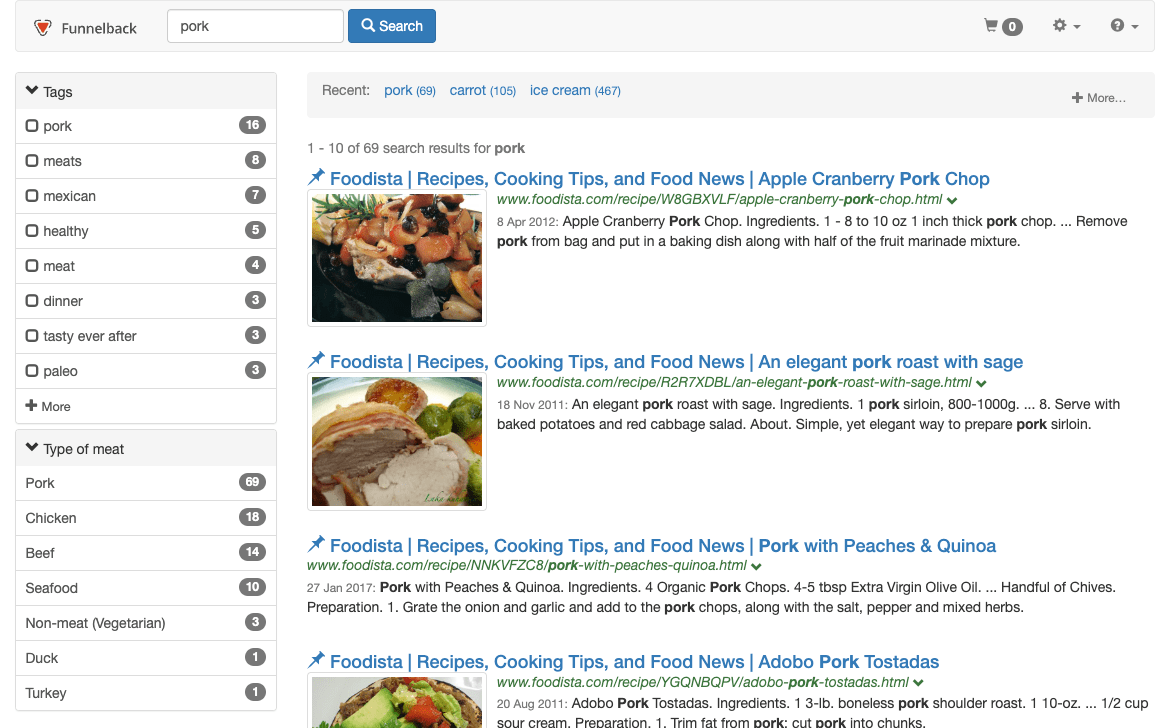
The -stemand-SFoptions are needed for other things and don’t related to the ranking changes you are making.
16.8. Query independent evidence
Query independent evidence (QIE) allows certain pages or groups of pages within a website (based on a regular expression match to the document’s URL) to be up-weighted or down-weighted without any consideration of the query being run.
This can be used for some of the following scenarios:
-
Provide up-weight to globally important pages, down-weight the home page.
-
Weighting different file formats differently (for example, up-weight PDF documents).
-
Apply up or down weighting to specific websites.
Query independent evidence is applied in two steps:
-
Defining the relative weights of items to up-weight or down-weight by defining URL patterns in the
qie.cfgconfiguration file. This generates an extra index file that records the relative weights of documents. -
Applying an influence within the ranking algorithm to query independent evidence by setting a weighting for
cool.4.The weighting forcool.4can be adjusted dynamically (for example, to disable it via a CGI parameter by setting&cool.4=0.0) or per profile.
Tutorial: Query independent evidence
-
Log in to the search dashboard and switch to the simpsons - website data source.
-
Click the manage data source configuration files item from the settings panel and create a
qie.cfgfile -
Add the following URL weightings to the
qie.cfgand then save the file: 0.25 provides a moderate down-weight, while 1.0 is the maximum up-weight that can be provided via QIE. Items default to having a weight of 0.5.# down-weight reviews and upweight episodes 0.25 www.simpsoncrazy.com/reviews/ 1.0 www.simpsoncrazy.com/episodes/ -
Re-index the data source ( From the update panel: .
-
Switch to the simpsons results page, then run a query for homer adding
cool.4=0and thencool.4=1.0to the URL to observe the effect of QIE when it has no influence and when it has the maximum influence. Applying the maximum influence from QIE pushes episode pages to the top of the results (and this is despite the default same site suppression being applied).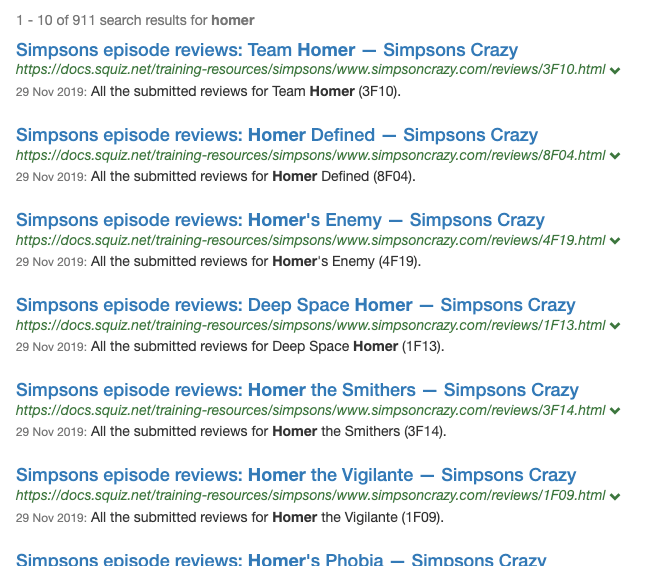
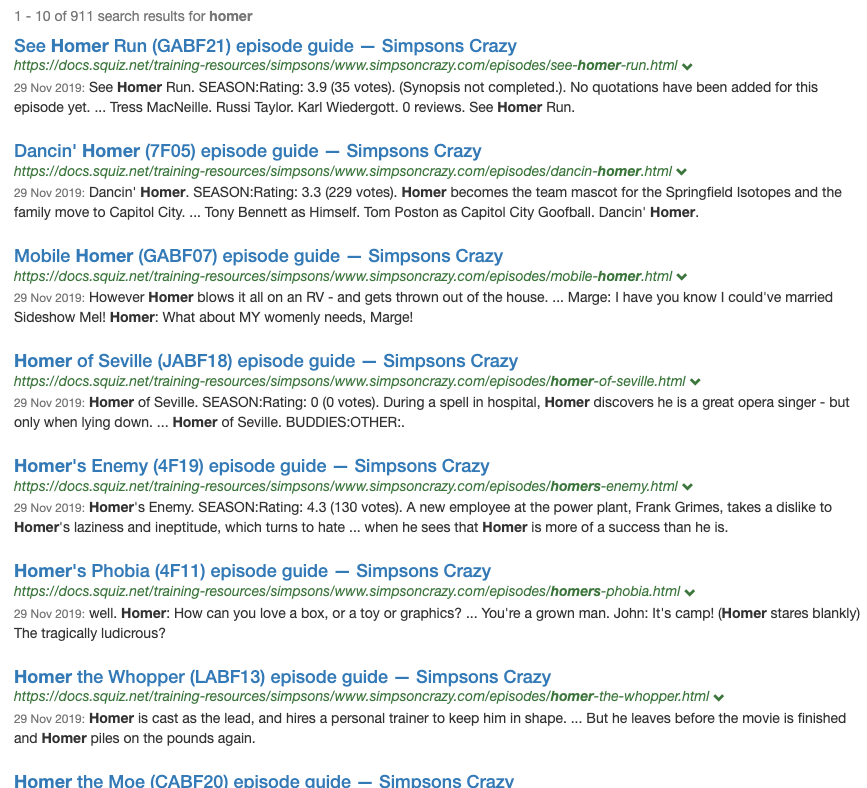
-
Like other ranking settings you can set this in the results page configuration once you have found an appropriate influence to apply to your QIE.
17. Template localization
Funnelback natively handles documents and queries in non-English languages and in non-Latin character sets. Funnelback’s built-in Freemarker templates can also be configured to support localization. This can be useful when providing a search interface designed to target several regions or languages.
Template localization allows the definition of one or more alternate sets of labels for use within the Funnelback templates.
Additional configuration can be created defining the label text for different languages - and the templates configured to use the labels from the appropriate localization file.
The localization is selected by providing an additional CGI parameter that defines the translation file to apply to the template.
Tutorial: Create a simple localization file
In this exercise an English (simplified) localization file will be created that defines some less technical labels for some headings used on the advanced search form.
-
Log in to the search dashboard where you are doing your training.
See: Training - search dashboard access information if you’re not sure how to access the training. Ignore this step if you’re treating this as a non-interactive tutorial. -
Select the Foodista search results page.
-
Create a new localization file from the file manager screen. (Select manage results page configuration files from the customize panel, then create a new
ui.*.cfgfile, enteringen_SIas the filename, when prompted.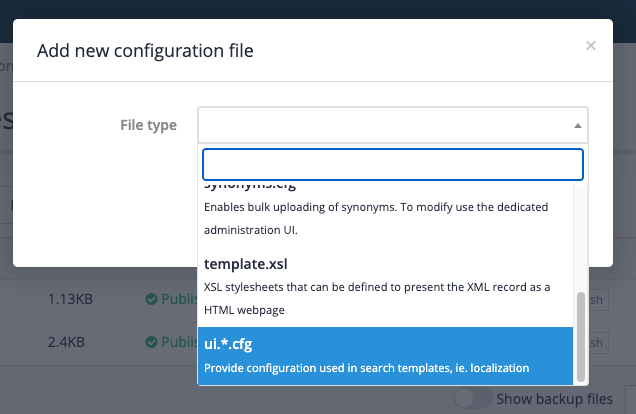
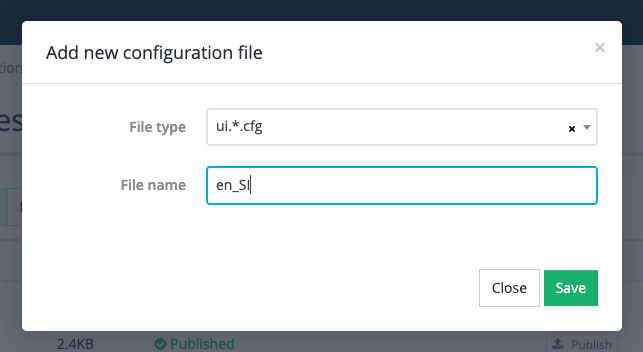
-
Define two alternate labels - add the following to the file then click the save and publish button:
metadata=Properties
origin=Position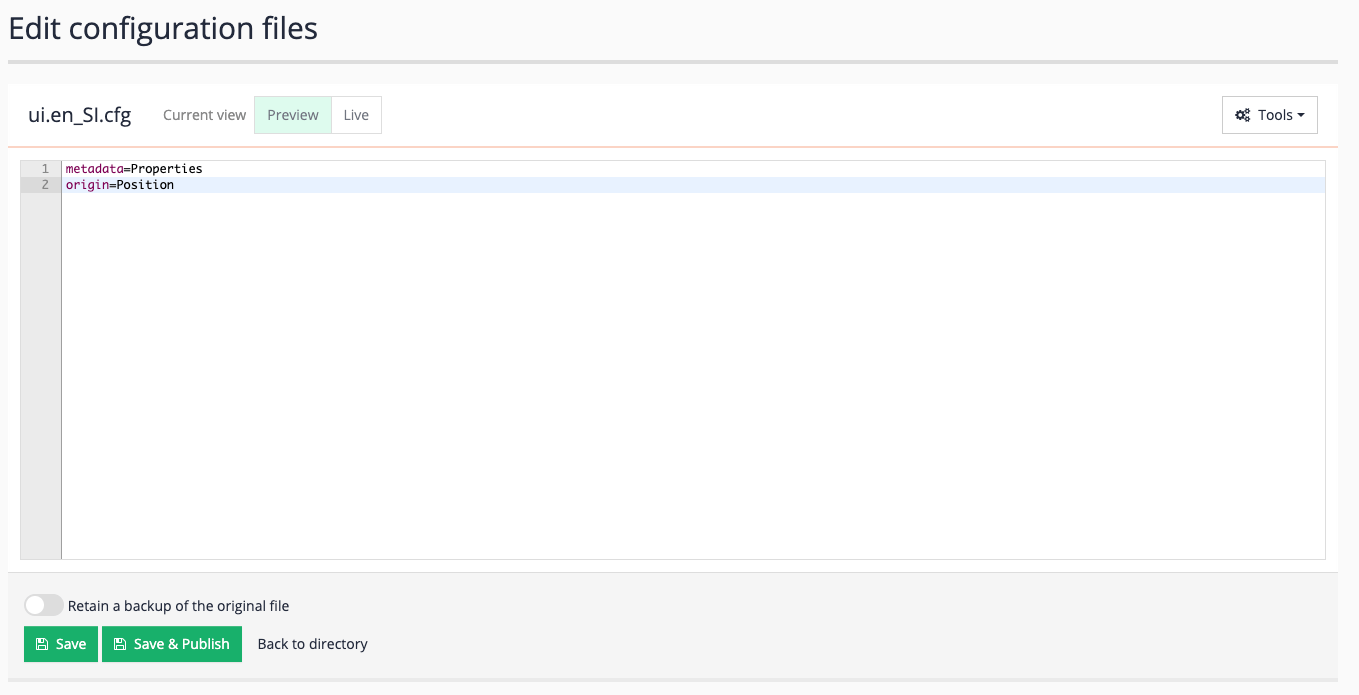
-
The default Funnelback search form hardcodes the labels in the template. Edit the default template and update the hardcoded labels to translation variables, defining a fallback to a default value. Locate the Metadata and Origin text in labels in the advanced search form (lines approx. 184 and approx. 268) and replace these with
${response.translations.metadata!"Metadata"}and${response.translations.origin!"Origin"}. Click the save and publish button after making your changes.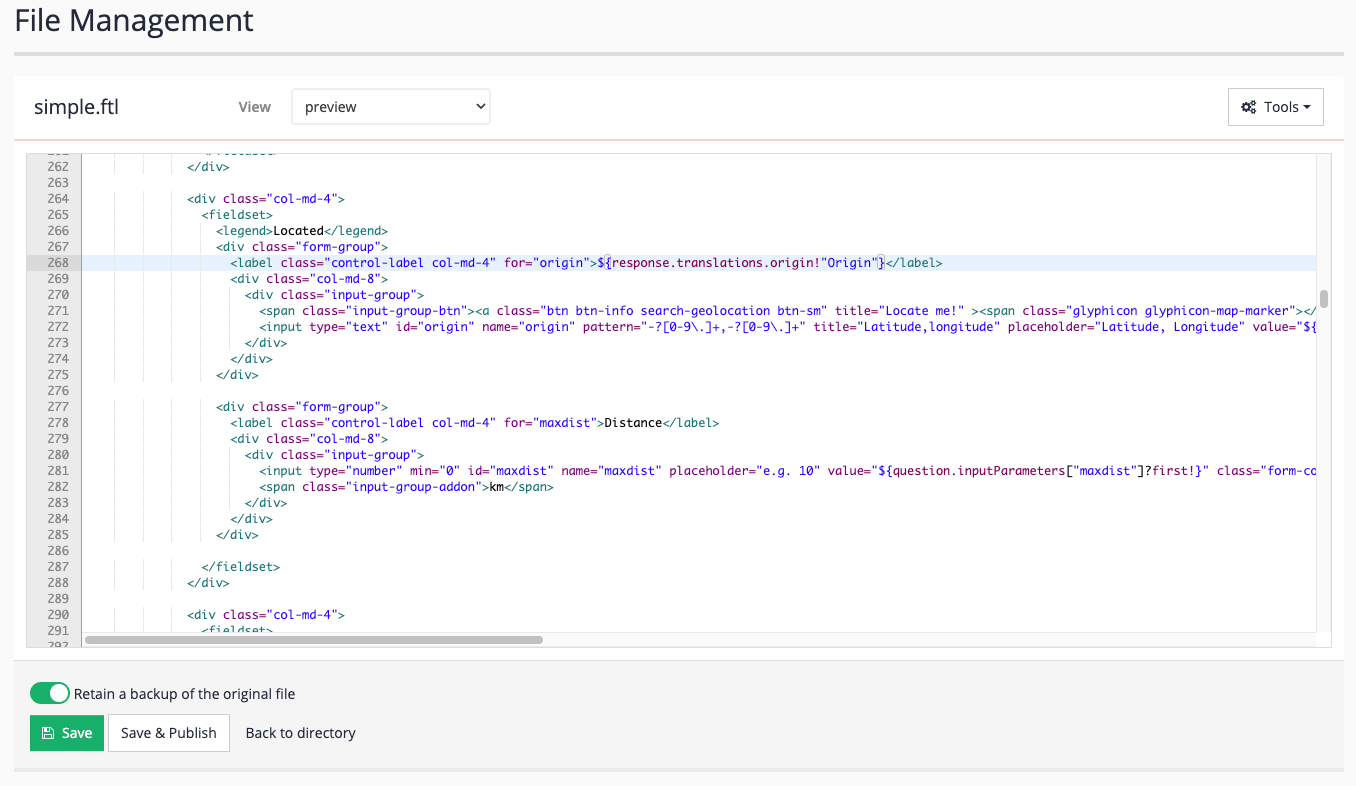
-
View the advanced search form - run a query for eggs, then view the advanced search form by selecting advanced search from the menu underneath the cog.
-
Observe the metadata heading and origin items are displaying the default values. This is because you’re not applying your translations.
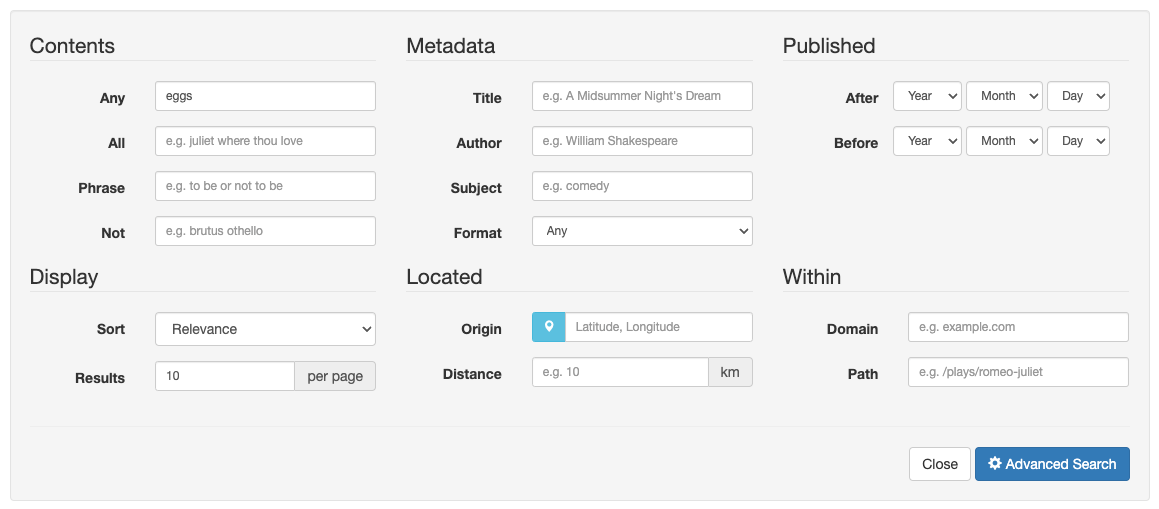
-
Modify the URL to specify the language by adding
&lang.ui=en_SIto the URL. Observe that the labels for metadata and origin update to properties and position, matching what you defined in the localization file. ]