Implementer training - Create a basic web search
A web search is probably the simplest search that you will create with Funnelback. It is used to provide a search for one or more websites.
In this exercise you will create a very basic search of a couple of websites containing the full text of some online books.
At a minimum, setting up a basic web search requires a search package containing a data source and a results page.
Step 1: Create a search package for your search
A search package is required for every search that you create. The search package bundles together all the data sources into a single index that you can then search across using results pages.
Tutorial: Create a search package
-
Log in to the search dashboard where you are doing your training.
See: Training - search dashboard access information if you’re not sure how to access the training. Ignore this step if you’re treating this as a non-interactive tutorial. -
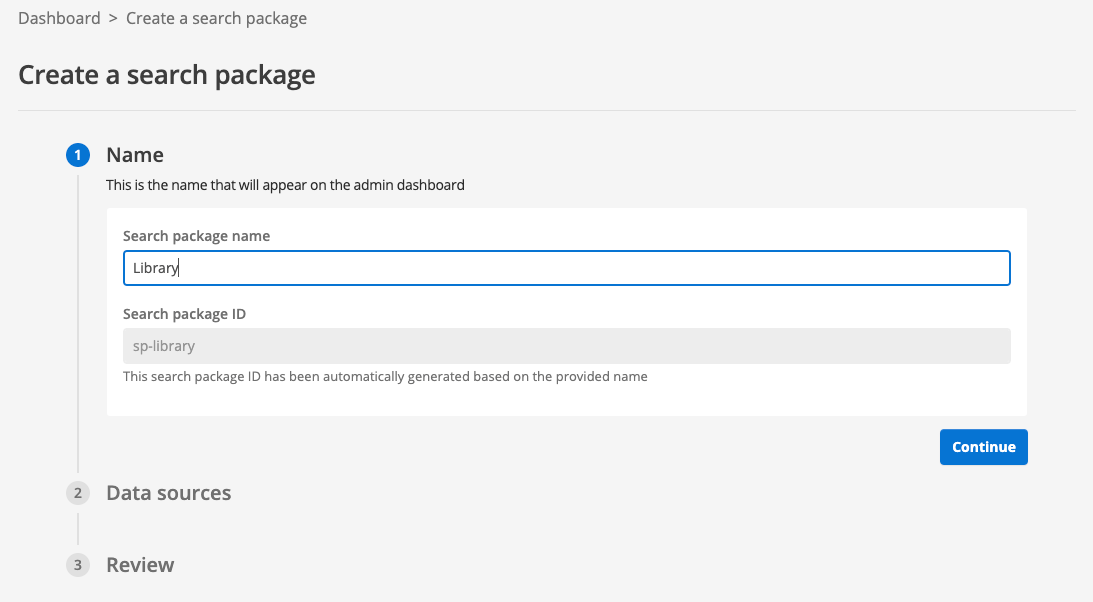
Click the add new search package button. This opens the screen used to create a new search package.

-
When prompted, enter Library as the search package name. Observe that the search package ID is automatically generated from the name that you enter. Click the continue button to proceed to the second step of search package creation.
-
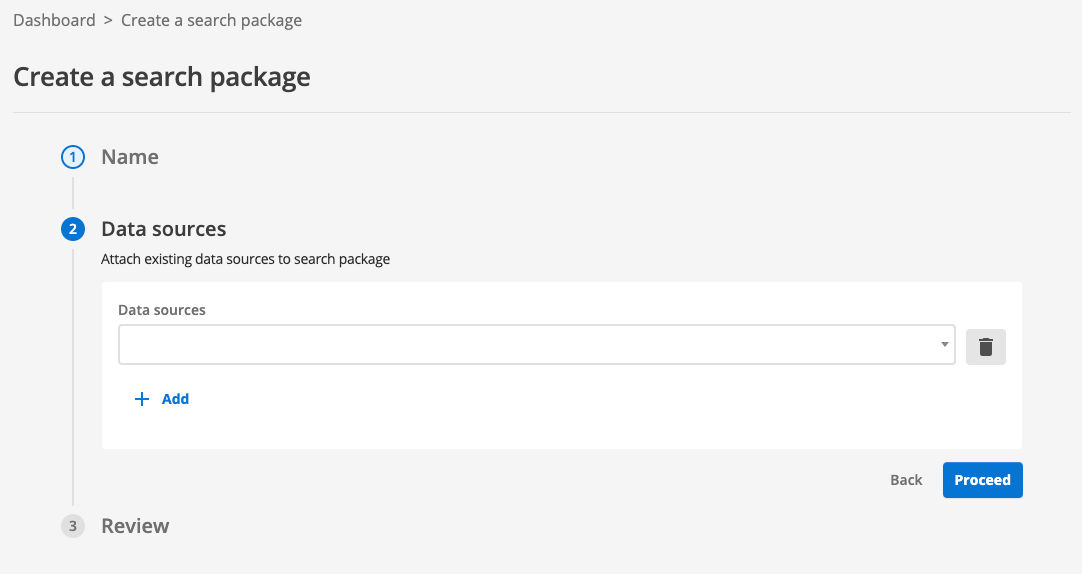
Step 2 of search package creation enables you to (optionally) attach existing data sources to your new search package, which you pick from the drop-down menu. Click the proceed button to skip this step as we will create our data source later.
-
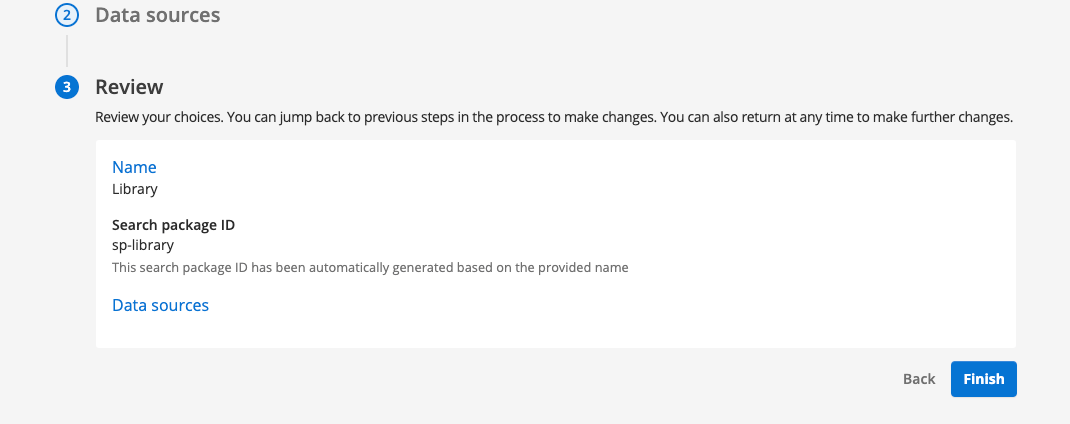
Review the information that you have entered. If you find any mistakes in the information you have entered you can return to a previous step by clicking on the step number. Once you are satisfied with the information in the review panel, click the finish button to create your search package.
-
The search package management screen is displayed. Data sources and results pages can be set up from the panel located at the bottom of your page. However, for this exercise we will return to the main search dashboard before setting these up. Return to the search dashboard home page by clicking the dashboard item in the breadcrumb trail, the search dashboard item in the side navigation, or by clicking on the Funnelback logo on the menu bar.
-
You are returned to the search package listing. Scroll down the list of search packages and observe that the Library search package that you just created is now listed with the other search packages.
Step 2: Create your data sources
Tutorial: Create a web data source
This exercise sets up the data source that will crawl and index a website that contains the complete works of Shakespeare.
A web data source is used to gather and index the content of a website or set of websites. Web data sources contain HTML, PDF and MS Office files that are gathered by crawling a website or set of websites.
A web crawler is a bit like a user that loads a web page and then clicks on every link on the web page in turn, repeating this process until all the links on the website have been visited.
| The web crawler’s view of a website is similar to what you would see if you visited the website in a web browser, but with Javascript disabled. The web crawler doesn’t execute Javascript so cannot crawl a website if it requires Javascript to generate the page. |
This exercise continues on directly from the previous exercise.
-
Log in to the search dashboard where you are doing your training.
See: Training - search dashboard access information if you’re not sure how to access the training. Ignore this step if you’re treating this as a non-interactive tutorial. -
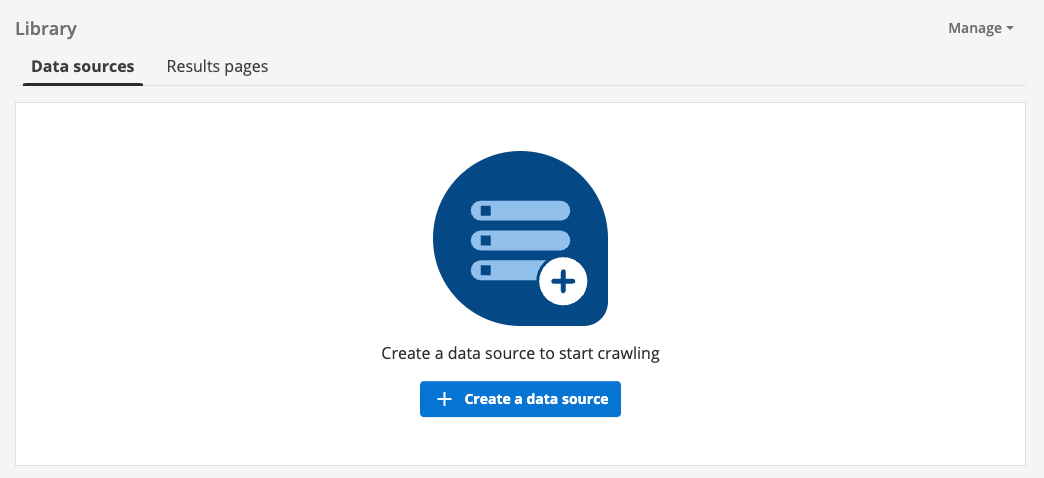
Start the process to create a new data source by clicking on the create a data source button, located on the data sources tab that is displayed for the search package you created in the previous exercise.
-
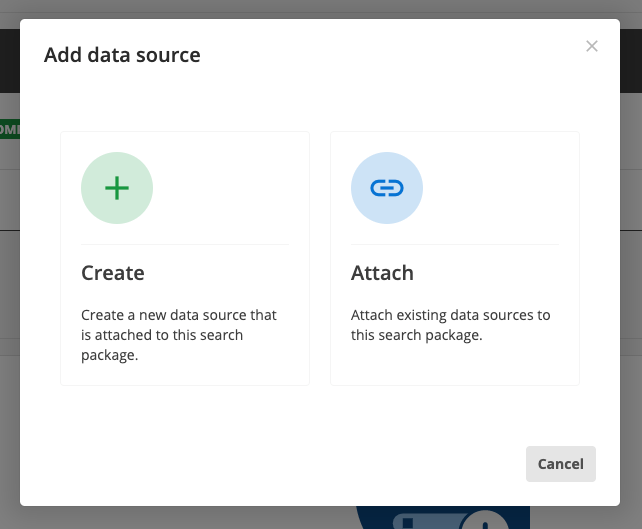
A modal opens providing you with the option to create or attach a data source. The attach option can be used to attach an existing data source to your search package. We are not interested in using any of the existing data sources in our new Library search, so we will create a new data source. Click the create button.
-
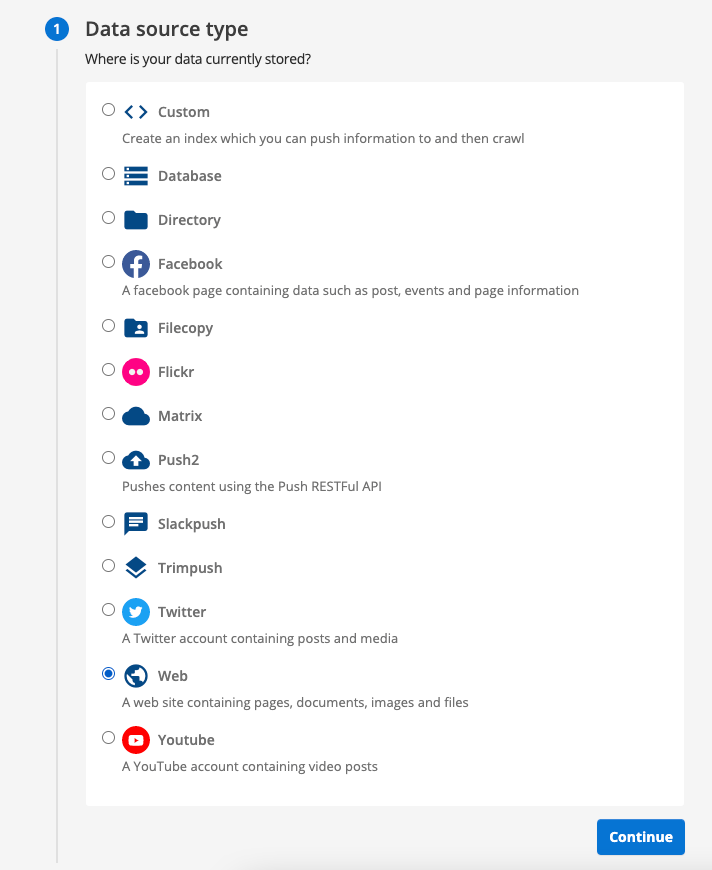
The first step of data source creation requires you to choose your data source type. Select the web radio button then click the continue button.
-
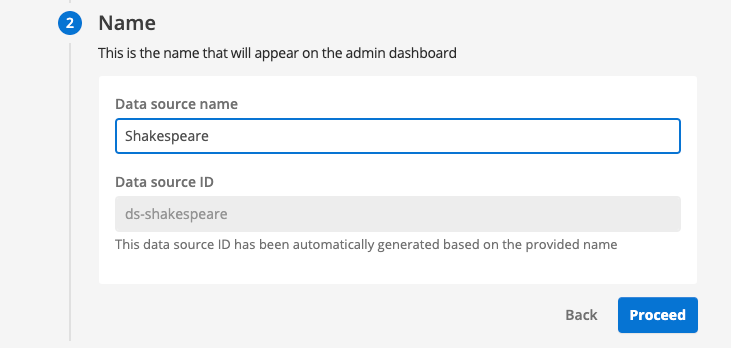
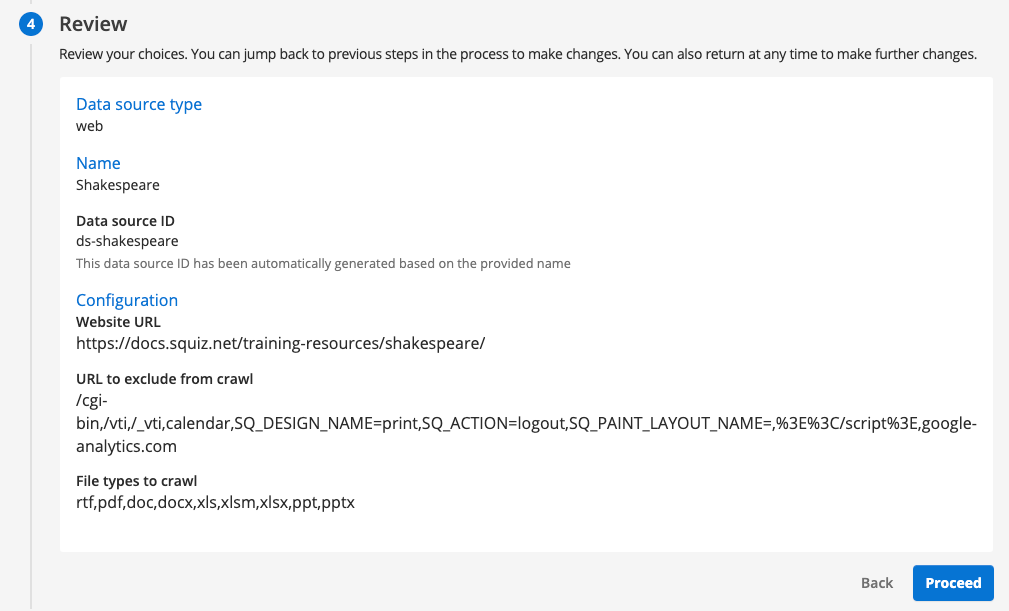
Enter Shakespeare when prompted for a data source name. Observe that the data source ID is automatically generated from your chosen name. Click the proceed button to move to the configuration step.
-
Enter some basic configuration for the data source. At a minimum you need to tell the crawler what should and shouldn’t be included in the crawl.
-
Enter the following into the
What website(s) do you want to crawl?field:https://docs.squiz.net/training-resources/shakespeare/Whatever you enter into this box will be included in your search, if the URL of the page matches.
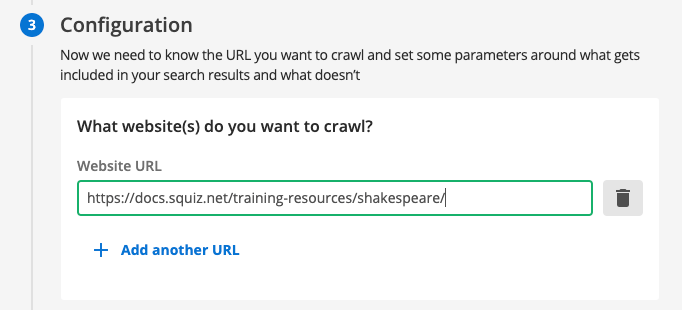
Normally you would just enter your website home page here (for example, https://www.example.com/) - this example is a little more complicated because we are crawling a local copy of the website for training purposes. The two following sections following this can be used to further adjust what is included or excluded from your search:
- What do you want to exclude from your crawl?
-
If any of the items listed here fully or partially match a page URL, then that page will not be included in the search (and links contained in the page won’t be followed).
- Which non-HTML file types do you want to crawl as well?
-
This is a list of non-HTML documents that will be included in the search.
-
Click the proceed button to review the information you have provided. If you find any errors in what you’ve provided you can click on the step number to update the information. Once you are happy with the information in the review panel click the proceed button to create your data source.
-
You are provided with a final option to update your data source now, or to update it later. Select the option to update now, then click the finish button to complete the data source creation steps.
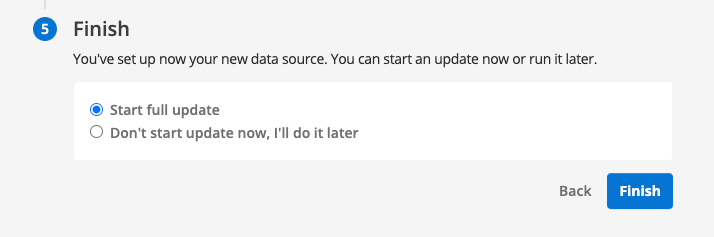
In most cases you will want to update your data source later because you will want to provide additional configuration such as metadata. -
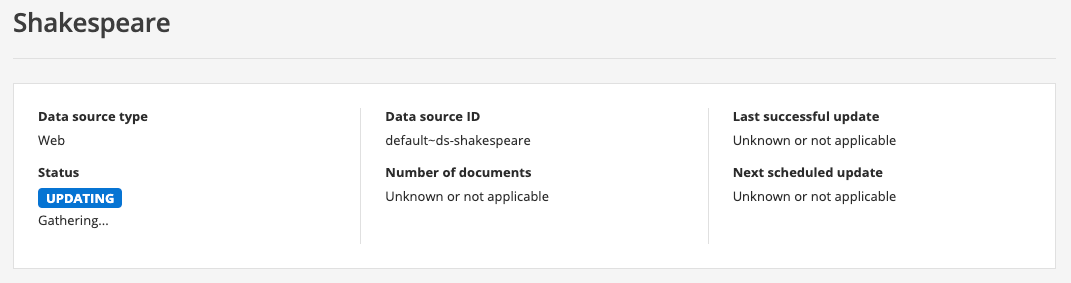
The data source management screen loads. Note that the status of the data source reads queued. This means that an update of the data source has been added to the task queue, but hasn’t yet started. The status will refresh as the update progresses.
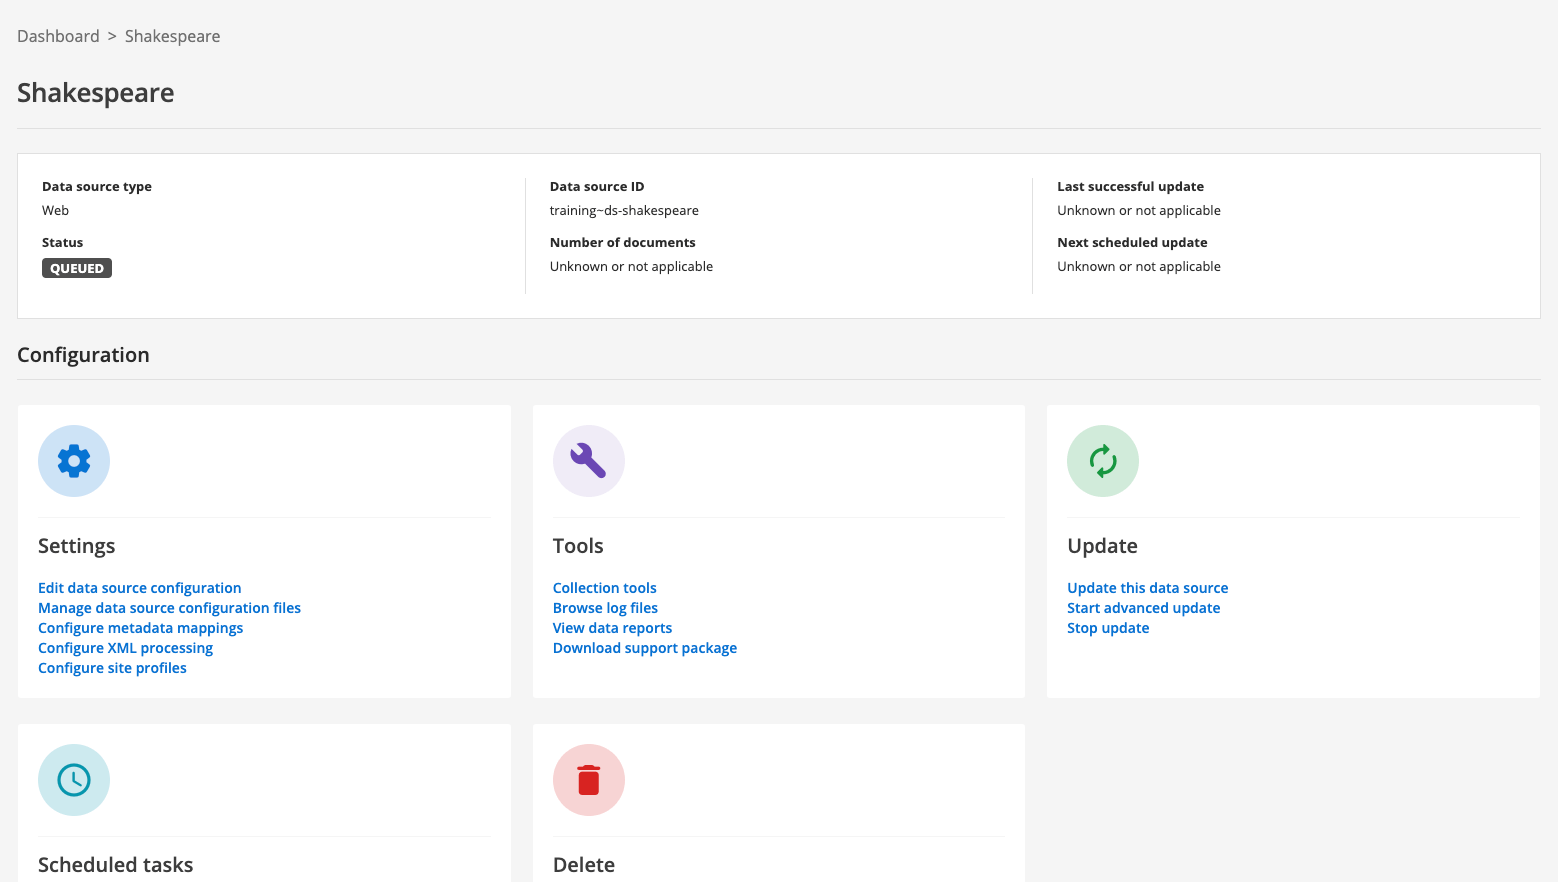
-
After a short time the status message should update to indicate that the update is running (or has finished).
-
Repeat the above steps to create a second data source with the following details:
- Data source type
-
web
- Data source name
-
Austen - What website(s) do you want to crawl?
- What do you want to exclude from your crawl?
-
leave as default value
- Which non-HTML file types do you want to crawl as well?
-
leave as default value
Here we are creating a second data source to independently crawl the austen website. In general, we recommend that you add the website to your existing web data source (especially if you are likely to have cross-linking between the websites) as this results in better ranking quality.
-
When you’ve finished creating the data source, run an update.
Step 3: Create a results page
Before we delve more into data sources, we’ll take a quick look at results pages, which is the final element required to provide a working search.
Every search package in Funnelback contains one or more results pages which underpin the preview/live templates and configuration and also which can be used to provide access to scoped versions of the search.
Once a results page is created, default display and ranking options can be applied.
Separate results pages should be created:
-
For each search provided by the search package.
-
When separate analytics are desired for the search.
-
When independent templates, best bets, synonyms or curator rules are required for the search.
Tutorial: Create a results page
-
Log in to the search dashboard where you are doing your training.
See: Training - search dashboard access information if you’re not sure how to access the training. Ignore this step if you’re treating this as a non-interactive tutorial. -
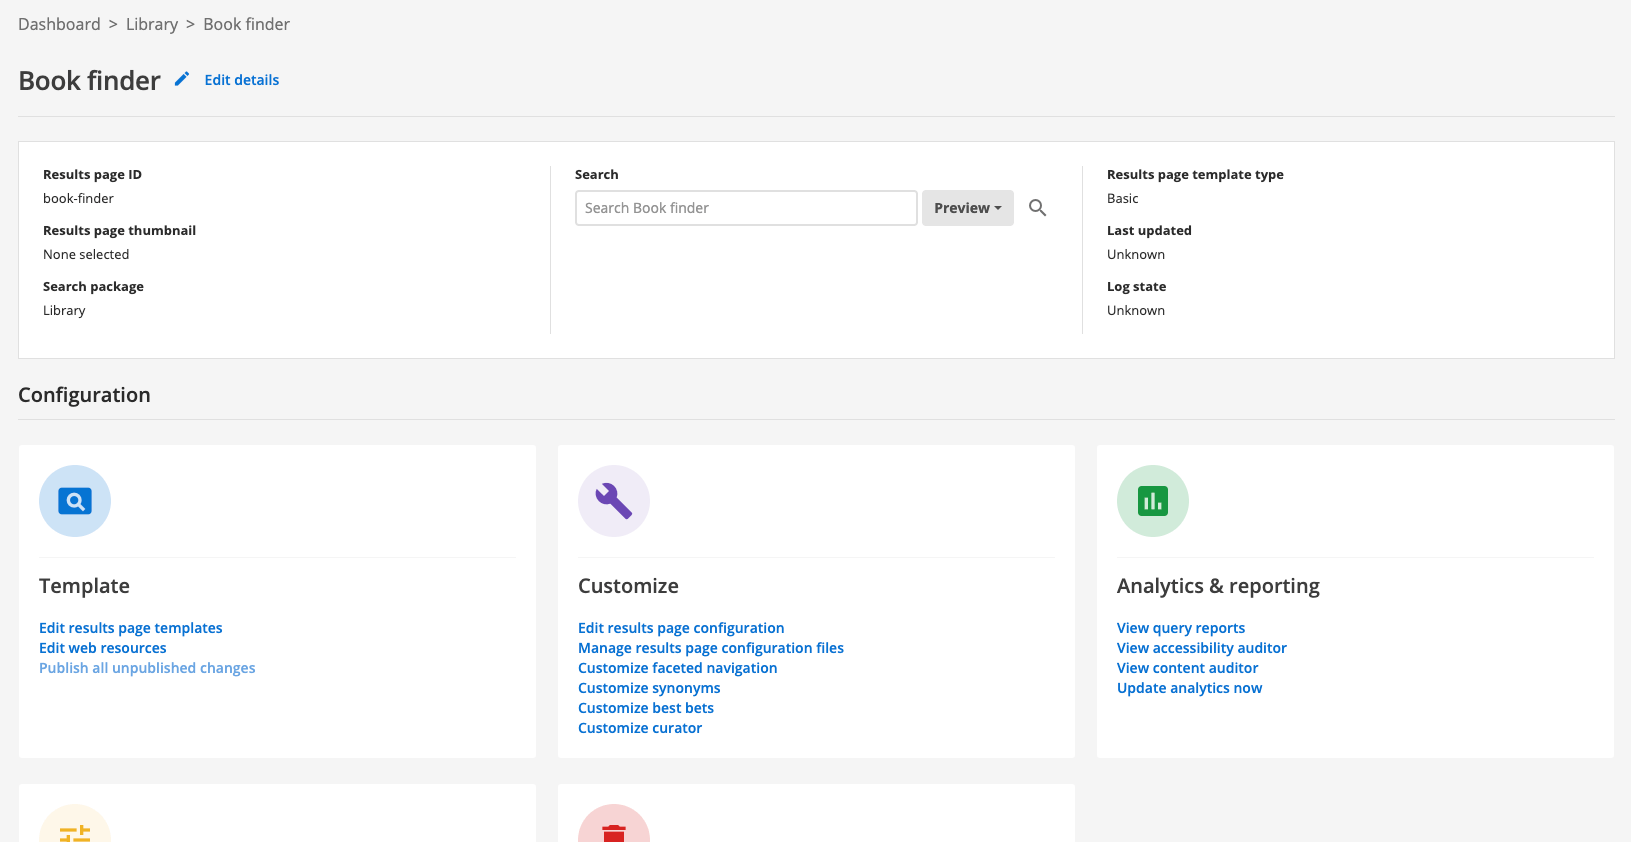
Locate the library search package that you created in a previous exercise.
-
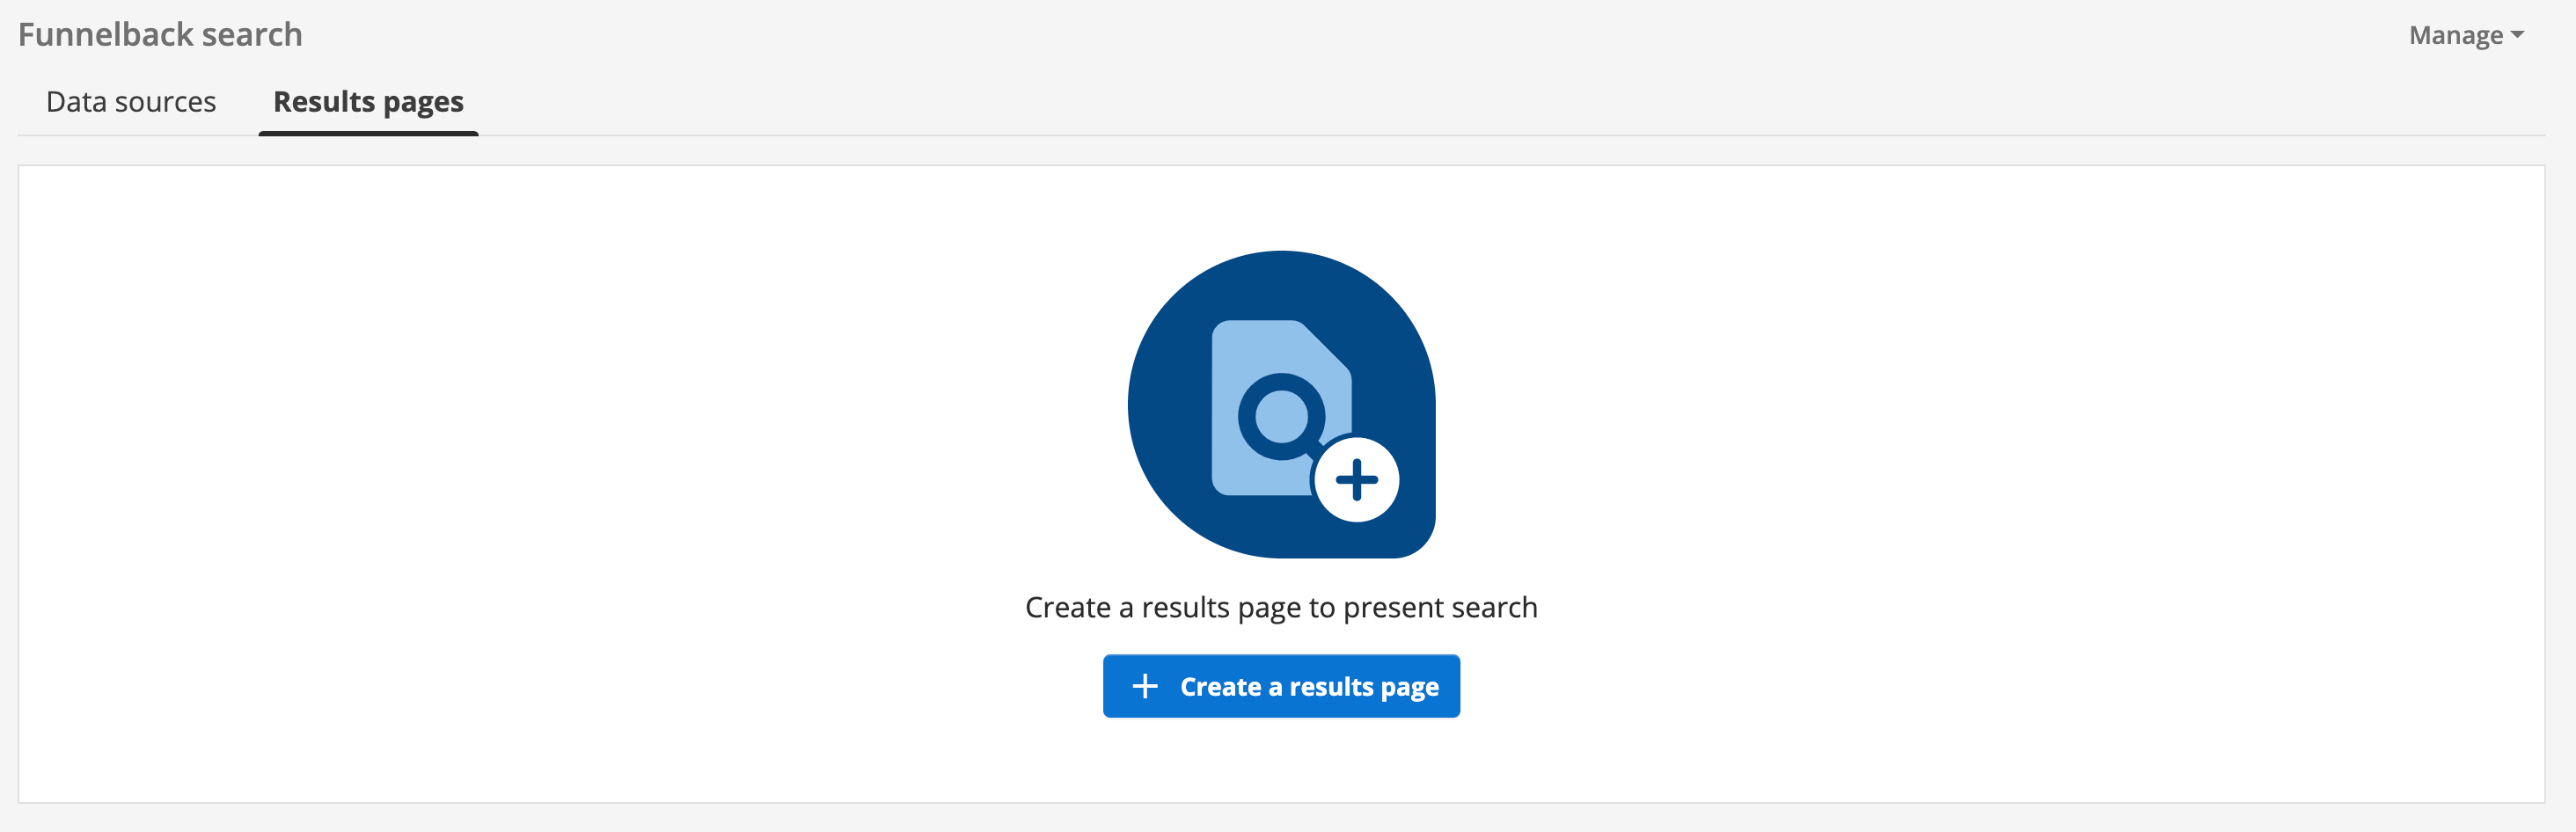
Click on the results pages tab then click the create a results page button.
-
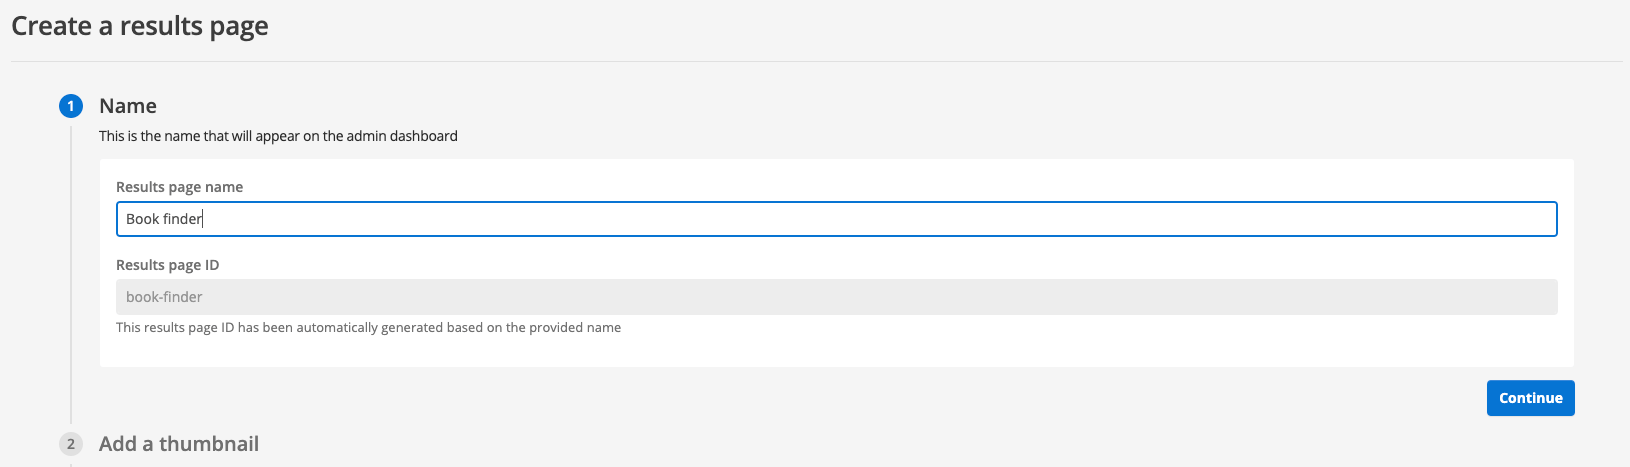
Enter Book finder as the results page name then click the continue button.
-
You are then provided with an option to add a thumbnail image for the results page - this image is displayed on the results page management screen and insights dashboard. We’ll skip this step now (an image is easily added later). Click the proceed button to move to the next step of the results page creation process.

-
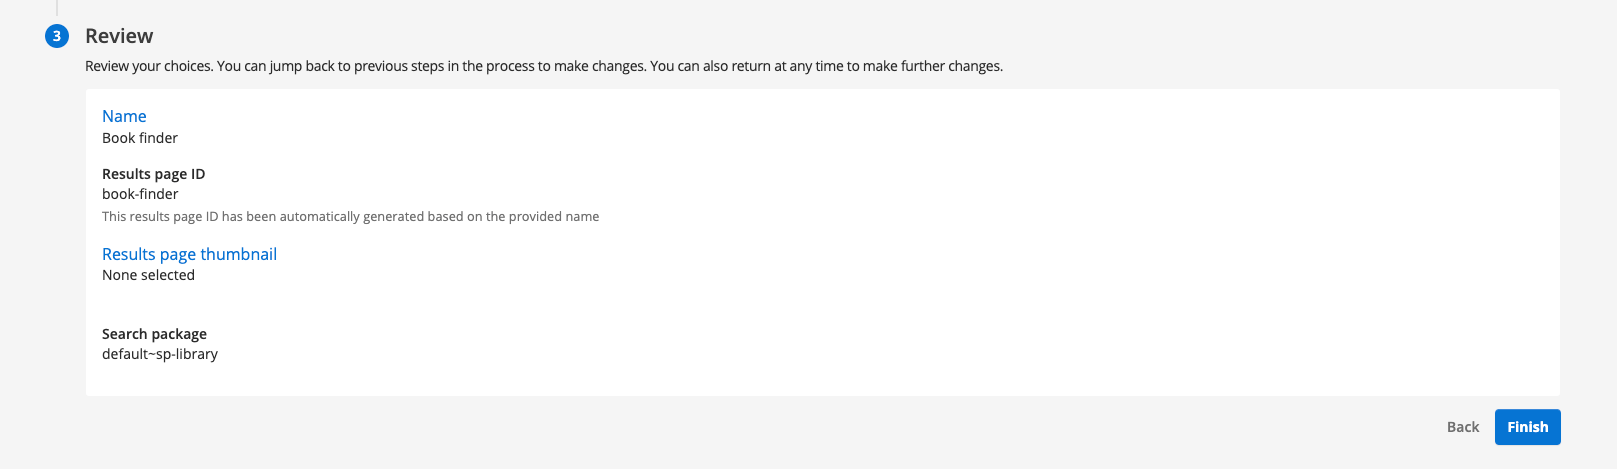
Review the settings that you have entered. Once satisfied, click the finish button to create the results page.
-
You are redirected to the results page management screen where you can perform further setup of your new results page.