Implementer training - manipulating search result content
Funnelback offers a number of options for manipulating the content of search results.
There are three main places where search result content can be manipulated. Which one to choose will depend on how the modifications need to affect the results. The options are (in order of difficulty to implement):
-
Modify the content as it is being displayed to the end user.
-
Modify the content after it is returned from the indexes, but before it is displayed to the end user.
-
Modify the content before it is indexed.
Modify the content as it is displayed to the user
This is the easiest of the manipulation techniques to implement and involves transforming the content as it is displayed.
This is achieved in the presentation layer and is very easy to implement and test with the results being visible as soon as the changes are saved. Most of the time this means using the Freemarker template. If the raw data model is being accessed the code that interprets the data model will be responsible for implementing this class of manipulation.
A few examples of content modification at display time include:
-
Editing a value as its printed (for example, trimming a site name off the end of a title)
-
Transforming the value (for example, converting a title to uppercase, calculating a percentage from a number)
Freemarker provides libraries of built-in functions that facilitate easy manipulation of data model variables from within the Freemarker template.
| If you’re integrating directly with Funnelback’s JSON or XML then you can make the equivalent display-time modifications in your templates. |
Tutorial: Use Freemarker to manipulate data as it is displayed
In this exercise we’ll clean up the search result hyperlinks to remove the site name.
-
Log in to the search dashboard where you are doing your training.
See: Training - search dashboard access information if you’re not sure how to access the training. Ignore this step if you’re treating this as a non-interactive tutorial. -
Run a search against the silent films search results page for buster and observe that the text for each result link ends with
: Free Download & Streaming : Internet Archive. -
Edit the template for the silent films results page navigating to the silent films search results page, selecting edit results page templates from the template panel.
-
Locate the results block in the template, and specifically the variable printed inside the result link. In this case it is the
${s.result.title}variable.
-
Edit the
${s.result.title}variable to use the Freemarker replace function to remove the: Free Download & Streaming : Internet Archivefrom each title. Update the variable to${s.result.title?replace(" : Free Download & Streaming : Internet Archive","")}then save and publish the template. -
Repeat the search against the silent films search results page for buster and observe that
: Free Download & Streaming : Internet Archiveno longer appears at the end of each link. If the text is still appearing check your replace parameter carefully and make sure you haven’t got any incorrect quotes or dashes as the replace matches characters exactly. -
The function calls can also be chained - for example adding
?upper_caseto the end of${s.result.title?replace(" : Free Download & Streaming : Internet Archive","")?upper_case}will remove: Free Download & Streaming : Internet Archiveand then uppercase the remaining title text. -
View the data model for the search results (update your URL to be
search.jsoninstead ofsearch.html) and observe that the titles still show the text that you removed. This demonstrates that the change you have applied above changes the text when the template generates the HTML, but the underlying data model is unaffected. -
Undo the change you made to your template (to replace the end of the title) then save your template.
Modify the content after it is returned from the index, but before it is displayed
This technique involves manipulating the data model that is returned.
There are two options for this type of modification:
-
Using a search lifecycle plugin from the plugin library
-
Writing your own plugin that implements the search lifecycle interface
Content modification using this technique is made before the data is consumed by the presentation layer - so the raw XML or JSON response is what is manipulated.
Writing your own plugin requires an understanding of Funnelback’s query processing pipeline, which follows the lifecycle of a query from when it’s submitted by a user to when the results are returned to the user. Writing plugins is covered in a separate course.
Tutorial: Use a plugin to manipulate search result titles as they are displayed
In this exercise we’ll make the same modification as in the previous exercise - to remove the : Free Download & Streaming : Internet Archive text from each title.
-
Log in to the search dashboard where you are doing your training.
See: Training - search dashboard access information if you’re not sure how to access the training. Ignore this step if you’re treating this as a non-interactive tutorial. -
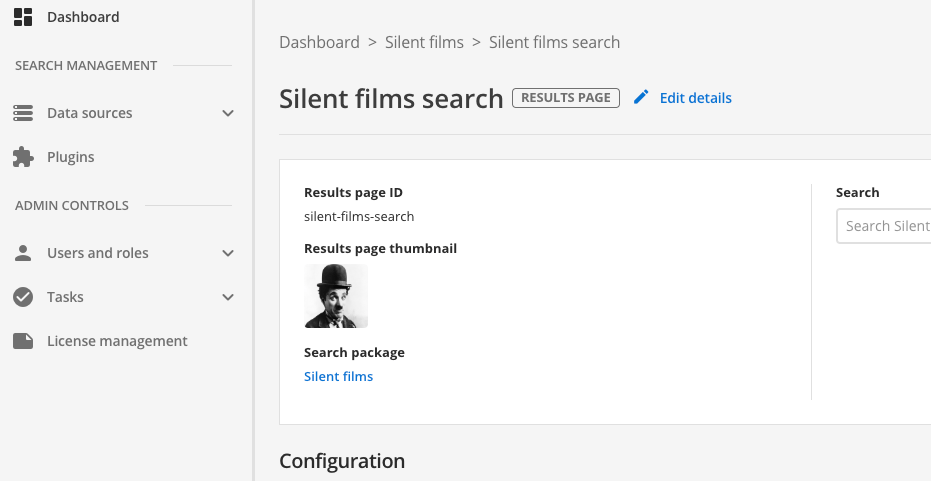
Navigate to the manage results page screen for the silent films search results page.
-
Run a search against the silent films search results page for buster and observe that the text for each result link ends with
: Free Download & Streaming : Internet Archive. This is the same as you saw in the previous exercise. We’ll now configure a plugin to remove the text. -
Navigate back to the search dashboard, then click the plugins item in the navigation. This opens up the plugins management screen.
-
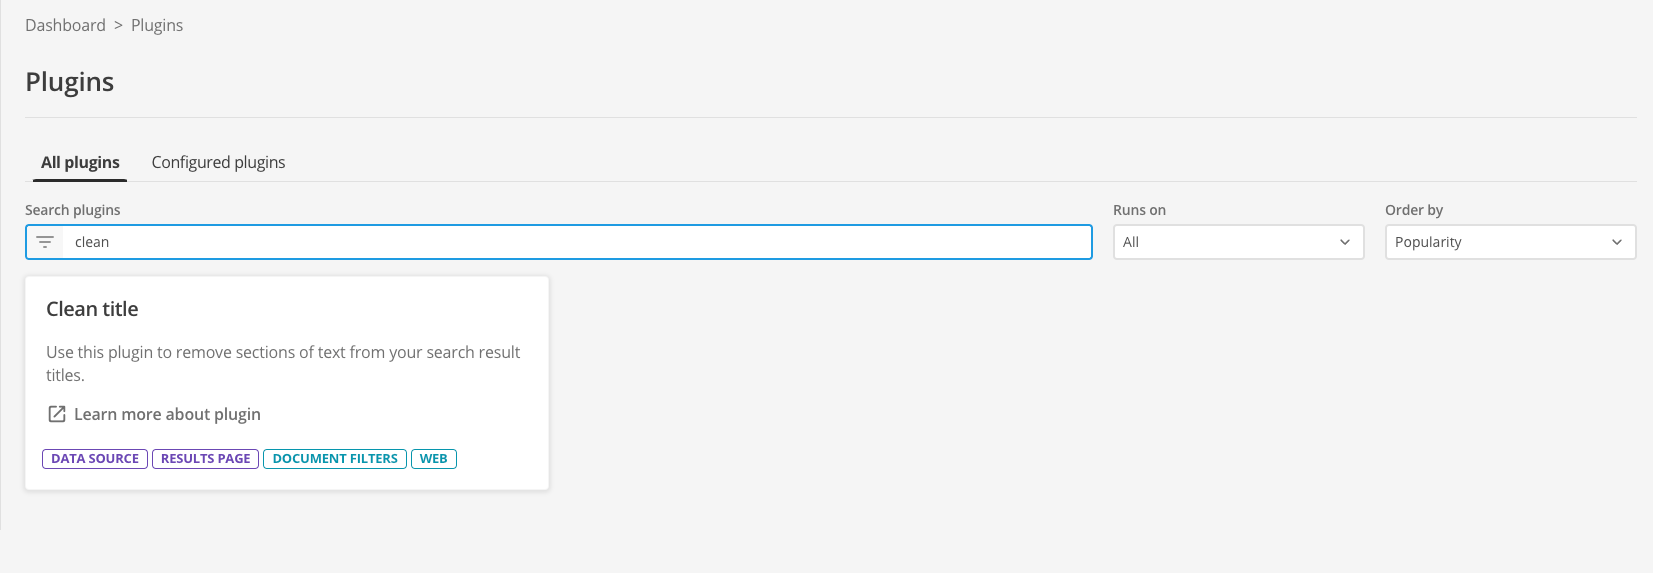
The extensions screen lists all the available plugins.
-
Locate the clean title plugin in the list. The tile presents some background information on the plugin, and provides a link to the documentation for the plugin
-
Click the learn more about plugin link. This opens the plugin documentation in a new browser tab. Have a quick read of the documentation then switch back to the tab containing the configuration screen. Don’t close the documentation tab as you’ll want to refer to this to configure the plugin.
-
Click on the plugin tile. This opens the wizard which guides you through the steps required to configure your plugin. The view documentation button can be used to access the plugin documentation if you need more information.
-
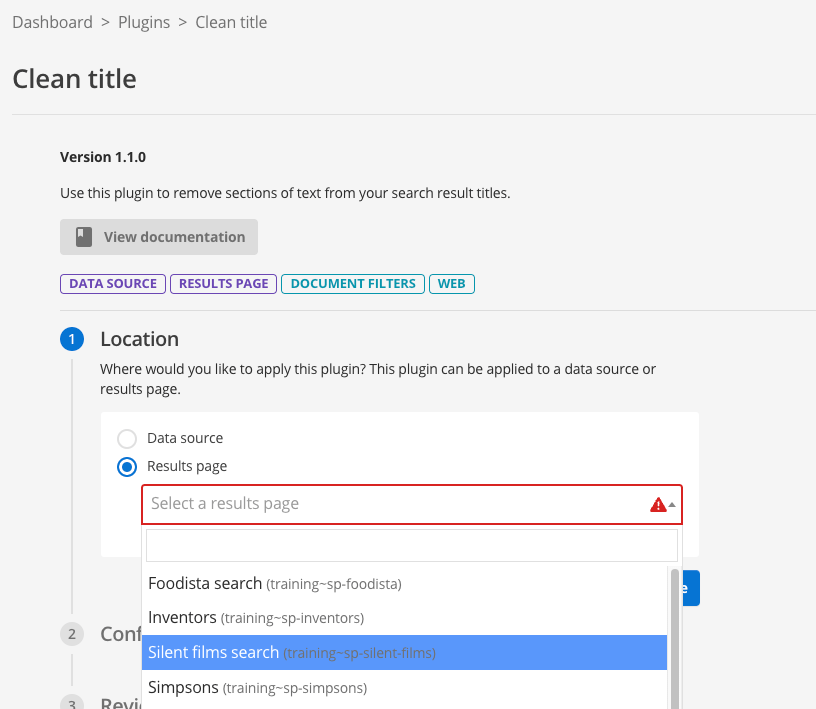
The location step is where you choose where to enable the plugin. If the plugin works on both data sources and results pages you will need to make a choice where you want the plugin enabled by selecting the appropriate radio button. You are then presented with a select list, where you select the results page or data source where you would like to enable the plugin. In this exercise we will enable the plugin on the results page. Select the results page radio button, then select Silent films search from the list.
-
In the configuration keys step you are presented with the various fields that you can configure for the plugin you’ve selected..
-
Add a new parameter with parameter 1 set to
titleand the value set to: Free Download & Streaming : Internet Archive, then press the proceed button. This configures the plugin with a rule called title to remove the string of text. The plugin supports multiple clean title rules. You define these in the same way, but with a different identifier (parameter 1).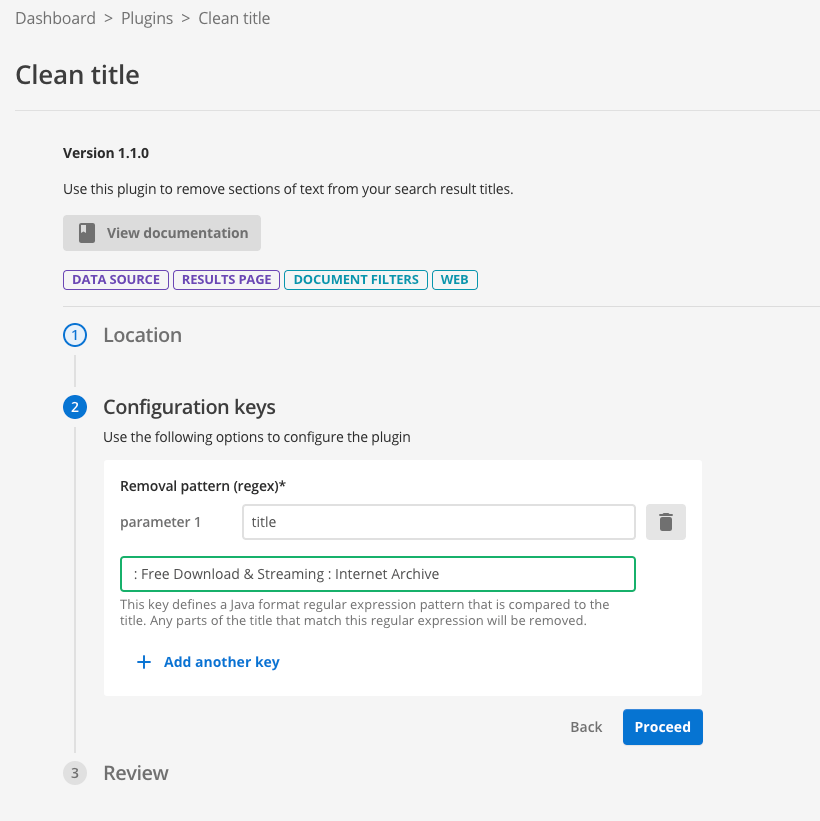
-
You will be presented with a summary outlining what you’ve configured for the plugin. Review the summary then click the finish button to commit the plugin configuration to your results page.
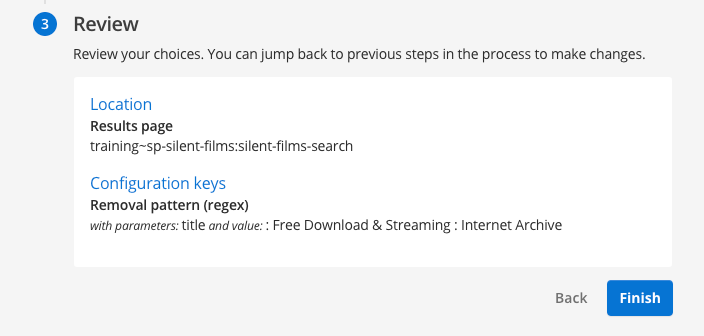
-
You will be directed to the results page management screen, where you can test out your plugin before you publish the changes. Run a search for buster (against the preview version of the results page) and observe that the titles have been cleaned.

-
Run the same search (against the live version of the results page) and observe that the titles still display text that you configured the plugin to clean. This is because the plugin configuration hasn’t been published.
-
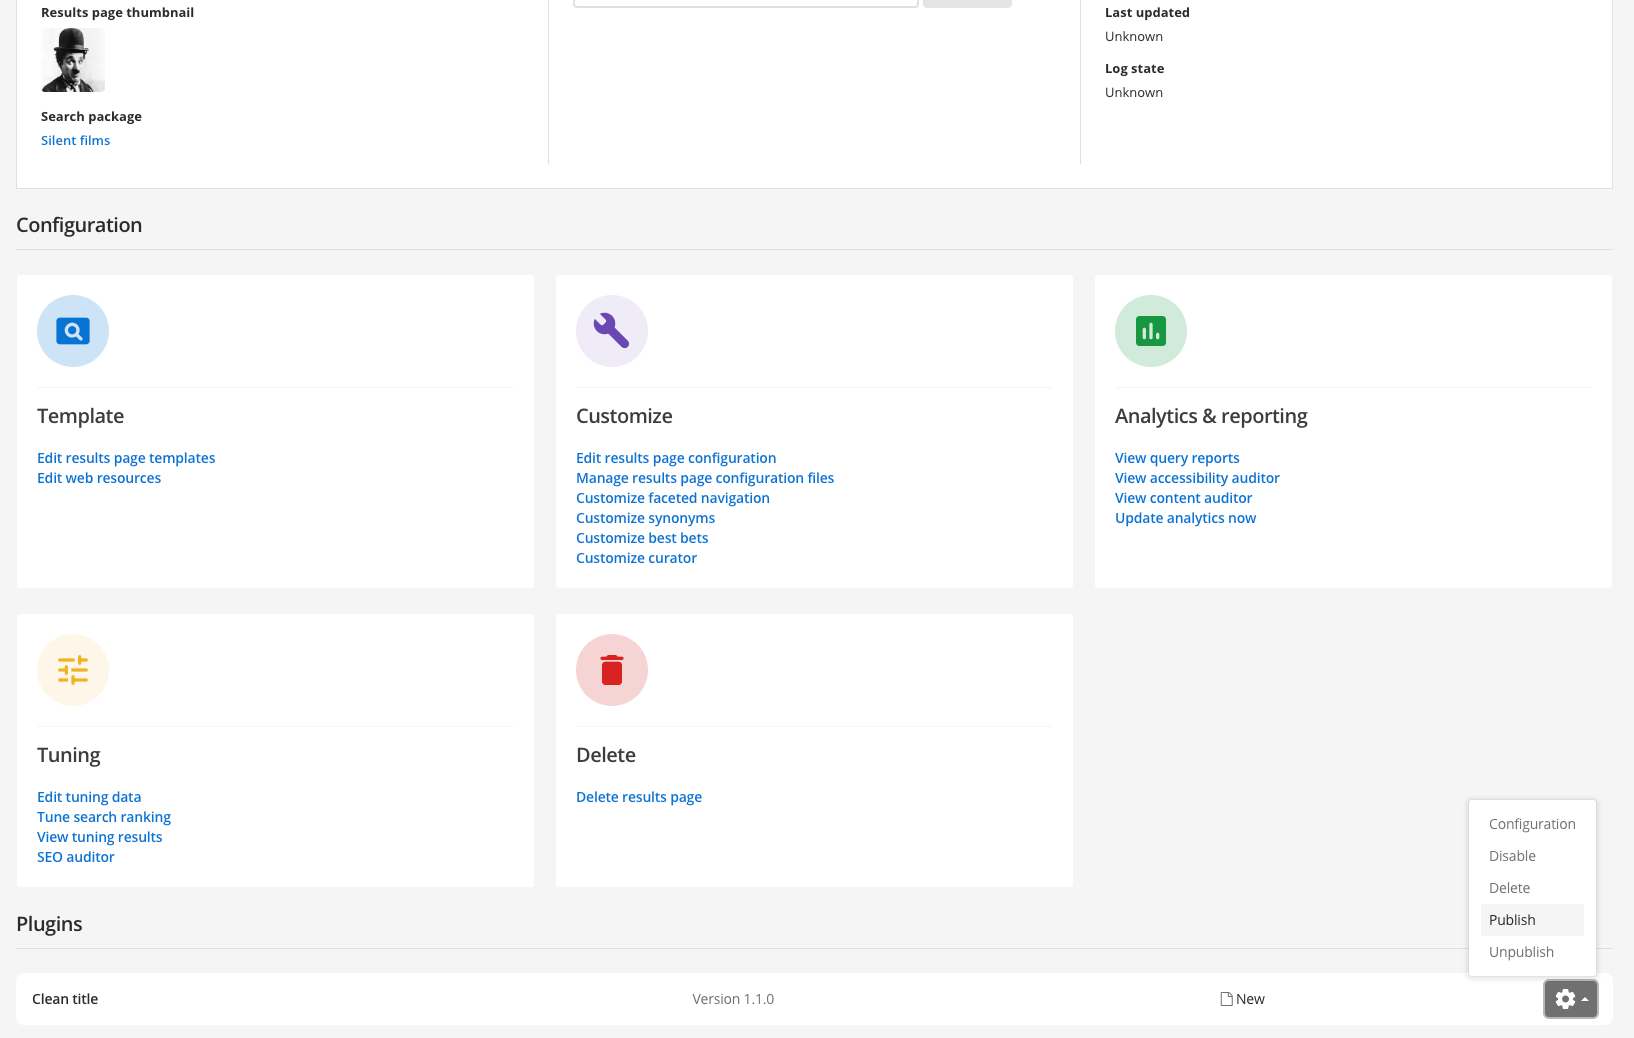
Return to the results page management screen and publish the plugin. Scroll down to the plugins heading then select publish from the menu for the clean title plugin. Observe that the menu also provides options to disable, delete and unpublish your plugin.
-
Rerun the search (against the live version of the results page) and observe that the titles are now cleaned.
Modify the after it is gathered, but before it is indexed (document filtering)
This technique takes the data that is downloaded by Funnelback and modifies this data before it is stored to disk for indexing. This process is known as document filtering. Many core Funnelback functions depend on filtering, and you can add additional filters as required.
This is the most robust way of manipulating the content as it happens much closer to the source. However, it is more difficult to make these modifications as the data needs to be re-gathered, modified and then re-indexed for a change to be applied.
There are three options available within Funnelback for this type of modification:
-
Using a built-in filter (such as the metadata scraper)
-
Using a filter (or jsoup filter) plugin from the plugin library
-
Writing your own plugin that implements the filter interface
Content modification using this technique is made before the data is indexed meaning the changes are captured within the search index.
This has the following benefits:
-
Search lookup and ranking will take into account any modifications
-
Features such as faceted navigation and sorting will work correctly
Filtering vs query-time modification
Consider a website where titles in one section have a common prefix, but this isn’t uniform across the site.
If you clean your titles by removing common start characters, but these don’t apply to every page then if you choose to sort your results by title the sort will be incorrect if you apply one of the previous modification techniques (updating at query time, or updating in the template). This is because Funnelback sorts the results when the query is made and if you change the title that you are sorting on after the sorting happens then the order might be incorrect.
A similar problem occurs if your filter injects metadata into the document - if you try to do this at query time you can’t search on this additional metadata because it doesn’t exist in the index.
Writing your own plugin requires an understanding of Funnelback’s filter framework. Writing plugins is covered in a separate course.
How does filtering work?
This is achieved using a series of document filters which work together to transform the document. The raw document is the input to the filter process and filtered text is the output. Each filter transforms the document in some way. For example, extracting the text from a PDF which is then passed on to the next filter which might alter the title or other metadata stored within the document.
Filters operate on the data that is downloaded by Funnelback and any changes made by filters affect the index.
All Funnelback data source types can use filters, however the method of applying them differs for push data sources.
There are two sources of filters:
-
A small set of built-in filters are included with Funnelback. These filters include Tika, which converts binary documents such as PDFs into indexable text, and the metadata scraper which can be used to extract and insert additional metadata into a document.
-
Filters provided by enabling a plugin that implements one of the filtering interfaces. Once a plugin is enabled, the filter that it provides works in exactly the same way as a built-in filter.
|
A full update is required after making any changes to filters as documents that are copied during an incremental update are not re-filtered. For push collections all existing documents in the index will need to be re-added to the index so that the content is re-filtered. Full updates are started from the advanced update screen. |
The filter chain
During the filter phase the document passes through a series of general document filters with the modified output being passed through to the next filter. The series of filters is referred to as the filter chain.
There are a number of preset filters that are used to perform tasks such as extracting text from a binary document, and cleaning the titles.
A typical filter process is shown below. A binary document is converted to text using the Tika filters. This extracts the document text and outputs the document as HTML. This HTML is then passed through the JSoup filter which runs a separate chain of JSoup filters which allow targeted modification of the HTML content and structure. Finally, a filter (provided by an enabled plugin) performs a number of modifications to the content.

JSoup filters should be used for HTML documents when making modifications to the document structure, or performing operations that select and transform the document’s DOM. Custom JSoup filter plugins can be written to perform operations such as:
-
Injecting metadata
-
Cleaning titles
-
Scraping content (for example, extracting breadcrumbs to metadata)
The filter chain is made up of chains (ANDs) and choices (ORs) - separated using two types of delimiters. These control if the content passes through a single filter from a set of filters (a choice, indicated by commas), or through each filter (a chain, indicated by colons).
The set of filters below would be processed as follows: The content would pass through either Filter3, Filter2 or Filter1 before passing through Filter4 and Filter5.
Filter1,Filter2,Filter3:Filter4:Filter5There are some caveats when specifying filter chains which are covered in more detail in the documentation.
There is also support for creating additional general document filters which are implemented when writing a plugin. Plugin document filters receive the document’s URL and text as an input and must return the transformed document text ready to pass on to the next filter. The plugin document filter and can do pretty much anything to the content, and is written in Java.
Plugin document filters should be used when a JSoup filter (or plugin jsoup filter) is not appropriate. Plugin document filters offer more flexibility but are more expensive to run. Plugin document filters can be used for operations such as:
-
Manipulating complete documents as binary or string data
-
Splitting a document into multiple documents
-
Modifying the document type or URL
-
Removing documents
-
Transforming HTML or JSON documents
-
Implementing document conversion for binary documents
-
Processing/analysis of documents where structure is not relevant
General document filters
General document filters make up the main filter chain within Funnelback. A number of built-in filters ship with Funnelback and the main filter chain includes the following filters by default:
-
TikaFilterProvider: converts binary documents to text using Tika
-
ExternalFilterProvider: uses external programs to convert documents. In practice this is rarely used.
-
JSoupProcessingFilterProvider: converts the document to and from a JSoup object and runs an extra chain of JSoup filters.
-
DocumentFixerFilterProvider: analyzes the document title and attempts to replace it if the title is not considered a good title.
There are a number of other built-in filters that can be added to the filter chain, the most useful being:
-
MetadataNormaliser: used to normalize and replace metadata fields.
-
JSONToXML and ForceJSONMime: Enables Funnelback to index JSON data.
-
CSVToXML and ForceCSVMime: Enables Funnelback to index CSV data.
-
InjectNoIndexFilterProvider: automatically inserts noindex tags based on CSS selectors.
Plugin document filters that operate on the document content can also be implemented. However, for html documents most filtering needs are best served by writing a JSoup filter. JSoup or plugin Jsoup filters are appropriate when filtering is required on non-html documents, or to process the document as a whole piece of unstructured content.
The documentation includes some detailed examples of general document filters.
HTML document (JSoup) filtering
HTML document (JSoup) filtering allows for a series of micro-filters to be written that can perform targeted modification of the HTML document structure and content.
The main JSoup filter, which is included in the filter chain takes the HTML document and converts it into a structured DOM object that the JSoup filters can then work with using DOM traversal and CSS style selectors, which select on things such as element name, class, ID.
A series of JSoup filters can then be chained together to perform a series of operations on the structured object - this includes modifying content, injecting/deleting elements and restructuring the HTML/XML.
The structured object is serialised at the end of the JSoup filter chain returning the text of the whole data structure to the next filter in the main filter chain.
Funnelback runs a set of Jsoup filters to support content auditor by default.
Funnelback also includes a built-in Jsoup filter:
-
MetadataScraper: used to extract content from an HTML document and insert it as metadata.
Tutorial: Using the metadata scraper
In this exercise the metadata scraper built-in filter will be used to extract some page content for additional metadata.
| Scraping of content is not generally recommended as it depends on the underlying code structure. Any change to the code structure has the potential to cause the filter to break. Where possible avoid scraping and make any changes at the content source. |
-
The source data must be analyzed before any filter rules can be written - this informs what filtering is possible and how it may be implemented. Examine an episode page from the source data used by the simpsons - website data source. Examine the episode page for Dancin' Homer and observe that there is potential useful metadata contained in the vitals box located as a menu on the right hand side of the content. Inspect the source code and locate the HTML code to determine if the code can be selected. Check a few other episode pages on the site and see if the code structure is consistent.
-
The vitals information is contained within the following HTML code:
<div class="sidebar vitals"> <h2>Vitals</h2> <p class="half">PCode<br> 7F05</p> <p class="half">Index<br> 2×5</p> <p class="half">Aired<br> 8 Nov, 1990</p> <p class="half">Airing (UK)<br> unknown</p> <p>Written by<br> Ken Levine<br>David Isaacs </p> <p>Directed by<br> Mark Kirkland <p>Starring<br>Dan Castellaneta<br>Julie Kavner<br>Nancy Cartwright<br>Yeardley Smith<br>Harry Shearer</p><p>Also Starring<br>Hank Azaria<br>Pamela Hayden<br>Daryl L. Coley<br>Ken Levine</p><p>Special Guest Voice<br>Tony Bennett as Himself<br>Tom Poston as Capitol City Goofball </div>There appears to be enough information and consistency available within the markup to write JSoup selectors to target the content. The elements can be selected using a JSoup CSS selector
div.vitals p. Once selected the content can be extracted and written out as metadata. -
Log in to the search dashboard where you are doing your training.
See: Training - search dashboard access information if you’re not sure how to access the training. Ignore this step if you’re treating this as a non-interactive tutorial. -
Locate the simpsons - website data source and manage the configuration.
-
Create a metadata scraper configuration file. Click the manage data source configuration files item on the settings panel. Click the add new button and create a metadata_scraper.json configuration file.
[
  {
    "urlRegex": ".*",  (1)
    "metadataName": "simpsons.pcode",  (2)
    "elementSelector": "div.vitals p",  (3)
    "applyIfNoMatch": false,
    "extractionType": "html", (4)
    "processMode": "regex", (5)
    "value": "(?is)^Pcode\\s*?<br>(.*)\\s*", (6)
    "description": "Program code"
  }
]
1 Apply this rule to every URL crawled ( .*matches everything).2 Write out a <meta name="simpsons.pcode">metadata field if anything is extracted3 Sets the Jsoup element selector. This will result in the content of each of the <p>tags contained within the<div>ofclass=vitalsbeing processed.4 Extracts the content of the selected element as html. When extracting as html this means the extracted content of each p tag will include any HTML tags. 5 Process the extracted content using the regular expression indicated in the valuefield.6 Regular expression that filters the extracted content. The regex capture groups are stored as the values of the metadata field indicated in the metadataName. This rule, when applied to the example HTML code above, will extract the PCode value and write it to a metadata field<meta name="simpsons.pcode" content="7F05"> -
Edit the date source configuration and add the
filter.jsoup.classeskey, adding theMetadataScraperto the end of the filter chain.
-
Run a full update of the data source (filter changes always require a full update to ensure everything is re-filtered).
-
Once the update is complete, check the
gather.logfor the update (from the live log files because the update was successful) and check for any errors. -
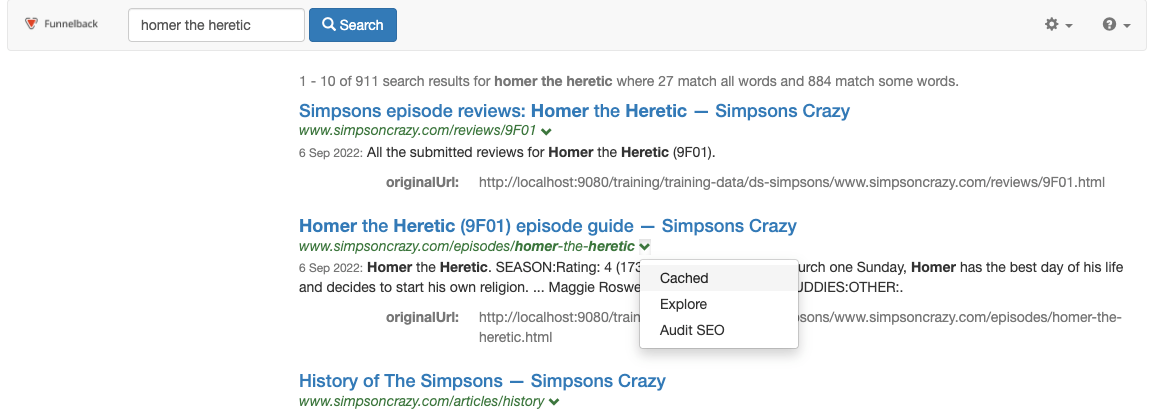
Search for the Homer the heretic and view the cached version for the episode guide.
-
View the page source and observe that a metadata field has been written (by the JSoup filter) into the source document. Remember that the filter is modifying the content that is stored by Funnelback, which is reflected in what is inside the cached version (it won’t modify the source web page). This additional metadata can be mapped to a metadata class for use in search, faceted navigation etc. in the same way as other document metadata.

Jsoup filters will write additional metadata into the HTML document source that is stored by Funnelback and the cache version can be used to verify that the metadata is written. For document filters the metadata is not written into the HTML source, but into a special metadata object that is indexed along with the HTML source. Metadata added via document filters will not be visible when viewing the cached version.
Extended exercise: Using the metadata scraper
-
Add additional metadata scraper rules to extract additional fields from the vitals table above.
-
Map the additional metadata and return the information in the search results.