Implementer training - auto-completion
Funnelback’s auto-completion provides the user with real-time suggestions as query terms are typed into the search box.
THe auto-completion returns one or more columns of suggestions, with each column derived from independent sources.
Auto-completion datasets
Funnelback supports auto-completion returned from one or more sources (auto-completion datasets), usually formatted as separate columns in the auto-completion drop down menu.

The datasets supported are:
-
Up to 1 simple auto-completion dataset: simple auto-completion is quick and easy to set up and returns suggestions that are words and phrases found within the content.
-
Zero or more structured auto-completion datasets: Structured auto-completion provides advanced auto-completion based on structured CSV data. The suggestions can be grouped by type and provide rich content (such as thumbnail images and other data) in the suggestion. Clicking on a suggestion can run a query, take the user directly to a resource or run some JavaScript.
-
Up to 1 recent searches dataset: Recent searches auto-completion is derived from the user’s search history. This is available when sessions are enabled on a user’s search.
The example above shows auto-completion from three independent datasets. The suggestions column is simple auto-completion from words and phrases present in the complete index being searched. The people and courses columns are both structured auto-completion based on structured CSV data.
The general approach for configuring the datasets is to have the simple auto-completion configured on the profile that is queried by the user (usually _default), and additional profiles created for each CSV dataset.
For this approach to work the Funnelback collection should be configured to generate auto-completion using spelling suggestions and results page CSV files.
By default, Funnelback will generate simple auto-completion. If you are using the default Funnelback template the simple auto-completion should automatically work after you have updated your collection.
Tutorial: Attach auto-completion to a Funnelback template
This exercise outlines the bits of code you need to add to a template in order to get auto-completion working with the Concierge plugin. If you’re using the default Funnelback template the code will already be there.
-
Log in to the search dashboard where you are doing your training.
See: Training - search dashboard access information if you’re not sure how to access the training. Ignore this step if you’re treating this as a non-interactive tutorial. -
Open up the results page management screen for the inventors results page (female inventors search package).
-
Edit the default template (
simple.ftl) by selecting edit results page templates from the templates panel. -
Locate the search box (hint: it is an input with a
name=query) and ensure it has a unique ID parameter. The search box should already haveid=queryset so no change is required to the search box for this page in order to add the auto-completion. When working with your own search boxes you will need to ensure you have a unique id assigned. This provides a unique identifier can be used to attach the auto-completion.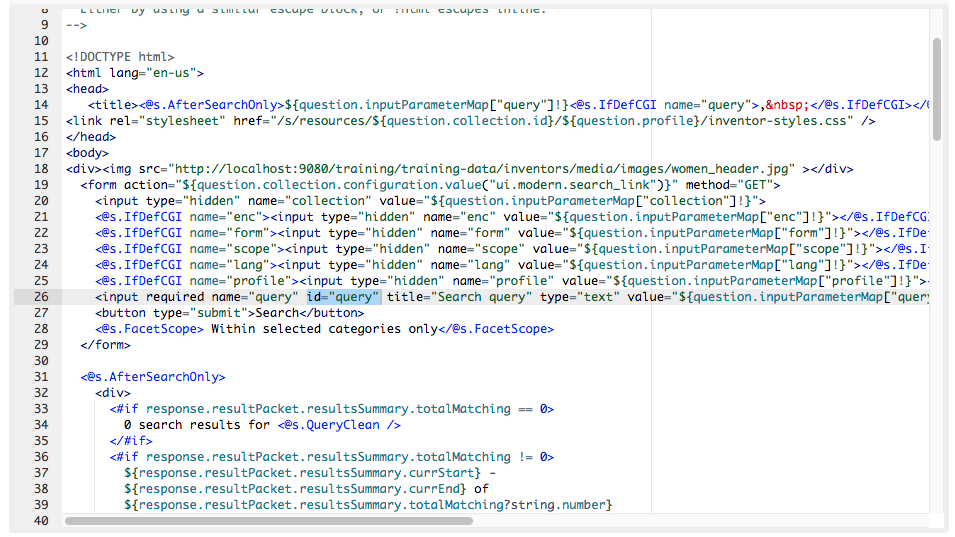
-
Load the required JavaScript libraries. Ensure that the jQuery, Typeahead, Handlebars and the
funnelback.autocompletion-2.6.0.jsJavaScript libraries are loaded from the template source. Add the following code to the bottom of the template, before the</body>tag. The${GlobalResourcesPrefix}variable is expanded into the base path on the Funnelback server so that the full URL will reference the correct file. The<#if>statement just checks to see if auto-completion is enabled for the search before importing the JavaScript libraries. Note: these files should be loaded in the order below.<script src="${GlobalResourcesPrefix}thirdparty/jquery-3.6/jquery.min.js"></script> <#-- Standard typeahead and handlebars libraries - required for auto-completion --> <#if question.currentProfileConfig.get('auto-completion') == 'enabled'> <script src="${GlobalResourcesPrefix}js/typeahead.bundle-0.11.1.min.js"></script> <script src="${GlobalResourcesPrefix}thirdparty/handlebars-4.7/handlebars.min.js"></script> <script src="${GlobalResourcesPrefix}js/funnelback.autocompletion-2.6.0.js"></script> </#if> -
Configure auto-completion options for the
funnelback.autocompletion-2.6.0.jsby adding the following block of JavaScript to the bottom of the file, immediately after thefunnelback.autocompletion-2.6.0.jsis loaded. This block of code attaches theautocompletionfunction to the element with the ID ofqueryand configures a list of parameters that will be passed to the auto-completion web service by the JavaScript function.<#if question.currentProfileConfig.get('auto-completion') == 'enabled'> <script> jQuery(document).ready(function() { jQuery('#query').autocompletion({ datasets: { <#if question.currentProfileConfig.get('auto-completion.standard.enabled')?boolean> organic: { collection: '${question.collection.id}', profile : '${question.profile}', program: '<@s.cfg>auto-completion.program</@s.cfg>', format: '<@s.cfg>auto-completion.format</@s.cfg>', alpha: '<@s.cfg>auto-completion.alpha</@s.cfg>', show: '<@s.cfg>auto-completion.show</@s.cfg>', sort: '<@s.cfg>auto-completion.sort</@s.cfg>', group: true }, </#if> }, length: <@s.cfg>auto-completion.length</@s.cfg> }); }); </script> </#if>If you wish to attach auto-completion to a search box with an ID of
searchboxthen you would replacejQuery('#query').autocompletion({with
jQuery('#searchbox').autocompletion({You can also define multiple code blocks similar to the one above, but attaching to different IDs if you wish to have auto-completion bind to more than one search box. Each code block can be configured with different auto-completion sources and configuration parameters.
-
Add CSS styling to handle the auto-completion suggestions. Add the following CSS import to the
<head>section of the template, then save the changes to your template.<#if question.currentProfileConfig.get('auto-completion') == 'enabled'> <link rel="stylesheet" type="text/css" href="${GlobalResourcesPrefix}css/funnelback.autocompletion-2.6.0.css" /> </#if> -
Test the auto-completion by previewing the search results page and start typing a query into the search box. Suggestions should be returned as you type.

Attach auto-completion to any search box
The above process can be used to attach Funnelback driven auto-completion to any search box on your website - the search box does not need to be part of a Funnelback search results page.
The HTML code needs to be cleaned when attaching to a search box that is not part of a Funnelback template (.ftl) file - any Freemarker macros or variables in the above examples will need to be removed for these non-Funnelback template pages. This means that full paths to the funnelback.autocompletion-2.6.0.js will be required and the configuration options that are auto-filled in the JavaScript configuration code (see above exercise) will need to be expanded to suitable values.
The simplest way to achieve this may be to view the HTML source of a search results page that includes the configured auto-completion and copy this into your web page, then fix any URLs that need to be made into absolute URLs.
For example: inspect the source code for the page in the previous example and observe the auto-completion JavaScript block.
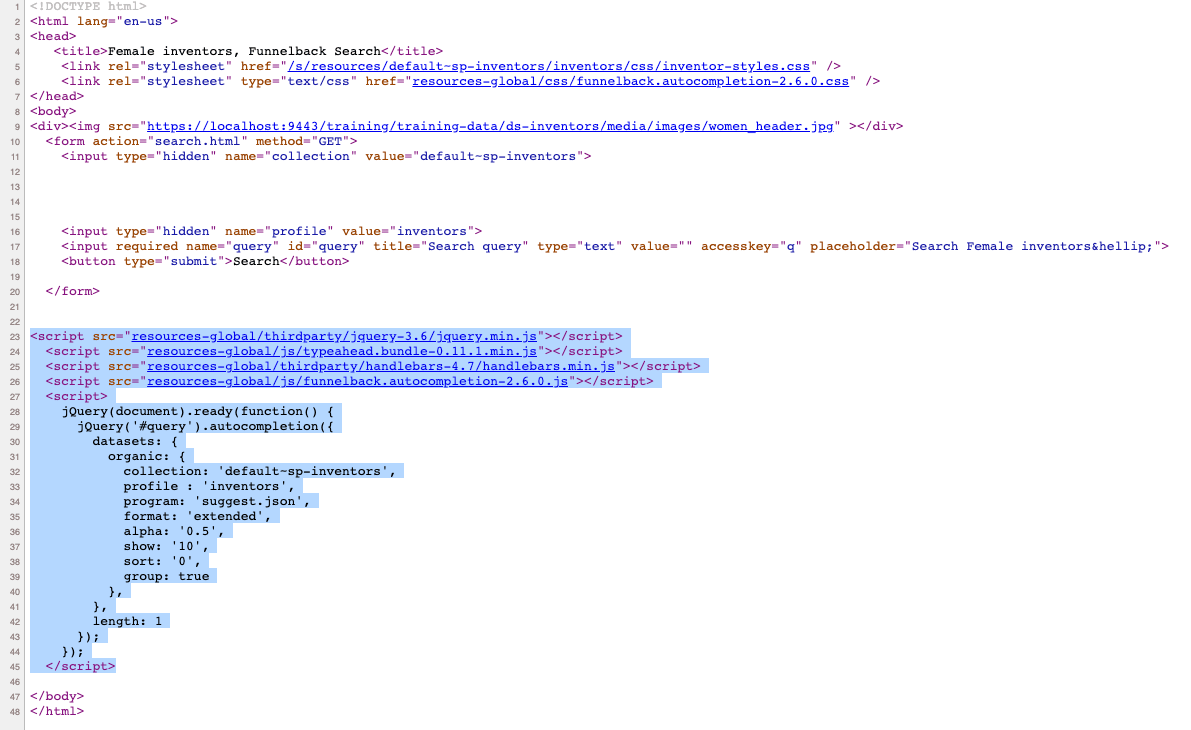
Placing the highlighted code, plus the JavaScript imports (jQuery, Typeahead etc.) and the auto-completion stylesheet include into your own web page or site template allows you to attach auto-completion to your website’s search box. You will also need to include relevant styling to display the auto-completion (or also include the CSS file in your page code).
| If your web page already uses any of the dependencies (JQuery, Typeahead etc.) then you shouldn’t import these again, just make sure you load the auto-completion Javascript code (and the configuration code) after the dependencies have loaded. |
Auto-completion Javascript plugin compatibility
The funnelback.autocompletion-2.6.0.js library that ships with Funnelback has some Javascript dependencies.
The funnelback.autocompletion-2.6.0.js code is only tested the bundled versions of jQuery, Typeahead and Handlebars. Although it has been found to be compatible with other versions, correct functioning is not guaranteed and the funnelback.autocompletion-2.6.0.js file should be treated as a sample implementation of integrating with the auto-completion web service. It should also be noted that if it is integrated with a website that also uses any of these dependencies then the website should be updated to use the same versions of as Funnelback, or some changes might be required to the funnelback.autocompletion-2.6.0.js code that is imported into existing website designs.
| Funnelback’s auto-completion web service which returns the suggestions as a JSON packet is not tied to any particular technologies or versions of JQuery, and you could implement your own auto-completion Javascript code to talk to the auto-completion web service. |
Auto-completion configuration
There are a numerous options available when configuring auto-completion.
A number of settings control the generation of auto-completion indexes and how they are interpreted by the auto-completion web service.
The other settings control how the Javascript auto-completion plugin interacts with the web service and displays the suggestions.
These options configure parameters that are sent to Funnelback’s auto-completion web service controlling behavior such as the number of suggestions to request, the number of keystrokes that are entered before the first request is made and how to sort the suggestions. Options also define how the auto-completion is displayed and other aspects of how the auto-completion behaves.
These options can be adjusted via the search dashboard and configure the integration of funnelback.autocompletion-2.6.0.js with the auto-completion web service.
The auto-completion options set via the search dashboard will only have an effect if you use the included JavaScript (funnelback.autocompletion-2.6.0.js) or if your implementation is designed to read the same options from Funnelback’s configuration and will only affect pages generated by Funnelback. A site search box that has been configured to display auto-completion has the values hardcoded in the JavaScript.
|
Tutorial: Configure simple auto-completion
-
Access the results page management for the inventors results page (female inventors search package).
-
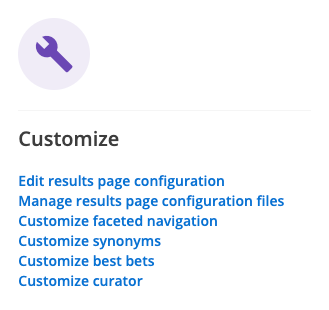
Select edit results page configuration from the customize panel.
-
Configure a simple auto-completion dataset. Check to see if an
auto-completion.sourceparameter is set for the results page. Clickadd newand look up theauto-completion.source. For simple auto-completion this needs to be set to a value ofinternal. Save and then publish the setting.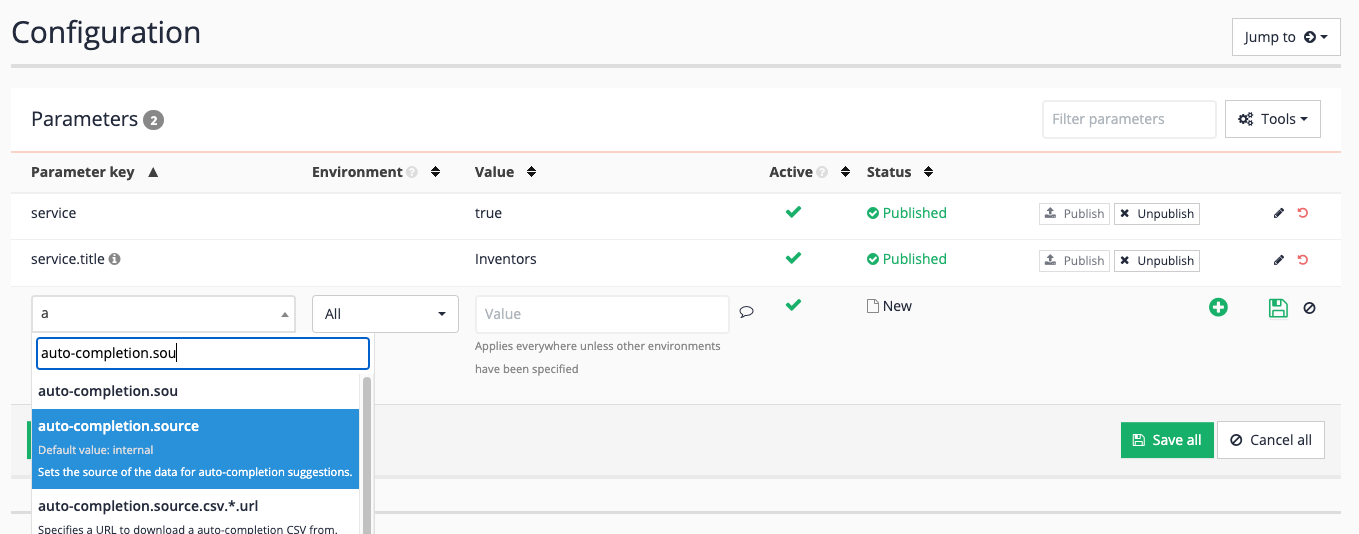
Observe that the default value for
auto-completion.sourceisinternal. This means you don’t need to set theauto-completion.sourcebut you can if you want to. For this example set the value as it will mean that you can see that this has been set when you view the results page configurations. This is all that is required to configure a simple auto-completion source. If you change the value ofauto-completion.sourceyou will need to rebuild the search index. -
We now make some basic changes to configure how the auto-completion widget works. The auto-completion widget is a Javascript program that is designed to interact with Funnelback’s auto-completion web service - sending through the user’s keystrokes as they are typed and formatting the set of returned suggestions.
Set auto-completion to occur when only one character is entered by the user. Adjust the minimum number of keystrokes before auto-completion is triggered. Set the following configuration key:
auto-completion.lengthto a value of1. Don’t forget that you need to publish the setting for it to take effect on the live version of the results page.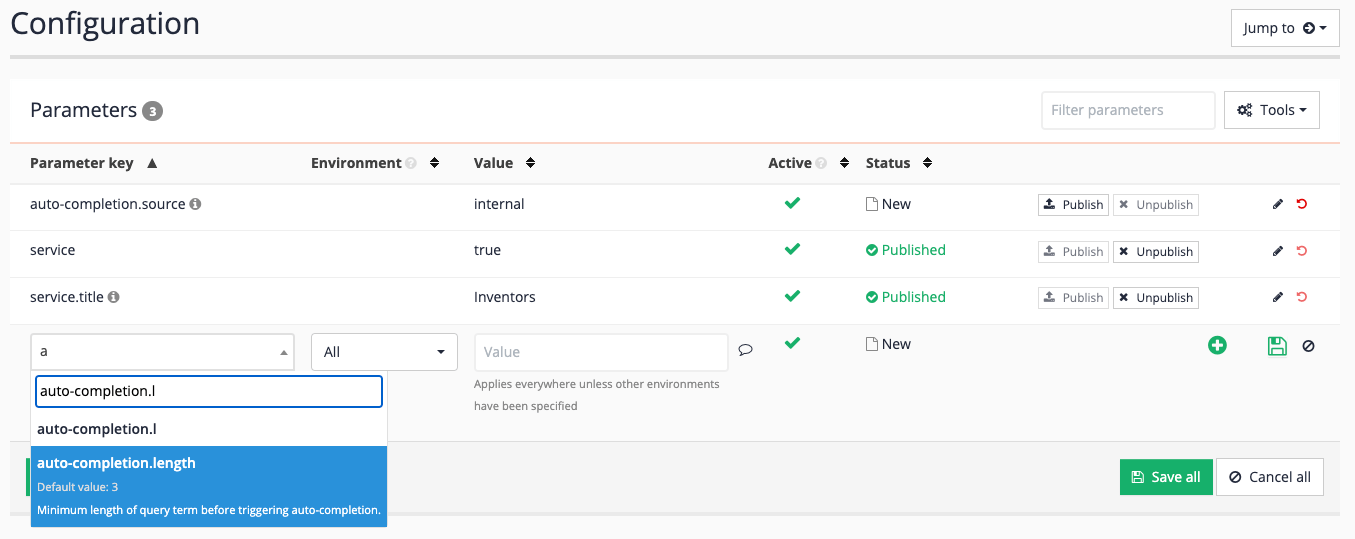
-
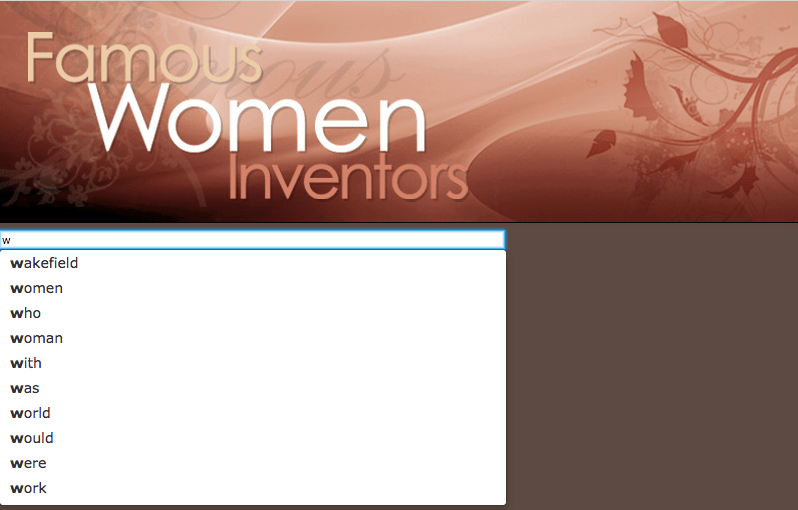
Preview the search and test the effect of this change. Auto-completion suggestions should now start to appear after a single character is entered into the search box.
-
Inspect the page source and observe the JavaScript configuration block at the end of the HTML file has been populated with the values from the administration interface. The other values within the configuration are populated from the default configuration values.
If you are integrating auto-completion with your site’s search box use this generated code as a guide for how to set the options in your page code. <script> jQuery(document).ready(function() { jQuery('#query').autocompletion({ datasets: { organic: { collection: 'inventors', profile : '_default_preview', program: '../s/suggest.json', format: 'extended', alpha: '0.5', show: '10', sort: '0', group: true }, }, length: 1 }); }); </script>
Structured auto-completion
The search suggestions displayed in simple auto-completion are words found in the indexed content. This improves a user’s search experience by reducing the chance of running a search that doesn’t return any results. These suggestions are generated automatically as part of the update and are a very powerful enhancement that can be added to the search.
Structured auto-completion is an extension of the functionality provided by simple auto-completion. Structured auto-completion generates suggestions based off auto-completions defined in CSV data, or by configuring the auto-completion plugin to generate structured auto-completion from metadata contained within the search index. The suggestions can be grouped by type and provide rich content (such as thumbnail images and other data) in the suggestion. The action performed when clicking on a suggestion is configurable and can run a query, take the use directly to a resource or run some JavaScript.
The CSV file can be edited directly from within Funnelback or uploaded via the file manager.
The CSV file can also be generated from the Funnelback index using the auto-completion plugin.
The CSV file format used by auto-completion is detailed in the Funnelback documentation
The CSV file contains 8 columns:
-
Trigger: This is the word, or set of words that will trigger the suggestion to display. The keywords that are input by the user are left matched against this trigger.
-
Weight: This is the weighting to apply to the suggestion. Range is 0 - 999. This weight is used to determine the order that suggestions will display when default sorted. Choose a high value (for example, 900) as your starting point and work from there - for most applications having the same weight of 900 for all the rich suggestions works well. The weighting is returned in the JSON (when you view the auto-completion web service response - see earlier section from the organic auto-completion exercise).
-
Display content: This is what is displayed to the user - it can be plain text (like for the organic suggestions, a html fragment (as nested within a DIV), a JavaScript statement to execute or JSON data.
-
Display type: This field indicates the type of the display content used by the display content field.
-
Category group: This field can contain a string that is used to group the suggestions.
-
Category type: This field is currently unused and is left blank.
-
Action: This field contains either a keyword string, a URL or a JavaScript callback function. A keyword string will be run as a search (as though the user input the string into the search box, a URL will take a user directly to the URL and the JavaScript callback will be executed.
-
Action type: This field indicates the type of action above.
U(for URLs) is the most common choice for rich auto-completion.
Tutorial: Create structured auto-completion from a CSV file
-
Access the search dashboard and locate the female inventors search package. .
-
Create a results page for the CSV dataset. Click on the results page tab, then create a new results page called
Wikipedia autocompletion dataset. We will add custom structured auto-completions coming from Wikipedia data. -
Results pages automatically inherit the simple completions from the content included in the results page (which is whatever data sources are included in the parent search package, unless you scope the result set of your results page). To ensure we only get CSV completion in this profile, we need to configure the source data for completions and limit it to the CSV data only.
-
Configure a structured auto-completion dataset. Select edit results page configuration from the customize panel, and add an
auto-completion.source(similar process as you followed in the previous exercise). Set the value tocsvthen save and publish the setting. This configures Funnelback to generate the auto-completion for the Wikipedia autocompletion dataset results page using a CSV file namedauto-completion.csvthat is configured as part of the results page.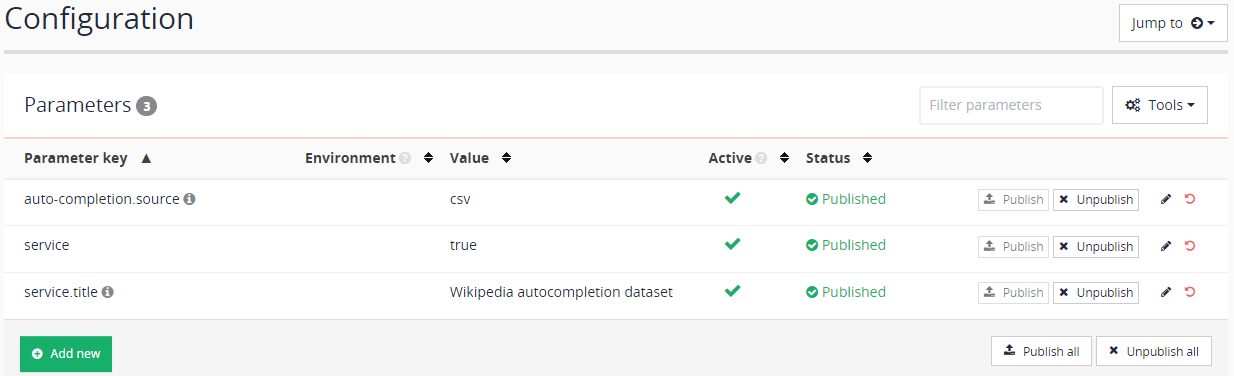
-
Return to the results page manage screen by clicking the Wikipedia autocompletion dataset link in the breadcrumb trail, then access the results page configuration file manager by clicking the manage results page configuration files item in the customize panel.
-
Create a new
auto-completion.csvfile. Click the add new button, then select auto-completion.csv from the drop-down menu. Click the save button to create the file.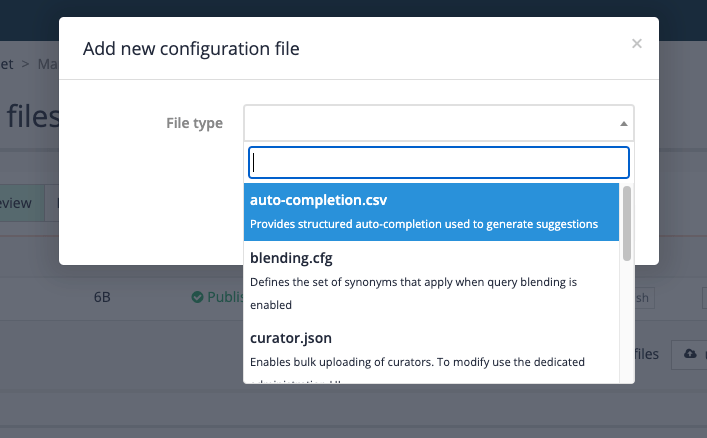
-
Observe that the file listing now displays an
auto-completion.csventry. Click on this entry to edit the file, then paste the following CSV into the editor window and save and publish the file.mary anderson,900,{\"name\":\"Mary Anderson\"\, \"yob\":\"1866\"\, \"yod\":\"1953\"\, \"thumb\":\"https://docs.squiz.net/training-resources/inventors-resources/mary_anderson.jpg\"\, \"inventions\":\"windshield wipers (1903)\"},J,Inventors,,https://en.wikipedia.org/wiki/Mary_Anderson_(inventor),U anderson,890,{\"name\":\"Mary Anderson\"\, \"yob\":\"1866\"\, \"yod\":\"1953\"\, \"thumb\":\"https://docs.squiz.net/training-resources/inventors-resources/mary_anderson.jpg\"\, \"inventions\":\"windshield wipers (1903)\"},J,Inventors,,https://en.wikipedia.org/wiki/Mary_Anderson_(inventor),U windshield wipers,900,{\"name\":\"Mary Anderson\"\, yob:\"1866\"\, yod:\"1953\"\, \"thumb\":\"https://docs.squiz.net/training-resources/inventors-resources/mary_anderson.jpg\"\, \"inventions\":\"windshield wipers (1903)\"},J,Inventors,,https://en.wikipedia.org/wiki/Mary_Anderson_(inventor),U wipers,890,{\"name\":\"Mary Anderson\"\, \"yob\":\"1866\"\, \"yod\":\"1953\"\, \"thumb\":\"https://docs.squiz.net/training-resources/inventors-resources/mary_anderson.jpg\"\, \"inventions\":\"windshield wipers (1903)\"},J,Inventors,,https://en.wikipedia.org/wiki/Mary_Anderson_(inventor),U barbara askins,900,{\"name\":\"Barbara Askins\"\, \"yob\":\"1939\"\, \"yod\":\"\"\, \"thumb\":\"https://docs.squiz.net/training-resources/inventors-resources/barbara_askins.jpg\"\, \"inventions\":\"new method for developing film (1978)\"},J,Inventors,,https://en.wikipedia.org/wiki/Barbara_Askins,U askins,890,{\"name\":\"Barbara Askins\"\, \"yob\":\"1939\"\, \"yod\":\"\"\, \"thumb\":\"https://docs.squiz.net/training-resources/inventors-resources/barbara_askins.jpg\"\, \"inventions\":\"new method for developing film (1978)\"},J,Inventors,,https://en.wikipedia.org/wiki/Barbara_Askins,U margaret knight,900,{\"name\":\"Margaret Knight\"\, \"yob\":\"1838\"\, \"yod\":\"1914\"\, \"thumb\":\"https://docs.squiz.net/training-resources/inventors-resources/margaret_knight.jpg\"\, \"inventions\":\"flat bottomed paper bag (1978)\"},J,Inventors,,https://en.wikipedia.org/wiki/Margaret_E._Knight,U knight,890,{\"name\":\"Margaret Knight\"\, \"yob\":\"1838\"\, \"yod\":\"1914\"\, \"thumb\":\"https://docs.squiz.net/training-resources/inventors-resources/margaret_knight.jpg\"\, \"inventions\":\"flat bottomed paper bag (1978)\"},J,Inventors,,https://en.wikipedia.org/wiki/Margaret_E._Knight,U ruth handler,900,{\"name\":\"Margaret Knight\"\, \"yob\":\"1916\"\, \"yod\":\"2002\"\, \"thumb\":\"https://docs.squiz.net/training-resources/inventors-resources/ruth_handler.jpg\"\, \"inventions\":\"Barbie doll (1959)\"},J,Inventors,,https://en.wikipedia.org/wiki/Ruth_Handler,U handler,890,{\"name\":\"Margaret Knight\"\,\"yob\":\"1916\"\, \"yod\":\"2002\"\, \"thumb\":\"https://docs.squiz.net/training-resources/inventors-resources/ruth_handler.jpg\"\, \"inventions\":\"Barbie doll (1959)\"},J,Inventors,,https://en.wikipedia.org/wiki/Ruth_Handler,U baby,900,"Disposable diaper (1949)",T,Inventions,,baby,Q baby,900,"Snugli baby carrier (1969)",T,Inventions,,baby,Q windshield wipers,900,"Windshield wipers (1903)",T,Inventions,,windshield wipers,Q car,900,"Windshield wipers (1903)",T,Inventions,,windshield wipers,QThis creates eight different suggestions, some of which have been duplicated several times with different triggers. The suggestions are grouped into two types - inventors and inventions. In this CSV file the inventor suggestions are JSON type suggestions that have Wikipedia pages as the target when you click on the suggestion. The inventions suggestions are text type suggestions that result in a query being run when you click on the suggestion.
Auto-completion is only generated for live results pages, so it is important that you do not forget to publish the CSV file. -
For auto-completion indexes to get generated you must run an update on any of the data sources that are contained in the parent search package. Navigate to the parent Female inventors search package by clicking on the Female inventors link in the breadcrumb trail, then scroll to the bottom of the page to manage the Female inventors - website data source. Rebuild the index by clicking the > advanced update menu item, from the female inventors data source quick actions.
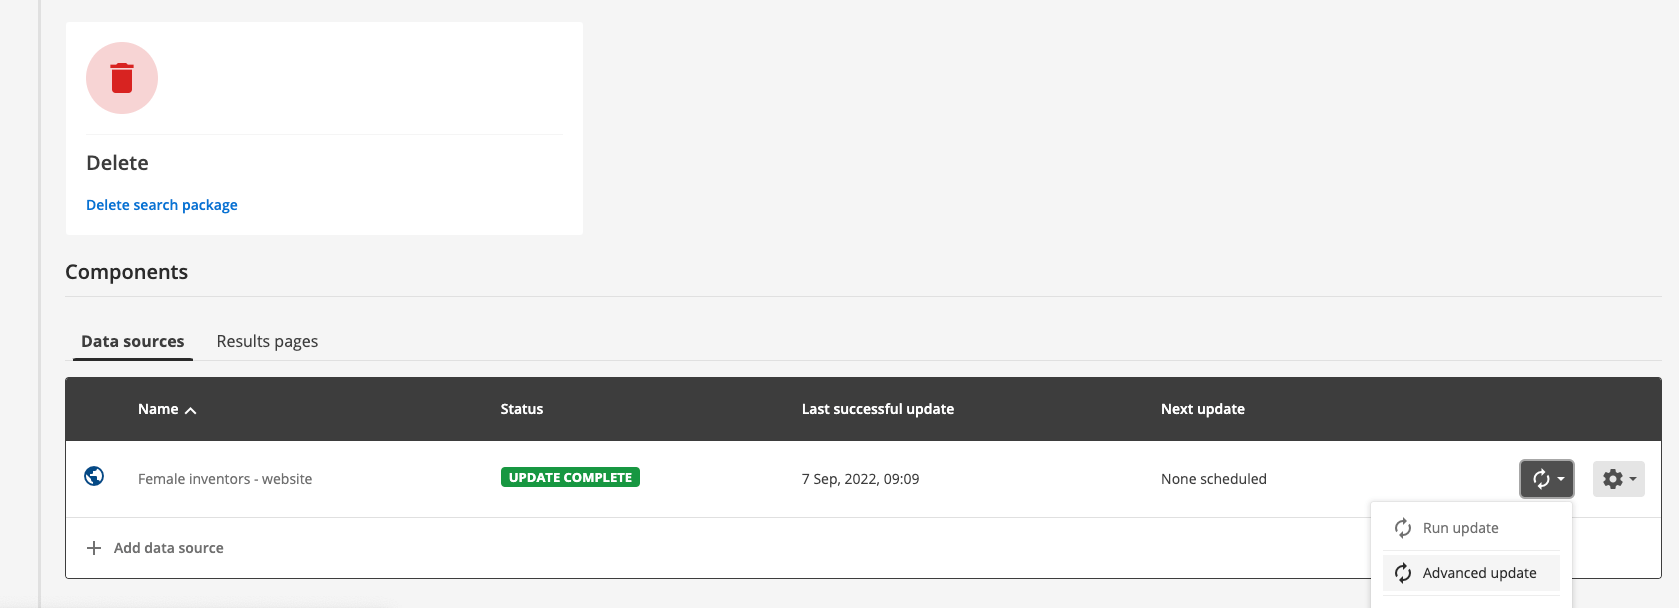
The advanced update option can also be accessed from the search dashboard home page, and the management page for the data source you want to update. -
Select the rebuild live view option from the rebuild index category, then click the update button. When you rebuild the live index this just rebuilds the indexes for your data source using the data that was previously downloaded. This differs from a full update which will also regather the content from the website.
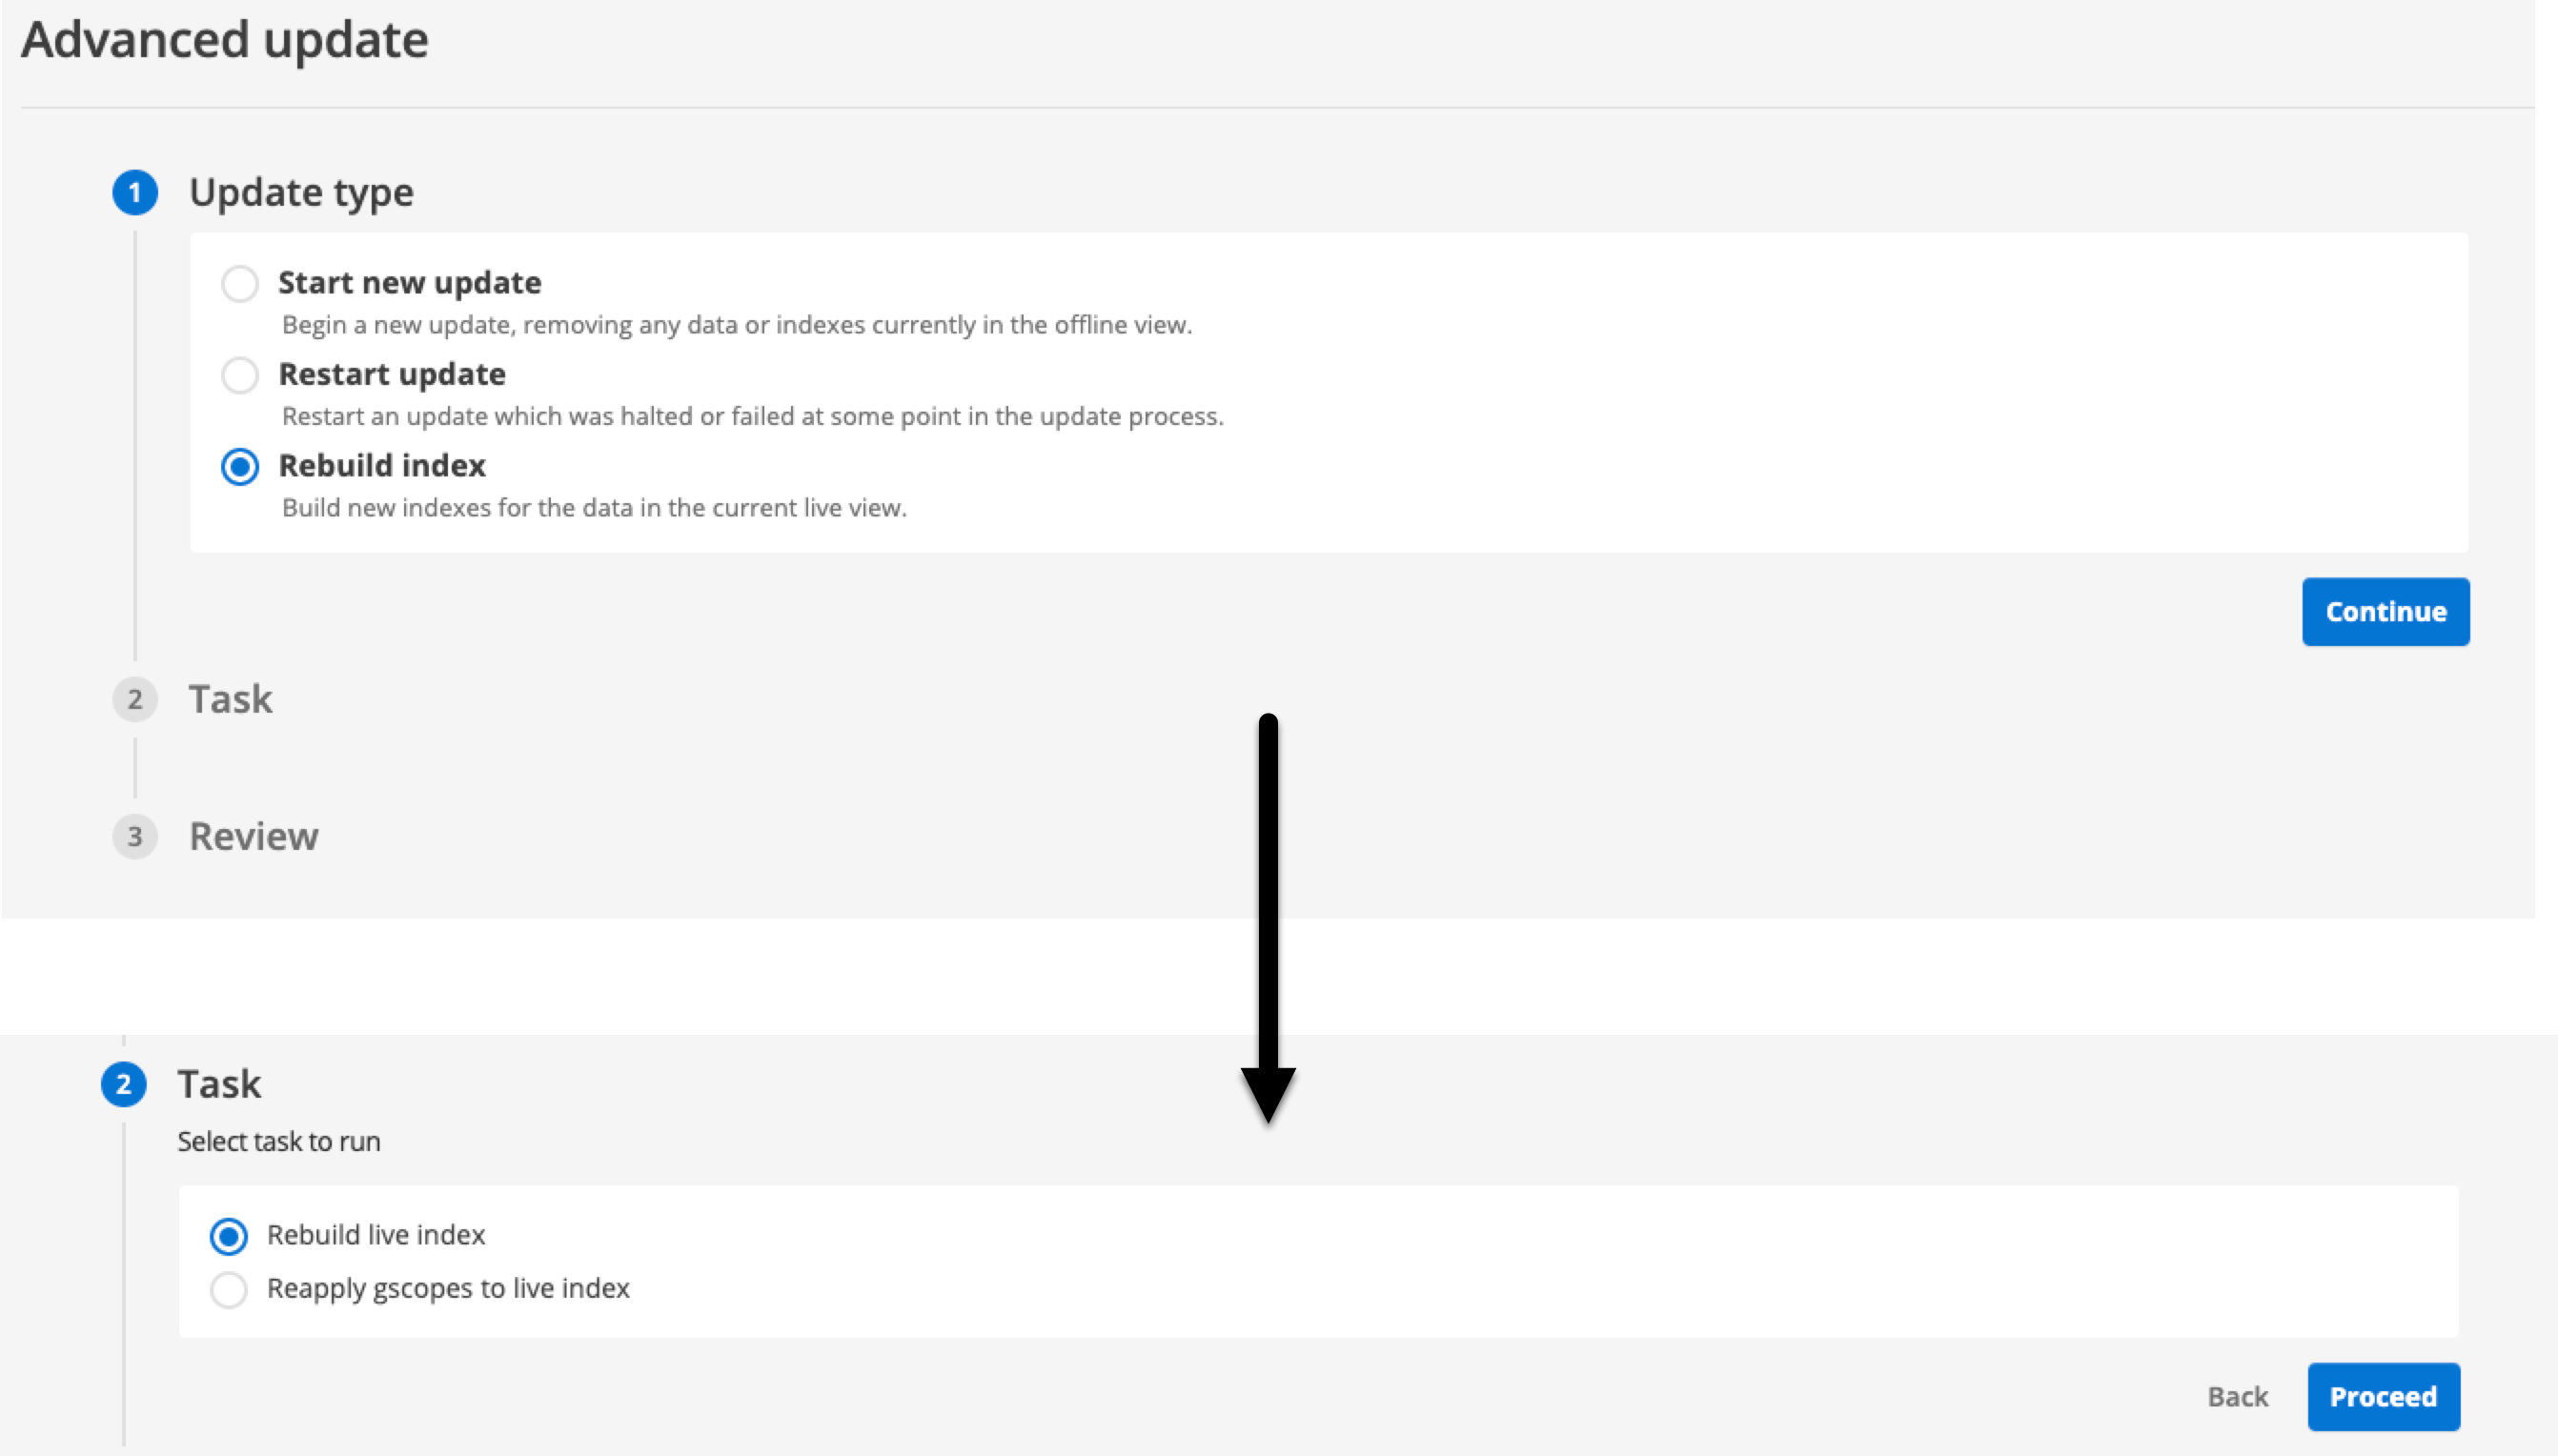
(select start advanced update from the update panel, then select rebuild live index and click update) to generate the auto-completion.
-
View the search results and perform a search for margaret observing the suggestions have not changed. This is because the JavaScript needs to be reconfigured to request the additional auto-completion dataset.
-
Update the JavaScript code as shown below (hint: you will need to edit your template on the inventors results page):
-
Add a dataset called
wikipediato the JavaScript auto-completion configuration. Note: make sure the case for the profile parameter matches the results page ID you created (wikipedia-autocompletion-dataset).<#if question.currentProfileConfig.get('auto-completion') == 'enabled'> <script> jQuery(document).ready(function() { jQuery('#query').autocompletion({ program: '<@s.cfg>auto-completion.program</@s.cfg>', (1) horizontal: true, (2) datasets: { <#if question.currentProfileConfig.get('auto-completion.standard.enabled')?boolean> organic: { collection: '${question.collection.id}', profile : '${question.profile}', format: '<@s.cfg>auto-completion.format</@s.cfg>', alpha: '<@s.cfg>auto-completion.alpha</@s.cfg>', show: '<@s.cfg>auto-completion.show</@s.cfg>', sort: '<@s.cfg>auto-completion.sort</@s.cfg>', template: { header: '<h4>Suggestions</h4>' (3) }, group: true }, wikipedia: { (4) collection: '${question.collection.id}', profile : 'wikipedia-autocompletion-dataset', show: '3', template: { header: '<h4>Wikipedia</h4>', suggestion: '<div>{{#if label.name}}{{#if label.thumb}}<img src="{{label.thumb}}" style="height:40px; float:left; clear:both; padding:1px; border:1px solid #333; margin-right:2px;"/>{{/if}}{{label.name}} ({{label.yob}} - {{label.yod}})<br/><span style="font-size:80%;"><em>Invented: {{label.inventions}}{{else}}{{label}}{{/if}}</em></span></div>', group: '<h5>{{label}}</h5>' }, group: true }, </#if> }, length: <@s.cfg>auto-completion.length</@s.cfg> }); }); </script> </#if>1 configure the auto-completion program at the global level. 2 configure the auto-completion to display in columns 3 add a header to the organic suggestions 4 configuration for the wikipediadataset, which sources the auto-completion suggestions from thewikipedia-autocompletion-datasetresults page. -
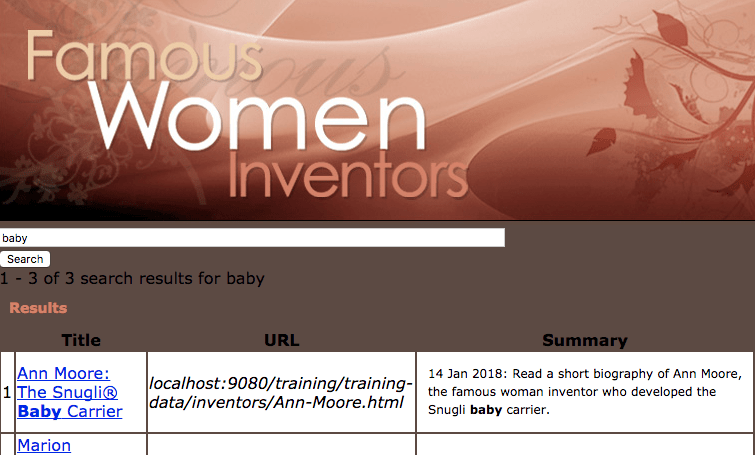
Start to search for baby and observe the two columns of suggestions and how they change as you type. If this doesn’t work, double check that you have published the results page configuration and the
auto-completion.csvfile (and performed a re-index if needed).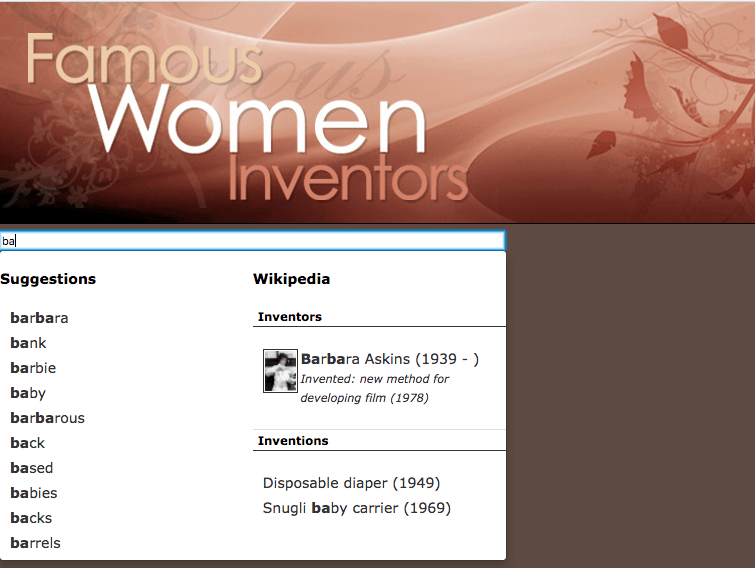
-
Click on the Barbara Askins suggestion and observe that you are taken directly to the Wikipedia page that you configured.
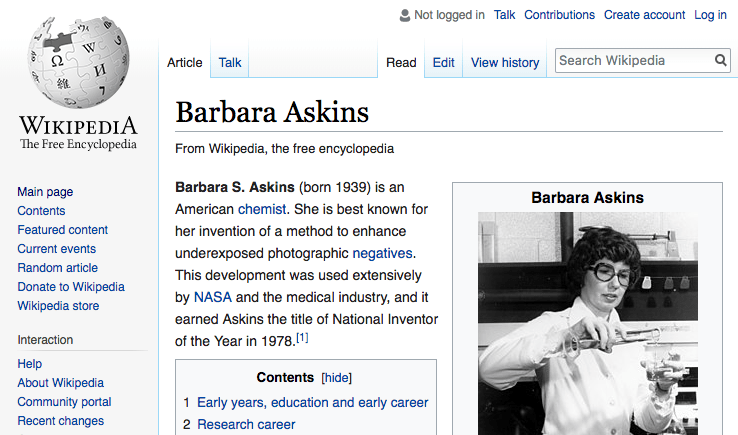
-
Repeat the search and this time click on the disposable diaper suggestion. Observe that a search for baby is run - this aligns with the action that was configured in the CSV.
Auto-completion plugin
Funnelback includes a plugin that can be used to generate auto-completion indexes using metadata that exists within the Funnelback search index.
The plugin allows you to define a number of properties that are used for configuring the auto-completion.
Consider a very simple web page:
<html>
<head>
    <title>King Lear</title>
    <meta name="author" content="William Shakespeare">
    <meta name="characters" content="Lear|Earl of Kent|Fool|Edgar|Edmund|Goneril|Regan|Cordelia|Duke of Albany|Duke of Cornwall|Gentleman|Oswald|King of France|Duke of Burgundy|Old man|Curan">
    <meta name="image.thumbnail" content="http://shakespeare.example.com/king-lear.jpg">
</head>
<body>
...
</body>
</html>
You define:
-
the auto-completion trigger: this is usually a field or set of fields from the data model. The values from these fields will be used to trigger a suggestion. For example, you might configure the
listMetadata.authorandtitlefields, resulting in suggestions triggered. The above html would generate an auto-completion suggestion triggered by somebody starting to enterking learorwilliam shakespeareinto the search box. There’s also an additional trigger expansion option which will trigger suggestions from the other words in a multi-word value. For the above example this would also return the suggestion if you started typinglearorshakespeare. -
the auto-completion action: This is usually a choice between going directly to a URL, or running a query. If you go to a URL, then clicking the suggestion will load the page that you generated the suggestion from. If you run a query you’ll need to define what the query is to run as part of configuring the suggestion.
-
the auto-completion suggestion data: This is a set of fields from the data model that will be returned as the data for the suggestion. For example, for the above example you might return the title, metadata image thumbnail URL and summary fields which can then be used in a template to generate a suggestion containing the title, short description and a thumbnail image.
Tutorial: Generate auto-completion using the auto-completion plugin
Generating auto-completion requires suitable metadata to exist within the search index. This metadata should ideally be included within your page content, or you could use another method (such as the metadata scraper, or external metadata) to provide additional metadata.
For the purpose of this training exercise we’ve included some in-page metadata that will be used to create the auto-completion. If you inspect the source for the female inventors pages you’ll see two metadata fields for pages that are about an inventor.
For example: viewing the source for: https://docs.squiz.net/training-resources/inventors/Mary-Anderson.html shows two metadata fields (inventor.name and inventor.thumbnail) that we can use to present an auto-completion that suggests inventors from the index. We will also use the keywords field as our triggers.
<title>Mary Anderson: Inventor of Windshield Wipers</title>
<meta http-equiv="Content-Type" content="text/html; charset=iso-8859-1" />
<meta name="keywords" content="mary anderson, inventor mary anderson, mary ann anderson, inventor of windshield wipers, windshield wiper inventor, invention of windshield wipers, windshield wipers" />
<meta name="description" content="Read a biography of Mary Anderson, whose invention of windshield wipers changed the American auto industry." />
<meta name="Rating" content="General" />
<meta name="robots" content="index, follow" />
<meta name="Copyright" content="Copyright © 2008 Famous Women Inventors" />
<meta name="inventor.name" content="Mary Anderson" />
<meta name="inventor.thumbnail" content="bio_anderson.jpg" />-
Map the two identified metadata fields: Open the female inventors - website data source management screen and select configure metadata mappings from the settings panel.
-
Create mappings for the two fields: map the
inventor.namefield to a metadata class calledinventorName, andinventor.thumbnailto a metadata class calledinventorThumb, then reindex the data source by selecting from the update panel on the data source management screen . Thekeywordsfield is already mapped, so we don’t need to set up a mapping for it. -
Return to the metadata mapping screen and locate the metadata mappings you just created. Observe that metadata was successfully detected for both of the fields you mapped.

-
Open the search dashboard and locate the Female inventors search package.
-
Create a new results page called Plugin autocompletion dataset. The name of the results page is not important, but a results page should be created for each auto-completion data set that you are creating.
-
Open the plugin management screen - click the Plugins menu item from the navigation panel.
-
Locate the Generate auto-completion from search index plugin. Click on the plugin tile to open the plugin setup screen.
-
Access the documentation for setting up the auto-completion plugin by clicking the view documentation button (you can also access the plugin documentation directly from the tile on the previous screen). Spend some time familiarizing yourself with how the plugin works.
-
Return to the plugin screen and work through the setup wizard. On the location step, select the results page you just created from the select list the click the continue button.
-
The configuration keys step is where you configure how the plugin works. If you read the documentation you will have noted that you need to configure trigger, action and display fields for the plugin. This is where you can set this up. Add the following configuration, then click the proceed button:
Configuration option Value Description Trigger sources
/listMetadata/keyword,/titleConfigures the fields that will provide the words that are used to trigger the suggestions.
Action type
USets the action to go to the page (indicated by the
liveURLfield in the data model) when the suggestion is clicked. (Q means run a search for the suggestion).Display fields
/listMetadata/inventorName,/listMetadata/inventorThumbReturns the
inventorNameandinventorThumbfields inside the auto-completion JSON, for use in your display template.Match each word in a multi-word trigger
true
When enabled if you have a multi-word trigger then the user’s input will be matched to all the words of the multi-word trigger instead of only the start of the trigger.
-
The review screen shows a summary of your plugin configuration. Read through this to ensure your configuration is correct then click the finish button to apply the configuration to your results page.
-
You are returned to the results page management screen. For the auto-completion plugin there is an additional step that you need to perform to ensure that the auto-completion that the plugin builds only contains the generated plugins. This involves setting an additional configuration key in the results page configuration. Click on the edit results page configuration option from the customize panel to open the configuration key editor.
-
You’ll see all the configuration keys that are defined for your results page (including the ones you just added for the plugin). Click the add new button and add and publish the following configuration key:
Parameter key Value Description auto-completion.source
<set this to an empty value>
This ensures that we don’t include additional suggestions in the auto-completion index which are words and phrases in the index (and that run a query for the word or phrase when you click the suggestion).
-
Return to the results page configuration screen and publish the plugin - scroll to the plugins section (at the bottom of the page) and select > publish.
-
Run an advanced update to rebuild the live index (on the female inventors - website data source). This will ensure that the auto-completion indexes are generated.
-
Check the log files for the female inventors search package to ensure that auto-completion was successfully generated. In the live log files, locate the
Step-BuildAutocompletion.plugin-autocompletion-dataset.logand verify that suggestions were generated. The log file name will include the results page ID where you enabled your plugin.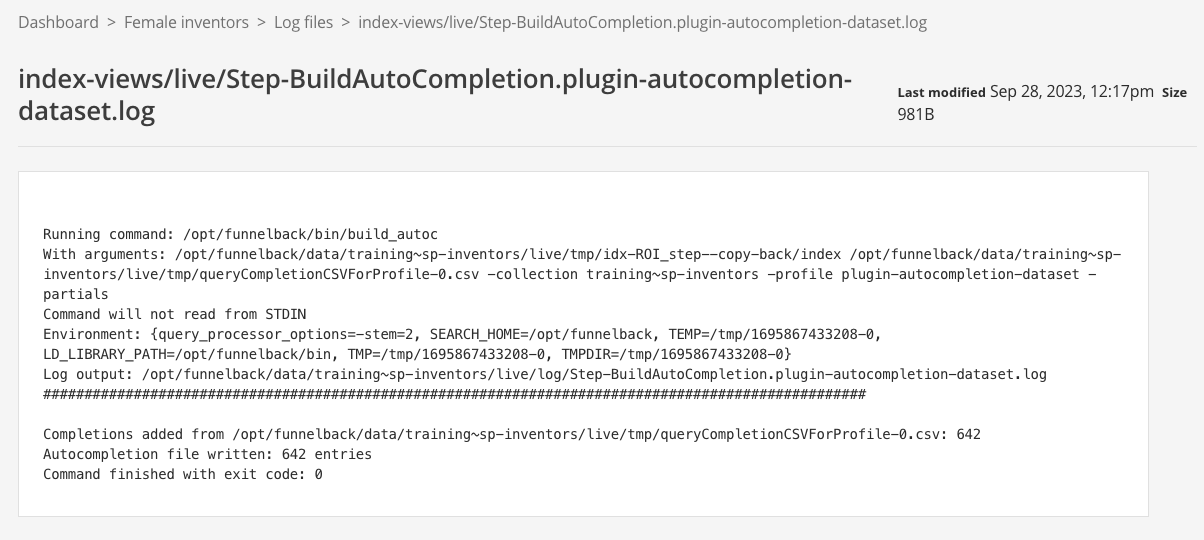
-
We now need to configure out results page template to include the auto-completion suggestions from this newly generated dataset. Edit the template for the inventors results page. Locate the Javascript block at the bottom of the template file, which configures the auto-completion. Add an additional dataset that sources suggestions from the dataset that you’ve just created. You can replace the entire script block with the following, noting that
pluginblock adds the auto-completion dataset you have created in the steps above.<script> jQuery(document).ready(function() { jQuery('#query').autocompletion({ datasets: { <#if question.currentProfileConfig.get('auto-completion.standard.enabled')?boolean> organic: { collection: '${question.collection.id}', profile : '${question.profile}', program: '<@s.cfg>auto-completion.program</@s.cfg>', format: '<@s.cfg>auto-completion.format</@s.cfg>', alpha: '<@s.cfg>auto-completion.alpha</@s.cfg>', show: '<@s.cfg>auto-completion.show</@s.cfg>', sort: '<@s.cfg>auto-completion.sort</@s.cfg>', group: true }, plugin: { collection: '${question.collection.id}', profile : 'plugin-autocompletion-dataset', }, </#if> }, length: <@s.cfg>auto-completion.length</@s.cfg> }); }); </script> -
Run a search against the live version of your results page. After the search results are returned start typing invent into your search box and observe that you get a bunch of additional suggestions returned at the bottom of the suggestions, but these all look like
[object Object]
This is expected because the auto-completion is returning a JSON object to the auto-completion widget, but we haven’t told the widget what to do with JSON, so it returns a default
[object Object]value. -
Open your browser debugger and view the network panel while typing into the search box you will see
suggest.jsoncalls to the auto-completion web service. Two calls are made for each keystroke, corresponding to the two datasets that are configured (organicandplugin). If you inspect the JSON that is returned you’ll see the object containing your suggestion data.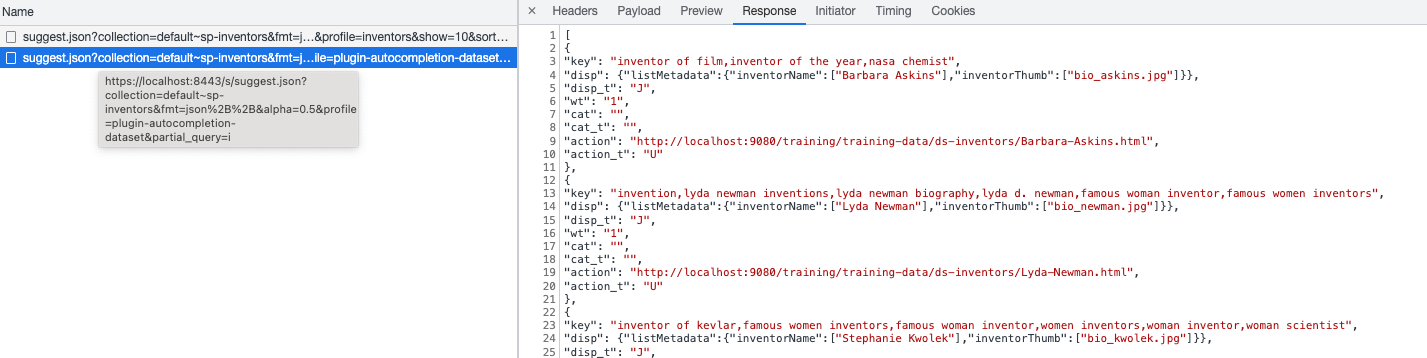
-
To get rid of the
[object Object]we need to configure a template to display the JSON - this is a handlebars template that converts the JSON into HTML that the browser can display. We’ll also add options to limit the number of suggestions from the plugin dataset and switch to a column display.<script> jQuery(document).ready(function() { jQuery('#query').autocompletion({ datasets: { <#if question.currentProfileConfig.get('auto-completion.standard.enabled')?boolean> organic: { collection: '${question.collection.id}', profile : '${question.profile}', program: '<@s.cfg>auto-completion.program</@s.cfg>', format: '<@s.cfg>auto-completion.format</@s.cfg>', alpha: '<@s.cfg>auto-completion.alpha</@s.cfg>', show: '<@s.cfg>auto-completion.show</@s.cfg>', sort: '<@s.cfg>auto-completion.sort</@s.cfg>', group: true }, plugin: { collection: '${question.collection.id}', profile : 'plugin-autocompletion-dataset', show: '3', (1) template: { (2) suggestion: '<div><img src="https://docs.squiz.net/training-resources/inventors/media/images/{{label.listMetadata.inventorThumb}} ">{{label.listMetadata.inventorName}}</div>' }, }, </#if> }, horizontal: true, (3) length: <@s.cfg>auto-completion.length</@s.cfg> }); }); </script>1 Limit the number of plugin suggestions to a maximum of 3 2 Template for formatting the JSON 3 Show each dataset in a separate column. -
Switch back to your search results page, refresh the page and start running a search for mary. Observe that you now see two columns of suggestions and the
[object Object]text is now replaced with the formatted suggestion.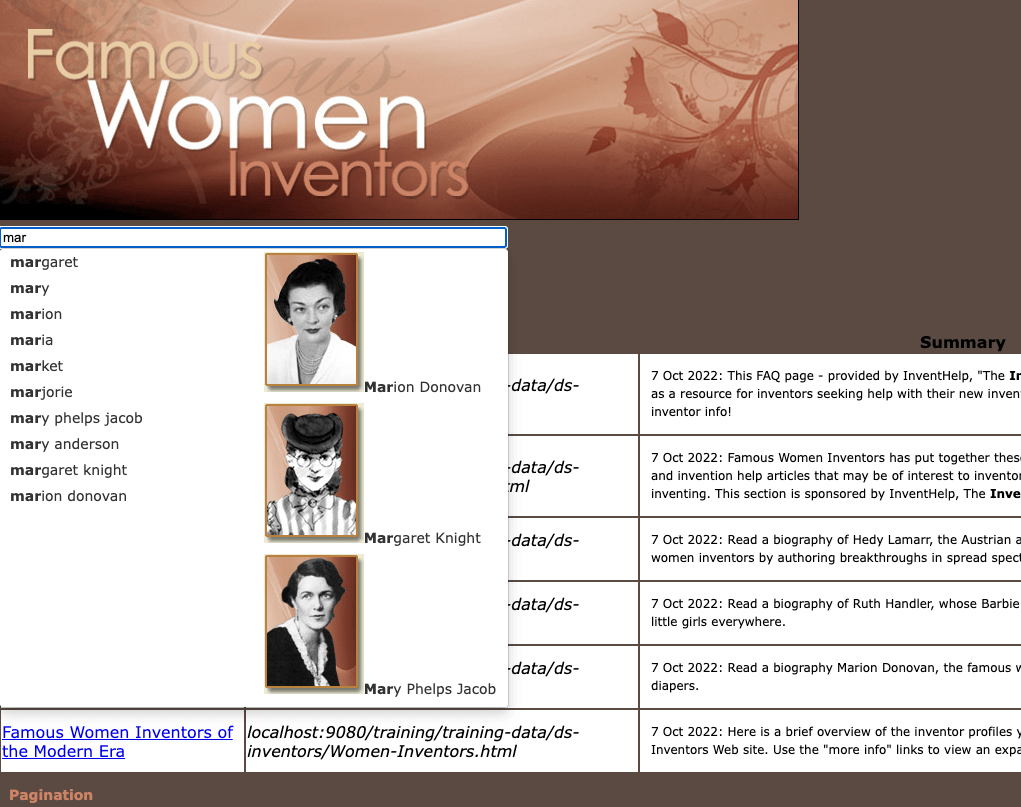
We could obviously do a lot more to improve the formatting of the suggestions, but this is not the aim of this exercise. The widget includes many options that can be applied to the auto-completion suggestions.
Extended exercises
-
Update the auto-completion suggestions so that headings are presented for each column.
-
Configure the no suggestions template for the plugin column (this configures what is returned when your input doesn’t trigger any suggestions).
-
Change or augment the information returned in the auto-completion JSON to include additional fields that you can then add to your suggestion template.
Auto-completion web service
Many of the auto-completion configuration options available via the search dashboard only control the call made to the JSON endpoint producing suggestions.
The funnelback-completion-2.6.0.js JavaScript is responsible for requesting auto-completion suggestions based on what has been entered into the search box, submitting the request after each keystroke and transforming the JSON response from the web service into the HTML presented to the end user.
As a front-end developer might wish to use other JavaScript frameworks or libraries to interact with the web service - your code will need to form these calls on the user’s behalf and transform and insert the response into page DOM.
Any implementation that interacts with the auto-completion web service will need to handle the construction of the suggest.json request URL and also the processing and conversion of the JSON response into the final HTML that’s returned to the end user.
Tutorial: Auto-completion web service
This exercise examines the raw request that is submitted to the auto-completion web service and JSON response.
-
Load the inventors results page in your browser by using the preview function from the administration interface.
-
Open up your browser debugger and ensure network traffic is being inspected.
-
Start typing a query into the search box and observe that a call to
suggest.jsonis made to each configured auto-completion dataset for each keystroke.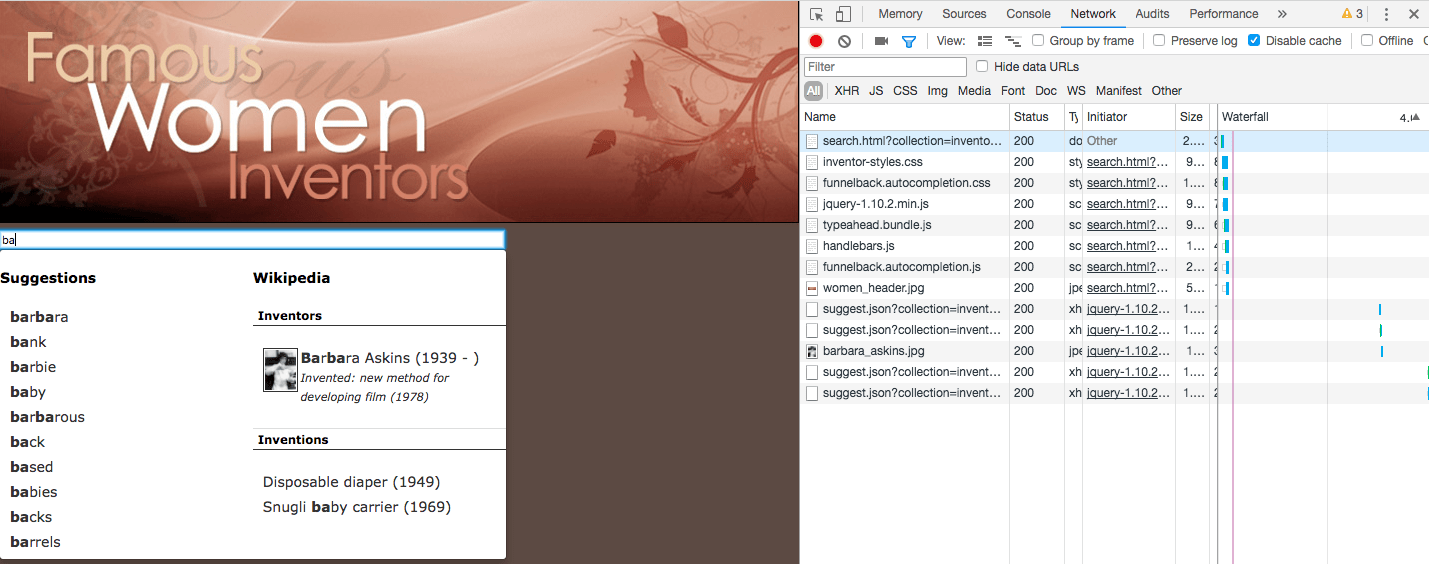
-
Each
/s/suggest.jsoncall is a request to the auto-completion web service. Observe that each call specifies the options set in the JavaScript and the only difference between subsequent calls is the value of the partial query which reflects the current partially entered query of the search box.FUNNELBACK-SERVER/s/suggest.json?collection=default~ds-inventors&fmt=json%2B%2B&alpha=0.5&profile=wikipedia&show=3&partial_query=b FUNNELBACK-SERVER/s/suggest.json?collection=default~ds-inventors&fmt=json%2B%2B&alpha=0.5&profile=wikipedia&show=3&partial_query=ba -
Open one of the URLs in your browser and inspect the JSON that is returned.
If you don’t know what FUNNELBACK-SERVERis then run a search from the search dashboard for your inventors results page to find out what your Funnelback server URL is - your URL will be something likehttp:/FUNNELBACK-SERVER/s/search.html?.... ReplaceFUNNELBACK-SERVERin the example above with this hostname.Compare this with what was returned in the list of suggestions displayed in the search box when you typed.
This is an example of simple auto-completion (note: the JSON has been truncated in this example):
[
  {
    "key": "barbara",
    "disp": "barbara",
    "disp_t": "T",
    "wt": "4.899",
    "cat": "",
    "cat_t": "",
    "action": "",
    "action_t": "S"
  },
  {
    "key": "bank",
    "disp": "bank",
    "disp_t": "T",
    "wt": "1.414",
    "cat": "",
    "cat_t": "",
    "action": "",
    "action_t": "S"
  },
  {
    "key": "barbie",
    "disp": "barbie",
    "disp_t": "T",
    "wt": "1.414",
    "cat": "",
    "cat_t": "",
    "action": "",
    "action_t": "S"
  },
  {
    "key": "baby",
    "disp": "baby",
    "disp_t": "T",
    "wt": "1.414",
    "cat": "",
    "cat_t": "",
    "action": "",
    "action_t": "S"
  }
]
And this is an example of the structured auto-completion returned:
[
  {
    "key": "barbara askins",
    "disp": {
      "name": "Barbara Askins",
      "yob": "1939",
      "yod": "",
      "thumb": "https://docs.squiz.net/training-resources/inventors-resources/barbara_askins.jpg",
      "inventions": "new method for developing film (1978)"
    },
    "disp_t": "J",
    "wt": "900",
    "cat": "Inventors",
    "cat_t": "",
    "action": "https://en.wikipedia.org/wiki/Barbara_Askins",
    "action_t": "U"
  },
  {
    "key": "baby",
    "disp": "Disposable diaper (1949)",
    "disp_t": "T",
    "wt": "900",
    "cat": "Inventions",
    "cat_t": "",
    "action": "baby",
    "action_t": "Q"
  },
  {
    "key": "baby",
    "disp": "Snugli baby carrier (1969)",
    "disp_t": "T",
    "wt": "900",
    "cat": "Inventions",
    "cat_t": "",
    "action": "baby",
    "action_t": "Q"
  }
]
Extended exercises: Auto-completion
The following resources will assist in the extended exercises and also provide additional information and options for configuring the auto-completion plugin.
-
In the browser debugger observe that separate calls to
suggest.jsonare made for to each dataset each time auto-completion is triggered. Inspect the JSON for each dataset and compare to the menus that are rendered in the browser, and also the template defined in the JavaScript configuration -
Configure the plugin to return 5 organic suggestions, and 1 wikipedia suggestion. (hint: configure the
auto-completion.showoption) -
Configure the plugin to return the different datasets stacked (hint: see the
horizontalJavaScript option) -
Configure the plugin to only return suggestions after 3 keystrokes (hint: configure the
auto-completion.lengthoption) -
Configure the plugin to display some default suggestions before the user types (hint: see the
defaultCallJavaScript option) -
Configure no suggestion templates for each dataset (hint: see the
notFoundtemplate) -
Attach auto-completion to a non-Funnelback search form.