Configuring DXP Content Management to supply metadata for your binary content
| This article only applies when you are using a web data source to create the index for your DXP Content Management site. If you are using a push index, you need to ensure you supply the metadata when you make the API call to the Push API to add or update the content. |
Every DXP Content Management site indexed by the DXP search service should include asset listings that expose metadata that is stored within DXP Content Management relating to binary documents (PDF, RTF and MS Office documents).
When a document is uploaded to DXP Content Management metadata is captured about the document - title, author and so on. Users will expect that the information that was entered when uploading the document will be reflected in the search results.
When DXP search crawls a DXP Content Management site it follows all links it encounters and downloads the documents. For PDF/office documents an additional operation to extract the text from the document runs. This is all DXP search has access to when creating the index.
The additional metadata entered when uploading a document to DXP Content Management is stored within the CMS database (and not within the metadata fields contained within the PDF or office document). This means that the DXP search won’t see these and the titles will be whatever happens to be stored in the document’s internal metadata - often something quite useless such as 'Template no. 3'.
This can be rectified by creating an asset listing that lists both the document’s URL and any associated metadata that you wish to include in the index. This listing is formatted in the DXP Search external_metadata.cfg format.
The DXP search provides a plugin that can be used to fetch this metadata.
Tutorial: Creating an external metadata asset listing
Part 1: Create the Page URL listing
This asset listing prints out a set of URLs to the pages that contain your metadata listings. This is required to handle a paginated listing.
| Asset listings that list out all the external metadata for a website should be avoided as this often will result in a timeout when the external metadata is fetched, or an error being returned by the asset listing due to the large volume of content in the listing. |
-
Create a folder for all your search-related assets if you don’t already have one. At the root of your site create a new folder asset named DXP Search Integration.
-
Create an asset listing asset underneath this folder named Document DXP Search Metadata Paginated. Right-click on the folder in your asset map where you would like to create the listing then select from the context menu.
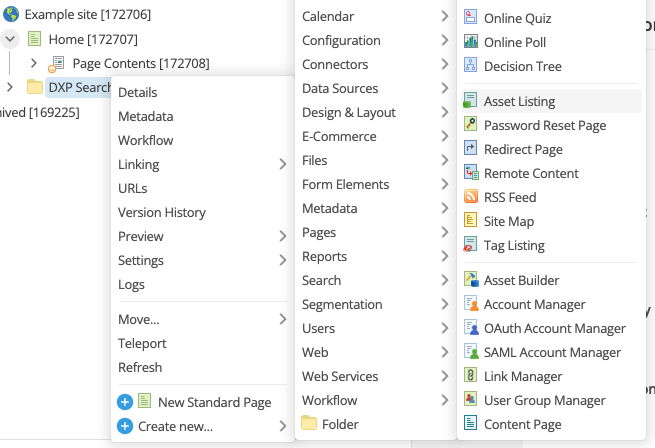
The asset listing should be created in a section of the site, where other DXP search assets are stored, normally within a hidden link type folder asset titled DXP search integration which sits amongst the first level of assets in a site. This will create and asset listing with a URL similar to:
http://www.example.com/dxp-search-integration/document-dxp-search-metadata-paginated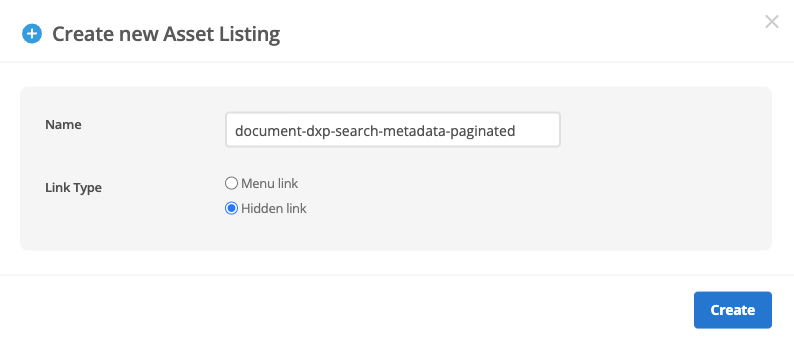
-
Configure the Asset selection settings.
-
From the Asset types to list dropdown select the following asset types:
-
File
Select the Inherit checkbox.
-
-
Set the Asset types to list to:
-
Live
-
Up for review
-
Safe editing
-
Safe editing pending approval
-
Safe edit approved to go live
-
-
From the Asset access to list to Read. Select the Include effective permissions checkbox.
The asset listing assumes that all items to be listed are publicly readable.

-
-
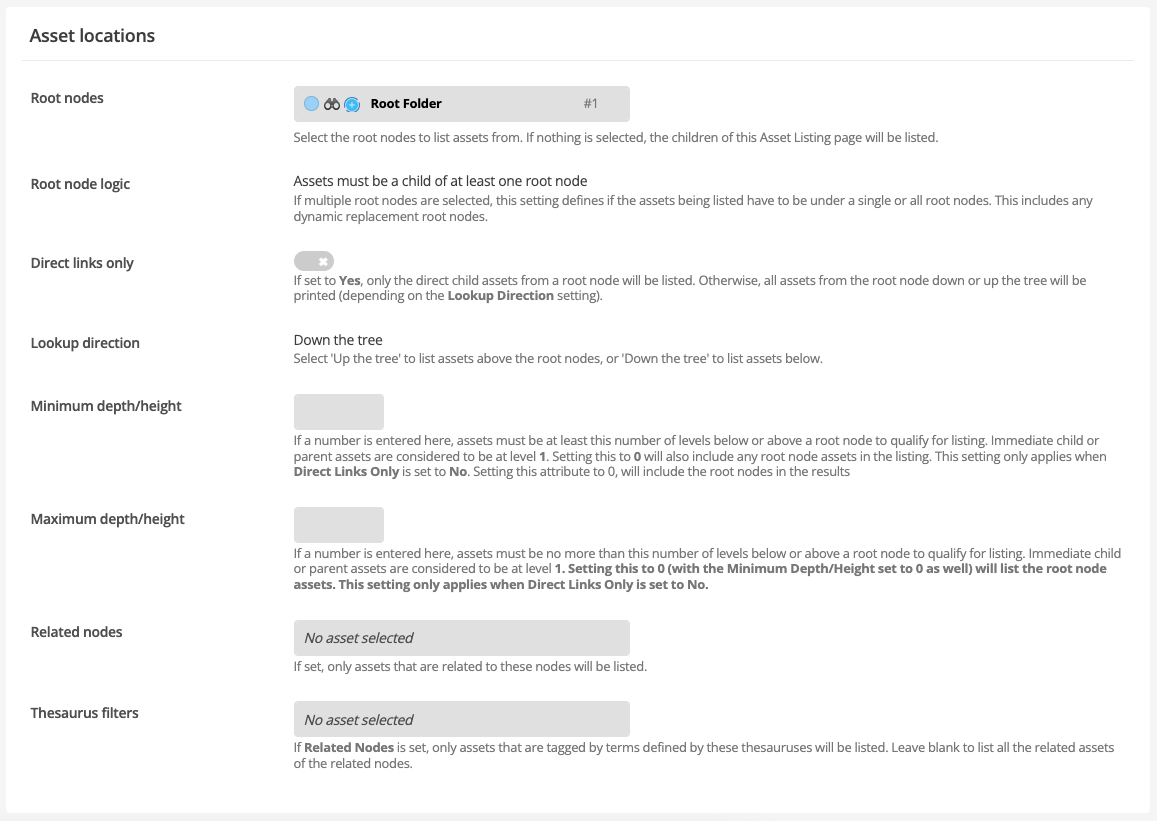
Configure the Asset locations settings.
-
Set Root nodes to your site asset. All other settings in this section can be left on their defaults. This root node should be varied as required, but should be a parent folder of all the binary file items that you wish to include. This will often be the root of your website.
-
-
Leave the Additional filtering options and Asset exclusions on their default settings.
-
Configure the List formatting settings.
-
Set Assets per page to
25.
-
-
Click the Save button to save your asset listing configuration.
Part 2: Create the output asset listing
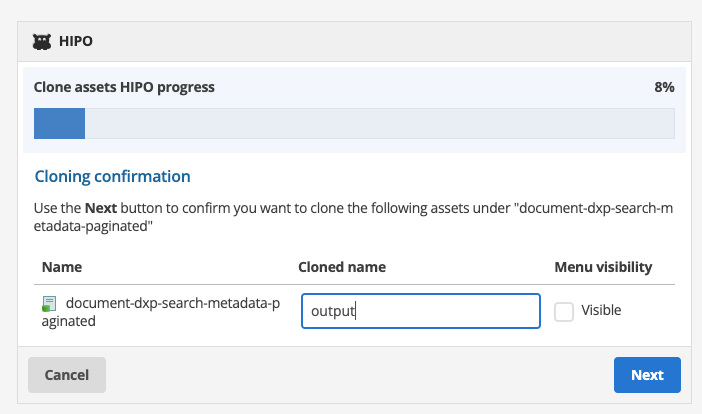
The second asset listing that outputs the metadata can be cloned from the asset you just saved.
-
Clone the asset listing as a child named
output.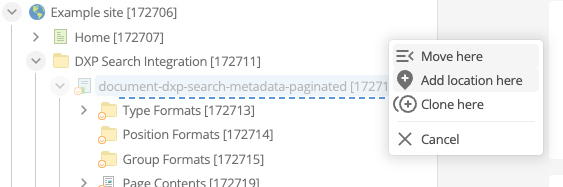

-
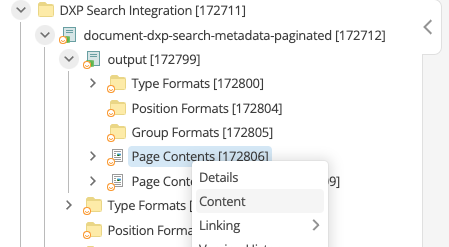
Right-click on the Page Contents child asset and edit the Content. Click the Edit button to edit the contents.
-
Switch to Raw mode and remove the HTML formatting, updating the asset content to
%asset_listing%. Click the Save button to save your changes.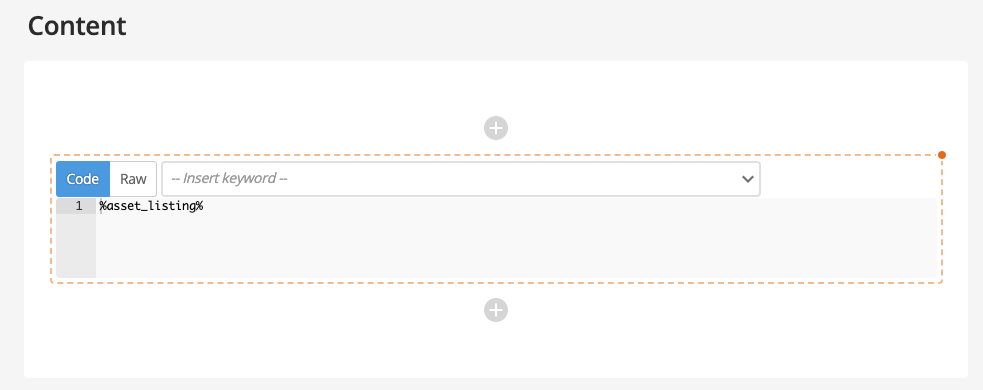
Removing HTML formatting is vital as the returned file must be in DXP Search external_metadata.cfgformat. -
Right-click on the Page Contents (No Results) child asset and edit the Content. Click the Edit button to edit the contents.
-
Switch to Raw mode and remove everything, leaving an empty field. Click the Save button to save your changes.
-
Right-click on the child asset and edit the Content. Click the Edit button to edit the contents.
-
Switch to Raw mode and update the field to contain the external metadata entries. The format of the content should be the
%asset_url%followed by each of the metadata fields you wish to expose.Each metadata field must follow the format:
METADATA_CLASS:"KW_ASSET^CLEAN_STRING"
where:
-
METADATA_CLASS: is the DXP Search metadata class that the metadata will be attached to. This should be set up in the metadata configuration of your search data source, with the correct metadata type assigned. See: External metadata: metadata mapping and types. -
KW_ASSET: is the DXP Content Management keyword that expands to the contents of the metadata field value you wish to attach. For example,%asset_attribute_title%.The asset value you insert here doesn’t have to be a metadata field in DXP Content Management and could be other document metadata such as the page title or modified date. -
CLEAN_STRING: is a set of keyword modifiers that clean up the metadata string to ensure it is returned in a valid external metadata format. The cleanup string needs to:-
Remove any line breaks within the field content.
This can be achieved using the keyword modifier:
^replace:(\s):
Removal of line breaks contained within the content is vital because each external metadata entry must be returned on a single line in the output. -
Backslash-escape (or remove) any double quote or vertical bar characters contained within the content.
This can be achieved using the keyword modifier:
^replace:":\"
For example:
description:"Shakespeare, commonly known as \"The Bard\" was an English playwright and poet."
-
Concatenate multiple field values with a vertical bar character. This can be achieved using a keyword modifier similar to:
^replace:;:|
The above modifier replaces all semicolon characters with a vertical bar. Adjust this to match the separator you are using in your field. For example:
country:"USA|Germany|Japan"
A metadata field might contain multiple values that should be treated separately. This should be supplied in the external metadata using a vertical bar to delimit the values. -
A single date can be set as special data metadata in a
dmetadata class. The date should be formatted as an ISO-8601 date (YYYY-MM-DD). This bac be achieved using the following keyword modifier:^date_format:Y-m-d
For example:
d:"2020-07-21"
Additional dates can be returned as textual metadata for presentation purposes, but these are not treated as dates by the search when sorting by date or when considering the document’s age in the ranking algorithm. -
Remove any HTML tags from the content. Metadata field content should be plain text.
Your type format will look something like the line below. This must be formatted as a single line.
%asset_url% t:"%asset_name^replace:":\"^replace:(\s): ^replace:;: |% matrixTitle:"%asset_attribute_title^replace:":\"^replace:(\s): ^replace:;: |% d:"%asset_file_updated^date_format:Y-m-d%" (1)
 (2)
1 The entire type format must be returned on a single line. 2 You must have a final blank line.
-
-
-
Create a design asset for plain text and edit the parse file to contain only the following:

<MySource_PRINT id_name="__global__" var="content_type" content_type="text/plain" /> (1)
<MySource_AREA id_name="body" design_area="body" />
1 Setting the parse file to return plain text is critical if you want your external metadata integration to work correctly. -
Use this design with the Document DXP Search Metadata Paginated - select from the context menu for the asset, and enter the asset ID of the plain text design asset you created above into the Override Design field under the System Defined Frontend Design heading.
-
Create a paint layout for raw contents only and configure the default format to:
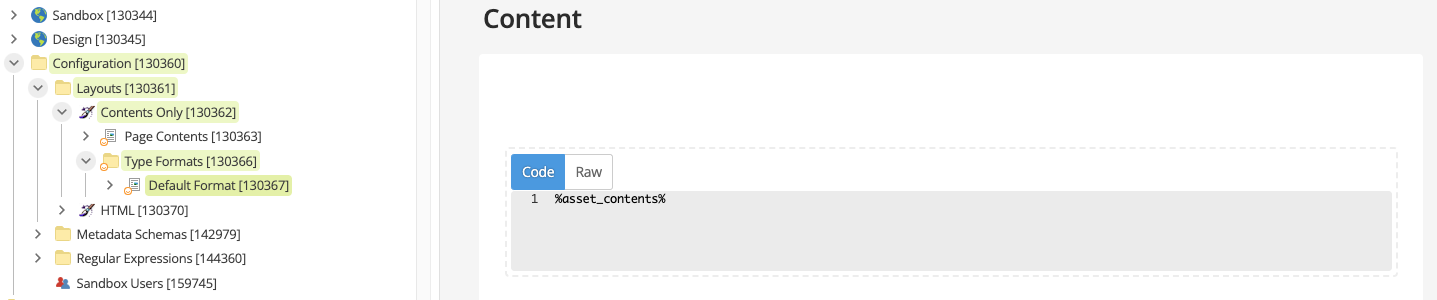
%asset_contents% -
Use this paint layout with the Document DXP Search Metadata Paginated - select from the context menu for the asset, and enter the asset ID of the contents only paint layout you created above into the Override Paint Layout field under the Effective Paint Layouts heading.
Part 3: Complete the Page URL listing configuration
Return to the parent Document DXP Search Metadata Paginated asset and finish configuring this. We need to set it up to return the list of pages produced by the output asset listing.
-
Right-click on the Page Contents child asset and edit the Content. Click the Edit button to edit the contents.
-
Switch to Raw mode and update the asset content to the following, the save your changes.
<script runat="server">
    const totalPages = %total_pages%;
    const assetListingUrl = "%globals_asset_url:OUTPUT-LISTING-ID%?result_OUTPUT-LISTING-ID_result_page="; (1)
    for (let i = 1; i <= totalPages; i++) {
        print(assetListingUrl+i+"\n");
    }
</script>
1 Replace OUTPUT-LISTING-IDwith the asset ID of the output asset listing you created in part 2, above. -
Right-click on the Page Contents (No Results) child asset and edit the Content. Click the Edit button to edit the contents.
-
Switch to Raw mode and remove everything, leaving an empty field. Click the Save button to save your changes.
-
Right-click on the child asset and edit the Content. Click the Edit button to edit the contents. Remove everything, leaving an empty field. Click the Save button to save your changes.
-
Ensure that access to these listings are disallowed in
robots.txt. For the URLs configured above you would add the following to yourrobots.txt:Disallow: /dxp-search-integration/
Part 4. Check the asset listing output
View the output from your asset listing URL.
The output from the Document DXP Search Metadata Paginated should be a text file containing a list of URLs, one entry per line. The URLs should correspond to each page in the paginated output listing.
For example:
https://example.com/dxp-search-integration/document-dxp-search-metadata-paginated/output?result_172799_result_page=1
https://example.com/dxp-search-integration/document-dxp-search-metadata-paginated/output?result_172799_result_page=2
https://example.com/dxp-search-integration/document-dxp-search-metadata-paginated/output?result_172799_result_page=3
| As this is un-formatted text you need to view the raw output. If you are viewing this in your web browser view the page source of the document and ensure you have 1 URL per line, with each URL corresponding to pages in the output listing. |
The output from the output asset listing should look similar to the following:
http://example.com/__data/assets/pdf_file/0009/10314/example-1.pdf description:"example description" color:"blue" d:"2020-03-04"
http://example.com/__data/assets/pdf_file/0017/10466/example-2.pdf description:"example description" color:"blue|green|pink" d:"2019-12-17
http://example.com/__data/assets/pdf_file/0003/10596/example-3.pdf description:"example description" color:"black|gold" d:"2023-05-05"
http://example.com/__data/assets/pdf_file/0019/10945/example-4.pdf description:"example description" color:"pink" d:"2020-08-24"
Each line must be a full entry with a URL followed by the list of metadata fields that you are attaching. If you see any line breaks you’ll need to check the type format and modify this to ensure they are removed.
Part 5: Configure the external metadata plugin on your web data source.
In this final step, you configure the DXP search to use a plugin to fetch the external metadata you have created in the previous steps.
-
Switch to the administration dashboard for your DXP search and click on the
Pluginsitem in the left hand navigation panel. -
Locate the Fetch external metadata from URL plugin and click on the tile.
-
On the Location step, select the data source that has been configured to index your DXP Content Management website then click the Continue button.
-
On the Configuration keys step set the following, then click the Proceed button.
-
External metadata file source URL type: List of external metadata file URLs.
-
External metadata file source URL: Set this to the URL that returns the list of paginated URLs. From the previous example this would be set to
https://example.com/dxp-search-integration/document-dxp-search-metadata-paginated/_nocacheYou should always use the _nocacheURL for supplying the external metadata because you need to guarantee that the search is not given an old copy of the page from the cache. If you get an old version then you may be missing some metadata that is crucial to your search.
-
Fail on error: We recommend you set this to Yes. Only set this to No if you consider the metadata as a non-vital content, and don’t care if the metadata is missing from an update.
-
Review the settings you have entered then click the Finish button to complete the plugin setup.
-
You will be directed to the data source configuration screen for your web data source.
-
Ensure all the metadata classes you included in your external metadata are set up in you metadata mappings. Select the Configure metadata mappings option from the setting panel to review your metadata settings.
-
The final step is to update your web data source by clicking the Update this data source button from the Update panel, or you can wait for the next automatic update to run. After a successful update completes the metadata you have configured should be included in the search index.
-
See also
-
DXP search: external metadata
-
DXP search: metadata
-
DXP search: fetch external metadata from URL plugin