Comment
The comment asset allows a user to add a comment about a page on your site. It is used in conjunction with an asset builder, an asset listing, and a paint layout. The asset builder allows the user to create the comment within your site. The asset listing lists the comments for an asset, and the paint layout is used to show the content of the page in the site, the asset builder, and the asset listing page.
Adding a comment
When you add a comment asset, the Create new comment screen will be displayed. The details section of the Create new comment screen is shown:
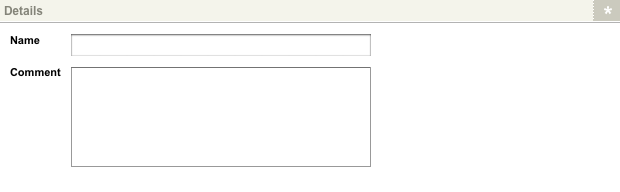
Enter the following details for the comment:
- Name
-
Enter the subject for the comment. This field is mandatory and is also used as the name of the asset.
- Comment
-
Enter the comment. This field is optional. Click Save once you have entered this information. Your comment will appear in the asset tree on the left-hand side of the screen.
Once your comment is created, you can configure its settings on its associated asset screens. This page describes the Details screen, which is different for a comment.
Details screen
The Details screen allows you to configure the settings for the comment. Read the Asset details screen documentation for more information on the Status, Future status, and Thumbnail sections on this screen.
Details
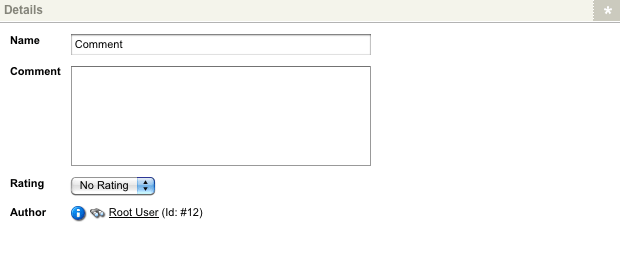
This section allows you to change the details of the comment. The details section of the Details screen is shown in the figure:
The fields available are as follows:
- Name
-
The name entered into the name field when the comment was created will appear in this field by default. You can change the name by clicking into this field and entering the new name for the comment.
- Comment
-
By default, the information entered into the comment field when the comment was created will appear in this field. You can change the comment by clicking into this field and entering the new comment.
- Rating
-
Select a rating to apply to the comment. These options include no rating,
0,1,2,3,4, and5. By default, no rating is selected. - Author
-
The user that created the comment will be displayed in this field.
| You can change the person who created the comment by updating the created date field on the comment’s settings screen. |
Preferences for a comment
Several preferences are available for a comment asset. These include the size of the comment box, how many characters you can type, the maximum rating you can select, and the rated images. These preferences can be found on either the Global preferences screen or the user group or role Preferences screen. For more information about these preferences, refer to the Global preferences documentation.
Using the comment asset
Consider a scenario where you want to let users add comments to the newsletters on the site, and each newsletter also needs to list the comments that have been made on it.
You can do this by following these steps.
Creating the asset builder
Create an asset builder under your site called Add comments.
On the Details screen, do the following:
-
Select
Commentin the Asset types to create option. -
Select
Livein the Create status option. -
Click Save.
In the Create form customization field:
-
Select Customize create form for the comment asset.
-
Click Save.
This field will create a layout under the asset builder in the asset tree.
Create locations
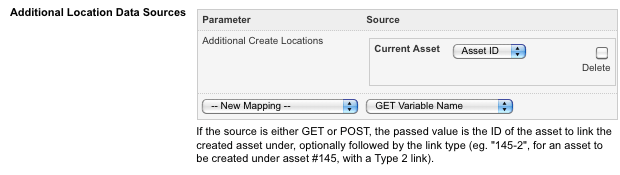
Each comment must be created under the newsletter to which it relates to display the comment in an asset listing. On the Create locations screen, in the Additional create locations section, do the following:
-
Select
Additional create locationsin the first list in the Additional location data sources option. -
Select
Current assetin the second list in the Additional location data sources option. -
Select the
Newslettersfolder in the Permitted tree locations option. -
Select
Standard pagein the Permitted asset types option. -
Click Save.
In the Additional location data sources field, make sure that asset ID is selected in the source field, as shown in the figure:
Laying out the asset builder
To allow a public user to create a comment, edit the contents of the Not logged in bodycopy:
-
Remove the keyword replacements added.
-
Add the keyword replacements Create asset error message and Create asset form.
-
Add these keyword replacements to the created bodycopy as well.
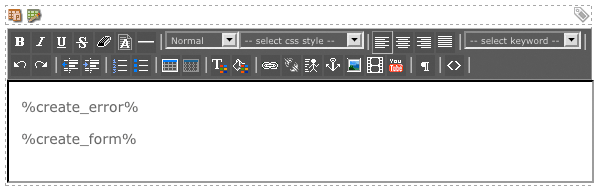
Adding these keyword replacements onto the created bodycopy allows the user to add additional comments.
-
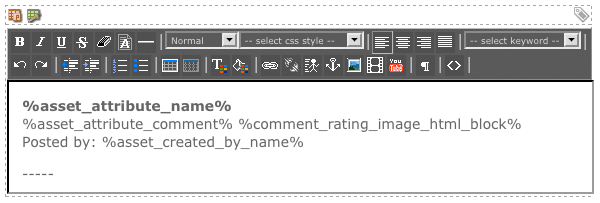
Edit the layout on the comment create form layout bodycopy. This layout will be used as the create form on the asset builder. An example of this is shown:
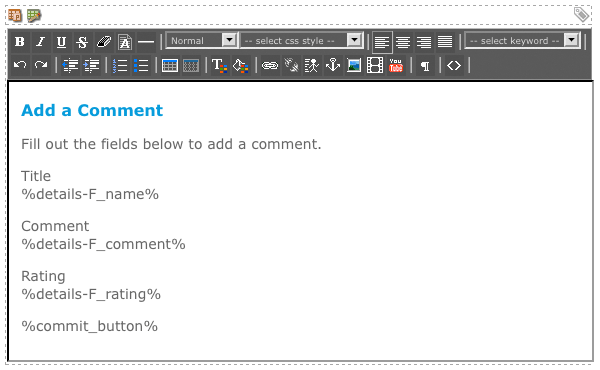
The keyword replacements shown in the figure can be found by clicking the hyperlink in the simple edit keywords section and selecting Comment in the pop-up window.
Creating the asset listing
-
Create an asset listing under your site called list comments.
-
Change the following options on the Details screen:
-
Select
Commentin Asset types to list. -
Select the
Newsletterfolder in the Root node. -
Change the Direct links only to
Yes. -
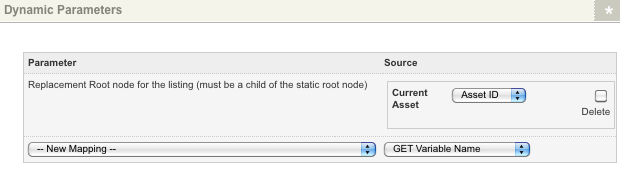
Select
Replacement root nodes for the listingin the first list of Dynamic parameters. -
Select
Current assetin the second list of Dynamic parameters.
-
-
Click Save.
In the dynamic parameters section, make sure that asset ID is selected in the source field, as shown:
Laying out the asset listing
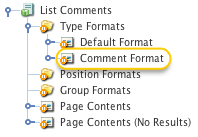
To create a type format for the comment asset:
-
Select
Commentin the Customized asset type formats field on the Display formats screen. -
Click Save.
The comment format bodycopy will appear in the asset tree.
Format the layout on the edit contents screen.
Creating the paint layout
-
Create a paint layout under your site called
Comment paint layout. -
Add two new divisions onto the default format bodycopy. Both divisions should be Nest content divisions.
-
Select the
Add commentsasset builder in the first Nest content division. -
Select the
List commentsasset listing in the second Nest content division.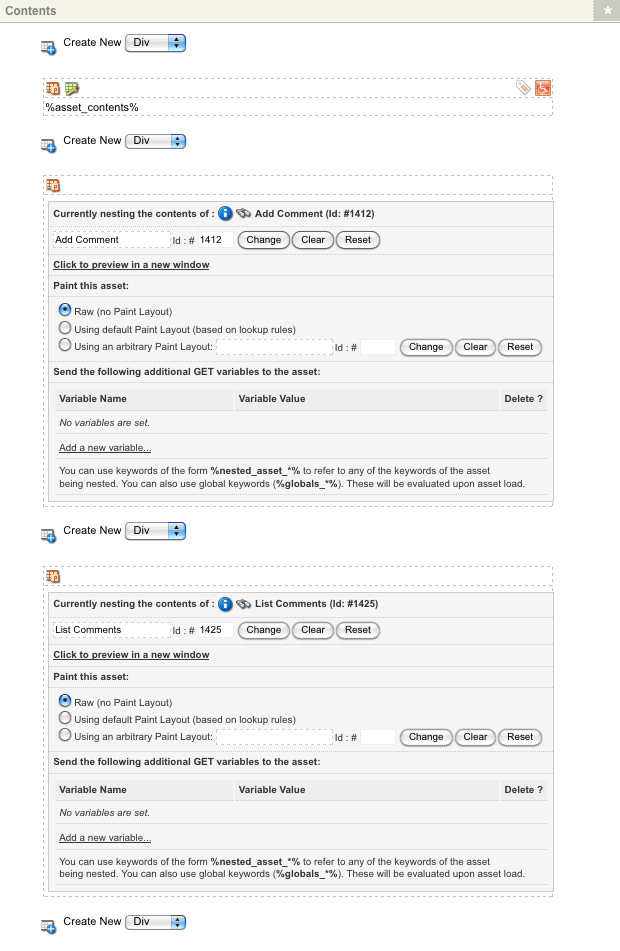
-
Click Save.
| The asset builder needs to be nested before the asset listing page for this comment system to work. |
Applying the paint layout
To apply the paint layout to the newsletters:
-
Right-click on the Newsletters folder.
-
Select Paint layouts.
-
Select the Comment paint layout paint layout in the System defined – frontend layout.
-
Click Save.
Status and permissions
Once the assets have been set up and tested, ensure that you change their status to Live and grant public read permission.
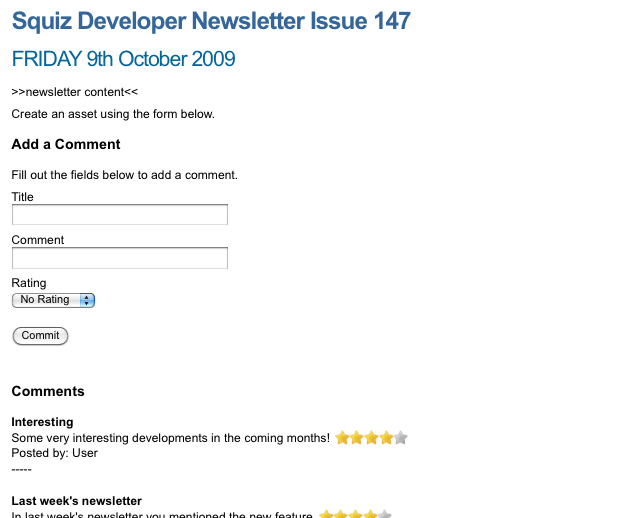
Using the comment system
When you preview a newsletter, you should see the content of the page, a section where you can add a comment, and a section where the comments will be listed:

When you add a comment and click Save, the page refreshes to show the comment at the bottom of the page:
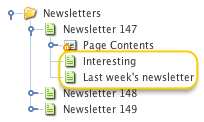
The comment assets will also appear in the asset tree under the newsletter, as highlighted in the figure: