Workflow bundles
When editing multiple assets with workflow applied, workflow bundles can be configured to simplify the approval process. This feature means that rather than users applying for approval and approving these assets individually, bundles of linked assets are assembled, which can be taken into workflow and approved in batches.
Once you have added a bundle, you can configure its settings on its associated asset screens. These screens are often the same as (or similar to) those for a standard page. Read the Asset screens documentation for more information about the common screens for assets in Matrix.
This chapter will only discuss the Details, Custom messages, and Workflow screens, which are different for a workflow bundle.
Linking an asset to a bundle
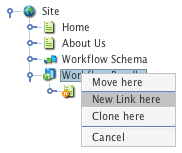
When a bundle is created, no assets will be grouped beneath it. Assets can be batched for the workflow process by linking them under a bundle.
When linking assets to a bundle, child assets of these assets will not be linked to the bundle.
These child assets will appear in the asset tree. However, they will not be affected by the bundle’s activities. Shadow assets, such as a data source record set, cannot be linked to a bundle.
Details screen
The Details screen allows you to set the workflow bundle’s status, determining the state of its assets during the editing and approval process.
Status
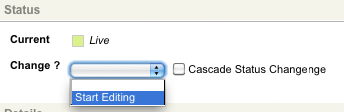
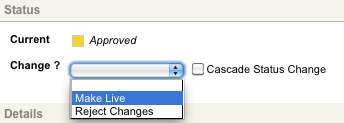
This section allows you to set the status of the workflow bundle. The status section of the Details screen is shown in the figure below.

When a bundle is first created, it will have the status of editing, as shown in the figure above. Once you have linked assets to the bundle, cascading this status will begin the bundle’s editing and approval process, as shown in the figure below.
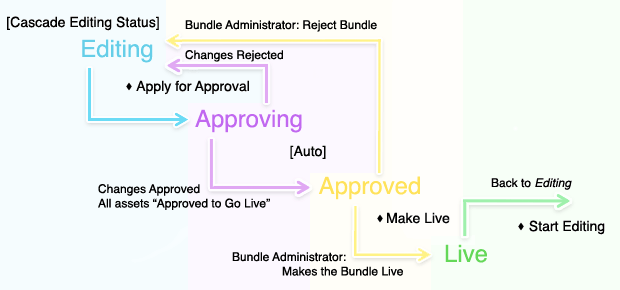
The statuses of the workflow bundle are described below.
Editing
This status allows you to make changes to the bundled assets, which will then be either approved or rejected in workflow.
To set this status, take one of the following actions:
-
Cascade the status of a newly created bundle.
-
Select Start editing on the Details screen of the bundle.
The bundled assets' status will be set to either Safe edit or Under construction, allowing you to make changes to these assets.
Approving
This status will start workflow on bundled assets that have an assigned workflow schema.
To set this status:
-
Load the Details screen of the bundle.
-
Select Apply for approval.

The bundled assets' status with an assigned workflow schema will be set to safe editing pending approval, and workflow will begin. Bundled assets without an assigned workflow schema will bypass the approval process; assets in safe edit mode will be set to safe edit approved to go live while under construction assets will be set to live.
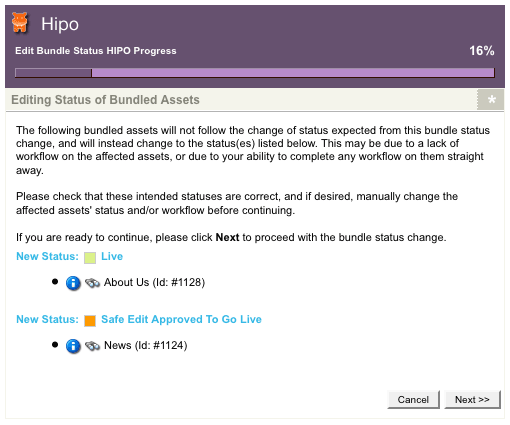
When Apply for approval is selected, a HIPO job pop-up will appear informing you of any assets bypassed in the approval process.
Approved
This status is automatically set when all applicable bundled assets have been approved in workflow. The bundled assets' status with an assigned workflow schema will be set to Safe edit approved to go live. NOTE: Bundled assets with this status are still considered within workflow and cannot be edited until the bundle is either made live or rejected by an administrator.
Live
When this status is set, the bundled assets will be live and will have completed the editing and approval process. This status is set when a bundle administrator selects Make live on the bundle’s Details screen.
To begin editing the bundled assets again:
-
Load the Details screen.
-
Select Start editing.
Custom messages screen
The Custom messages screen allows you to customize the email notifications associated with the workflow bundle. You will be able to edit the following messages:
- Start workflow message
-
The message sent to users when workflow is started on the bundle. This action occurs when the bundle’s status is changed from editing to approving.
- Progress workflow message
-
The message sent when workflow has progressed to a new set of users due to changes approved at the bundle level. Users who can newly approve an asset will receive this email.
- Reject workflow message
-
The message sent to users when changes at the bundle level are rejected.
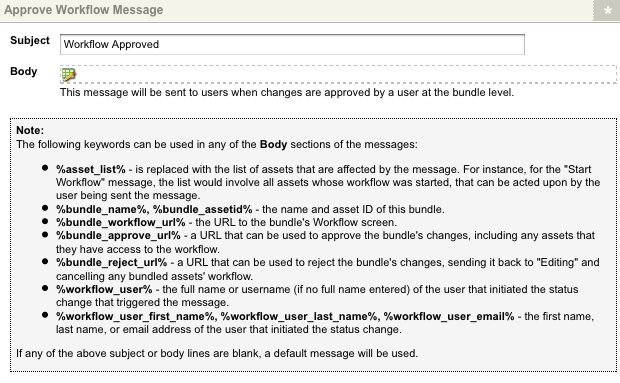
- Approve workflow message
-
The message sent to users when changes are approved at the bundle level.
To create a custom message, enter the content of the message in the corresponding field. Available keyword replacements are listed at the bottom of the screen.
Workflow screen
The Workflow screen of a bundle allows users to approve and reject workflow at the bundle level. This feature allows you to deal with the changes of bundled assets in batches, rather than individually.
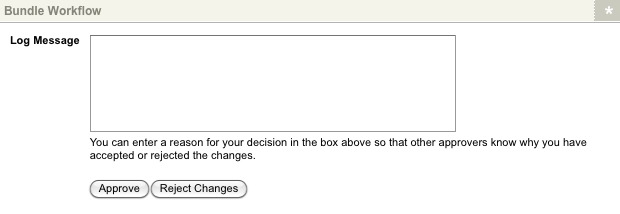
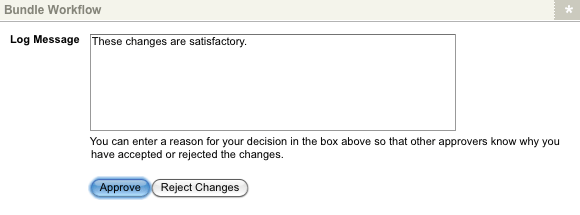
The bundle workflow section of the Workflow screen:
| These fields will only appear if the bundle is in the approving status, and you are part of the approval process, or you are a bundle administrator. |
Users are given the option to either approve or reject the changes made on the bundled assets. Selecting one of these options will approve or reject the changes on all current workflow steps applicable to the user. This action is virtually the same as the user visiting each bundled asset’s workflow screen and approving or rejecting the changes manually.
A log message can be added to append any comments to the approval or rejection. This message will be attached to the workflow on each asset the user is amending.
How a workflow bundle works
To see how a workflow bundle works, consider an example of a site with two standard pages that need updating. These assets both have the same workflow schema applied to them and are usually updated simultaneously. Creating a bundle will allow editing and approval of any changes to these two assets together rather than individually.
The general process for creating a bundle under these circumstances is described in the following steps:
-
A bundle asset is added, and the standard page assets are linked beneath it.
-
The editing status of the bundle is cascaded on the Details screen to begin the editing process. The bundled asset’s statuses are automatically set from Live to Safe editing. If this bundle is live, selecting Start editing in the status field will begin the editing process.
-
Content changes are made to the standard page assets.
-
Once the changes are completed, they need to be approved in workflow.
-
Apply for approval is selected in the status field of the bundle’s Details screen.
-
The workflow schema applied to the bundled assets has the alternate stream Not urgent.
-
As the changes made to the bundled assets are only minor, the Not urgent stream is selected, and the status change is committed.

The bundle’s status is automatically set to approving, and the bundled assets are automatically set to safe editing pending approval.
-
-
The Not urgent workflow stream contains one workflow step requiring the approval of an administrator.
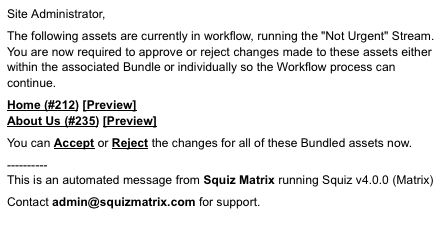
An email is automatically sent to all administrators inviting them to approve or reject the changes and display a list of the bundled assets they can access. These emails can be customized on the custom messages screen of the bundle.
An example email is shown in the figure below.
-
An administrator reviews the bundled assets' changes and approves the changes on the bundle’s Workflow screen. This action will approve the changes for all bundled assets.
-
A log message has been entered for the approval. This message will be displayed on both of the bundled asset’s workflow logs.

You can approve and reject the changes individually on the workflow screens of each asset. This feature can be useful if you want to leave a different comment for each asset. -
-
Once the changes have been approved, both assets will have completed workflow. The bundle’s status is automatically set to approved.
-
A bundle administrator reviews the approved changes and sets the bundle to live by selecting make live in the status field.
The bundled assets will be set to live, and the bundle has completed the workflow process.