Custom edit layouts
|
Make the switch from legacy Standard Pages to Content Pages in Page Builder. Get A/B testing, Personalization, Layouts and Templates, ongoing feature improvements, and a great authoring experience compared with Standard Pages. Read the standard page and content page feature comparison page for more information. |
This documentation explains how to modify the layout of the inline edit mode, including adding and editing layout assets and applying them on either a system-wide basis (through the use of the Custom Edit Layout Manager) or by root node (through the Layouts screen of an asset).
Edit layout
The edit layout asset allows you to customize the layout of the fields in the inline edit mode.
Each edit layout you add can correspond to a screen for a particular asset type in the administration interface. For example, you can create an edit layout for the Details screen of a standard page, one for the Edit contents screen, and one for the Metadata screen.
A drop-down can then be added to each edit layout to allow the user to navigate between the screens in the inline edit mode. Alternatively, you can add all fields onto one edit layout so that they appear on one screen.
You can also create a different layout for different asset types. For example, you can use one layout for a standard page and a different layout for a backend user.
To do this:
-
Create two edit layouts.
-
Apply the layouts to the asset type in the Custom Edit Layout Manager.
Read the Creating and applying custom edit layouts documentation for more information.
Alternatively, if you were showing the same set of fields on each asset type, you can use one layout.
Details screen
The Details screen allows you to change the name of the edit layout and configure the Cascade value flag option for metadata fields on the layout.
Simple edit configuration options
This section allows you to configure the editing layout options and how it presents editing forms on the front end.
|
Both the Include default Matrix JavaScript and Include default Matrix CSS settings have no effect when used as the editing interface within a Component Template. The intention behind these two settings is that they apply at the whole-of-asset (page) level. |
- Include default Matrix JavaScript
-
This setting controls whether:
-
the core JavaScript files are added to the
<head>tag when in/_editmode. -
the same JavaScript files are included when used within an asset builder or account manager asset.
-
the inline onsubmit code for the
<form>tag is added. -
the Save button’s onclick code is added.
Some JavaScript that is part of specific editing fields such as WYSIWYG metadata fields will always be included. If set to
No, default form JavaScript files and inline code are not included in the inline edit mode layout output.- General usage caveats
-
This setting has no effect when default JavaScript is used within the editing interface of a Component Template.
The intention is that this setting applies only to the whole-of-asset (page) level.
Setting this to
Nomight cause some form functionality not to work unless you manually include these JavaScript files and inline code. - Asset builder usage caveats
-
If you are using multiple created layouts on an asset builder page and any of the custom layouts have this field set to
Yes, the asset builder will always include the default JavaScript code. - Multiple layouts usage caveats
-
All must have this field set to
Nofor the JavaScript code not to be printed.
-
- Include default Matrix CSS
-
This setting controls whether:
-
the core CSS files added in the
<head>tag when in/_editmode. -
the same files are included when used within an asset builder or account manager asset.
If set to
No, default form CSS files are not included in the inline edit mode layout output.- General usage caveats
-
This setting has no effect when default CSS is used within the editing interface of a Component Template.
The intention is that this setting applies only to the whole-of-asset (page) level.
Setting this to
Nomight cause some form functionality or layouts not to work correctly unless you manually include these CSS files and styles.
-
- Show "Cascade metadata" field
-
This field allows you to turn off the Cascade value flag for any metadata fields displayed in the edit layout.
By default, the show Cascade metadata field option is not enabled, meaning that the Cascade value flag will be shown.
If you do not want to show the flag on the screen, select this option.
Edit contents screen
The Edit contents screen allows you to add content to and configure the formatting of the edit layout.
Simple edit keywords
This section provides you with a list of the keyword replacements used within the edit layout.
To view the list:
-
Click on the hyperlink, a list of specific asset keywords available for use in inline edit mode.
The simple edit keyword replacements pop-up will appear, as shown in the figure:
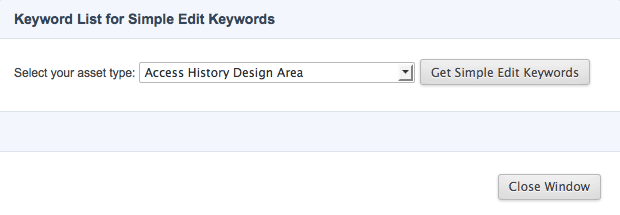 Figure 1. Simple edit keyword list.
 -
Select the type of asset you are using this layout for in the Select your asset type drop-down menu.
-
Click the Get simple edit keywords button.
The list of available keyword replacements for this asset type will appear on the screen, as shown in the figure:
Figure 2. Simple Edit Keywords list for standard pages. -
Highlight the keyword replacement you want to use.
-
Copy it (⌘/Ctrl+C).
-
Paste it into the WYSIWYG editor on the Edit contents screen (⌘/Ctrl+V).
Each keyword replacement listed corresponds to a screen, a screen section, or a field in the administration interface. If a screen, a section, or a field is not listed, it cannot be displayed within the inline edit mode.
Contents
This section allows you to format the information the show in the edit layout. The contents section of the Edit contents screen is shown in the figure:
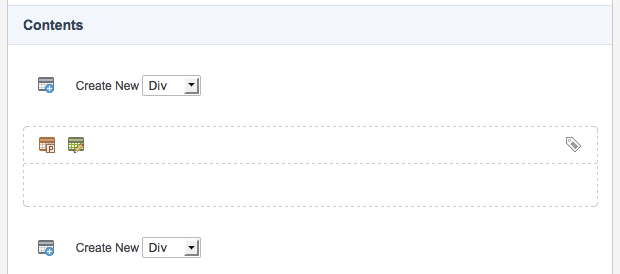
You can use keyword replacements in conjunction with text, images, and links to layout what to show in the inline edit mode. For example, you might want to include instructions on how to fill out metadata fields or apply for approval.
Keyword replacements
Along with the keyword replacements that are shown in the simple keyword replacements pop up, there are several other keyword replacements that you can use within the layout.
These keyword replacements are available in the – Select keyword – drop-down list in the WYSIWYG editor toolbar and are as follows:
- Screen menu
-
This will show the list of screens the user can access for the asset in the inline edit mode. If you have created different edit layouts for each screen, then you need to include this keyword replacement so the user can navigate between them.
- Save button
-
This will show the Save button on the screen. This keyword replacement needs to be included. Otherwise, the user will not be able to save their changes.
- Save button (without formatting)
-
This is the same as the Save button keyword replacement, but it will only show the button without any formatting.
- Release-locks button
-
This will show the Release lock(s) button on the screen. This setting will allow the user to release the locks on the page once they have finished editing it.
Applying edit layouts
Edit layouts can be applied on either a system-wide basis (through the use of the Layout manager) or by root node (through the Layouts screen of an asset).
Read the Creating and applying custom edit layouts chapter for more information.
Status and permissions
You must grant backend users read permission to an edit layout for them to view it in the inline edit mode. Alternatively, if you have created one edit layout and only specific users can view certain fields in the interface, you can modify each division’s permissions on the edit layout instead.
For example, say you have created an edit layout that has the fields to allow users to edit the contents and make workflow approvals. You can place the workflow fields in a new division on the edit layout and only grant read permission on that division to the users that are part of the approval process, rather than allowing all users to view both sets of fields.
Each edit layout also needs to be live.