Use a custom form to create TRIM records
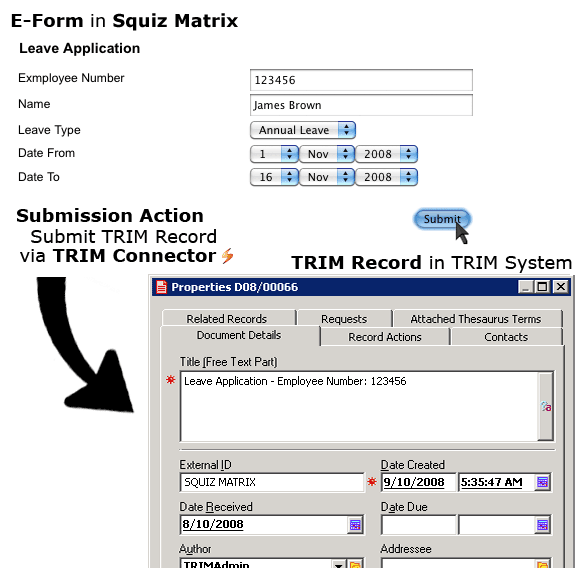
A custom form can be configured to function as an e-form using the submit TRIM record submission action. This allows form submissions to be sent as TRIM records to a connected TRIM system through the TRIM connector asset. E-forms are especially useful as they create a log of the form submission in both the Squiz Content Management and TRIM systems.
Example
To create an e-form that submits TRIM records:
-
Create a custom form with questions. Read the Custom form documentation for more information.
-
Once the custom form is complete, it needs to be configured to send form submissions to a selected TRIM system. Right-click on the custom form and select Submission actions.
-
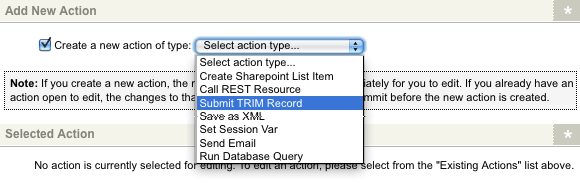
In the Add new action section, select the Create a new action of type: field, then select Submit TRIM record, as shown in the figure.
-
Click Save. Additional fields will be displayed on the screen.
-
In the Existing actions section, the Submit TRIM record action will be displayed. However, as it is not yet configured, the data source will read; No connection details specified, and the action will not be valid, as shown in the figure.

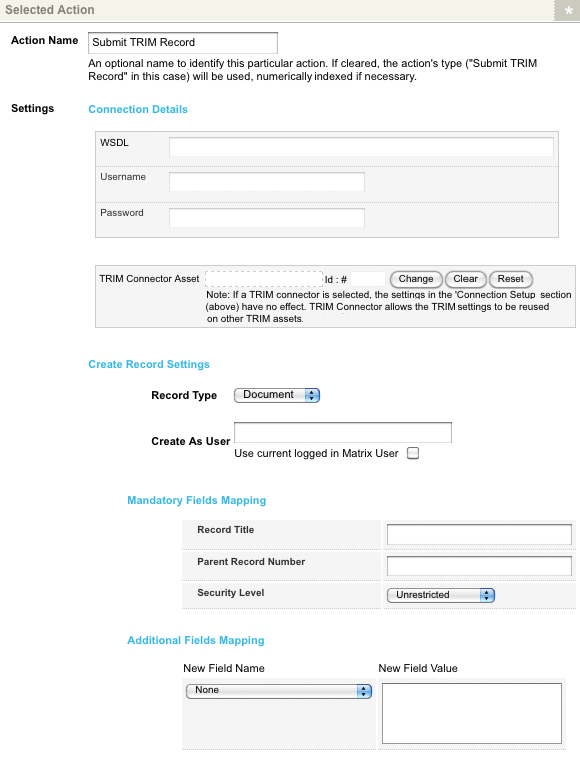
The Selected action section will contaIn the Additional fields for configuring the submit TRIM record action, as shown in the figure.
-
In the Action name field, enter the name for the submission action. By default, the name entered into this field is submit TRIM record.
-
In the Connection details section, configure the TRIM bridge that will link Squiz Content Management to the TRIM system where TRIM records should be sent. Enter a connection setup that can be configured, or a TRIM connector can be selected from the asset tree:
-
In the WSDL field, enter the URL to the WSDL of the TRIM system.
-
In the Username field, enter the username used to connect to the TRIM system.
-
In the Password field, enter the password used to connect to the TRIM system. This password must be entered twice for validation purposes.
Or
-
In the TRIM connector asset field, select a configured TRIM connector to use as the TRIM bridge for the Submit TRIM record action.
-
-
In the Create record settings section, configure the settings for creating the TRIM records:
-
In the Record type field, select the type of TRIM record to create from the submitted e-form. Document is the only option available in this field.
-
In the Create as user field, enter the name for the user accredited with creating the TRIM record. To use the username of the signed-in user, select the User currently logged in Squiz Content Management user field.
-
-
In the Mandatory fields mapping section, enter the information for the mandatory* fields on the TRIM record:
-
In the Record title field, enter a title for the TRIM record. Keyword replacements can be used in this field.
-
In the Parent record number field, enter the record number of the parent container where the TRIM record should be stored.
-
In the Security level field, enter a security level of the TRIM record. This will determine who can view and edit the record.
The following options are available:
-
Public.
-
Unrestricted.
-
In-confidence.
-
Protected.
-
Highly protected.
The configuration of these security levels, including access and restrictions, are determined by the TRIM system settings.
-
-
-
In the Additional field mapping section, select additional fields to be appended to the TRIM records and the values of these fields. For example, a Notes field can be created with the value as the responses of the e-form by using keyword replacements:
-
In the New field name field, select the field name from the drop-down list for the field to be added to the TRIM record.
-
-
In the New field value field, enter the value to be used for the selected field. Keyword replacements can be used in this field.
-
Once configured the settings of the submit TRIM record action, click Save. The action will now be displayed as valid In the Existing actions section, as shown in the figure.

Form submissions can now create TRIM records as defined in the selected action settings, as shown in the figure.