Convert deprecated linked CSS design areas for Squiz Content Management 6 compatibility
This tutorial shows you how to manually convert the deprecated CSS design area in design assets to an implementation using supported design features in Squiz Content Management 6.
Overview
In Matrix version 5.4.4.0, the Linked CSS Design Area was officially deprecated. This deprecation was done to reduce the number of ways to include CSS into a design and drive new and best-practice implementation techniques.
While users could still use the linked CSS design area from Matrix 5.4.4.0 onwards, the Squiz Matrix product team did not support it. This feature was subsequently removed as a usable feature in Squiz Content Management 6.0.0.
If your Squiz Content Management system is hosted with Squiz and you plan to upgrade from Matrix 5 to Squiz DXP automatically, these CSS design areas will no longer work.
If you still want to bring in CSS using a design customization, or if you need to convert any existing CSS design areas ahead of your instance upgrade, there are alternative ways to do so using new best practices.
This guide will explain two such methods:
-
A method that is as close as possible in design to the original design area logic.
-
A best-practice method that offers an optimal way of referencing CSS files in your designs.
Previous implementation example
Before learning about the new methods, let’s first review a typical implementation example of using the deprecated CSS design area in a design.
Consider a basic asset tree structure that looks something like this:
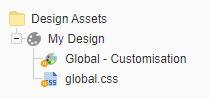
A design asset might then have the following code inside it where you would want to reference a CSS file on the frontend:
<mysource_area id_name="css_global" design_area="linked_css"></mysource_area>This method is how you brought in linked CSS using the old CSS design area. You would then create a design customization that picked up which CSS design asset to include in this design code area.

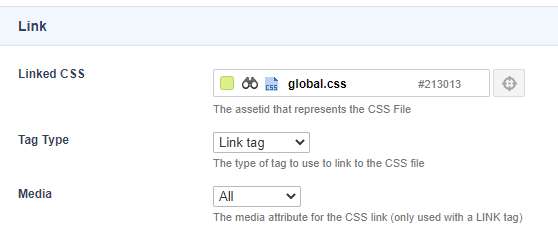
On the details screen of the css_global design area, you would then have picked the CSS file asset in the "Linked CSS" field.
This example is a typical use case of the deprecated CSS design area.
You can replace this functionality with either a declared_vars design area or a nested standard page.
The following sections describe these approaches in detail.
Method 1: Using a declared_vars design area
You can use the declared_vars design area method to reimplement a linked CSS design area.
This method is the best way to achieve an implementation that closely resembles the old linked CSS design area approach.
This design area lets you set custom variables that you can print in other parts of the design. You can then configure the values for each design customization. You can add additional CSS variables within the same design area and use a single place to define all your CSS files through a design customization. This method also gives you greater control over the <link> tag that gets printed on the frontend.
Before you start
Check the following requirements before continuing:
-
You have experience using linked CSS design areas in your site.
-
You know where your site design assets are located within your Content Management system and have write permission on the assets.
Steps
To set up a declared_vars design area:
-
Go to the Edit parse file screen of your design and find the location in your design code where you would link to create a CSS file reference.
-
Add a
declared_varsdesign area and specify a new asset ID-based variable.<mysource_area id_name="css" design_area="declared_vars" print="no"> <mysource_declare name="global" value="" type="assetid" description="The global CSS file."/> </mysource_area> -
Click Save to create the design area. This design area behaves similarly to the previous
linked_cssdesign area. -
In the newly-created design area, specify where you want to print the CSS asset ID.
You can use themysoure_printdesign area to print the global variable of the“css”declared variables design area.Because
mysource_printonly prints the CSS design asset’s asset ID, you need to add some code before and after it to create the full CSS <link> tag.<mysource_area id_name="css" design_area="declared_vars" print="no"> <mysource_declare name="global" value="" type="assetid" description="The global CSS file."/> </mysource_area> <link rel="stylesheet" type="text/css" href="./?a=<mysource_print id_name="css" var="global"/>" media="all" /> -
Navigate to the Declared Variables section of the Design area’s Details screen.
-
Select the CSS design asset you would like to reference and click Save.
-
Finish by deleting the old
linked_cssdesign area from your design code.
Method 2: Using a nested standard page
If you want to go a step further and follow modern best-practice implementations for including CSS into your Squiz Content Management design, you can use the nested standard page approach.
This approach uses a nested design area that nests in a standard page that holds the code for the CSS <link> tag.
This best-practice method gives you greater control over what code you want to print on the frontend with your CSS code. You can even nest in alternative standard pages for each design customization if you need to.
Before you start
Check the following requirements before continuing:
-
You know where your site design assets are located within your Content Management system and have write permission on the assets.
Steps
To create a nested standard page:
-
Create a new standard page named
CSS Includesin the asset tree location you use to store your design assets. For example, “CSS Includes”.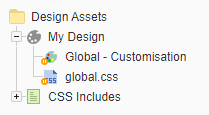
-
Go to the Content screen of this standard page and change the content container’s content type to Raw HTML.
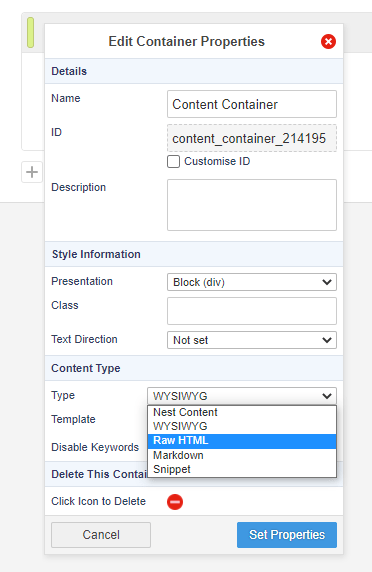
-
Select Set Properties and then click Save to save your changes.
-
In the Raw HTML content container, add the following
<link>tag code for the CSS file you want to include.<link rel="stylesheet" type="text/css" href="./?a=1234?v=%globals_asset_version:1234%" media="all" /> (1)1 Replace “1234” with the asset ID of your CSS file asset you want to reference. -
Go back to the Edit parse file screen of your design and add a nested content design area.:
<mysource_area id_name="css_includes" design_area="nest_content" /> -
Go to the Details screen of your design customization and click to customize the
css_includesdesign area. -
On this screen, select the standard page asset you created previously as the asset to nest in and click Save.

-
Finish by making the standard page asset live and ensure it has the correct read permissions applied so that visitors on the frontend can see it.
Summary
You have now replaced the previous functionality offered by the linked CSS design area with an optimal and best-practice method. This method gives you complete control of how to reference your CSS files on the frontend.
You can now delete the old linked_css design area from your design code.