Nest content design area
This design area allows you to nest the content of an asset inside the design. For example, you can create an area in your design to show your site’s latest pages and nest a What’s new page in it. By doing this, you can regularly change the content without having to change the design.
The code that is required for the nest content design area is as follows.
<MySource_AREA id_name="news_panel" design_area="nest_content" />
Once you have added the code to the parse file, you need to customize it in a design customization and select which asset to nest to get this design area to work.
Set variables
The set variable available for the nest content design area is as follows:
- type_codes
-
This variable allows you to restrict which asset types can be nested into the design. For example, if you only want to allow image assets to be nested, set this value to Image. The type code checking is not strict, which means inherited asset types will also be allowed. For example, if you set this value to File, it will include all assets that are of type file. To add multiple asset types, use either a comma or space in between each type code. The following example restricts the nest content to pages and files.
<MySource_AREA id_name="whats_new" design_area="nest_content">
  <MySource_SET name="type_codes"  value="page file" />
</MySource_AREA>
Customizing the nest content design area
Once you have added a nest content design area to a design’s parse file, you must create a design customization to select which asset you want to nest.
Read the Design customizations for more information on creating a design customization and customizing the design area.
Once you have customized the nest content design area, you can customize its settings on the Details screen.
Read the Asset details screen documentation for more information on the Status, Future status, and Thumbnail sections of the screen.
Read the Design customizations documentation for more information on the General section.
Link
This section allows you to select which asset to nest in the design area.

Select the asset you want to nest in the first field and select whether to style the content through a paint layout.
You can use either:
-
No paint layout by selecting Raw.
-
The paint layout applied to the asset the user is viewing by selecting Using default paint layout. For example, if the user is viewing the Contact us page in your site, the paint layout applied to the Contact us page will be used for the asset that has been nested.
-
A different paint layout that you have created for the design area.
If the type_codes variable has been set in the parse file, you can only select an asset that matches one of the types that has been listed.
For example, if type_codes has been set to Image, you can only select an image asset.
|
Example
The following is the HTML code added to the static HTML file to show where the nest content design area should go in the design.
<div id="right-col">
  <!-- Nest right column area -->
</div><!-- end right-col -->
The required code is added to the parse file for the design area, as shown:
<div id="right-col">
<MySource_AREA id_name="whats_new" design_area="nest_content">
<MySource_SET name="type_codes" value="page" />
</MySource_AREA>
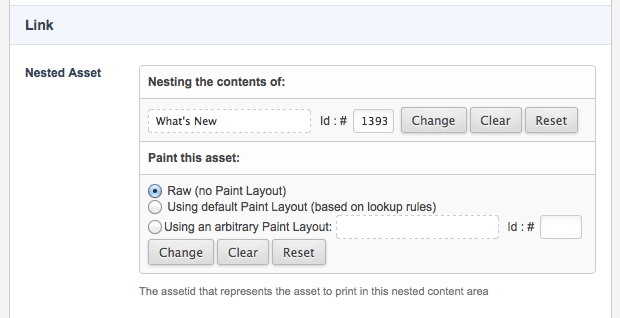
</div><!-- end right-col -->A design customization is created, and the nest content design area is customized. On the Details screen of the nest content design area, the What’s new page is selected in the link section, as shown in the figure:
The design customization is applied to the site on the Settings screen. Read the Asset screens documentation for more information on the Settings screen.
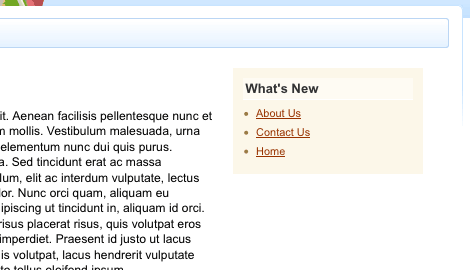
The What’s new page now appears on the right-hand side of the screen, as shown in the figure: