Asset scheduling screen
The Scheduling screen lets you schedule parent location changes or deletions in the future. The screen lets you schedule a linking job to happen at a future date and time.
Linking assets
Squiz Content Management sets up relationships between assets when you build your site. These inter-asset relationships are called links. Links control how assets display in you website frontend. Links also control more technical aspects of your website, such as how asset relationships are managed through web services and APIs.
You can link an asset to another location on your site or several locations. Managing assets relationships like this let you have far greater control over where the content appears on your frontend.
Linking screen
The Linking screen of an asset lets you view detailed information about its incoming and outgoing relationships with other assets. This screen lets you change an asset’s parent and child relationships and how an asset appears in website menus and other navigation elements of your site.
For Web services assets and APIs, these link relationships use a set of type codes to define each type of link in the database. These codes provide a robust way to communicate asset relationship information between systems. You can read more about type codes in the System link values documentation.
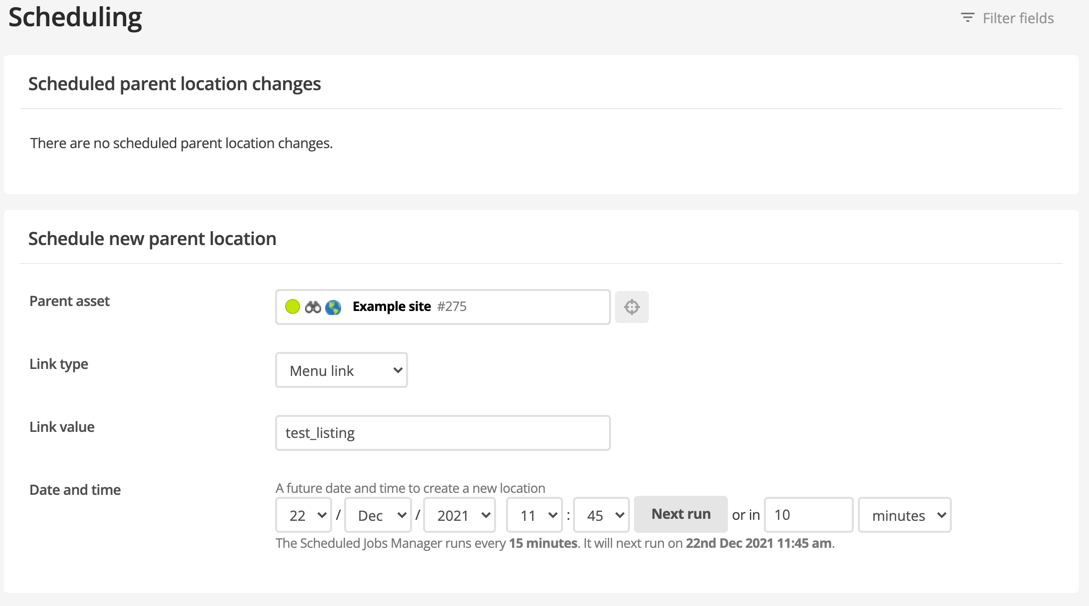
Schedule a new parent location
The Schedule new parent location section lets you create a new link for the asset at a future date and time. Using this option creates the same asset in a new position in the system.
To schedule a new parent location:
-
Click Save to begin creating a new schedule.
-
Complete the following information:
- Parent asset
-
Use the asset picker to select the parent or child asset for the new linked asset. Right-click on the asset and select Use me to set the parent asset. For example, if you link the asset under the Example site site asset, the parent is the Example site asset.
- Link type
-
Select the visibility for the linked asset.
- Link value
-
(Optional) Specify a value for links that are Menu link, Hidden link, or Reference link.
-
In the Date and time section, select from the following options:
-
Leave the Date and time settings empty to make the changes immediately.
-
Select Next run to set the date and time for the next run of the scheduled jobs manager.
-
Use the or in option to specify the number of minutes, hours, days, weeks, months, or years in the future.
-
-
Once you have filled out the required fields, click Save.
-
On the HIPO screen, select Next

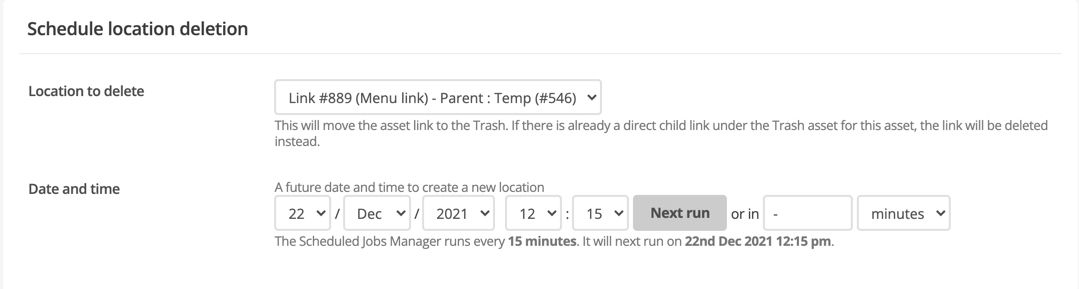
Schedule a location deletion
The Schedule location deletion section lets you create a job to move an asset link to the trash at a specified date and time.
To schedule a location deletion:
-
Click Save to begin editing the schedule.
-
Complete the following information:
-
In the Location to delete field, select the asset link to move to the trash.
If there is a direct child link under the Trash asset for this asset, the link is deleted instead. You can select to delete all links by selecting All from the list or only a specific link.All linked assets are trashed if you select All and leave the Date and time field empty. -
In the Date and time section, select from the following options:
-
Leave the Date and time settings empty to make the changes immediately.
-
Select Next run to set the date and time for the next run of the scheduled jobs manager.
-
Use the or in option to specify the number of minutes, hours, days, weeks, months, or years in the future.
-
-
Once you have filled out the required fields, click Save.
