Step 5: Add metadata schemas
In this tutorial step, you will build on your new site by creating a metadata schema.
The metadata schema will have some simple fields used in <meta> tags and some functional fields you will use later when you render the layout.
You will also create a second metadata schema to allow editors to configure some site settings.
About metadata
This section contains some basic overview information about metadata. It is provided in case you are new to Squiz Content Management metadata.
What is metadata used for in Squiz Content Management?
In Squiz Content Management, you can use metadata for multiple purposes:
-
Rendering HTML meta tags in the HTML head.
-
Creating structured content models. For example, custom fields for a product page or some content type.
-
Allowing content editors to configure options for a particular page. For example, turn off the right column.
What does Squiz Content Management metadata consist of?
Squiz Content Management Metadata is made up of the following parts:
- Metadata fields
-
Several types of form fields to capture data.
- Metadata sections
-
Used to group fields together.
- Metadata schemas
-
Used to group sections together into an overall schema.
Site asset schemas and page schemas
Metadata can be applied to a whole site, or set to only apply to an individual asset. The common convention is to use one Site asset schema for global variables that are defined once to use across an entire site. For example, the image used as the site logo could be referred to as a global variable. A Page schema can be cascaded to all pages in a site, and is used for data that is specific to a given page. An example is the description content or layout controls for a page.
For more background information on Squiz Content Management metadata schemas, read Configuring metadata schemas.
Create a metadata schema for your page
-
In the Metadata Schemas folder, create a metadata schema asset called Global schema.
-
Right-click on the Metadata Schemas folder.
-
Select .
-
Type Global schema as the name.
-
Select Create.
-
-
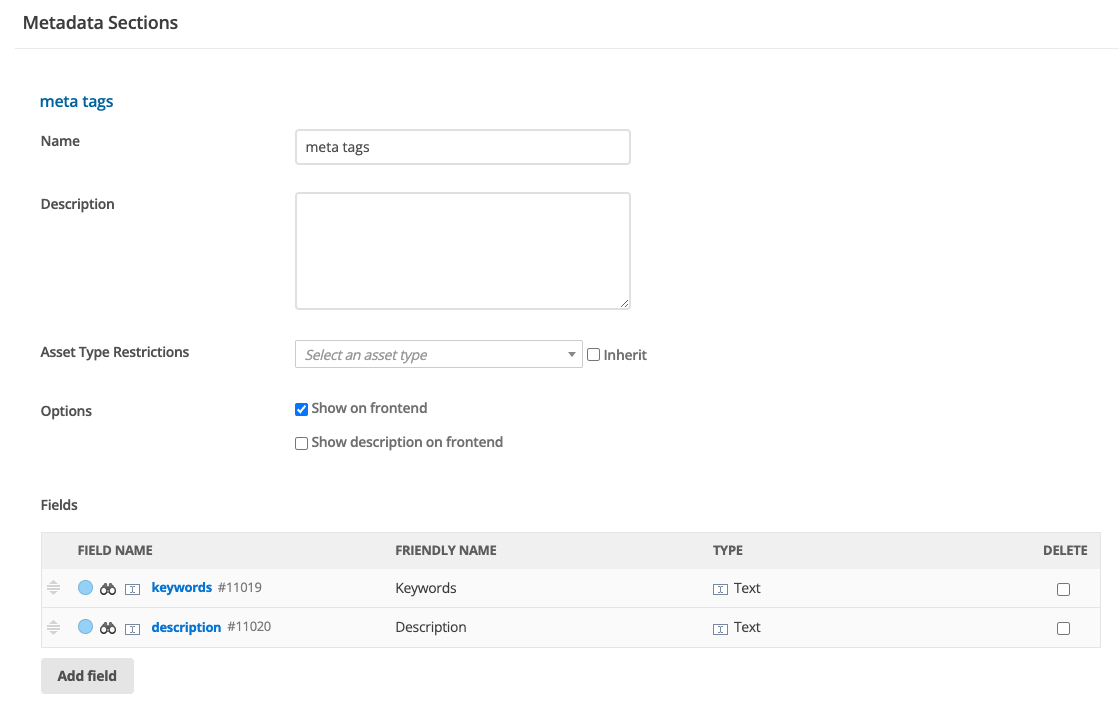
Add a new section to the Metadata Schema asset called meta tags.
-
Right-click on the Global schema asset.
-
Select Details.
-
Click Save.
-
Scroll to Create new section.
-
Type meta tags as the section name.
-
Click Save.
-
-
On the Global schema Details page, add the fields shown in the table below:
-
Scroll to the meta tags section.
-
Select Add field.
-
Complete the following fields based on the table.
Field name Friendly name Type keywords
Keywords
text field
description
Description
text field
-
Click Save.
-
-
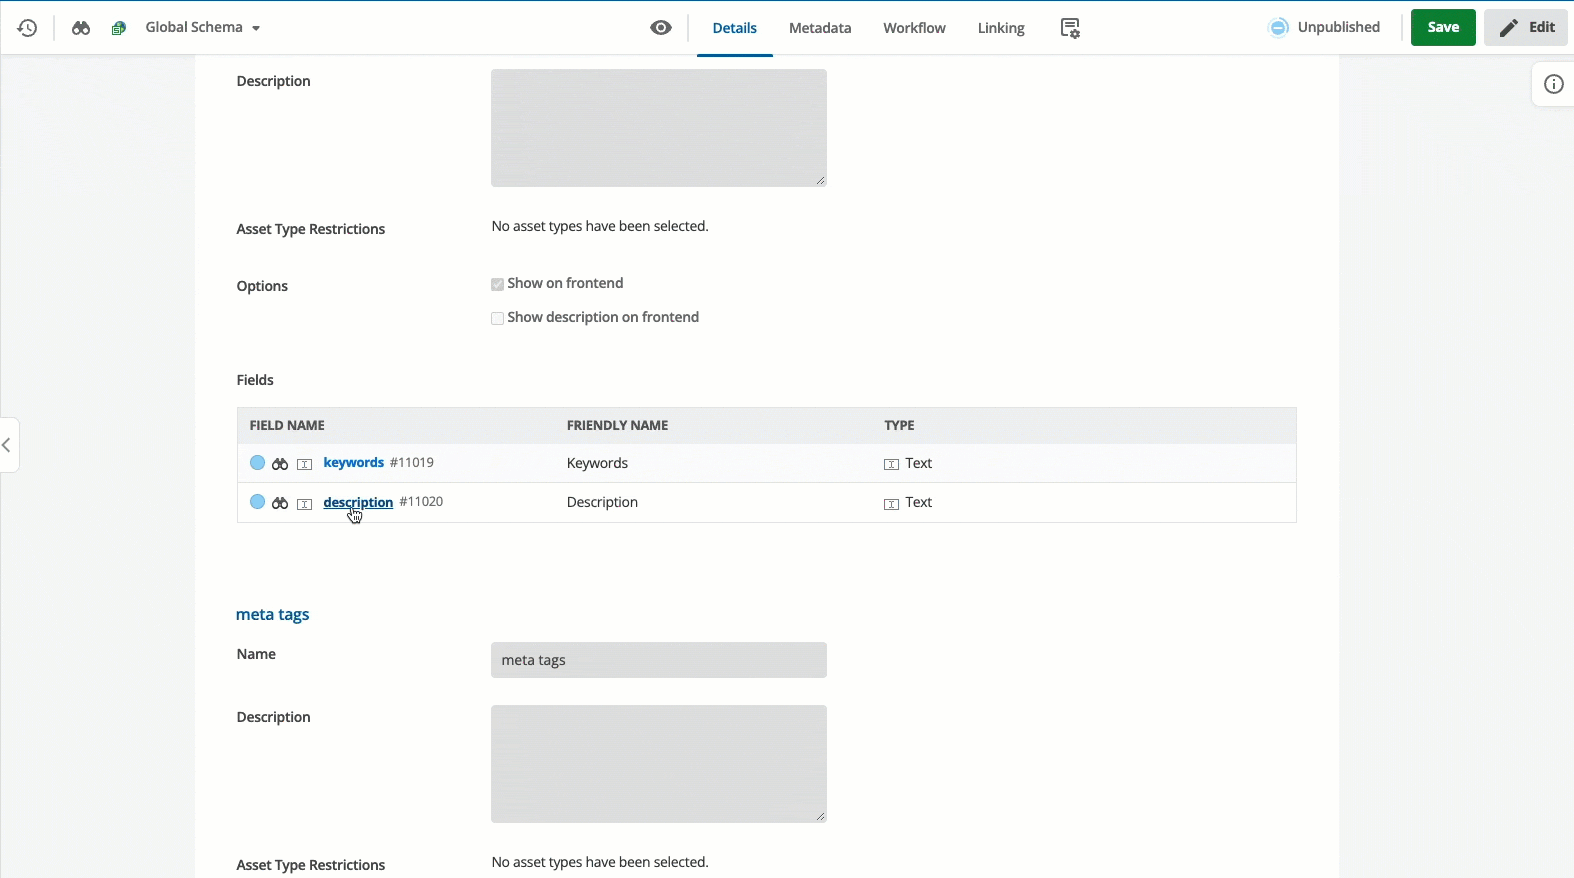
Select the description field name. You will go to the description field asset details page.
-
Set the Field Type to Text area to provide a larger field to hold more content.
-
Click Save.
-
Go back to the Global Schema metadata schema Details screen.
-
Select on the keywords field name to go to the keywords field asset details screen.
-
Change the field type to Multiple text fields.
-
Add a new section to the schema called layout:
-
Right-click on Global Schema.
-
Select Details.
-
Click Save.
-
Scroll to Create New Section.
-
Type layout as the section name.
-
Click Save.
-
-
In the layout section add the following fields:
Field name Friendly name Type show-heading
Show heading?
Select
right-col
Show right column?
Select
right-col-include
Right column include
Related asset
-
Select show-heading in the fields section.
-
Click Save.
-
On the Details page of the show-heading asset, set the following fields as specified:
-
The Allow Multiple field is not set.
-
The Allow Empty field is not set.
-
Style is checkbox.
-
Type is unordered list.
-
Add the following Select Field Options.
-
Select Add option.
-
Enter the Option Key and the Option Value for each field shown in the table below.
-
Repeat until all options are added.
-
Click Save.
-
Option Key Option Value 0
No
1
Yes
-
-
The Default value field will appear. Select Yes from the options.
-
Click Save.
-
Update the right-col asset to match the following:
-
The Allow Multiple field is not set.
-
The Allow Empty field is not set.
-
Style is checkbox.
-
Type is unordered list.
-
The options are as follows:
Option Key Option Value 0
No
1
Yes
-
Create a site asset metadata schema
Create a metadata schema for your site asset. See Site asset schemas and page schemas for an explanation of the difference between the two.
-
In the Metadata Schemas folder create a new metadata schema called Site schema.
-
Add a section called Site settings.
-
Add a field called site-logo to the section based on the following details:
Field name Friendly name Type site-logo
Site logo
related asset
-
Select on site-logo on the Fields section of the Site settings Details page.
-
On this page, set Restrict asset types to Image. Content editors can use this field to assign an image for the site logo.
-
Click Save.
Apply your metadata schemas
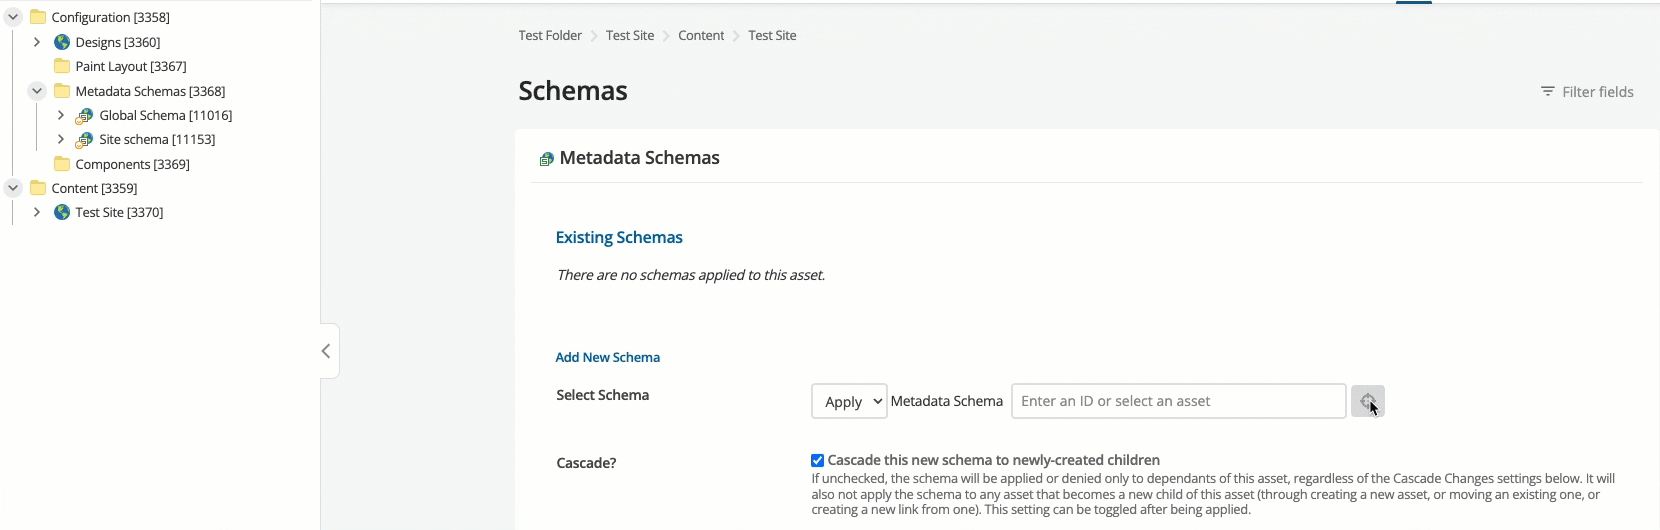
You now need to apply your metadata schemas to the site asset.
-
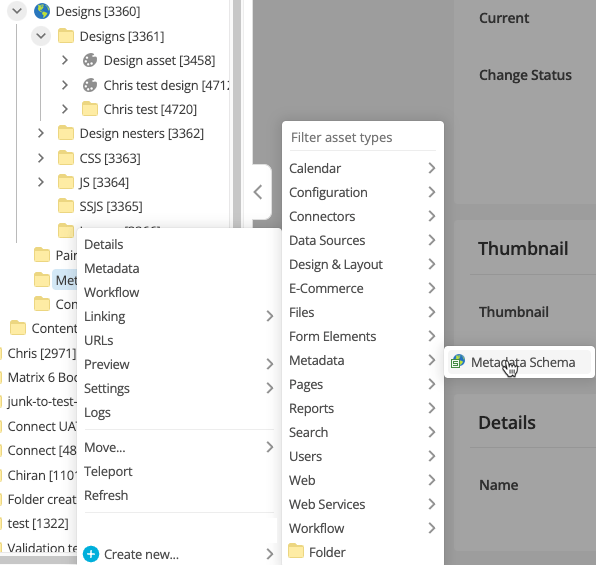
Right-click on the Test Site site asset and then select .
-
Click Save.
-
In the Add New Schema section’s Select Schema option, select Apply from the drop-down menu.
-
Enter the Global schema asset ID, or select the Global schema asset ID using the asset picker.
-
Select the Cascade this new schema to newly-created children checkbox.
-
Click Save.
-
The Global Schema will appear on the screen. The Cascade? check box will be checked.
-
Apply the Site schema to the Site asset. On the same Schemas page:
-
In the Add New Schema section’s Select Schema option, select Apply from the drop-down menu.
-
Enter the Site schema asset ID, or select the Site schema asset ID using the select tool.
-
Clear the Cascade this new schema to newly-created children checkbox. Doing so will ensure that the site schema will only be applied to the Test Site asset and not its children.
-
Click Save.
-

Update your design asset to render metadata
To make your metadata values appear on the page, you must add a tag to the parse file on the Design asset.
-
Open the parse file on the Design asset:
-
Go to .
-
Right-click on Global design and select Edit Parse File.
-
-
Click Save.
-
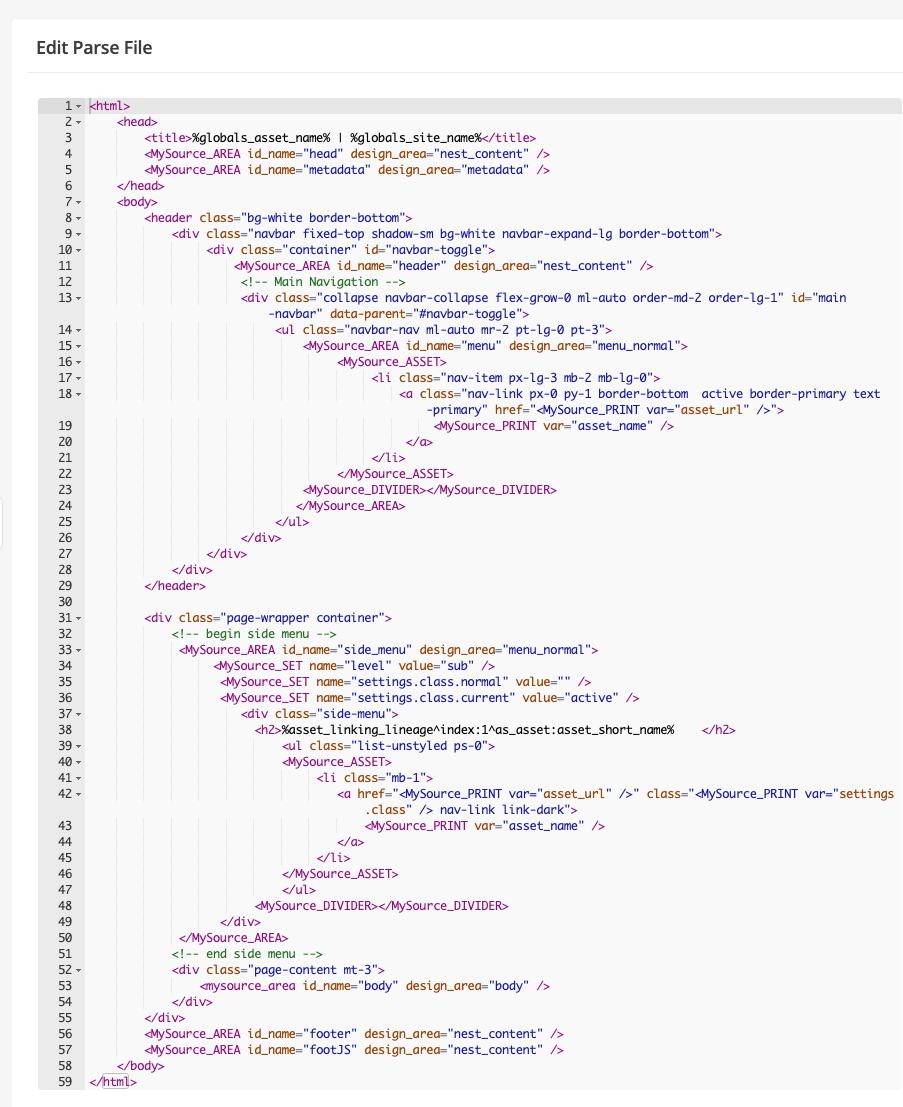
Add the following line just before the ending
</head>tag:<MySource_AREA id_name="metadata" design_area="metadata" />
The parse file will now look like this:
Test your page metadata
To test your page metadata you will have to enter some content into metadata fields on a page and then check the page source HTML. You will see metadata tags in the HTML.
-
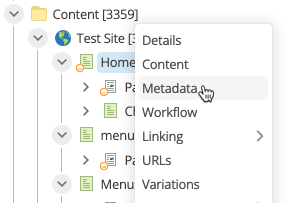
Right-click on your Home page and then select Metadata.
-
Click Save.
-
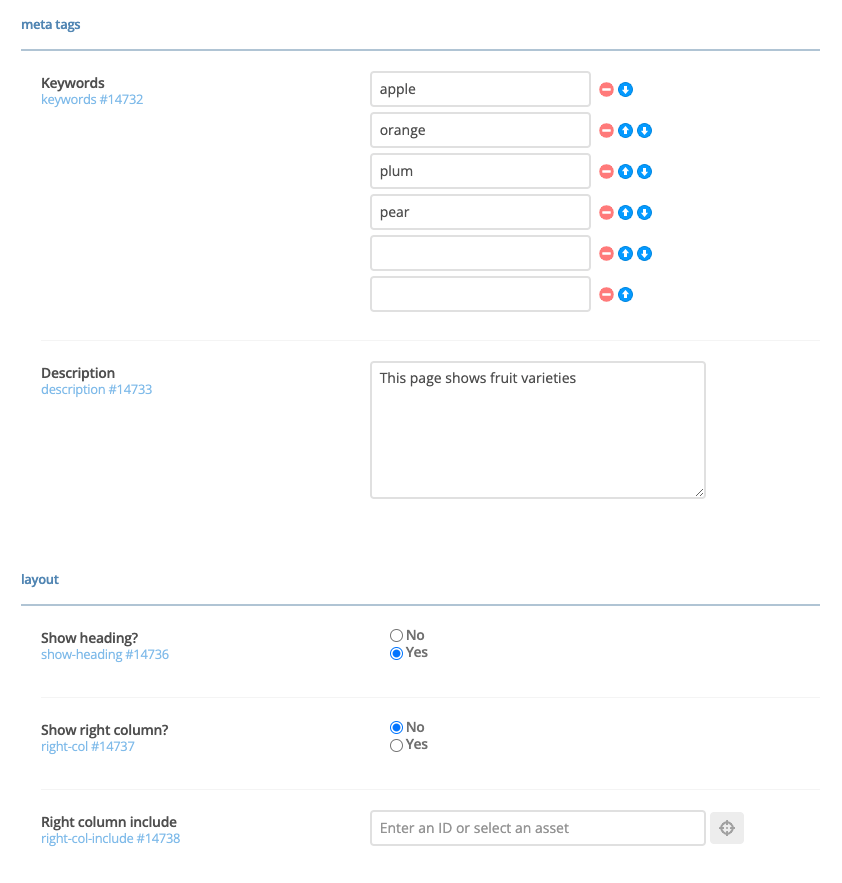
Enter the following information on the Metadata screen:
-
Keywords: fruit
-
apple
-
orange
-
plum
-
pear
-
-
Description: This page shows fruit varieties.
-
Set Show heading? to
No.
-
-
Click Save.
-
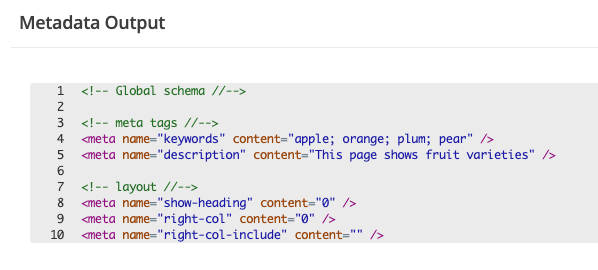
Look at the Metadata Output at the top of the page. It will show the
keywords,description,show-heading,right-colandright-col-includemetadata tags.
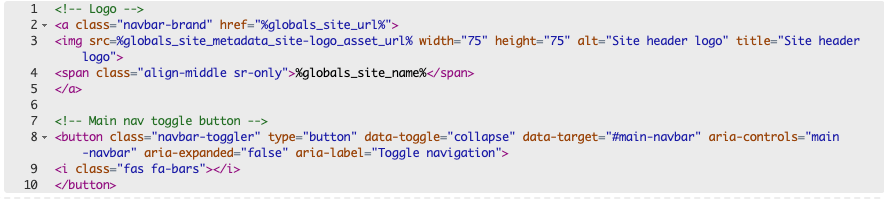
Update your header include asset to use the logo
-
Edit .
-
Edit the code to replace the logo URL with
%globals_site_metadata_site-logo_asset_url%.
This will dynamically load the logo image URL after it is set on the Site asset metadata.
Set your site logo image
-
Add a folder under your site asset.
-
Call it Images.
-
Select Hidden link so that it will not be displayed in menus.
-
Select Create.
-
-
Create a new image file called Logo.
-
Right-click on Logo.
-
Select .
-
Select Choose file.
-
Choose your image.
-
Select Create.
-
-
Add the logo file to the site asset metadata:
-
Right-click on the Test Site site asset.
-
Select Metadata.
-
Click Save.
-
Scroll to the Site logo section and either:
-
add the asset ID of the Logo file
-
use the asset picker to select the Logo file.
-
-
Test your site and page metadata
You can test your site in a browser in two ways:
-
Copy the URL from the site asset and paste it into a browser.
OR
-
Right-click on the site asset and select .

You will see your site in the new tab.
-
Check that the following points are true:
-
You see your logo in the header.
-
You see your logo in the footer, from the keyword when we created the footer.
-
When you view the source of the page, you see the meta tags in the HTML.
-
-
Your site will now look like this:

-