Use roles to simplify workflow messaging logic
Roles can help make workflows operate the way you need them to. Consider this example of a site where three teams are responsible for maintaining content on a website.
Overview
-
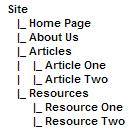
Team A maintains the Home Page and About Us pages.
-
Team B maintains the Articles section.
-
Team C maintains the Resources section.
Each team has an administrator who leads the team. The administrator is responsible for approving all changes made by their team through the workflow system. Each team also has a legal expert who must approve all content changes before making them available to the public.

The users are all members of different user groups. Each team needs write permission on the pages they maintain except for the administrator, who requires admin permission.
The desired workflow for all these pages is:
-
The legal expert approves content changes made by other members of the team.
-
The administrator approves content changes made by other members of the team.
Problem
While this workflow example is simple, it still requires three workflow schemas to be created. Each step requires you to assign a different user for each of the three sections.
You could create a new set of user groups to avoid this situation.
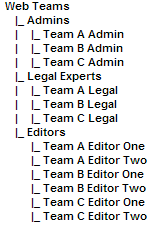
Then we can change the workflow schema to look like this:
-
A member of the Legal Experts user group approves content changes made by other team members.
-
A member of the Admins user group approves content changes made by other team members.
This schema allows us to add new team members in the future. However, it introduces a situation wherein users in the workflow receive messages informing them that a piece of content requires reviewing. However, that content may not be within their section of the site.
Solution
By using roles, we can avoid this problem. Create two roles:
-
an Administrator role
-
a Legal expert role.
For each asset in the site, you must assign the roles and which user performs each role on the Roles screen. The role assignments needed are:
- Home page
-
The Team A admin user fulfills the Administrator role, and the Team A Legal user fulfills the Legal Expert role.
- About Us page
-
The Team A admin user fulfills the Administrator role, and the Team A Legal user fulfills the Legal Expert role.
- Articles section
-
The Team B Admin user fulfills the Administrator role, and the Team B Legal user fulfills the Legal Expert role.
- Resources section
-
The Team C admin user fulfills the Administrator role, and the Team C Legal user fulfills the Legal Expert role.
We can now change the Workflow Schema to look like this:
-
The Legal Expert role approves content changes made by other team members.
-
The Administrator role approves content changes made by other team members.
Summary
When a piece of content requires reviewing, only the users assigned the roles for that asset will receive internal messaging to approve that content. For example, if an editor changes the home page, only the Team A Legal user and the Team A Admin user will receive the message to approve the changes.