Trigger actions
Trigger actions let you set what Matrix should do when Trigger events and their associated Trigger conditions pass evaluation. Read Adding triggers for more information about creating a trigger.
Add remap
The action creates a new remap for an asset when it is fired.
The short URL is a combination of the asset’s site and its ID.
An example is http://www.example.com/1234 (where 1234 is the ID of the asset where the trigger was fired).
Add URL
This action adds another URL to the asset.
-
Enter the URL that you want to add into the field provided.
-
Select either HTTP or HTTPS.
Add web path
This action adds another web path to the asset.
The following fields are available:
- Web path
-
Enter the web path that you want to add to the field provided. You can use keyword replacements and global keyword replacements within the web path. For more information on these keyword replacements, refer to the keyword replacements manual.
- Options
-
- Delete all other web paths
-
Select this field to delete all other web paths associated with the specified asset.
- Make the new web path in lowercase
-
Select this field to convert the supplied web path into lowercase letters automatically. For example, if a user creates an asset with uppercase letters, this action can convert the new asset’s web path into lowercase.
- Update lookups for children
-
Select this field to update the web paths for the specified asset’s children.
- Don’t add remap
-
Select this field to prevent this trigger from adding remaps for the newly created web path.
Assign user to groups
This action allows you to add the current user (that is, the user who fired the event) to a specified user group or list of groups. The user group linking settings section allows you to configure the linking settings to use when assigning the user to the specified user groups. The fields available in this section are as follows:
- Join method
-
Specify whether the user will join the selected groups as a physical link or for the current session.
- Link type
-
Specify the link type and value when assigning the user to the selected user groups.
- Fixed user group to join
-
Manually select the user groups to which to assign the user. You can add multiple groups by clicking the More… button.
The user groups to join by name section allows you to specify the user groups to assign the user by asset name. The fields available in this section are as follows:
- Root node to join groups under
-
Select a root node to specify that only groups under this asset will be joined, as per the join by name settings.
- User groups to join by asset name
-
Enter the names of the user groups to join. Multiple groups can be set as comma-separated values. If no group names are specified in this field, no groups will be joined by asset name.
- Create and join missing user groups?
-
Enable this option to create any user groups under the specified root node for any groups not found by name. These groups will be created with a status of under construction.
- Join conditions
-
This field allows you to create several conditions to match against to evaluate whether or not to join the groups that have been specified by name.
You can add new conditions by clicking the New condition button. Specify the user group keyword replacement to check and a set value or keyword replacement value to match against for each condition. You can specify whether any or all of the configured conditions must be met to join the group.
- Leave groups settings
-
This field allows you to specify the current user leave any groups, matching a selected link type and value, under the set root node they are currently joined.
Calculate average comment rating
This action calculates the average percentage rating for all comment assets under a particular root node and the total comments that have been added. The values are then stored in the specified metadata fields on the root node.
Select in which metadata fields to store the values. For this to work, the metadata schema that contains the metadata field needs to be applied to the root node.
Call rest resource
This action allows communication with web services exposing themselves using representational state transfer (rest) methods.
Read the Web services assets documentation for more information on these fields and the functions of the call REST resource trigger action.
| This action will only appear when you have the web services module installed in your system. |
Clear Matrix cache
This action clears the cache for one or more assets. For example, if you have an asset listing showing all of your documents, you may want to clear its cache when a new document is added to your site. You can select to clear the cache for the asset on which the event is fired and any other assets in the tree.
The following fields are available:
- Include current asset?
-
Select this field to clear the cache for the asset on which the event is fired.
- Choose assets
-
Select which asset caches are cleared.
- Level
-
Select whether you wish to clear the cache for the selected assets only, these assets and their dependents, or these assets and their children. The dependants of an asset are those that cannot exist without that asset. Examples are the bodycopy asset of a standard page or the question assets for a custom form. The children of an asset are those assets that have been created underneath it in the hierarchy.
- Asset types
-
Select which asset type’s cache will be cleared. You can select more than one asset type from the list by holding down the Ctrl or Shift keys and left-clicking on each type. The cache will be cleared for all assets of the selected types.
Clear Squid Cache
This action clears Squid Cache on the URL(s) of the asset that fired the event.
The setup of the clear squid cache command run on this trigger is specified in the Squid Cache preferences section of the External tools configuration screen.
Please note that these settings must be configured before using this trigger action.
Review the Clear Squid cache tool chapter for more information.
- The following fields are available
- URLs
-
Enter the URLs of each page for which you want to clear the cache.
Enter each URL on a new line.If you leave this field empty, the trigger will clear the cache on the URL(s) of the asset that fired the event.
Clear Session var
This action clears existing sandbox session variables on your Content Management system.
To clear all session variables, select the Clear all session variables field. Please note that selecting this option will override any other settings on the clear session var trigger action.
Alternatively, you can choose to identify particular session variables to clear using the clear session variable(s) with the field, specified by either name or prefix.
Select the attribute to match against and enter the value that will be evaluated.
For example, you can select the prefix option and input the value soap_ to clear session variables that begin with soap_ (this could be session variables generated by a Make SOAP call form submission action).
Create asset
This action creates another asset. The following fields are available:
- Create a new asset of type
-
Select the type of asset to be created from the list provided.
- Linked under
-
Select the parent asset under which the asset is to be created. For example, if you select a site, the asset will be created under that site.
- Under the broadcasting asset
-
Select this option if you want to create the asset under the asset that fired the event.
- Using a
-
Select the type of link to create the asset as from the list provided. You can select menu link, hidden link, and invisible link.
- Optional items for advanced users
-
These options allow you to provide a link value for the created asset to its parent, as well as stipulate whether it is a dependant asset or non-dependant. Additionally, you can also specify whether the asset is exclusive or non-exclusive, that is, whether the asset can be linked elsewhere in the system or if it will be exclusive to its parent.
- Set attribute values
-
Enter the values for any specific attributes that need to be filled in for the selected asset type. Selecting the Replace keywords in the set value field will swap any keyword replacements in the attribute value field with the corresponding values of the firing asset. To add additional attribute values, click Save.
- Created asset ID session var name
-
The asset ID of the created asset from this action can be stored as a session variable. Use this field to determine the session variable’s name that you can then use in subsequent actions using the
%globals_session_<var_name>%keyword.
Create clone and link to asset
This action creates a clone of the asset that fired the event and links it to another asset.
The following fields are available.
- Create a clone of the asset, and link it as a child of the asset
-
select the asset to be cloned and the parent asset under which the cloned asset is to be linked. For example, if you select a standard page as the cloned asset and a site as the parent asset, the standard page will be cloned and linked under that site.
- Using a
-
Select the type of link to create the asset as from the list provided. You can select menu link, hidden link, and invisible link.
- Optional items for advanced users
-
This section is used for custom development.
- Do not create if a clone with the same name and asset type exists
-
Check this box if you do not want the clone to be created if an asset with the same name and asset type already exists under the parent asset.
- Clone broadcasting asset
-
Check this box to use the asset that fired the event as the asset to be cloned.
- Link broadcasting asset
-
Check this box to use the asset that fired the event as the parent asset under which the cloned asset is to be linked.
Create design customization
This action will create a design customization of a design.
The fields provided allow you to change the name of the design customization.
By default, the design customization name will have the format of %asset_name% - customization.
To use additional keyword replacements, select the keyword replacement from the list provided.
It will appear within the second field.
Create file asset
This action will create a file asset of a specific type, for example, an image.
The following fields are available.
- Create a new asset of type
-
Select the type of asset to be created from the list provided. The available file asset types are CSS file, data source graph, file, image, JS file, MS Excel document, MS PowerPoint document, MS Word document, PDF file, RTF file, text file, and thumbnail.
- Under
-
Select the parent asset under which the asset is to be created. For example, if you select a site, the asset will be created under that site.
- Under the broadcasting asset
-
Select this option if you want to create the asset under the asset that fired the event.
- Using a
-
Select the type of link to create the asset as from the list provided. You can select menu link, hidden link, and invisible link.
- And populate it with the file located on the server at
-
Enter the file’s full path to use to create the asset.
- Optional items for advanced users
-
This section is used for custom development.
- Set attribute values
-
If specific attributes need to be filled in for the asset type selected, enter the values into this section. To add additional attribute values, click Save.
Create image variety
This action creates an image variety, which is a different-sized version of an image within the system. For example, you could use this trigger action to create an image variety when an image is created within the system.
To see an example of how this trigger action works, check out the tutorial on how to create image varieties using a trigger.
The following fields are available.
- Create an image variety with the name
-
Enter the name for the image variety to be created.
- And constrain by
-
The following options are available:
- Width
-
Constrain the variety size by the width that you enter into the width field. The height of the variety will automatically be set.
- Height
-
Constrain the variety size by the height that you enter into the height field. The width of the variety will automatically be set.
- Both
-
Constrain the maximum width and height of the variety to the dimension specified into the dimension field. For example, entering a value of
100 pixelswill ensure that neither dimension of the image is greater than 100 pixels. If the original height was 400 pixels and the width was 200 pixels, the height would become 100 pixels and the width 50 pixels. - Both min size
-
Constrain the minimum width and height of the variety to the dimension specified into the dimension field. For example, entering a value of
100 pixelswill ensure that neither dimension of the image is smaller than 100 pixels. If the original height was 400 pixels and the width was 200 pixels, the height would become 200 pixels and the width 100 pixels. - Neither
-
Create the variety size to the width and height that you enter into the width and height fields provided.
- Center-weighted square
-
Create the variety as a square image to the size of dimension field, where the square is measured from the center of the image.
Create link
This action links the asset that fired the event to another asset.
The available fields are:
- Link as the
-
Select whether to link the asset as a child or parent of the selected asset.
- Of the asset
-
Select the asset that is used as either the child or parent asset.
- Using a
-
Select the type of link to create the asset as from the list provided. You can select menu link, hidden link, invisible link, and reference link.
- Parameter and source fields
-
This section allows you to specify a dynamic target asset ID through a dynamic parameter. An asset must still be selected in the fields above so that if the dynamic parameter cannot be used, the asset can still be linked.
- Optional items for advanced users
-
This section allows you to set a link value for the newly created link and specifying whether to link the child dependently and exclusively to the parent. You can use both regular and global keyword replacements when setting the link value in these fields.
- Unlink this asset from all its existing parents
-
Select this box to unlink the asset that fired the event from its existing parent assets.
Decrement hit count
This action decreases the hit count for an asset by one. You would use this action in conjunction with the hit count listing page.
Please note that this action will only appear when you have the data module installed in your system.
Delete bulkmail user
|
This section describes a deprecated feature. The feature may only be mentioned in the documentation for the purpose of warning readers. You should not enable or use deprecated features for new development. Read Deprecated assets and features for more information about the deprecation level of this feature before trying any suggested procedures or actions described for this feature. Contact Squiz Support for assistance if you are still uncertain about whether you should use this deprecated feature after reading these resources. |
This action allows you to delete bulkmail users from your system based on their email address.
The available fields are:
- Delete bulkmail users under the root node
-
Select a root node to specify the location where the bulkmail users will be deleted.
- That match the following emails
-
Enter the email addresses of the bulkmail users you want to delete, separated with commas.
- Move them under the specified asset, using a
-
Select an asset and link type to link bulkmail users under the asset instead of deleting them. You can select menu link, hidden link, invisible link, and reference link as the link type. Not specifying an asset in this field will delete the selected bulkmail users from the system.
GET, POST, and SESSION values can be set as the root node, emails, and link under node parameters of this trigger action.
Delete future lineage
This action deletes a link between the asset that fired the trigger and an asset specified within this action. When the trigger is fired, a scheduled job will be set up to remove the link at the specified time.
The available fields are:
- Link type
-
Select which link type to delete. The options available include menu link and hidden link.
- Asset
-
Select which asset to delete the link.
- At
-
Select the date and time for when the link should be deleted from the list provided.
- Next run
-
Alternatively, click on the Next run button to set the date and time to the next run of the Scheduled Jobs Manager.
- Or in
-
You can set the link to delete in a certain number of minutes, hours, days, weeks, months, or years. Enter the number into the text box and select the appropriate time frame from the list provided.
Delete future permission
This action allows you to delete any future permission scheduled jobs that have been created for the asset that has fired the trigger.
Select which type of permission change you want to delete on the scheduled job. For example, if you want to delete any future permission jobs for write permission, select write in the list provided.
Delete future status
This action removes any future status jobs of a certain status for the asset.
For example, you may want to remove any future status jobs that will set the asset to Live if it has been made Live manually.
From the list provided, select the status for the future status job that you want to delete.
Use this action in conjunction with the Set future status action to delete any jobs that exist before creating a new one.
If
You have a trigger that states; When the home page status is set to Live, create a future status job of 'Up for review' in three months.
And
Your home page changes often.
Then
The home page will constantly be up for review, since a future status job will be created every time the status is changed to Live.
Using the Delete future status action, you can delete the existing future status job and create a new one with updated date and time. Therefore, the home page will only be reviewed if its status has not been changed to live within the last three months.
Delete image variety
This action removes either a single image variety or all varieties under a specified image asset.
The available fields are:
- Image asset details
-
- Image to look under
-
Select the image asset under which to delete the image variety.
OR
- Use image asset firing the trigger
-
Use the asset that fired the event as the image under which to delete the image variety. Please note that if this option is selected, it will overwrite any asset selection made in the Image to look under field.
- Image variety details
-
- Variety name to delete
-
Enter the name of the image variety to delete.
OR
- Delete all varieties
-
Select this field to delete all image varieties under the specified image asset. Please note that if this option is selected, it will overwrite any variety specified in the Variety name to delete field and any dynamic parameters that have been configured.
OR
- Parameter/source
-
These options allow you to dynamically specify the value of the image variety to delete from the parameter map. The options available include GET variable name, POST variable name, SESSION variable name, current asset, current user, current site, set value, and any superglobal. Please note that if this option is configured, it will overwrite any variety specified in the Variety name to delete field.
Execute database query
This action allows you to set a SQL query for a selected database.
In the connection type field, select which type of connection to use, enter the account and database details into the connection setup fields and enter your query into the SQL query field. Within the query, you can use keyword replacements and global keyword replacements. For more information on these keyword replacements, refer to the Keyword replacements manual.
Please note that this action will only appear when you have the data module installed in your system.
Increment hit count
This action will increment the hit count of the asset by one. You would use this action in conjunction with the hit count listing page.
Please note that this action will only appear when you have the data module installed in your system.
Increment version number
This action will increment the version number of the asset that fired the event.
Select which version number will be incremented from the list provided. You can increment the major, minor or micro version number.
Issue counter value
This action issue a unique counter integer to a session variable. This can then be used in conjunction with the counter number issued event to apply the issued integer within your system, for example, as a metadata or asset attribute value.
The issue counter value action can be used for various applications, such as assigning member ids to newly created user accounts.
The fields available are as follows:
- Issue the counter number to the session variable name
-
Enter the session variable name to issue the counter number. This session var can be used to apply the integer elsewhere within your system.
- Current counters
-
These fields define the counter value issued to the session variable. You can define a prefix for the counter in the Counter prefix field and the starting value in the Current value field. In the Increment/decrement field, select whether the counter value should increase or decrease; the integer value will increase or decrease by one each time it is issued (for example,
1000,1001,1002).To delete a counter:
-
Click the Delete field for the corresponding counter.
-
Click Save.
Additional counters can be added by entering a name into the New counter field and selecting Save.
-
- Counter ID
-
These fields allow you to pass GET, POST, or SESSION parameters to retrieve the ID to specify which counter value to issue. This is useful when multiple counters have been created on this trigger action. If the returned counter ID value does not match, or these settings have not been set, the default counter will be used.
Join user group for session
This action will dynamically link the current user to a user group for the remainder of the sign-in session.
In the available fields, specify the user group to which to link the current user dynamically. This user group is identified by asset ID, either selected through the asset tree or retrieved through a keyword replacement.
When the trigger is fired, the currently logged-in user will be linked to the user group for the remainder of the sign-in session. This allows a user to be associated with a user group without being physically linked to it.
Select the Remove user from previously joined session groups field to remove the current user from any previously joined session groups before being linked to the specified user group.
Leave user group for session
This action will temporarily remove the current user from one or more specified user groups for the remainder of the sign-in session.
-
Specify, in the available fields, the user group(s) from which to remove the current user. These user groups are identified by asset ID, selected through the asset tree.
-
To add additional user groups, then select More….
When the trigger is fired, the currently signed-in user will be temporarily removed from the specified user groups for the remainder of the sign-in session. This allows a user to be disassociated from a user group to which they would otherwise be linked.
Make SOAP call
This action will send a message to a remote SOAP server when the trigger is fired.
The make SOAP call trigger action supports both SOAP 1.1 and SOAP 1.2 standards. Please note, however, that this trigger action does not currently support ws-security features and mime multi-part attachments.
The Make SOAP call trigger action works similarly to the custom form’s Make SOAP call submission action. For more information on how to configure these settings, refer to the form contents chapter of the custom form manual.
Morph asset
This action allows you to morph an asset into a new compatible asset type.
-
In the Morph from type field, select the asset type of the asset you want to morph.
-
Click Save; additional options will appear in the Morph to type field, allowing you to select the asset type to which to morph.
The asset types available to morph to will be dependent on the original asset type of your asset.
Only user and file type assets can be morphed.
Parse push notification
This action will allow Matrix to integrate with Parse, mobile backend-as-a-service (MBaaS) provider, to send push notifications to a mobile device application.
The Parse API details section provides the configuration options of the Parse API. Please consult the parse documentation during the application setup process for more information on retrieving the keys, strings, and tokens required in this section.
The following fields are available in this section:
- Device type
-
Select the type of device you are using. The available options include iOS, Android, Windows, Windows Phone, and All.
- Application ID
-
Enter the application ID provided to you during the Parse API setup procedure.
- Rest API key
-
Enter the rest API key provided to you during the Parse API setup procedure.
- Device tokens
-
Enter the token strings for device vendors (Apple, Google, Windows) generated by the Parse API.
- Broadcast
-
Enable this option to broadcast the push notification to all users associated with the specified application ID. If this option is enabled, the device tokens will be ignored. The Push notification details section allows you to define the settings of the push notification sent to mobile devices.
The following fields are available in this section:
- Channel
-
The name of the channel to which the device is subscribed.
- Badge
-
The number to set as the app icon badge number. This setting is only available on iOS applications.
- Sound
-
The name of the sound to be played when the notification is received. This setting is only available on iOS applications.
- Alert
-
The alert message displayed when the notification is received.
- Custom parameters
-
Additional key-value pairs that will be sent as part of the payload. The dynamic parameters section allows you to dynamically source the device token, badge, sound, message, channel, title, and URI for the push notification based on GET, POST, or SESSION variables, current asset, current user, current site, set value or any superglobal.
Redirect to URL
This action will allow you to redirect the user to the specified URL.
In the field provided, enter the URL to which the user is directed.
Release lock
This action releases any locks held on the asset that fired the event. For example, you could use this trigger action to release a user’s locks when they sign out of the system.
Select this action to release the locks for the asset that fired the trigger or for the assets that the trigger locked. The second option only works for user accounts such as user and backend user.
Reload user
This action reloads a user if external authentication variables are present. This is best used to keep someone from logging themselves out and logging in as another user when authenticated by external means by using this action in conjunction with the user logout event.
Remove future lineage cron job
This trigger action removes any future lineage scheduled jobs on the asset that fired the event. This will effectively cancel any future links on the asset.
In the Type field, select whether to remove future lineage scheduled jobs of type Create or Delete. This allows you to specify whether to remove future jobs only when a link is either created or deleted. Alternatively, you can specify to delete all of these scheduled jobs, regardless of the future link type, by selecting Create/Delete.
Remove links
This action removes the links between the asset that fired the trigger and its parents. You can limit which links to remove based on the type of link, the link value, and asset types. For example, you can delete a link between an asset and its parent if the parent is a standard page and it is a menu link.
The fields available are as follows:
- Root node
-
Select the root node which the parent asset needs to reside under to be deleted.
- Link type
-
Select which type of link to check for between the asset and its parent. You can also select Any type which will ignore what link type it is, and fire it on any type.
- Link value
-
By default, the link value will not be checked when firing the trigger. You can untick Any link value and enter a specific link value to check for between the asset and its parent.
- Linked asset type
-
Select which asset type the parent asset must be in order for the link to be deleted.
- Directly linked to root node
-
If enabled, the trigger will only delete asset links that are linked to parents, which are directly linked under the root node selected in the root node setting above.
Remove metadata schema
This action removes either one or all metadata schemas from the asset that fired the event.
Either select the metadata schema to remove in the asset finder field provided or click Remove all metadata schemas (optional) to remove all metadata schemas. To cascade the change to the child assets for the asset, select the Cascade schema changes option.
Remove asset remaps
This action deletes any remaps that match the URL of the asset that fired the event.
Select the first option to delete all remaps where the remapped URL matches the URL of the asset. Select the second option to delete all remaps where the original URL matches the URL of the asset.
Remove web path
This action removes a URL from the asset that fired the event.
The following fields are available:
- Remove the web path
-
Enter the web path that you want to remove into the field provided. You can use keyword replacements and global keyword replacements within the webpage. Review the Keyword replacements manual for more information.
- Delete all web paths
-
Select this field to delete all the web paths associated with the specified asset.
- Update lookups for children
-
Select this field to update the web paths for children of the specified asset.
Remove workflow schema
This action removes non-running workflow schemas on the asset that fired the event.
Select the workflow schema to remove and determine whether or not to cascade this removal to all children of the asset.
Replace file asset
This action replaces the content of a file asset type with a file that is stored on the server. Please note that this action will only work when the asset that fired the event is a file type asset (that is, file, image, PDF file, MS Word document) and will otherwise fail for all other asset types.
Enter the full path of the file with which to replace the content of the asset.
Reset hit count
This action resets the hit count. You would use this action in conjunction with the hit count listing page.
Please note that this action will only appear when you have the data module installed in your system.
Schedule bulkmail job
|
This section describes a deprecated feature. The feature may only be mentioned in the documentation for the purpose of warning readers. You should not enable or use deprecated features for new development. Read Deprecated assets and features for more information about the deprecation level of this feature before trying any suggested procedures or actions described for this feature. Contact Squiz Support for assistance if you are still uncertain about whether you should use this deprecated feature after reading these resources. |
This action schedules a bulkmail job to run when the trigger is fired.
The following fields are available:
- Asset to send
-
The asset to send on the bulkmail job. You can choose to specify an asset or send the asset that fired the trigger, using the Use current asset option. Specifying an asset to send in this field will override the default settings of the selected bulkmail job asset.
- Bulkmail job
-
The bulkmail job asset to be run.
- Recipients
-
The recipients of the bulkmail job. You can select either users, user groups, or roles as the job recipients. Specifying a value in this field will override the default settings of the selected bulkmail job.
- Enable subscription filter
-
This option allows you to set a subscription filter on the bulkmail job. When this option is enabled and saved, additional configuration fields will be available. For more information on these options, refer to the bulkmail job chapter in the bulkmail manual.
Send email
This action will send an email when an event occurs. For example, you may want to send a user an email notification when their account details have changed.
To learn more about how this trigger action works, refer to the Configuring a trigger to email a site administrator example in this manual.
The following fields are available:
- Active user recipient
-
Select this option to send an email to a user if their user account asset fires the trigger. For example, if you want to create a trigger that will send an email to the user when their user account has been activated (that is, the asset’s status is changed to Live), you can select this option. The system will get the email address from the email field on the user account asset.
- Group recipients
-
If you want to send the email to the people in a particular user group that has been assigned to that asset, select that user group in this field. You can select multiple user groups by clicking on the More… button.
- Role recipients
-
If you want to send the email to the people assigned to a particular role for the asset that fired the event, select that role in this field. You can select multiple role assets by clicking on the More… button.
- Recipient source
-
These options allow you to pass GET, POST, or SESSION parameters that contain either the recipient asset ID or email address (multiple recipients can be specified through a comma-separated list of values). The email is then sent to that user’s email address or the specified email address.
For example, you could set up a trigger that had the condition if the URL begins with http://matrix.com. If the URL is http://matrix.com?email=example@squiz.net, then the trigger will fire, and this action could be set up to send an email to example@squiz.net. You can also pass user LDAP strings as the set value in an array format, for example:
["1234:uid=auser,o=squiz,c=au,dc=net", "4321:uid=buser,o=squiz,c=au,dc=net"] - Asset to send
-
These options allow you to override the asset to send field. The asset that causes the trigger to fire can be used as the asset to send, or GET, POST or SESSION parameters can be set, containing the asset to send asset ID. If both options are selected, the asset to send asset ID parameter will override the asset that causes the trigger to fire option.
- General email settings
-
This section allows you to send an email to a particular email address, a user account, a user group, or a role. It also allows you to format the email that is sent.
- Send mail to
-
The email configured in this trigger action will be sent to the users specified in the To: field. This field allows you to stipulate how these users will receive the email. You can select to send the email to:
-
User’s email: The email address of the user. This option will be selected by default.
-
User’s Matrix inbox: The user’s mail inbox in the Matrix backend interface.
-
Both: Both the user’s email address and their Matrix inbox.
-
- To
-
Enter the email address for each person that should receive an email when this event is fired. You can enter either their email address or select a user account, a user group, or a role.
To select additional users, user groups, or roles, then select More…. An additional field will appear. You can use global keyword replacements in this field to set the email address of the email receiver.
For example, if this trigger is set to fire when a user accesses an asset, using the global keyword replacement
%globals_user_attribute_email%will send an email to that user. - From
-
Enter the from address for the email. If this is left blank, the From: address will be the default email address set up on the System configuration screen.
You can use global keyword replacements in this field to set the email address of the email sender. For example, if this trigger is set to fire when a user accesses an asset, using the global keyword replacement
%globals_user_attribute_email%will use the email address of that user as the from address. - Reply-to
-
Enter a reply-to address for the email. You can use global keyword replacements in this field to specify the email address for a user to reply. If no reply-to address is configured, the header will not be sent on the email.
- Subject
-
Enter the subject for the email. You can use keyword replacements and global keyword replacements in this field. For example, if you want to specify the asset’s name that fired the event as the subject name, enter the keyword replacement
%asset_name%. - Body
-
Specify either the text and HTML version of the body of the email. By default, the text version is shown. Click on the icon to see the HTML version of the email. This will show the WYSIWYG editor. You can use keyword replacements and global keyword replacements in this field.
For example, keyword replacements such as
%asset_name%and%asset_updated_readabledate%can be used in the email body to show information about the asset that fired the event. - Asset to send
-
Select an asset to use as the contents of the email. If an asset is selected here, the information entered into the body field will not be used.
- Design to apply
-
Select a design to apply to the contents of the email. This field is not mandatory.
This will only get applied to the asset selected in the Asset to send field; it will not get applied to the content entered into the Body field. - Layout to apply
-
Select a paint layout to apply to the contents of the email. This field is not mandatory.
This will only get applied to the asset selected in the Asset to send field; it will not get applied to the content entered into the Body field above.
You can select the Add new file attachment checkbox to configure file attachments on the email. Once you have selected this field, click Save; the file attachment settings section will be displayed on the screen.
The fields available in this section are as follows:
- Asset to send
-
Specify the asset to send as a file attachment on the email.
- File name
-
Enter the name of the file attachment. If you have selected a non-file type asset in the asset to send field, the extension used in this field will determine the type of file attached to the email. For example, if you select a standard page asset and enter
index.htmlas the file’s name, it will be attached to the email as an HTML file. If no file name or extension is provided, the asset will be sent as a text file by default, and the selected asset’s name will be used as the name of the file. - Design to apply
-
Specify a design asset to apply a design to the selected asset to send. This field is only applicable when dealing with non-file-type assets. Read the Design asset documentation for more information.
- Layout to apply
-
Specify a paint layout asset to apply a layout to the selected asset to send. This field is only applicable when dealing with non-file-type assets. For more information, refer to the paint layouts manual.
- Dynamic parameters
-
Allows you to source the asset to send ID for the dynamically sent email based on GET, POST, or SESSION variables, current asset, current user, current site, set value, or any superglobal.
- Additional GET parameters
-
Allows you to send additional GET variables to the asset that is being attached. This field is useful, for example, if you want to send a dynamic root node to an asset listing to send or have conditional keywords on a standard page based on these GET parameters.
- Delete
-
To delete a file attachment:
-
Select the Delete field.
-
Click Save.
-
Send HTTP header
This action allows you to send a custom HTTP response header as part of the Matrix page build request. This can be useful when using the action in conjunction with an asset accessed trigger event.
This trigger action will only fire in the front end and won’t be fired if the asset is accessed through the admin or edit interface URLs.
The following fields are available:
- Name
-
The name of the HTTP response header. For example:
content-type - Value
-
The value of the HTTP response header. For example:
text/HTML; charset=utf-8
Set attribute value
This action sets an attribute value of a particular asset type.
By default, no asset type is selected. To use this action:
-
Select the asset type from the list provided.
-
Click Save. An additional list will appear on the screen.
-
Select the attribute from the list.
-
Enter the desired value into the box.
Selecting the Replace keywords in the set value field will replace any keyword replacements specified in the attribute value field with the firing asset’s corresponding values.
Set cache expiry
This action will set the time for the cache to expire for the asset that fired the event. For example, you can set up a trigger to set the cache expiry ten minutes after a standard page’s content is changed.
The following fields are available:
- Include current asset?
-
Select this field to set the cache expiry time for the asset on which the event is fired.
- Choose assets
-
Select which assets set the cache expiry time.
- Level
-
Select whether you wish to set the cache expiry for the selected assets only, these assets and their dependents, or these assets and their children. For an asset to be visible on the public site, its status needs to be live, and public read permission needs to be granted.
- Asset types
-
Select the asset types for which the cache expiry will be set. You can select more than one asset type from the list by holding down the Ctrl or Shift keys and left-clicking on each type. The cache will be cleared for all assets of the selected types.
- Set cache entries related to current asset to expire in
-
Specify the amount of time before the cache expires for the asset selected. You can select to expire the cache in minutes, hours, or days.
- Use alternative?
-
By default, the cache will expire for the DSN specified in the Default cache DSN section. Click this box if you want to clear the cache for a different DSN. The fields under this option will become available where you can enter the information for the DSN.
Set cookie
This action allows a cookie to be set for the asset that fired the event.
The following fields are available:
- Set cookie name
-
Enter a name for the cookie.
- To value
-
Enter the value of the cookie. You can also specify the value of the cookie from the parameter map. The options available include GET variable name, POST variable name, SESSION variable name, current asset, current user, current site, set value, and any superglobal. Please note that the current asset source refers to the asset that fired the trigger.
- Expire time
-
Enter the amount of time that will pass before the cookie expires. You can Enter this value in seconds.
- Path
-
Enter the URL path that the cookie is valid within. If no path is selected, by default, the system will set the cookie path to the path that Matrix uses for session cookies.
- Domain
-
Enter the internet domain that the cookie is valid within. If no domain is select, by default, the cookie domain will be set to the path that Matrix uses for session cookies.
- Secure?
-
Select whether or not the cookie will be secure. If this option is set to Yes, the cookie will only be sent when there is a secure connection HTTPS.
- HTTP only?
-
Select whether or not the cookie will be HTTP only. If this option is set to Yes, the cookie will only be accessed through an HTTP protocol.
Set design
This action sets the design for an asset, either as a default or override design.
You can also choose whether to set it as a frontend, sign-in, or user-defined design.
Set design associated files
This action is used within import scripts and should not be used within the administration interface.
Set design parse file
This action is used within import scripts and should not be used within the administration interface.
Set file contents
This action sets the contents of a file asset.
The following fields are available.
- File contents
-
Text-based assets can simply be entered as text; however other assets, such as image assets, must be entered as a base64 string.
- Dynamic parameters
-
Allows you to source the asset to send ID for the dynamically sent email based on GET, POST, or SESSION variables, current asset, current user, current site, set value, or any superglobal.
Set force secure
|
This section describes a deprecated feature. The feature may only be mentioned in the documentation for the purpose of warning readers. You should not enable or use deprecated features for new development. Read Deprecated assets and features for more information about the deprecation level of this feature before trying any suggested procedures or actions described for this feature. Contact Squiz Support for assistance if you are still uncertain about whether you should use this deprecated feature after reading these resources. |
This action sets the force secure setting for the asset that fired the event.
In the force secure field, select either Allow all protocols, Force secure protocol (HTTPS), or Force insecure protocol (HTTP). Read the Asset screens documentation for more information on these options.
Set future lineage
This action sets a future linking job for the asset that fired the event.
The following fields are available.
- New link type
-
Select the type of link to create the list as from the list provided. You can select menu link or hidden link.
- New link parent
-
Select the parent asset under which the asset is to be linked. For example, if you select a site, the asset will be linked under that site.
- Delete all existing links
-
Select this box to delete all existing links for the asset that fired the event.
- At
-
Select the date and time for when the link should be created from the list provided.
- Next run
-
Alternatively, click on the Next run button to set the date and time to the next run of the scheduled jobs manager.
- Or in
-
You can set the link to take place in a certain number of minutes, hours, days, weeks, months, or years. Enter the number into the text box and select the appropriate time frame from the list provided.
Set future permission
This action sets a future permission job for the asset that fired the event.
The following fields are available.
- Add a scheduled job to
-
Select to either add or remove a permission from the asset, the type of permission, and to either grant or deny to a user, user group, or role.
- Immediately when this trigger is fired
-
Select this option to set the future permission immediately when the trigger is fired.
- At exactly
-
Select this option to set an exact time and date to set the future permission.
- As determined from asset attribute
-
Select this option to set the future permission with a date and time stored in an attribute selected from the drop-down menu.
- As determined from metadata field
-
Select this option to set the future permission with a date and time store in a selected metadata field.
- Offset for the above fields
-
Select an amount of time before or after the time previously specified to offset the future permission.
- Update the asset’s dependant children only
-
Select this option to update the permissions of the dependant children of the asset that triggered the event.
- Automatically cascade this permission to newly-created children
-
Select this option to cascade the future permission to all children under the asset, created after the permission has been set.
- Parameter and source fields
-
This section allows you to specify a dynamic target asset ID through a dynamic parameter. An asset must still be selected in the fields above so that if the dynamic parameter cannot be used, the asset can still be linked.
Set future status
This action sets a future status job on the asset that fired the event.
Select the status for the future status job and specify when it should be set. The options available are as follows:
- Immediately when this trigger is fired
-
Select this option to set the future status immediately when the trigger is fired.
- At exactly
-
Select this option to specify an exact date and time the future status will be set.
- As determined from asset attribute
-
Select this option to specify the date value of an asset attribute to determine when the future status is set. For example, you can specify the start date of a recurring calendar event. If the firing asset is a recurring calendar event, its start date value will be used as the date and time to set the future status.
- As determined from metadata field
-
Select this option to specify a metadata date field to determine when the future status is set. This field’s value on the firing asset will be used as the date and time to set the future status. Please note that this value must be provided in the format
y-m-d h:i:s(ISO8601).
You can specify an offset for any of the above options, before or after the specified value, in days, hours, and minutes.
This means, for example, if you have selected the immediately when this trigger is fired option, configuring an offset of 2 hours after would mean that the future status would not be set until two hours after the trigger is fired.
Select the cascade field to also apply the status change to all children of the firing asset.
The error message field allows you to configure a custom error message to display if the date of the future status job is set in the past. For example, when a user causes a trigger to fire, the trigger attempts to set the future status job on the asset. If the specified date is not in the future, you cannot set this job - you can configure this error message to be displayed under these circumstances.
The treat as fatal error option allows you to treat any errors on the set future status action (where the date of the future status job is set in the past) as fatal errors. This means that if you cannot set the job, the trigger will fail and stop the script execution. For example, if the event used to fire the trigger is before the asset is created, a fatal error will prevent the asset from being created.
Set index page for site
This action sets the index page of a site.
Select the asset to use as the index page of the site.
Set metadata field date
This action sets the date and time for a metadata date field.
Select which metadata date field to set and enter the number of months, days, hours, and mins from which you want to set it.
For example, if you enter 5 days, the date-time will be set to five days from when the event was fired.
When a metadata field is set, the set value in this context field will appear.
In this field, select a configured context in the system to set the date-time value.
+ For example, setting this field to an alternate context will only set the metadata value for that specific context. By default, the option uses currently active context at the time of firing is selected. For more information, refer to the contexts manual.
This action is commonly used in conjunction with the metadata time trigger event and trigger action.
Set metadata schema
This action will apply a metadata schema to the asset that fired the event.
Select either apply or deny from the list provided and choose the metadata schema. Select whether or not you want to cascade the schema to the child or dependant assets of the asset that fired the event.
Set metadata value
This action will set the value of a metadata field.
Select the metadata field to set in the field provided and click Save - additional fields will appear. Set the value of the metadata field in the field provided. Alternatively, you can use the parameter and source fields to populate the metadata field with information from the asset that fired the event.
You can also select a specific context to set the metadata value in. In the Set value in this context field, select a configured context on the system to set the value in. For example, setting this field to an alternate context will only set the metadata value for that specific context. By default, the option uses currently active context at the time of firing is selected.
Read the Using contexts documentation for more information.
Set paint layout
This action applies a paint layout to the asset that fired the event.
Select the paint layout that you want to apply to the asset in the top field. If you want to override a paint layout, select the paint layout in the second field. Alternatively, you can use the parameter and source fields to select an alternative asset ID for either field.
Set permission
This action sets the permission of the asset that fired the event.
Select to either grant, deny or delete read, write or admin permission for a particular user, user group, or role. Alternatively, you can use the parameter and source fields to set the user’s permission that fired the event.
You can also select only to update the dependant assets or the parent asset of a dependant asset. For example, if a bodycopy asset fired the event, the standard page would be updated, as it is the parent asset.
Set role
This action applies a role to the asset that fired the event.
To add a new role, select the role in the first field and select either a user or user group in the second field. You can add additional users or user groups by clicking on the More… button. The user who fired the trigger can be assigned to the role by selecting the use current user (one who fires the trigger) field.
The Cascade roles to dependents field allows you to cascade the role to all child assets of the asset that fired the event. The Delete all the users from the role before assigning new one field allows you to delete any existing users on the role before the new user(s) is(are) added.
Set session var
Matrix allows you to store values in a session-level array, which can be used in turn in a dynamic parameter (that is, parameter map). These values can only be set using this trigger action.
Enter the session variable name and value into the fields provided. Please note that the current asset parameter source refers to the asset that fired the trigger.
Once set, you can access the session variable using the global keyword of %globals_session_<variable>% where <variable> is the name of your session variable entered into the text field of this trigger action.
Set site special page
This action allows you to set the asset that fired the event as the special page of a site.
Set the asset that fired the event as either the index, not found, or archived asset page of a selected site. Any existing special pages can be overridden by selecting the override the existing special page field. The Use the direct parent sites of the broadcasting asset field allows you to set the asset as a special page of its direct parent site(s).
Set standard asset date
This action sets either the created, last updated, published, or status last changed asset date for the asset that fired the event.
The following fields are available:
- Set the following standard asset date field
-
Select the date set by this trigger action.
- The options available are
-
Created date, published date, last updated date, and status last changed date.
- To the time when the trigger was fired
-
Select this option to set the asset date to the time when the trigger was fired.
- To this exact time
-
Select this option to set an exact time and date for the asset date.
- To the value of this asset attribute
-
Select this option to set the asset date with a date and time stored in an attribute selected from the drop-down menu.
- To the value of this metadata field
-
Select this option to set the asset date with a date and time store in a selected metadata field.
- Offset for the above fields
-
Select an amount of time before or after the time previously specified to offset the asset date. Please note that this field is ignored when the exact time option is set for the asset date.
Set status
This action sets the status for the asset that fired the event.
Select the status to set the asset to from the list provided. You can also select only to update the parent asset of a dependant asset. For example, if a bodycopy asset fired the event, the standard page would be updated, as it is the parent asset.
Set SugarCRM record ID
This action allows you to set a new SugarCRM record ID attribute for a Matrix user asset.
The following fields are available:
- SugarCRM module
-
Enter the name of the SugarCRM module to set the record ID. You must use title case and match the relevant module name in SugarCRM, which you want the user account to be linked to, for example: Accounts.
- Record ID
-
Enter the record ID attribute value to set for the user for the module specified above.
- Dynamic parameters
-
This field allows you to dynamically source the SugarCRM module and record ID values for this trigger action.
Set tag
This action allows you to tag the asset that fired the event with a thesaurus term.
Select the thesaurus term with which to tag the asset. Alternatively, you can choose to remove the tag from the asset by selecting remove instead of setting this tag or cascade the changes to all child assets for the asset that fired the event. Multiple thesaurus term tags can also be assigned, generated by array-based selections sourced from either GET, POST, or SESSION variables. For example, tags generated by checkbox submissions.
Set thesaurus term from XML
This action is used within import scripts and should not be used within the administration interface.
Set thumbnail
This action will take an asset ID of an image asset sourced from either GET, POST, or SESSION variables and apply it as the thumbnail for the asset that fired the event. This action will also override any current asset used as the thumbnail image.
Set workflow schema
This action will apply a workflow schema to the asset that fired the event.
Select either apply or deny from the list provided and choose the workflow schema. Select whether or not you want to cascade the schema to the child or dependant assets of the asset that fired the event.
Sort asset children
This action lets you sort asset children of the asset that the trigger is firing on. For example, you could set up a trigger action that fires on asset-created events to always put newly created assets at the top of the asset tree order.
- Sort by
-
The value to sort by. If you select keyword value, another text field will appear, allowing you to enter a mix of keywords to sort by. Note that choosing this option is slower than sorting by standard asset fields.
- Sort direction
-
The direction to sort in, ascending or descending.
- Sort type
-
The sorting type to use. These sort type options are based on the PHP sort() function’s sort_flags parameter.
- Dynamic parameters
-
Use dynamic values for some of the fields above.
Sync user to SugarCRM record
This action allows you to sync a Matrix user asset to a SugarCRM record ID by assigning the ID as a special attribute on the user. The SugarCRM record ID attribute gets stored on the Details screen of the user asset the trigger fires on.
When this trigger action fires on a user asset, it will first try and search for a record within the nominated SugarCRM system to see if it already exists. If it exists, it will return that record data and assign the ID of it to an attribute on the Matrix user.
If it doesn’t find the record, it will make another call to the SugarCRM system and create a brand new record. This will, in turn, return the data of the new record and assign the new ID to the Matrix user.
You must have a configured and connected SugarCRM token asset to use this trigger action.
The Sync settings section allows you to configure which SugarCRM token to use and which module and record ID to sync. The following fields are available:
- Sugarcrm token
-
Select the SugarCRM token asset to connect and authenticate to the SugarCRM system.
- SugarCRM module
-
Enter the name of the module in SugarCRM under which to create this record and to search under for an existing record to sync.
- Existing SugarCRM record ID
-
Enter the value to use to search for existing SugarCRM records. For example, you can use the current user’s stored SugarCRM record ID attribute as a keyword (
%globals_user_sugar_ <module_name>_id%) in this field or any other dynamic user or global keyword. Matrix will then try to find and sync to the existing record. If not found, Matrix will then create a new record if the Create new record if record ID not found setting is set to Yes. - Create new record if record ID not found
-
Enable this setting to make the trigger action try and create a new record in SugarCRM if it can not find the existing SugarCRM record ID specified by the Existing SugarCRM record ID value.
- Attributes for creating new record
-
Enter the attributes in JSON format to use when creating a new record in SugarCRM.
- Attributes for syncing to existing record
-
Enter the attributes in JSON format to use when syncing the user to an existing record in SugarCRM.
The record linking settings section allows you to configure record to record linking if the record exists in multiple modules. Matrix will use the SugarCRM linking rest API call to perform this action.
The following fields are available:
- Link record to another record
-
Set this to Yes to make Matrix try to link the synced record to another record under a different module in the SugarCRM system. For example, this can be useful when you have records under a module for Contacts, and you want to link that record to another record ID that sits under a module for Accounts.
- Target module
-
Enter the name of the other module where the linked record is.
- Target record ID
-
Enter the record ID within the other module (specified above) to which to link the Matrix user’s record.
- Target record ID attribute name
-
Specify the attribute’s name in the current Matrix user record profile that holds the target record ID. Matrix will only fire the linking API call to the SugarCRM system if this attribute is empty (as in, if the record is not yet linked).
Example: If we are linking a contact record to an account record, we should specify the attribute name as
account_id. When the trigger fires, Matrix will only try and link the record if this attribute is not already populated with a value.The SugarCRM record ID attribute that gets stored on the Details screen of the user asset the trigger fires on is only editable by the root user and system administrator users due to security reasons. You can use the Set SugarCRM record ID trigger action if you want to enable updates to the ID after it has already been set.
Trigger log message
This action allows you to generate a custom error message and optionally block the execution of an event. For example, say you had a rule that says all images should be created within the media folder. To stop a user from creating an image in your site, you can create a trigger that listens for the Before asset created event and checks that the asset is of type image.
- Type
-
The type of log message to trigger. The options include:
- Silent
-
A silent message that only gets logged but not presented to the user within the interface. When this option is chosen, you also can choose the place to log the message in the Log to field.
- Notice
-
This will show the message to the user as a notice message but will not stop the event. For example, you may want to inform a user that when they change an asset’s name, they should also change the page’s URLs. You can set up a trigger that listens for the asset attributed changed event and checks that the attribute changed is the page’s name. Then add a This action that will show a notice error type and enter the message into the message field.
- Warning
-
This will show the message to the user as a warning message but will not stop the event. This is similar to the notice type, the only difference being instead of the message being styled up as a notice, it will instead be styled up as a warning.
- Error
-
This will show the message to the user and will stop the event from occurring. As described earlier, if you want to stop people from deleting user accounts, you would select this error type. Note that this action will only prevent the trigger event from occurring if the event occurs after the trigger fires.
- Message
-
The custom message that will appear to the user and in the logs when this action is fired.
Messages are only shown in the admin ( /_admin) interface.Messages are not supported when firing events through APIs, such as the JS API. The error type does not prevent JS API actions from occurring if they fire the trigger.
Update internal messages
This action allows you to update the status of internal messages found within a user’s Matrix inbox. For more information on a user’s inbox, refer to the My account chapter in the concepts manual.
By default, this trigger action will update the status of internal messages for the user who fired the event. You can use the action on the Other assets tool to specify alternate user accounts to which to use this action. For more information on this tool, refer to the adding and maintaining triggers chapter in this manual.
In the Message action field, select the action you want to perform on the user’s internal messages. The following actions are available:
-
Mark as read.
-
Mark as unread.
-
Move to trash.
-
Recover from trash (mark as read).
-
Recover from trash (mark as unread).
-
Purge from trash.
The Message source field allows you to select which internal messages will be affected by this action. The options available are:
-
All messages in the user’s inbox.
-
All messages in the user’s sent folder.
-
All messages in the user’s trash.
Alternatively, you can configure a dynamic parameter to set the messages that this trigger will action on through a comma-separated list of message IDs.
Update link
This action allows you to update the link type and value of a link.
In the Link characteristics section, specify the link to update by entering its ID in the Link ID field.
OR
Alternatively, you can configure a set of attributes to match a link against the firing asset of the trigger. The attributes that can be identified are link type, link value, side of link, and asset type. Please note that if you have configured a set of attributes to match against, the Update link action will only execute if exactly one link match is found.
In the new Link characteristics section, enter the new link type, and link value attributes for the link. You can use both regular and global keyword replacements when setting the link value in these fields.
| You cannot use the Update link action to change a link from significant to non-significant (for example, menu link to reference link) and vice versa; you can also not edit a link that is dependant or exclusive. |
Update Twitter status
This action will POST a 'tweet' on a Twitter account, based on the asset’s content that fired the event.
Register system as a Twitter client
To use the Update Twitter status action, you will first need to register your system as a Twitter client using OAuth authentication. This is a one-time process that will allow you to use this action anywhere in the system.
To register your system:
-
Go to the Twitter developers' My applications page.
-
Click Create a new application.
-
Complete the application creation form, entering the system root URL as the callback URL.
Once you have completed the registration process, Twitter will provide you with a consumer key and a consumer secret string.
The update Twitter status action requires both read and write access on the application that has been created. By default, Twitter applications are created with read access only. You will need to change this setup on the application settings.
Client credentials
In this screen:
-
Enter your consumer key and consumer secret string into the corresponding fields.
-
Click Save.
The authentication status on the action will change, as shown in the figure below.
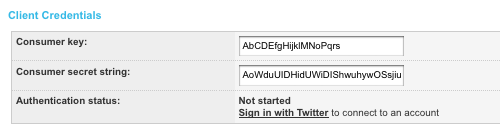
The Sign-in with Twitter link will appear in the authentication status section. Clicking this link will transfer you to Twitter, where you can sign in (using the Twitter account to which you want to tweet) and authenticate the connection to the system. Once you have completed the authentication process, you will be redirected back to the trigger action, where the authentication status will change to Connected, as shown in the figure below.
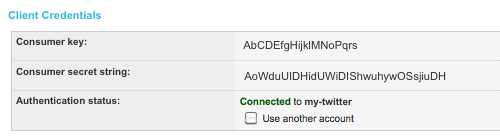
To change the Twitter account to tweet to, select Use another account and click Save. You can then sign in with a different Twitter account.
Tweet format
This section allows you to structure the format of tweets posted to the configured Twitter account.
In the Format of Tweets field, create a format for tweeting. You can use both global and asset keyword replacements for the asset that triggered the event. For example:
`%asset_name%` has been updated - check it out here: `%asset_short_url%`This tweet will display the asset’s name, informing followers that it has been updated and linked to it.
Please note that due to the variable length of keyword replacements, the Format of Tweets field may not limit the tweet to 140 characters (the limit set by Twitter). The If tweet too long field allows you to configure the action to take if the tweet exceeds the character limit. Selecting abbreviate where possible in this field will abbreviate non-link text to reduce the tweet’s size, where possible. If abbreviation is not possible, the trigger will fail. Selecting fail the trigger will automatically fail the trigger if the tweet exceeds the character limit.
Urban Airship push notification
This action allows Matrix to integrate with Urban Airship, a push messaging and marketing solution, to send push notifications to a mobile device application.
| This feature only supports version 3 of the Urban Airship API. Please consult the Urban Airship API v3 documentation for more information on how this API works. |
The Urban Airship API details section provides the configuration options of the Urban Airship API. Please consult your Urban Airship documentation during the application setup process for more information on retrieving the keys, strings, and tokens required in this section.
The following fields are available in this section:
- Application type
-
Select the type of application device you are using.
- App key
-
Enter the app key provided to you during the Urban Airship API setup procedure.
- Master secret
-
Enter the master secret string provided to you during the Urban Airship API setup procedure.
- Device tokens
-
Enter the token strings for device vendors (apple, google, windows, blackberry) generated by the Urban Airship API.
- Broadcast
-
Enable this option to broadcast the push notification to all users associated with the specified app key. If this option is enabled, the device tokens will be ignored.
The Push notification details section allows you to define the settings of the push notification sent to mobile devices. The following fields are available in this section:
- Badge
-
The number to set as the app icon badge number.
- Sound
-
The name of the sound to be played when the notification is received.
- Alert
-
The alert message displayed when the notification is received.
- Custom parameters
-
Additional key-value pairs that will be sent as part of the payload.