Role screens
Once you create your role, you can configure its settings on associated asset screens. The Details screen of a role is different from other asset types. Read the Asset screens documentation for more information about the common asset screens in Squiz Content Management.
Details screen
The Details screen lets you change the role’s name and status. Read the Asset details screen documentation for more information about the status, future status, and thumbnail sections of the details screen.
The name entered into the Role name field at the creation time appears here by default.
You can change the role name by clicking into the Role name field and entering the new name.
Viewing user roles
You can view the roles assigned to a user on the Role Assignments screen. Right-click on the user account asset in the asset tree and select Role Assignments.
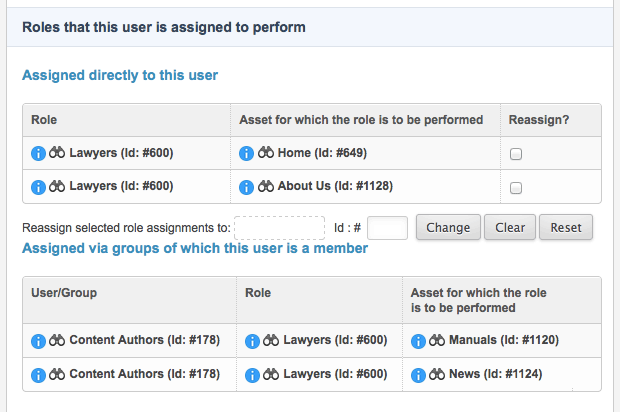
The screen has two sections: The first section lists the roles directly assigned to this user. The second section lists the roles assigned to this user through a user group.
Role assignments
The Role assignments screen on a user lets you view all the roles that a user has assigned. It also lets you reassign these roles.

The screen has three sections.
The first section lists the roles assigned directly to this user. The user in the Use roles to simplify workflow messaging logic example uses the Lawyers role on the Home and About Us pages.
The second section lists the roles this user has inherited through a user group.
In the example, the Content authors user group is assigned the Lawyers role on the Manuals and News pages. Thus, the example user also has these roles as they are under the Content authors user group.
On this screen, you can reassign the roles directly assigned to this user. To do this, click the Reassign box for the role you want to reassign. In the Reassign selected role assignments to field, select the user or user group to which you want to reassign this role.