Redirect page
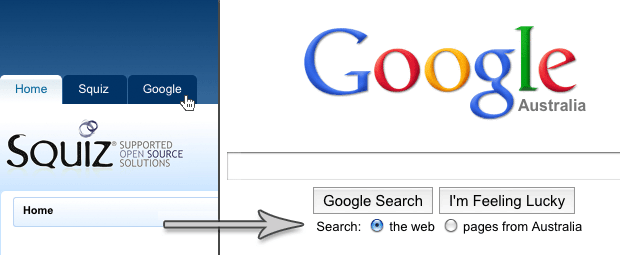
A redirect page allows you to include a hyperlink to an external site or internal asset within your site’s menu. This hyperlink will transparently take your users to another page or web site. For example, say you create a redirect page that takes the user to the google website.
The figure shows that in the menu, the redirect page’s name (in this case, Google) appears. When the user clicks on this menu item, they are taken to the google website.
If you are redirecting to an internal asset, the menu name (that is, the name of the redirect page) can be something different from its original name. Child assets will not appear in the menu.
Once your redirect page is created, you can configure its settings on its associated asset screens. The majority of these screens are the same as a Standard page. In this chapter, we will describe the Details screen, which is different for a redirect page.
Details screen
The Details screen allows you to configure the settings of the redirect page. Read the Asset details screen documentation for more information about the Status, Future status, Thumbnail and Details sections of the Details screen.
Redirect type
This section allows you to specify the type of redirect you are sending.
- Permanent redirect
-
Enable this setting to send a
301response code, indicating that the redirect is permanent (moved permanently). Disabling this setting will send a302response code, indicating that the redirect is temporary (moved temporarily).
Location
This section allows you to specify the page to which you want to redirect the user. You can select from one of the following options:
- URL
-
Enter the URL of the page in this field – for example, http://example.com. You should use this field when you want to redirect the user to a website outside of your system. You need to include the protocol (for example,
http://) of the URL; otherwise, the redirect page will not work. - Or asset
-
Select the asset to which to redirect the user.
- Or use query string parameters?
-
Specify the query string parameter’s name whose value will specify the redirect URL. For example, if this box’s value is URL and the inbound query string to this page is
?URL=http://example.com, this page will redirect to http://example.com.
Location options
This section allows you to enter additional information about the URL and set up a redirect timeout period.
The fields available are as follows.
- URL suffix
-
You can specify more text to send as part of the URL query string in this field. Enter your key-value pairs separated by an ampersand for example,
/action=send&redirectid=5. Only advanced users should use this option. - Pass-through query string parameters?
-
Select
Yesto pass-through query string parameters to the page to which you are redirected. For example, to redirect the user to http://google.com.au/search?q=squiz+australia, you will have set the fields as follows:-
Pass-through query string parameters?to Yes. -
URL suffix field to
?q=Squiz+Australia. -
URL to http://google.com.au/search.
This URL will perform a search for the terms
SquizandAustraliawithin Google.
-
- Redirect timeout
-
Setting a value greater than zero in this field will apply a timeout on the redirect page, automatically redirecting a user after the specified period (in seconds). This timeout allows you to display a message to users using a paint layout. For example:
You will be redirected in 5 seconds
The use of a paint layout is required if a timeout has been configured in this field. By default, this field is set to 0(zero), meaning that this asset will redirect immediately.This setting will have no effect if the redirect page’s new window option is enabled. For more information, refer to the New window section in this chapter.
Session variables
This section allows you to provide dynamic assignment of session variable values based on GET, POST, or SESSION variables, current asset, current user, current site, set value, or any superglobal.
The fields that are available in this section are as follows:
- Session variable names
-
Enter the names of the session variables. These names will be selectable from the parameter menu once you have clicked Save, allowing you to assign a value to that specific session variable.
- Parameter
-
Select the SESSION variable to configure. Please note that no options will appear in this field until the names in the SESSION variable names field have been saved.
- Source
-
Select the source for the selected SESSION variable value. You can select one of the following options:
- GET variable name
-
This allows you to enter a GET parameter.
- POST variable name
-
This allows you to enter a POST parameter.
- SESSION variable name
-
This allows you to enter a SESSION parameter.
- Current asset
-
This allows you to set the SESSION variable’s value from the current asset. You can source this value from either the asset ID or a keyword of the asset.
- Current user
-
This allows you to set the value of the session variable to be sourced from the current user. You can source this value from either the asset ID or a keyword of the user.
- Current site
-
This allows you to set the value of the session variable to be sourced from the current site. You can source this value from either the asset ID or a keyword of the site.
- Set value
-
This allows you to assign a static value to the session variable. For example, if a session variable named Redirect is given the value, you have been redirected; using the keyword replacement
%globals_session_redirect%on the redirected asset will display this value. - Any super global
-
This allows you to enter a value for any of the major super global arrays. The SESSION, POST, and GET variables will be checked in succession until a value is found.
To set up the session variables:
-
Enter a name for the session variable in the Session variable names field.
-
Click Save. The name will now be available in the Parameter field.
-
Select this parameter.
-
Select a source from the second list.
-
Click Save. An additional field will appear in the Session variables section.
-
Enter the value for the source into the field.
To delete a session variable:
-
Click the Delete box.
-
Click Save.
New window
This section allows you to specify whether the page will open in a new window and the new window settings.
The fields available in this section are as follows:
- New window?
-
Select whether to open the redirect page in a new window. By default, this value is
No. If you are using a redirect timeout, this option must be set toNo. - Options
-
This section allows you to set the options for the new window.
- Hide location bar
-
Check this box to hide the location bar on the new window.
- Hide menubar
-
Check this box to hide the menu bar on the new window.
- Hide scrollbars
-
Check this box to hide the scroll bars on the new window.
- Hide status bar
-
Check this box to hide the status bar on the new window.
- Hide toolbar
-
Check this box to hide the toolbar on the new window.
- Not resizable
-
Check this box to make the new window not resizable.
- Window width
-
Enter the width of the new window in pixels.
- Window height
-
Enter the height of the new window in pixels.
Creating a redirect timeout using paint layouts
To create a redirect timeout that shows a message to the user, follow these steps:
-
On the redirect page’s Details screen, enter a redirect timeout, for example,
5.0. This setting will mean that when the user clicks on the redirect page in the menu, it will appear five seconds later. -
Create a paint layout asset.
-
Add a type format bodycopy for the redirect page.
-
Edit the contents of the redirect page format bodycopy.
-
Add a message to show to the user.
-
Apply the paint layout to the redirect page. Do this on the Paint layouts screen of the redirect page. Read the Asset paint layouts screen documentation for more information about this screen.
When you preview the redirect page, the message defined on the paint layout will appear. After five seconds, the user will be redirected to the Squiz website.
Keyword replacements for the redirect page on a paint layout
A list of keyword replacements is provided in the WYSIWYG editor toolbar on the Edit contents screen of the redirect page format bodycopy for a paint layout. You can use these keyword replacements in conjunction with text, images, and links to layout what to show in the paint layout.
A majority of the available keyword replacements have the general format of %referring_asset_<keyword>%, where <keyword> is a standard keyword replacement.
These keyword replacements allow you to show details about the page the user was viewing before navigating to the redirect page.
For example, if you want to show the previous page’s asset name, you can use the keyword replacement %referring_asset_name%.
Three additional keyword replacements are also available:
%javascript_redirect%-
This keyword replacement defines where the javascript code to do the redirect should appear. This replacement can be used to satisfy any HTML validation requirements in a paint layout. If the keyword is omitted, the javascript redirect code will appear at the bottom of the page.
%redirect_url%-
This will show the URL of the page to which the user is redirected. This replacement can be used in the HTML source code to show a hyperlink to the page that the user can click if they do not want to wait for the redirect.
%redirect_assetid%-
This will show the page’s asset ID to which the user is redirected.