Setting up the search manager
The search manager allows you to configure the internal Squiz Content Management search engine and is located under the system management folder. The search manager allows you to:
-
Set up indexing.
-
Change the criteria for the types of words the search engine will index.
-
Set up weightings for the system.
-
Set up weightings for a specific part of the system.
-
Set up weightings for a specific asset.
Management of indexing is done on the Details screen and the management of weights is done on the Asset weights, Asset tree weights, and Global weights screens.
Each of these screens is explained in the following sections. Read the Asset screens documentation for more information on the other screens for the Search manager.
| If you change any of the Search manager settings, you will need to perform a re-index before the changed setting takes effect. |
Details screen
The Details screen allows you to control the search options and index your system’s assets.
Indexing manager
This section allows you to turn indexing on for all assets in the system. By default, indexing is enabled.
When indexing is enabled for the system, any added or changed assets will be indexed in the search system. Any assets that have been created previously, however, will not be indexed. .To index these assets, you will need to re-index the system manually.
Re-index assets
This section will only appear if search indexing is enabled.
This section allows you to re-index all assets in the system or assets in a specific part of the system. To re-index all assets:
-
Select
Reindex all assetsin the system. -
Save the screen.
If you only want to re-index a specific part of the system, you can select the parent asset in the root node field instead.
| Indexing all assets in the system can take a long time and potentially put a heavy load on your system. |
It is always recommended to choose a root node from which to index assets.
Indexer settings
| The functions available in this section are not available when using an Oracle database. |
This section allows you to define which words to index or not.
- Minimum word length
-
Enter the number of characters a word must be before it is indexed.
By default, this value is set to
4.This default means that any word that is less than four characters long will not be indexed.
For example, cat will not be indexed, but cats will be.
- Indexer ignore list
-
Enter the words that should not be indexed by the system. You can enter as many words as you want to in the list; separate each word with space.
By default, the following words are added to the list:
a au all am an and any are as at be been but by can cant co
com de do eg else etc for from get go had has hasnt have he
hence her here hers him his how http https i ie if in is it
its la me my nor not now of off on or our ours pm put re she
so than that the their them then there these they this those
thus to too uk un until up upon us very through was we well
were what when where which while who why www you your yours
Adding more words to the noise word list can improve search indexing and search performance. - Indexer include list
-
Enter the words that should always be indexed by the system. This field ignores the settings that have been entered into the minimum word length and noise word list.
For example, say that we were building a search page on a website, and the minimum word length was set to
6. _ The word squiz would not be indexed, as it is five characters long. Instead of changing the minimum word length, we can enter squiz into the white word list to always index.You can enter as many words as you want to list; separate each word with a space.
Search options
This section allows you to enable the contains search setting.
When enabled, if the user searches for the word room, it will find room and bedroom, Broomfield, and roommate.
If searching is slow within your site, you can disable this option by selecting No in the Enable contains search field.
By doing this, searching will be faster as the entire word will not be taken into account.
Only the results that start with the term being searched for will be returned.
For example, if the user searches for the word room, it will find room and roommate, but it will not find bedroom or Broomfield.
Asset weights screen
This screen allows you to set weights for a particular asset in the system. You can also turn indexing on or off for an asset. For example, you can turn indexing off for the home page of your site. Any values set on this screen will override the values set on the Asset tree weights screen or the Global weights screen.
By default, no assets will be selected on the screen.
-
Select the asset you want to customize in the Customize asset field.
-
Save the screen.
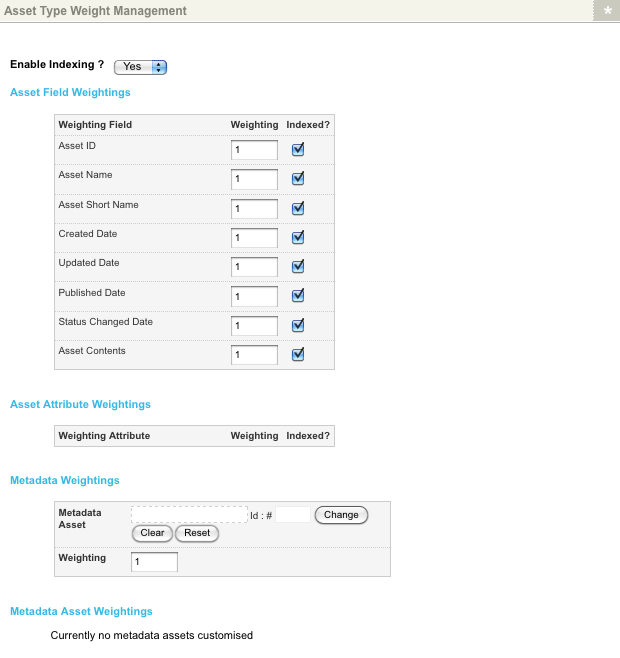
Additional fields will appear in the asset weight management section, as shown:
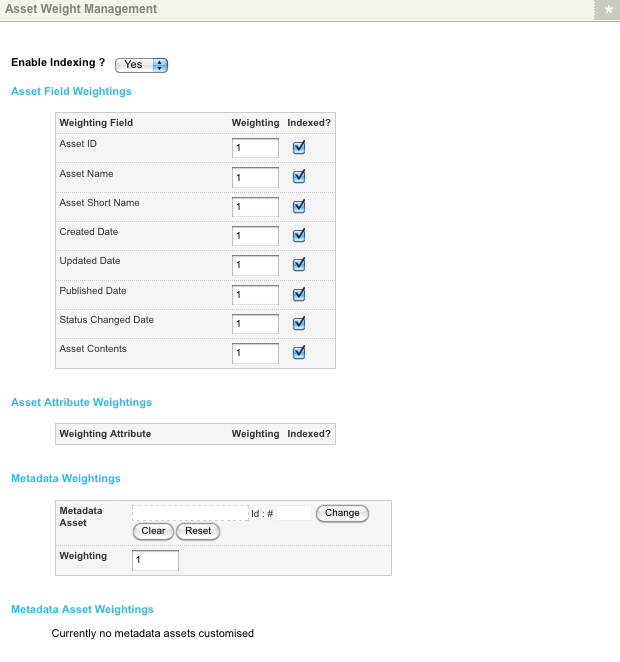
The fields available in this section are as follows:
- Enable indexing?
-
Select whether this asset will be indexed. By default, this is set to
Yes, meaning that it will be indexed. To disable indexing, selectNo. - Asset field weightings
-
This section allows you to customize the weightings for the asset’s fields. These fields are the standard fields that appear on all assets in the system. By default, all fields will be indexed with a weighting of one.
To change the weighting for a field, enter the number into the Weighting field.
To disable indexing for a field, clear the Indexed field.
- Asset attribute weightings
-
This section allows you to customize the weightings for the asset’s attributes. Attribute fields are the fields that are specific to a particular asset type. For example, an asset type of PDF file has an attribute of title. For assets without attribute fields no information will appear in this section. If an asset has attribute fields, they will be indexed with a weighting of one by default.
To change the weighting for a field, enter the number into the Weighting field.
To disable indexing for a field, clear the Indexed field.
- Metadata weightings
-
This section allows you to customize a metadata field applied to the asset.
-
Select the metadata field from the asset tree in the metadata asset field.
-
Enter the weight into the Weighting field.
-
Click Save.
The field will appear in the metadata asset weightings section. Repeat this process to customize other metadata fields.
-
- Metadata asset weightings
-
By default, no information will appear in this section. Once a metadata field has been added in the metadata weightings options, it will appear in this field, as shown in the figure:
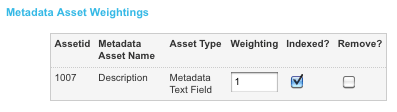
These fields allow you to change the settings for the selected metadata field:
-
Enter the weight into the Weighting field to change the weighting for a field.
There is no limit on the numbers that you can enter into the weighting fields. When entering the weights, you may consider leaving a buffer between fields if you need to change the weights in the future.
-
Clear the Indexed field to disable indexing for a field.
-
Select Remove to remove a metadata field from the list.
-
Click Save once you have modified these settings.
-
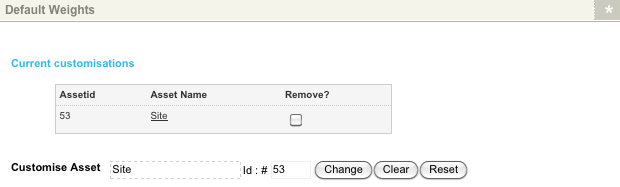
The asset will be listed in the Current customizations section, as shown in the figure:
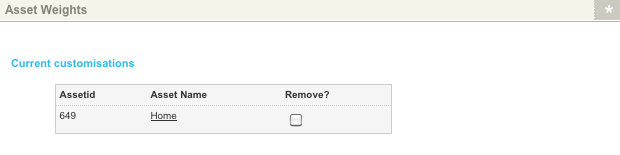
To edit a customized asset’s settings, click on the asset’s name in the Current customizations section once you have customized it.
The fields for that asset will appear in the asset Weight management section.
To remove the settings for an asset:
-
Select
Removein the Current customizations section. -
Click Save.
To customize the settings for another asset:
-
Select the asset from the asset tree in the Customize asset field.
-
Click Save.
The fields for that asset will appear in the asset Weight management section.
Asset tree weights screen
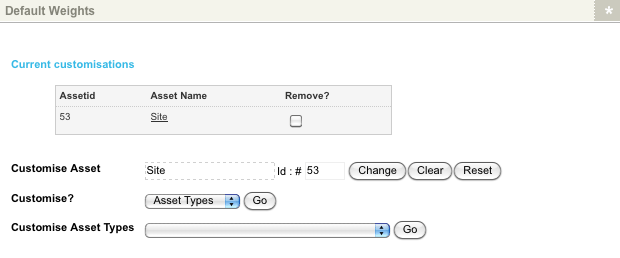
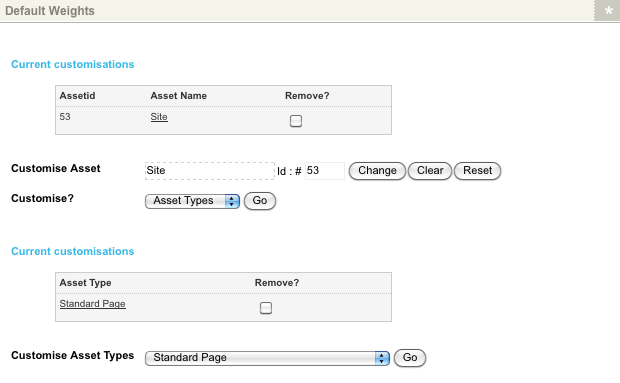
This screen allows you to set weights and indexing for an asset type or metadata field for a particular section in the system. For example, your intranet site can have a different set of weightings than your internet site, or indexing may be turned off for your intranet site. Any values set on this screen will override the values set on the global weights screen. The Default weights section of the asset tree Weights screen is shown:

Customizing the settings for an asset type for a section in the system
By default, no sections will be selected on the screen.
-
Select the section that you want to customize in the Customize asset field.
-
Click Save. The customize field will appear on the screen, as shown:

-
Select
Asset typein the Customize field. -
Select Go.
The customize asset types field will appear on the screen, as shown:
-
Select
- All asset types -on the customize asset types field. -
Select the asset type that you want to customize in the Customized asset types field.
-
Select Go.
Additional fields will appear in the Asset type weight management section, as shown:
These fields are the same as those that appear on the Asset weights screen and are explained in this chapter’s Asset weights screen section.
-
Click Save once you have modified these settings.
The section and asset type will be listed in the default weights section, as shown:
To edit an asset type’s settings after you have customized it:
-
Click on the name of the asset in the first current customizations section.
-
Select asset types from the Customize field.
-
Select Go. The list of asset types that have been customized will appear.
-
Click on the asset type you want to edit. The fields will appear in the asset type weight management section.
To remove the settings for an asset type:
-
Select
Removein the second Current customizations section. -
Click Save.
To customize the settings for another asset type for the section:
-
Select the asset type from the customize asset types list.
-
Select Go.
To customize the asset types for another section:
-
Select the Customize asset field section.
-
Click Save.
To remove the section’s settings:
-
Click
Removein the first Current customizations section. -
Click Save.
Customizing the settings for a metadata schema for a section in the system
By default, no sections will be selected on the screen.
-
Select the section that you want to customize in the Customize asset field.
-
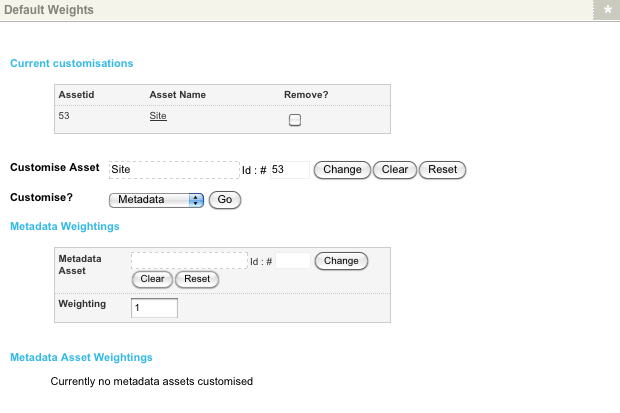
Click Save. The customize field will appear on the screen, as shown in this figure:
-
Select
Metadatain the Customize field. -
Select Go. The fields shown in the next figure will appear. These fields are the same as those in the Metadata sections on the asset weights screen and are explained in the asset weights screen section in this chapter.
-
Click Save once you have modified these settings. The section will be listed in the Current customizations section, as shown:
To edit the settings of a customized metadata field:
-
Click on the asset’s name in the Current customizations section.
-
Select
Metadatafrom the Customize field. -
Select Go.
The list of metadata fields that have been customized will appear.
To remove the section’s settings:
-
Click
Removein the first Current customizations section. -
Click Save.
Global weights screen
This screen allows you to set weights and indexing for asset types or metadata fields for the system. For example, you can set the weights for all standard pages different from the PDF files in the system or turn indexing off for all files in the system.
The Global weights section of the Global weights screen is shown in the figure:

Customizing the settings for an asset type for the system
By default, no sections will be selected on the screen.
-
In the Customize field, select
Asset types. -
Select Go. The Customized asset types field will appear on the screen:

-
In the Customized asset types field, select the asset type you want to customize, such as
Standard page. -
Select Go.
Additional fields will appear in the asset type weight management section: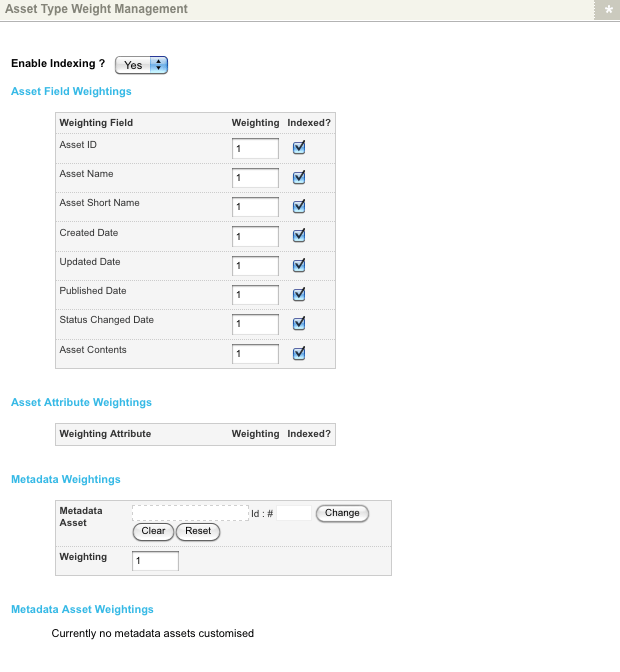
These fields are the same as those that appear on the asset weights screen and are explained in this chapter’s asset weights screen section.
-
Click Save once you have modified these settings. The asset type will be listed in the current customizations section:
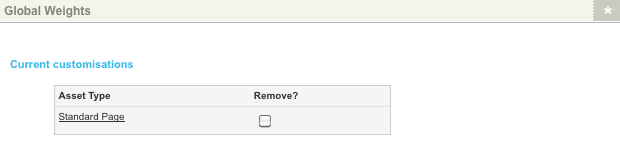
To edit a customized asset type’s settings, click on the asset type in the Current customizations section. The fields will appear in the asset type weight management section.
To remove the settings for an asset type:
-
Select
Removein the Current customizations section. -
Click Save.
To customize the settings for another asset type, select that asset type from the Customize asset types list.
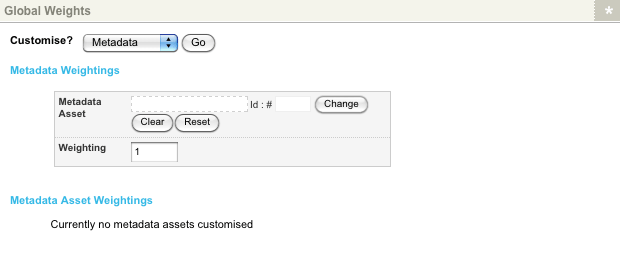
Customizing the settings for a metadata schema for the system
By default, no metadata fields will be selected on the screen.
-
Select
Metadatain the Customize field. -
Select Go. The fields shown in the next figure will appear. These fields are the same as those in the Metadata sections on the asset weights screen and are explained in the asset weights screen section in this chapter.
-
Click on
Metadatain the Customize field. -
Select Go.
The list of metadata fields that have been customized will appear.