Image asset
An image asset is used to upload image files into the Squiz Content Management system. To display an image in your site’s content, you need to create an image asset. Once created, an image asset can be used as many times as needed within your Squiz Content Management system.
The details screen of the image asset differs from the details screen of other assets. The following sections describe the unique features of the image asset.
Details
This section of the screen contains basic metadata about the image. The fields available are:
- Filename
-
The filename of the uploaded image file.
- Title
-
The friendly name of the image. The filename is used as a suggestion for this field. You can change it if the filename is too long or does not describe the image well.
- Allow unrestricted access
-
Select Yes to allow this file to be accessible directly through its URL by the web server. The file must have a Live status and be publicly accessible. If this option is not selected, you can only show the file within the context of a page of your website.
- Alt
-
The alternative text for the image, describing what it is. This text is for accessibility. Read more about alt and title attributes for images on https://yoast.com/image-seo-alt-tag-and-title-tag-optimization/.
Changing the alt text of an image asset will not change the alt text of the image used within the site. - Caption
-
The caption or short description for the image.
| To determine which assets in the system are using an image in their content, look at the Linking screen. The assets using the image are in the current linking section. |
Image
This section shows additional metadata such as the file size, dimensions, and when the image was last updated.
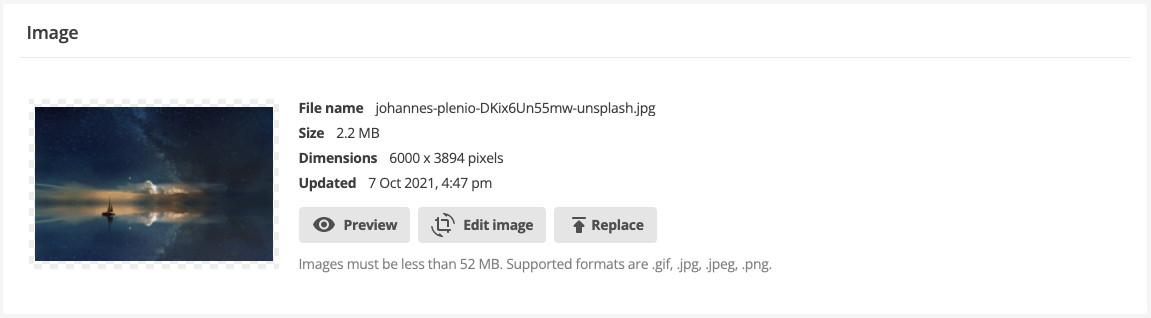
You can also preview the image file and then make minor changes to the file such as cropping and rotating the image.
If an image becomes outdated, you can replace the image with an updated version.
Select Preview to load the image in a preview window. You can access the image editing tools from the preview window.
Select Edit image to load the image editing functions within the preview window. You can make minor changes to the image such as cropping and rotating the image. Select Finish editing to save changes to the image.
Select Replace to upload a new image file for the image.
| Any dynamic image varieties listed in the Varieties section are affected by changes you make to the main image. |
Varieties
This section lets you create different sized versions of the image.
For example, if your image has a width of 400 pixels, you can create a variety with a width of 100, so you can use a smaller version of the image.
| If you combine varieties with triggers you can automatically create different image types when you add them to your Squiz Content Management instance. Read more about this in the How to create image varieties using a trigger tutorial. |

There are two types of image varieties:
- Dynamic
-
These image varieties are updated when you replace the main image, or make changes to the image using the image editing tools. You use a preset list of image constraint options to create your variants.
- Width
-
The image variety is created with the specified width. The image will be either stretched or compressed to match the width specified. For example, if an image is
100pixels wide, and you select to constrain to200pixels, the image will be stretched. The height will also double to retain the aspect ratio. If your image is100pixels wide and you select to constrain to50pixels, it will be compressed to half its original width. The height will be also be halved to retain the aspect ratio. - Height
-
The image variety is created with the specified height, and will be either stretched or compressed accordingly. The width will be constrained in the same manner to maintain the aspect ratio.
- Both
-
The image variety is created so that the image’s largest dimension is constrained by the dimension specified. For example, entering a value of
100pixels will ensure that neither dimension of the image is greater than100pixels. So if the original height was400pixels and the width was200pixels, the height would become100pixels and the width50pixels. Note that the smaller dimension is constrained with the same aspect ratio as the larger dimension. - Smallest
-
The image variety is created so that the smallest dimension of the image is constrained by the dimension specified. For example, entering a value of
100pixels will ensure that neither dimension of the image is less than100pixels. So if the original height was400pixels and the width was200pixels, the height would become200pixels and the width100pixels. Note that the larger dimension is constrained with the same aspect ratio as the smaller dimension. - Square
-
The image variety is created as a square-shaped image, cropped (center-weighted), and constrained by the dimension specified. Therefore, if the original image were
400pixels high and200wide, it would be cropped vertically to200pixels. It would then be resized, as per the specified dimension.
- Custom
-
These image varieties remain unchanged when you replace or edit the main image. You must manually update these varieties with new images or make changes to each custom variety for changes to take effect. The image editor lets you make more complex edits to the image.
Create a dynamic image variety
To create a dynamic image variety based on the main image:
-
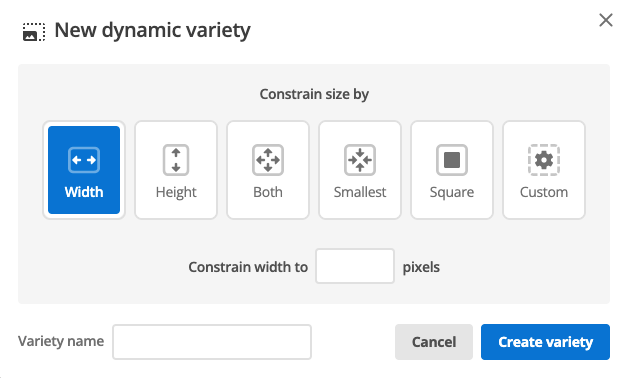
Select Plus in the Dynamic varieties to open the New dynamic variety dialog box.
-
Review the different constraint options by selecting each one for more information.
-
Select the constraint option and specify the constraint value.
-
Name the dynamic image variety logically so you can identify it amongst the other varieties in the system.
-
Select Create variety to complete the creation process.
The variety you made is added to the list, but is not yet created. -
Repeat these steps to make more dynamic varieties if you need to.
-
Click Save to save all varieties you created based on the main image.
You can now select from any of these varieties when adding the image into your Squiz Content Management site.
Create a custom image variety
To create a custom image variety based on either the main image or a new uploaded image:
-
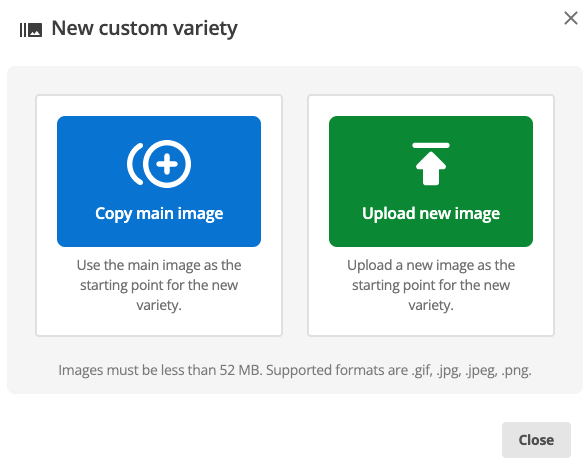
Select Plus in the Custom varieties to open the New custom variety dialog box.
-
Select whether you want to copy the main image or upload a new image for this custom variety.
-
Use the tools in the image editor to customize the image. For example, you may want to crop the image, and apply an aspect ratio to keep the dimensions accurate when resizing.
-
Name the custom image variety logically so you can identify it amongst the other varieties in the system.
-
Select Create variety to complete the creation process.
The variety you made is added to the list, but is not yet created. 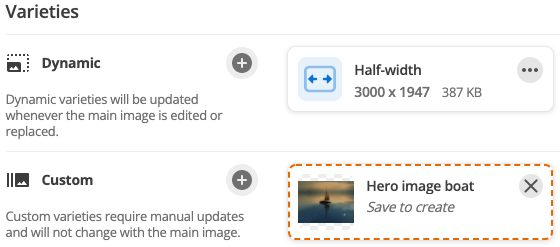
-
Repeat these steps to make more custom varieties if you need to.
-
Click Save to save all the custom varieties associated with this image asset.
You can now select from any of these varieties when adding the image into your Matrix site.
Keyword replacements for image varieties
Keyword replacements can be used to display information about an image variety.
The available keyword replacements are listed below.
Note that <variety_name> is the name of the variety that you want to use.
| Keyword replacement | Information shown |
|---|---|
|
This will display the variety of an image. |
|
This will display the url of the variety. |
|
This will display the pixel width of the variety. |
|
This will display the pixel height of the variety. |
|
This will display the variety of a thumbnail. |
Extracting metadata from a jpeg file
Matrix reads the dc:*xmp metadata from Adobe Photoshop image assets that use JPEG files and lists them in the Embedded data section on the Details screen.
These values can be used in the metadata for the image asset. To do this, copy the keyword that you want to use from the list provided and paste it into the metadata field on the Metadata screen.
Read the Asset metadata screen documentation for more information on the Metadata screen.
This feature requires PHP Metadata Toolkit to be installed on your server by a person with command-line access to your Matrix instance.
The tool’s path must then be entered on the External tools configuration screen.
System administrator permissions are required.
| Metadata extraction occurs when the image asset is created. Any existing images in your system will need to be re-uploaded for metadata extraction. |