Bulk file upload tool
The bulk file upload tool allows you to upload multiple files through the browser into a specified location. The type of asset used will be assigned based on the extension of each file you upload. For example, if you upload a Microsoft Word document, a Microsoft Word document asset will be created. If a specific asset type is not available for the file you are importing, a file asset will be created.
The tool is available from in the toolbar.
Upload settings
The following fields are available:
- Allow unrestricted
-
This field allows you to set the default value for the Allow unrestricted access field for the file. Depending on what this setting is, the file’s status, and whether public read access has been granted, Squiz Content Management will use different style URLs.
- Yes
-
If the file’s status is Under construction and public read access has been granted, then a human-readable URL will be used, for example, http://example.com/image.jpg. This means that it is served dynamically from the Squiz Content Management repository and is not optimal in terms of performance. If the status of the file is Live and public read access has been granted, then a static URL will be used, for example, http://example.com/__data/assets/image/100/image.jpg where
100is the asset ID of the file. The static URL gives optimal performance as it is served directly by the webserver. - No
-
If this setting is
No, then a human-readable URL will be used. This may be required if an external system is referencing the file and uses the dynamic human-readable URL. The default setting of the Allow unrestricted field isYes.
- Link type
-
Select the default link type for the file assets that will be created. These options include Menu link and Hidden link. By default, it is set to Menu link.
- Allow virus scan
-
This field allows you to select whether to perform a virus scan when each file is uploaded. You must have the Global virus checker configured in external tools to perform a scan.
- Upload root node
-
This allows you to select the asset from the asset tree under which you require the files to be uploaded.
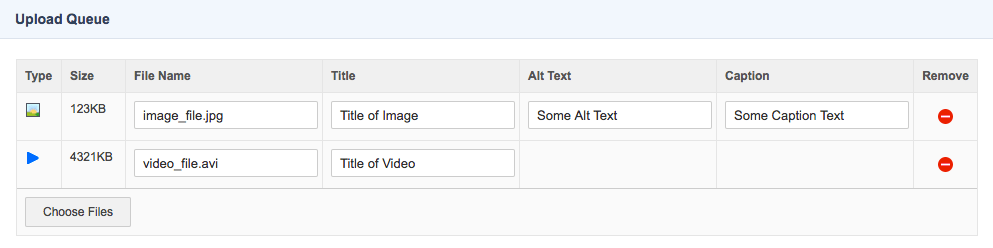
Upload queue
The upload queue allows you to select multiple files to upload from your computer. Select Choose files to launch the file explorer in your browser. You can select multiple files at once to be included in the queue. The individual files will be listed in the queue, and properties can be updated before uploading.
The following properties are shown for each file:
- Type
-
The type of asset that will be created based on the file extension.
- Size
-
The size of the file.
- File name
-
The name of the file. This field will initially be set to the name of the file on your computer. If the file extension is not provided in the file name, a generic file asset will be created.
- Title
-
The title to be used for the asset that will be created in Squiz Content Management. If this field is not populated, the file name will be used as the title.
- Alt-text
-
An image-only option. The alt text to use when describing what details the image contains.
- Caption
-
An image-only option. This text is the caption that will be used for the image.
- Remove
-
Select this to remove the file from the upload queue. Once a file has completed uploading, this button will be replaced with a tick icon.
Uploading files
Selecting Start upload will begin uploading the files that have been added to the upload queue. Once initiated, you can pause the process by selecting Pause upload. Once the upload process has been paused, the current file upload will complete, and no additional files in the queue will progress. You can then select Resume upload to continue uploading the remaining files in the upload queue.
Any errors during the upload process will be displayed under the file name of the individual file in the upload queue.