Ecommerce default delivery method
The ecommerce default delivery method asset allows you to configure a delivery method for site users to select when completing an ecommerce transaction. Form fields, email options, and payment gateways can all be configured with this asset.
Once you have added an ecommerce default delivery method, you can configure its settings on its associated asset screens.
The majority of these screens are the same as a standard page and are described in the Asset screens documentation.
This chapter describes the Details screen, which is different for an ecommerce default delivery method asset.
Additional dependant assets
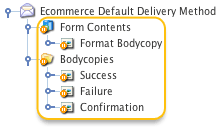
When you create an ecommerce default delivery method, several assets are automatically created beneath it. You can use these assets to define the contents and layout of the ecommerce default delivery method form.
- Form contents
-
The form contents asset allows you to configure the settings and define the sections and fields of the ecommerce default delivery method form.
- Format bodycopy
-
This bodycopy is used to define the layout of the ecommerce default delivery method form contents. This asset will only be available when the Customize format field on the form contents Details screen is set to
Yes. - Bodycopies
-
These bodycopies are used to define the layout of the ecommerce default delivery method in the checkout page pages.
This section describes a deprecated feature.
The feature may only be mentioned in the documentation for the purpose of warning readers. You should not enable or use deprecated features for new development.
Read Deprecated assets and features for more information about the deprecation level of this feature before trying any suggested procedures or actions described for this feature.
Contact Squiz Support for assistance if you are still uncertain about whether you should use this deprecated feature after reading these resources.
The following bodycopies are listed in this folder:
- Success
-
This bodycopy is used to define the layout of the receipt summary on the receipt page of the checkout page asset.
- Failure
-
This bodycopy is used to define the failure summary’s layout on the failure page of the checkout page asset.
- Confirmation
-
This bodycopy is used to define the confirmation summary layout on the confirmation page of the checkout page asset.
Details screen
The Details screen for the ecommerce form contents allows you to change this asset’s settings. Read the Asset details screen documentation for more information about the Status, Future status, Thumbnail, and Details sections.
Payment gateway
This section allows you to select the payment gateways for users to pay for the items on a site.

In the payment gateway field, select a payment gateway for the delivery method form. You can add additional payment gateways by clicking the More button. For more information on the payment gateways available, refer to the payment gateway chapters in this manual.
Alternatively, you can choose not to use a payment gateway on your ecommerce setup.
This setting will allow users to submit orders without going through the payment process.
To do this, select No in the Gateway required? field.
By default, this field is set to Yes, meaning a payment gateway must be configured for the ecommerce setup to work.
| If the Gateway required? option is disabled, users will always bypass the payment process even if you have selected a payment gateway asset in the payment gateway field. |
Quantity tracking
This section allows you to change the message displayed when negative quantities occur during payment processing.
In the Negative quantity message field, enter the text to display when an order has been paid for but contains items that have insufficient quantities available. By default, this message will read this is a list of products paid for, but you do not have enough quantity.
The listed numbers are the number of products that have been ordered but are currently not in stock. This message is shown when the keyword replacement Negative quantity message is used on the delivery emails.
Delivery email options
This section allows you to select whether to send recipient and receipt emails after a successful order is placed. The delivery email format section is shown:

In the Send emails field, select whether to send the emails.
If set to the default value Yes, the recipient email format and receipt email format can define the email layout and contents.
Recipient email options
This section defines an email to whoever needs to be notified when a successful order has been made. For example, this could be the individual in charge of shipping out the items for sale. The recipient email options section is shown:
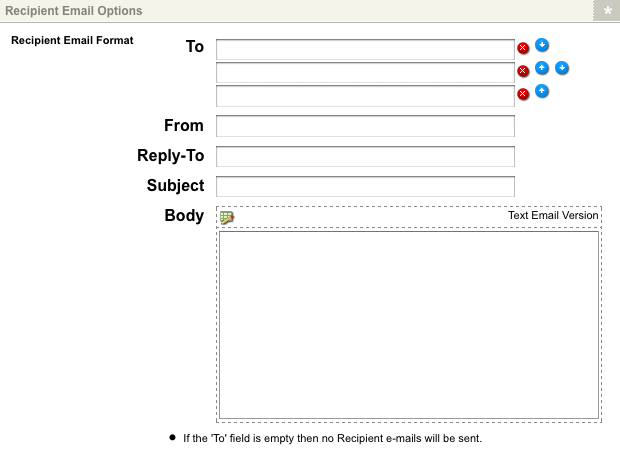
The fields that are available in this section are as follows:
- To
-
Enter the email address of a person who should receive the email. You can enter their email address in the text fields or select their user account in the asset finder field.
- From
-
Enter the email address that will appear in the from field in the email.
- Reply-to
-
Enter the email address to which a user will reply. If no reply-to address is configured, the header will not be sent on the email.
- Subject
-
Enter the text to be used as the subject of the recipient email. You can use the keyword replacements in the available keywords section of the Details screen to display the order’s information.
- Body
-
Enter the body of the email. You can enter either the text or HTML version of the email in this field. To edit the HTML version:
-
Click on the edit
 icon – a WYSIWYG editor will appear.
You can use the keyword replacements in the available keywords section of the Details screen to display the order’s info.
-
Receipt email options
This section allows you to define an email sent to the user who successfully placed an order on the site. The receipt email options section is shown:
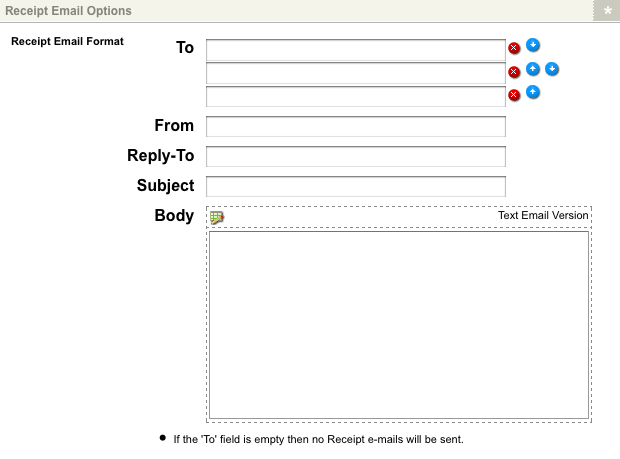
The fields that are available in this section are as follows:
- To
-
Enter the email address of a person who should receive the email. You can use the response keyword replacement of an email question from the delivery form in this field.
- From
-
Enter the email address that will appear in the from field in the email.
- Reply-to
-
Enter the email address to which a user will reply. If no reply-to address is configured, the header will not be sent on the email.
- Subject
-
Enter the text to be used as the subject of the recipient email. You can use the keyword replacements in the available keywords section of the Details screen to display the order’s info.
- Body
-
Enter the body of the email. You can enter either the text or HTML version of the email in this field. To edit the HTML version:
-
Click on the edit
icon– a WYSIWYG editor will appear.You can use the keyword replacements in the available keywords section of the Details screen to display the order’s info.
-
Form contents
The form contents asset allows you to create the delivery form for the ecommerce default delivery method used by site visitors to complete ecommerce transactions. Form fields can be added to the delivery form to provide the information required for the specific delivery method.
The Details screen of the form contents asset is very similar to the Custom form contents screen.
Format bodycopy
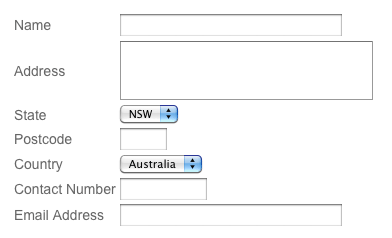
The format bodycopy is only available when the Customize format? field is set to Yes on the Details screen of the form contents asset.
The format bodycopy is used to configure the default layout of the delivery form of the ecommerce default delivery method asset. The default layout of the delivery form is shown:
To configure the layout for this page:
-
Right-click on the form bodycopy in the asset tree.
-
Select Edit contents.
-
Click on the edit
icon– the WYSIWYG editor will appear. -
Use the keyword replacements and formatting to configure the layout of the information to show on the form page.
By default, no information will appear in the WYSIWYG editor.
Keyword replacements on the format bodycopy
A list of keyword replacements is provided in the WYSIWYG editor toolbar on the Edit contents screen of the format bodycopy. You can use the keyword replacements in conjunction with text, images, and links to configure the receipt page’s layout. These keyword replacements are similar to those available on the format bodycopy of a Custom form.
Success bodycopy
|
This section describes a deprecated feature. The feature may only be mentioned in the documentation for the purpose of warning readers. You should not enable or use deprecated features for new development. Read Deprecated assets and features for more information about the deprecation level of this feature before trying any suggested procedures or actions described for this feature. Contact Squiz Support for assistance if you are still uncertain about whether you should use this deprecated feature after reading these resources. |
The success bodycopy is used to define the layout of the receipt summary. This summary is shown when the keyword replacement receipt summary is used on the checkout page’s receipt bodycopy.
To create a layout for the receipt summary:
-
Right-click on the success bodycopy in the asset tree.
-
Select Edit contents.
-
Click on the edit
icon– the WYSIWYG editor will appear. -
Use the keyword replacements and formatting to set the information’s layout to show on the receipt summary.
By default, no information will appear in the WYSIWYG editor.
Keyword replacements on the success bodycopy
A list of keyword replacements is provided in the WYSIWYG editor toolbar on the Edit contents screen of the success bodycopy. You can use these keyword replacements in conjunction with text, images, and links to configure the receipt summary layout. The standard keyword replacements that are available can be used to display each field in the delivery form and include the following:
%form_q<question_number>%-
Show the response the user-submitted for the question.
<question_number>is the number of the question on the delivery form. For example, it will show the first question on the delivery form.
Failure bodycopy
|
This section describes a deprecated feature. The feature may only be mentioned in the documentation for the purpose of warning readers. You should not enable or use deprecated features for new development. Read Deprecated assets and features for more information about the deprecation level of this feature before trying any suggested procedures or actions described for this feature. Contact Squiz Support for assistance if you are still uncertain about whether you should use this deprecated feature after reading these resources. |
The failure bodycopy is used to define the layout of the failure summary. This summary is shown when the keyword replacement failure summary is used on the checkout page’s failure bodycopy.
To create a layout for the failure summary:
-
Right-click on the failure bodycopy in the asset tree.
-
Select Edit contents.
-
Click on the edit
icon– the WYSIWYG editor will appear. -
Use the keyword replacements and formatting to set the layout of the information to show on the failure summary.
By default, no information will appear in the WYSIWYG editor.
Keyword replacements on the failure bodycopy
A list of keyword replacements is provided in the WYSIWYG editor toolbar on the Edit contents screen of the failure bodycopy. You can use these keyword replacements in conjunction with text, images, and links to configure the failure summary layout. The standard keyword replacements that are available can be used to display each question in the delivery form and include the following:
%form_q<question_number>%-
Show the user-submitted response to the question where
<question_number>is the number of the question on the delivery form. For example, it will show the first question on the delivery form.
Confirmation bodycopy
The confirmation bodycopy is used to define the layout of the confirmation summary. This summary is shown when the keyword replacement confirmation summary is used on the checkout page’s confirmation bodycopy.
|
This section describes a deprecated feature. The feature may only be mentioned in the documentation for the purpose of warning readers. You should not enable or use deprecated features for new development. Read Deprecated assets and features for more information about the deprecation level of this feature before trying any suggested procedures or actions described for this feature. Contact Squiz Support for assistance if you are still uncertain about whether you should use this deprecated feature after reading these resources. |
To create a layout for the confirmation summary:
-
Right-click on the confirmation bodycopy in the asset tree.
-
Select Edit contents.
-
Click on the edit
icon– the WYSIWYG editor will appear. -
Use the keyword replacements and formatting to set the layout of the information to show on the confirmation summary.
By default, no information will appear in the WYSIWYG editor.
Keyword replacements on the confirmation bodycopy
A list of keyword replacements is provided in the WYSIWYG editor toolbar on the Edit contents screen of the confirmation bodycopy. You can use these keyword replacements in conjunction with text, images, and links to configure the confirmation summary layout. The standard keyword replacements that are available can be used to display each question in the delivery form and include the following:
%form_q<question_number>%-
Show the user-submitted response to the question where
<question_number>is the number of the question on the delivery form. For example, it will show the first question on the delivery form.