Cache manager
The cache manager allows you to configure caching within your system, including turning it on, setting a cache expiry time, selecting who is affected by caching and clearing the cache. It is located under the system management folder in the asset tree.
Cache management happens on the Details screen, Clear cache screen, Refresh cache screen, Type code specific screen, Root node-specific screen, and Send cacheable header screen.
Details screen
The details screen of the cache manager allows you to turn caching on for the system and set the default cache expiry time.
Cache options
The section allows you to turn caching on for the system and set the default cache expiry time.
The following fields are available: Matrix caching status:: To enable caching for the system, select on in this field. Once you have turned caching on, Squiz Content Management will start caching your system. By default, this field is enabled.
- Cache storage type
-
The method used to store and retrieve cache objects.
- Number of cache buckets
-
This field allows you to set the number of cache bucket directories to use for caching. The cached information is stored as files in these buckets (or directories). The maximum number of cache buckets created for storage is this number squared. If you set a low number, each bucket retains many cache files. You may start to reach the limit on the number of files in a directory imposed by your server’s operating system. If you set the value too high, each bucket will hold a small number of cache files, which can be inefficient in terms of performance.
- Default expiry
-
Set the length of time (in seconds) the cache file is valid. By default, this field is set to 86400 seconds (24 hours). For example, if you want the cache to be refreshed every three hours, you would enter a value of 10800. When an asset is updated, the cache is not automatically cleared until the default expiry time has elapsed. As a result, some changes may not appear on the frontend of your site until the next time the cache is refreshed.
- Accelerator cache expiry
-
Set the length of time (in seconds) that the requested page is cached within a proxy accelerator, such as Squid cache. This field is set to 86400 seconds (24 hours).
- Browser cache expiry
-
Set the length of time (in seconds) that the requested page is cached in the browser. This field is set to 1800 seconds (30 minutes).
- Clear asset cache automatically
-
When enabled, Squiz Content Management will automatically clear the cache on assets whenever their attributes or metadata are updated.
- Clear proxy cache automatically
-
When enabled, Squiz Content Management clears the Proxy cache automatically on asset URLs whenever the asset attributes or metadata are updated.
Cache levels
You can use different permissions to show different content on a page depending on whether the user is signed in and of which user groups the user is a member. For example, if the user is part of the "Members" user group, they can see additional content on the home page.
Once activated, you can set up the cache manager so that Squiz Content Management first looks in the cache for the different page versions for the public user and user groups before building the page from the repository.
Different asset versions are displayed for some assets within the system. The assets shown depend on whether the user has read, write, or admin permission for that asset. You can also set up the cache manager so that the system first looks in the cache for the different versions of the page based on the user’s permissions before building the page from scratch.
This section of the details screen allows you to specify which levels of caching you would like to use.
The following fields are available:
- Public level caching
-
If enabled, when a public user requests a page within your site, Squiz Content Management will first look in the cache for the public page. If it does not exist in the cache, it will build the page from scratch. Signed-in users never see the public cache version.
- Permission level caching
-
This setting is only applicable to signed-in users. If enabled, when a signed-in user requests a page within your site, Squiz Content Management will first look in the cache for the appropriate asset according to that user’s highest available permission setting (read, write, or admin). This means the cache will be shared amongst users who have the same permission setting on the asset. If it does not exist in the cache, it will then build the page from scratch.
- Group level caching
-
This setting is only applicable to signed-in users. If enabled, when a signed-in user requests a page within your site, Squiz Content Management will first look in the cache for the version of the page for the user groups to which they belong. This means the cache of the asset will be shared among users who belong to the same parent user groups. If it does not exist in the cache, it will then build the page from scratch. You should only use this option if you are using user groups for permissions instead of roles or individually assigned permissions. These settings will only work if the Caching status is
On.
Cachable root URLs
This section allows you to control the caching for each system root URL listed on the system configuration screen (for more information about this screen, read the xref:system configuration documentation).
If you do not want to use caching for a particular URL, clear the use cache box and save the screen. This will mean that if a user views a page using that URL, the system will behave as if the _nocache suffix is being used. By default, the use cache field is selected for each system root URL.
Clear cache screen
The clear cache screen allows you to clear the cache for a particular asset, an asset, and its children or an asset and its dependents.
Clear cache
This section allows you to clear the cache for a particular asset.
The fields that are available on this screen are as follows:
- Choose asset
-
This field allows you to select for which asset to clear the cache. With the additional fields on this screen, you can clear the cache for this asset only, this asset and its children, or this asset and its dependents. You can also specify for which asset types that you want to clear the cache. For example, you can clear the cache for all of the news items under your site.
- Level
-
Select whether you want to clear the cache for the asset(s) only, the asset(s) and its dependents, or the asset(s) and its children. The asset(s) that will be used are specified in the chosen asset field above. The dependants of an asset are those that cannot exist without that asset. For example, the page contents asset of a standard page or the question assets belonging to a custom form. The children of an asset are those that have been created underneath it in the hierarchy.
- Asset types
-
Select for which asset type to clear the cache. For example, if you want to clear the cache for all news items in your site, you would select your site in the choose asset field, this asset and its children in the level field, and news item in the asset types field. You can select multiple asset types from the list. If you want to clear the cache for all asset types, select – all asset types – from the list.
- Clear Squid cache
-
If set to yes, Squiz Content Management will also send a clear Squid cache request for the URLs applied to the assets specified above that get their Squiz Content Management cache cleared.
Clear Squid cache
This section allows you to clear the Squid cache on specific URLs manually. Enter each page’s URLs to clear the cache on and enter each URL on a new line. This is useful if you want to clear the Squid cache on URLs that are not associated with an asset, such as a 301 remap or 404 page.
If you are using a different caching proxy than Squid that you have configured to follow Squid cache clearing commands, you can also add additional commands to the URLs entered here. For example, if you are using Squiz Edge as a proxy cache, you can add a query string wild card to the end of the URL to clear all query string versions of the URL.
Clear system wide cache
This section allows you to clear the cache for all assets in the system. To do this, select yes in the delete all system cache field and save the screen.
How to clear the cache for an asset Consider the following example. A site has been set up where the cache has been set up to refresh every 24 hours. Changes have been made to the home page, and the cache needs to be cleared.
On the clear cache screen of the cache manager, the following details can then be entered:
- Choose asset
-
The home page asset is selected.
- Level
-
This asset and its dependants are selected as we only want to clear the cache for the home page and the bodycopy assets under it.
- Asset types
-
As we only want to clear the cache for the home page, Standard page is selected from the list. Once the screen is saved, the cache for the home page is cleared.
Clearing the cache for an asset type
If you wanted to clear the cache for a specific asset type, for example, news items, you could use the following settings:
- Choose asset
-
The site asset is selected in this field.
- Level
-
This asset and its children are selected as we want all news items under this site to have their cache cleared.
- Asset types
-
As we only want to clear the cache for the news, news item is selected from the list. Save the screen, and the cache for all news items will be cleared and not for any other types.
Clearing the cache for an asset listing
For example, if you have an asset listing that lists child news items assets beneath it, and you only want to clear the cache for the asset listing and not for the child assets; you would select This asset and its dependents in the Level field on the Clear cache screen.
If you want to clear the cache for the child assets and the asset listing, you would select this asset and its children.
Refresh cache screen
The refresh cache screen allows you to schedule a job to refresh the public cache of an asset and its dependents. Typically, the cache for an asset is refreshed when the first user visits the page after elapsing. This process can potentially take a while, especially on assets such as asset listings. This scheduled job will delete the existing cache for the asset and regenerate the cache as the public user and potentially improve the user experience.
To add a new scheduled job, fill out the following fields in the add a job section:
- Asset
-
Select for which asset to clear the cache.
- At
-
Select the date and time for when the cache should be regenerated from the list provided.
- Next run
-
Alternatively, click on the next run button to set the date and time to the next run of the scheduled jobs manager.
- Or in
-
You can set the regeneration to take place in a certain number of minutes, hours, days, weeks, months, or years. Enter the number into the text box and select the appropriate time frame from the list provided.
- Repeat this process
-
If you want to repeat the scheduled job, enter the time between runs in the fields provided. For example, if you want to clear the cache of the home page every two days, enter
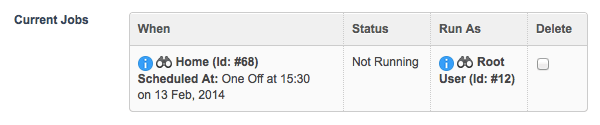
2 daysin this field. Enter the number in the first field and select the appropriate time frame in the second list. Once you have filled out the required information, save the screen. The scheduled job will appear in the current jobs section, as shown in the example below.
To delete a job, select the delete box and click save. The scheduled job will no longer be run.
Type code specific screen
The type code-specific screen allows you to override the default settings on the details screen and configure the caching status and expiry for specific asset types in the system.
To configure a particular asset type, select it from the configure type code list and click go. For example, to configure the settings for a standard page, select Standard page from the list. Additional fields will appear in the Type code cache management section.
To customize a setting, clear the use default option and click save. Additional fields will appear.
The fields you can modify in this section are the same as the settings found on the details and send cacheable header screens of the cache manager.
To revert a field to its default setting, clear use default and click save.
Root node-specific screen
The root node-specific screen allows you to override the default settings on the details screen and configure the caching status and expiry for specific root nodes in the system.
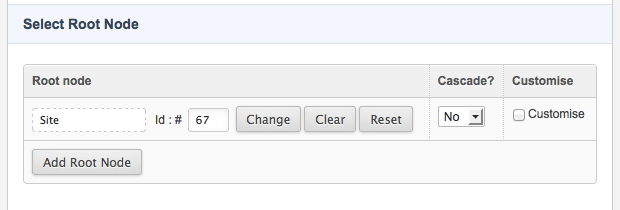
To configure a particular root node, select it in the configure root node field, select whether to include its child assets, and click save. The customize field will appear on the screen, as shown in the example below.
Select the customize option. Additional fields will appear in the Root node cache management section.
To customize a setting, clear the use default option and save. Additional fields will appear.
The fields you can modify in this section are the same as the settings found on the details and send cacheable header screens of the cache manager.
To revert a field to its default setting, clear use default and click save.
Send cacheable header screen
The send cacheable header screen allows you to set the root URLs of your system for which cacheable headers will always be sent and with what settings.
Send cacheable headers settings
- Send cacheable header
-
This field shows the current setting for cacheable headers however the setting can not be changed. This option is configured on the System configuration screen.
For more information on the send cacheable header field, read the System configuration screen documentation. - Protocol(s)
-
You can specify the protocol to send cacheable headers on, either HTTP only, HTTPS only, or both. By default, this field will be set to both.
- HTTP cache control level & HTTP cache control level
-
The cache control levels of each protocol can be individually set in these fields to either public or private.
By default, both these fields will be set to public. For more information, refer to w3’s cache control documentation. - Edge permission header
-
This is a unique header setting for use with squiz edge and caching content for authenticated users. Contact Squiz for more information on this feature, as it only applies to systems that use the trinity caching module with their Squiz Edge caching configuration.
Root URLs to send cacheable headers
A list of the system’s root URLs will be displayed in the root URLs to send cacheable headers section of the screen, as shown in the example below.

The Send headers and Public user only options are available for each URL listed in this section. By default, these options are enabled, meaning that cacheable headers will be sent for pages served to users who are not signed in (public users) on each of these URLs.
Clearing the Public user only option will mean that cacheable headers will also be sent for pages served to signed-in users on the corresponding URL.
To disable the sending of cacheable headers on a particular URL, clear the corresponding send headers field and click save.
Cache related URL suffixes
There are three URL suffixes related to caching that can be appended to each page’s URL.
- System bypass cache suffix
-
Enter the suffix to be appended to the URL of the site to access the matrix-uncached version of the page. Using this suffix forces Matrix to serve the most recent version of the page to the user. By default, this is set to
_nocache. - System bypass proxy cache suffix
-
Enter the suffix to be appended to the URL of the site to access the proxy-uncached version of the page. Using this suffix forces Matrix to ignore any "send cacheable headers" settings and will not send relevant headers (such as cache-control, expires, and last-modified) when serving the page to the user. By default, this is set to
_noproxycache. - System clear cache suffix
-
Enter the suffix to be appended to the URL of the site to clear and re-populate the Matrix cache for the page. Please note that relative hrefs generated when using
_recacheare meant to work for the actual URL without the suffix and will not work as expected when viewing with the suffix attached. By default, this is set to_recache.
Read the URL suffixes and query strings documentation for more information on URL suffixes.