User account screens
All user account types share the following common screens.
Details screen
The details screen lets you configure the user and password details for a user account. You can also view the current locks a user has and choose to release them if you have Admin access over their account.
User details
- Username
-
The username of the user account. Use this name to sign in to the Squiz Content Management system.
- Password
-
The password used to sign in.
These fields are blank and only used if you are changing the user’s password. Password creation rules display below the field.
- Disable password authentication
-
When set to Yes (On) the user’s password can no longer be used to authenticate.
Users who access the system using APIs use OAuth tokens and an external authentication system to authenticate.
Setting this option to Yes is not the same as setting the Disallow password sign in option to enabled when creating a user using 0Auth.
Such users should also have the Disable password authentication detail set to Yes (On).
But the two options are separate.
- First name
-
The user’s first name.
- Last name
-
The user’s last name or surname.
-
The email address of the user. Squiz Content Management uses this email to send any system messages to the user. These messages include workflow notifications and password reset instruction emails.
This email address will also receive any messages sent to this user’s Squiz Content Management inbox.
You can use this value when accessing the user’s email address using keywords (such as
%asset_attribute_username%) and other functionality that sends emails to Squiz Content Management users. - Last sign in IP
-
The IP address of the user at last login.
Set to (not set) if the user has never logged in.
Locks
This section lets you view and release the locks that the user currently holds. The Show user held lock details button shows the last 100 locks that the user has held.
To release the locks held by a user:
-
Select .
-
Click Save.
If you have not acquired the lock on the details screen, a button is seen instead of a list in the Release held locks field. You can release the locks by clicking the Release all locks button without first acquiring the locks.
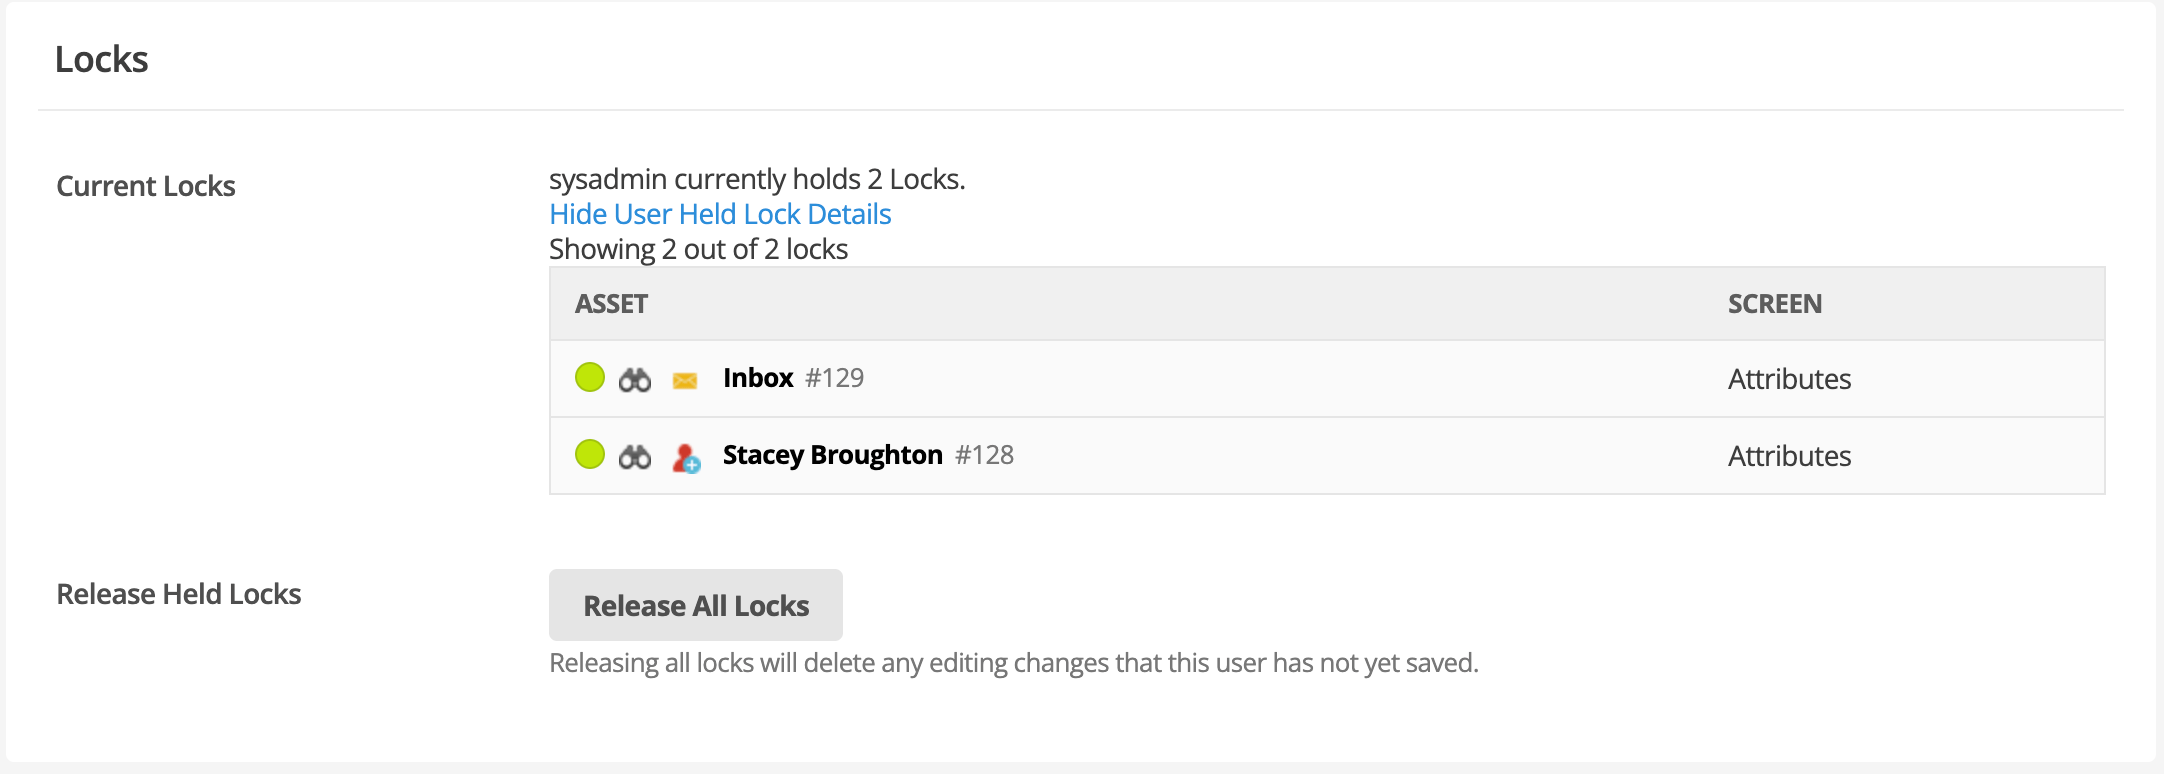
| If you release all locks while a user is working on an asset, they will lose uncommitted changes. |
Memberships screen
The memberships screen lists all user groups the user is a member of, including directly linked and nested groups.
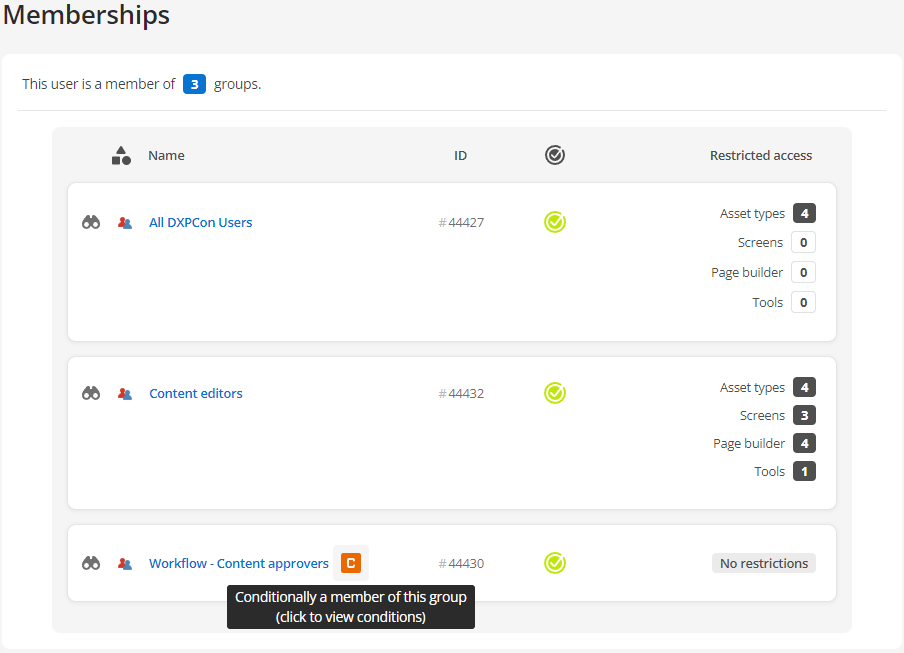
This membership visibility makes it easier for admins to make sure a certain user is part of all the correct groups. The screen also helps identify where feature restrictions and membership conditions are applied as part of those memberships.
The list highlights any groups that have feature restrictions applied. Additionally, the list also highlights user group memberships where certain conditions must be met for the membership to take effect.
| If a user is a member of two or more groups the membership that has the most restrictions set overrides all other group membership permissions. |
Membership conditions screen
The membership conditions screen on a user account lets you add a conditions to restrict the user’s inclusion in User groups.
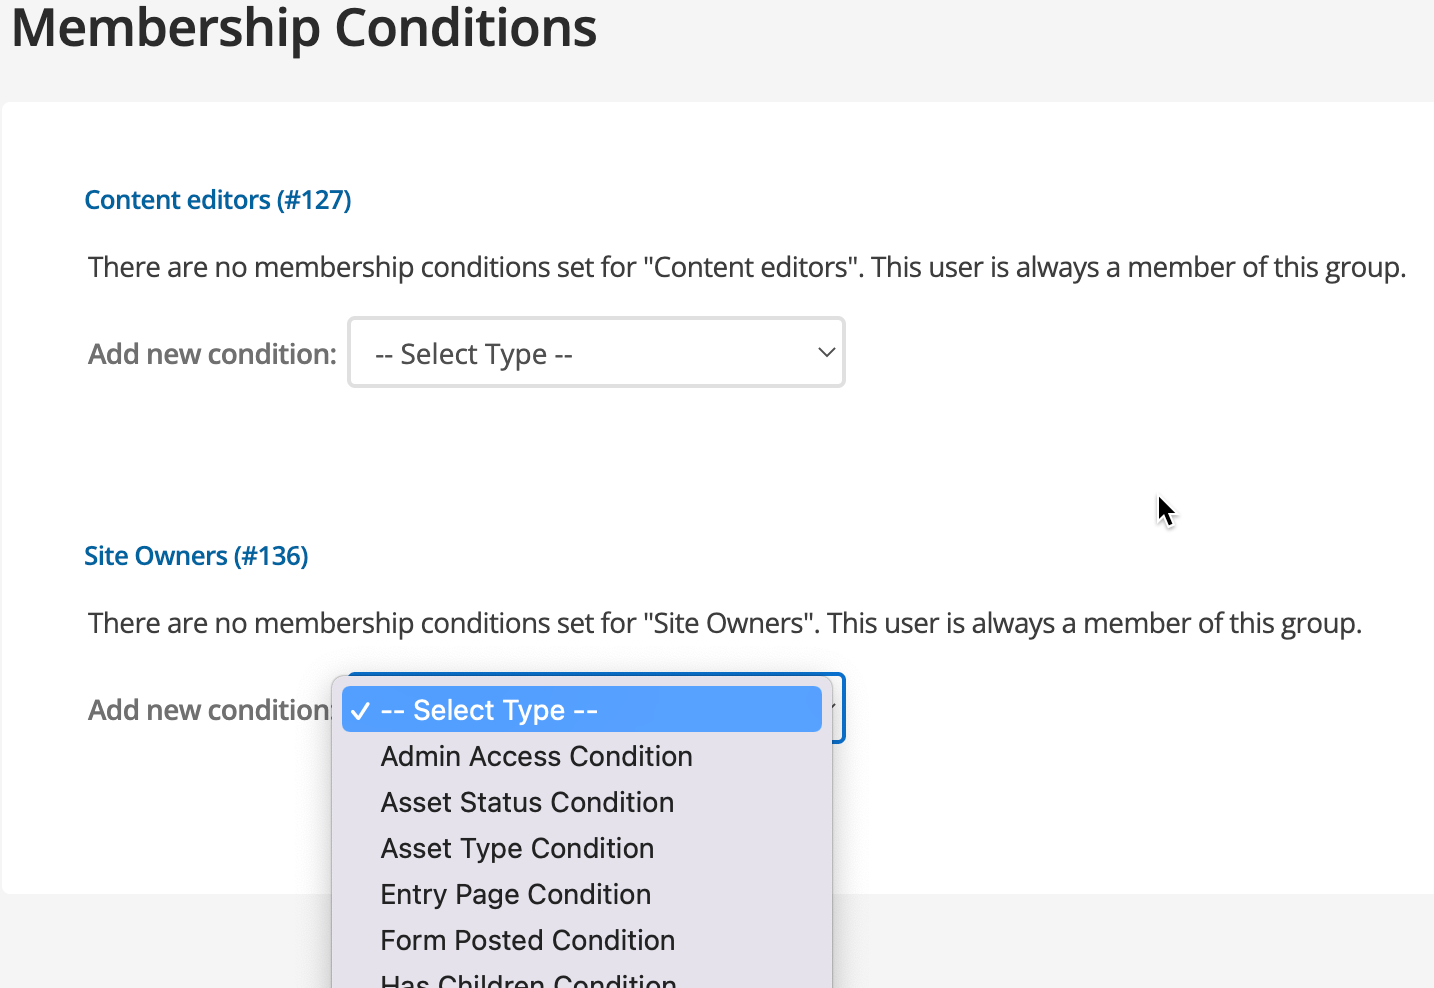
You can create a different set of conditions for each user group on this screen.
If a user is not part of a user group, you cannot use the membership conditions screen.
To add a condition to a user account:
-
Select the condition type you want to use from the Add new condition list.
More information about conditions is available in the Conditions reference section. -
Click Save.
-
Configure the condition based on the fields that appear.
Conditions reference
You can add as many membership conditions as you like. Some conditions should not be used except for very specific circumstances, and are deliberately not described in detail .
| The more conditions you add, the greater the chance the user will experience unexpected behavior in Squiz Content Management. Keep the conditions as basic as possible to make user management simpler. |
- Admin access
-
Do not use this condition. This condition should only ever be used for very specific circumstances because of the potential access it can grant users.
- Asset status
-
Determines group membership based on the workflow status of the asset. You can select multiple asset statuses as part of this condition.
- Asset type
-
Determines group membership based on one or more asset types.
Click on the asset types from the list to add them to the condition.
Click away from the list to view those asset types you’ve selected.
Click the x next to an asset type to remove it from the list. - Entry page
-
Determines group membership based on the first asset the user sees as part of their Squiz Content Management session.
You can filter on a URL pattern or a list of one or more asset IDs. - Form posted
-
Do not use this condition. This condition should only ever be used for very specific circumstances.
- Has children
-
Determines group membership based on what child assets exist beneath the current asset.
You can select one or more asset types from the list and further refine membership for the selected asset types based on the link type. - In maintenance mode
-
Determine group membership based on whether the system is in maintenance mode.
- In user group
-
Specifies that the user account is only a user group member if they belong to another user group.
- Inline edit mode
-
Specifies that the user account is only a member of the user group if they use the Simple Edit Interface.
- Keyword regexp
-
Do not use this condition. This condition should only ever be used for very specific circumstances.
- Logged in
-
Specifies that the user account is only a user group member if the user is signed-in to Squiz Content Management.
- Logical condition
-
Determines group membership based on a combination of keywords that evaluate to either
TRUEorFALSE.Keywords are considered FALSEif their value is empty or zero. - Page referrer
-
Determines group membership based on a pattern for the page referrer URL.
- Server variable
-
Determines group membership based on whether a specific user variable matches the specified pattern.
For example, you can specify that the user is only part of the user group if the browser they are using is Internet Explorer.
To do this, select The following server variable matches the specified pattern from the list provided, enter
HTTP_USER_AGENTinto the Server variable field, and enterMSIEinto the Pattern field. - Site referrer
-
Determines group membership based on a pattern for the site referrer URL.
- User agent
-
Determines group membership based on the user’s browser type.
For example, you could specify that the user is only part of the user group if the browser they are using is Internet Explorer.
To do this, check the browser user agent string matches the pattern from the list provided and enterMSIEinto the User agent pattern field. - User frequency
-
Determines group membership based on the amount of time on the site or the number of visits to the site.
- User IP
-
Determines group membership based on a particular IPv4 range. Read Restrict user group membership based on their IP address range to learn how to use this option.
- User IPv6
-
This condition works the same as User IP, using a specified IPv6 range.
- User type
-
Do not use this condition. This condition should only ever be used for very specific circumstances.
- Visited pages condition
-
Specifies that the user is a member of the listed groups based on previously visited pages filtered by URL pattern or asset ID.
- Write access condition
-
Do not use this condition. This condition should only ever be used for very specific circumstances.
Role assignments
The Role assignments screen on a user lets you view all the roles that a user has assigned. It also lets you reassign these roles.
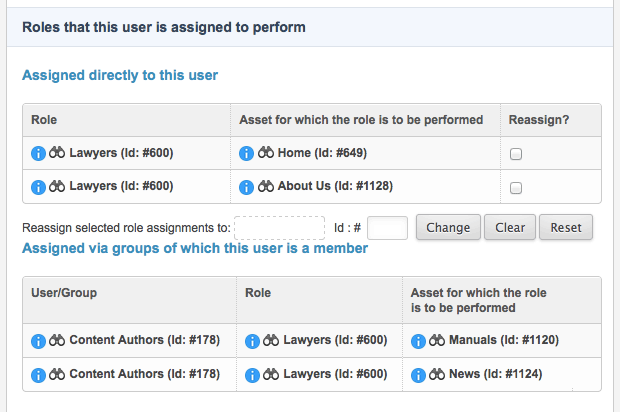
The screen has three sections.
The first section lists the roles assigned directly to this user. The user in the Use roles to simplify workflow messaging logic example uses the Lawyers role on the Home and About Us pages.
The second section lists the roles this user has inherited through a user group.
In the example, the Content authors user group is assigned the Lawyers role on the Manuals and News pages. Thus, the example user also has these roles as they are under the Content authors user group.
On this screen, you can reassign the roles directly assigned to this user. To do this, click the Reassign box for the role you want to reassign. In the Reassign selected role assignments to field, select the user or user group to which you want to reassign this role.