Create a multi-step custom form
This tutorial shows you how to create a Job Application online form using the Custom Form asset.
A user can complete the form over multiple pages, including uploading a file attachment in one of the steps. Before submitting the form, a user can confirm their responses on a Form Confirmation Page.
Before you start
This tutorial assumes you already have some basic knowledge and understanding of the Custom Form asset.
| To see a working solution for this tutorial, you can Download tutorial assets used in this tutorial and import them into your Content Management system using the Import Assets from XML tool. |
Set up the custom form
Start by creating and setting up the Custom Form asset used to power our Job Application form. This form consists of three main steps that the user needs to complete, so we’ll create a section for each step.
-
Start by creating a new Custom Form asset named "Job Application" in a location where you can view it on the frontend.
-
Right-click on the Form Contents asset and select the form contents screen.
-
Add three Sections on the form: Personal Information, Upload a CV and Closing Comments.
-
On the same screen, scroll down to the Formatting section and set the Use Confirmation Page? option to "Yes".
-
Find the Use Bodycopy field and select Page Contents, Confirmation Page Contents and Thank You.
We customise these layouts later in the tutorial but need to make them visible now. -
Scroll down to the Multiple Page From Options section, and set the Multi-Page? option to Yes to make each of the sections created in the previous step represent a separate page on the custom form.
Add the form questions
Add some field questions to each section. For our example we’ll add the following questions:
-
Under the Personal Information section:
-
Text question called Name.
-
Text question called Contact Number.
-
Email Address question called Email Address.
-
-
Under the Upload a CV section:
-
File Upload question called CV.
-
-
Under the Closing Comments section:
-
Text question called Comments. Also, make this field present as a textarea by changing the Height attribute to something like 5.
-
Create a file submission folder
We need to define a place to store any files uploaded by the job applicants using our form.
-
Create a new Folder asset under the Job Application Custom Form asset and name it "CVs".
-
Go to the Details screen of the CV question.
-
In the Create Locations field, select the CV Folder as the asset selection and save the screen.
Best practiceYou can add file validation rules at this step to make sure applicants only upload file types you accept (like.pdfand.doc) and limits on the file sizes they can upload.
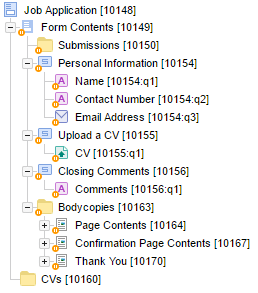
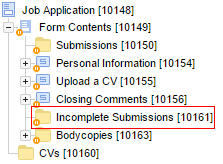
Your Custom Form asset in the tree should now look similar to this:
Configuring the layout
Refine the presentation layout of the various steps, including the Confirmation and Thank You page formats.
Configure the page contents layout
Begin with the Page Contents layout of the form. We need to add a couple of additional features such as a Previous Page button for better navigation while completing the form.
-
Right-click on the Page Contents asset and select the Edit Contents screen.
-
Open the Edit component properties popup and change the component to Code, save the screen.
-
Paste in the following basic HTML mark-up with keyword replacements:
<p>Please fill in the values below:</p> (1)

%form_errors_message% (2)

%current_page_contents% (3)

<div>
  %previous_page_button% %submit_button% (4)
</div>
1 This static text appears at the top of each step of the form. 2 %form_errors_message%prints a message if submitting the form step fails.3 %current_page_contents%prints the contents of each step (section) of the form.4 %previous_page_button%and%submit_button%print the Previous and Next step buttons dynamically. These keywords are intelligent in that if we are on step 1 of the form, the%previous_page_button%is not displayed. If we are on the Confirmation Page of the form, the%submit_button%says "Submit" instead of "Next Page".
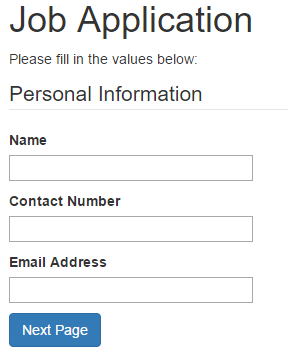
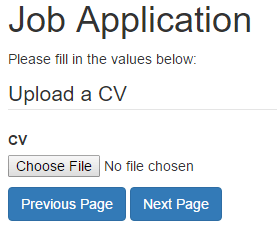
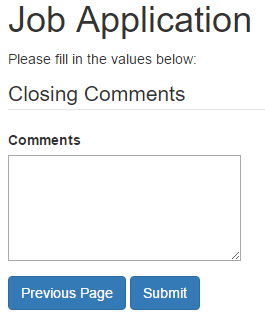
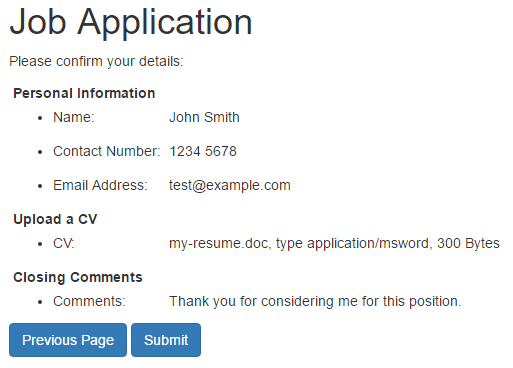
If you preview the Custom Form asset on the frontend now, you should see similar layouts described in the following figures:
Configure the confirmation page layout
Next, we’ll customise the layout of the Confirmation Page.
-
Go to the Edit Contents screen of the Confirmation Page Contents asset.
-
Convert the component to Code.
-
Paste in the following basic HTML mark-up with keyword replacements:
<p>Please confirm your details:</p> (1)

%form_summary% (2)

<div>
  %previous_page_button% %submit_button% (3)
</div>
1 Static text that is unique to this page only. 2 %form_summary%prints a summary of all form responses grouped by each step (section) of the form.3 %previous_page_button%and%submit_button%prints the Previous Page button (allowing the user to go back and change the values) and the Submit button.
The Confirmation Page layout has a similar format to this on the frontend:
Configure the "Thank You" layout
Lastly, we’ll configure our "Thank You" page layout that shows the user a message after they have successfully submitted their job application.
-
Go to the Edit Contents screen of the Thank You asset.
-
Convert the component to Code.
-
Paste in the following basic HTML mark-up with keyword replacements:
<p>Thank you %response_10154_q1% for your submission.</p> (1)

<p>Outlined below is the information you have supplied to us. If any of this is incorrect, please contact us and quote the following reference number:<br/>
<strong>%form_submission_id%</strong></p> (2)

%form_summary% (3)
1 The first paragraph consists of some static text as well as a keyword replacement for the response to the Name question of the Personal Information section. Replace the 10154asset ID with the one matching your example.2 Print the asset ID of the Form Submission asset created as part of the submission. The %form_submission_id%keyword is an excellent choice for a reference ID because it is a unique value stored in Squiz Content Management.3 %form_summary%`prints the same summary that we saw on the Confirmation Page.
About incomplete submissions
When you use a multi-page form, Squiz Content Management needs to store form submission assets temporarily while a user completes the steps. Storing this information is the role of the incomplete submissions folder.
The incomplete submissions folder is created by Squiz Content Management automatically the first time a user loads the form and moves from step 1 to step 2.
| Seeing as you probably would have tested the form before publishing it to the public, this folder should be available already under the Form Contents asset in the tree: |
Once the user goes through the form and completes all steps, the Form Submission asset moves from this folder to the Submissions folder. The asset ID is available in the Submission Logs area on the Form Contents asset.
See the submissions logs documentation for more information about this feature.