How to create a "Contact us" custom form
The following example will create a Contact us custom form page on your web site. This form will contain a security CAPTCHA field. It will automatically send an email to both the user who completed the form and the site administrator.
Setting up the custom form
-
Right-click on your site asset and select
-
Name the custom form
Contact usand select Create and then close the create asset dialog box. -
Right-click on the Custom form asset in the asset tree and select the Contents screen.
-
On the Form contents screen:
-
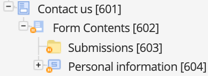
Enter Personal information in the Add sections field.
-
Click Save.
-
A new section asset will appear in the asset tree, as shown in the figure.
Adding the form fields
-
Right-click on the Personal information section asset in the asset tree.
-
Select the Details screen.
-
In the Form fields section, select Add field and configure the following values:
- Field name
-
Type
Question 1as the value. - Type
-
Select "Text" from the options.
-
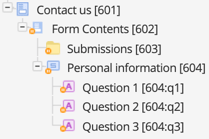
Repeat step three twice more to add a total of three
QuestionText form fields, incrementing the question number each time. -
Click Save.
Three question assets will appear in the asset tree and be added to the current form fields list, as shown in the figure above.
Add a Select type question to the form:
-
Click the Add field button.
-
In the Field name field, type
Question 4as the value. -
Choose Select in the Type list.
-
Click Save.
A fourth question asset will appear in the asset tree and be added to the current form fields list.
Repeat these steps to add three more form fields:
-
Two Numeric type form fields
-
One Email Address address type form field.
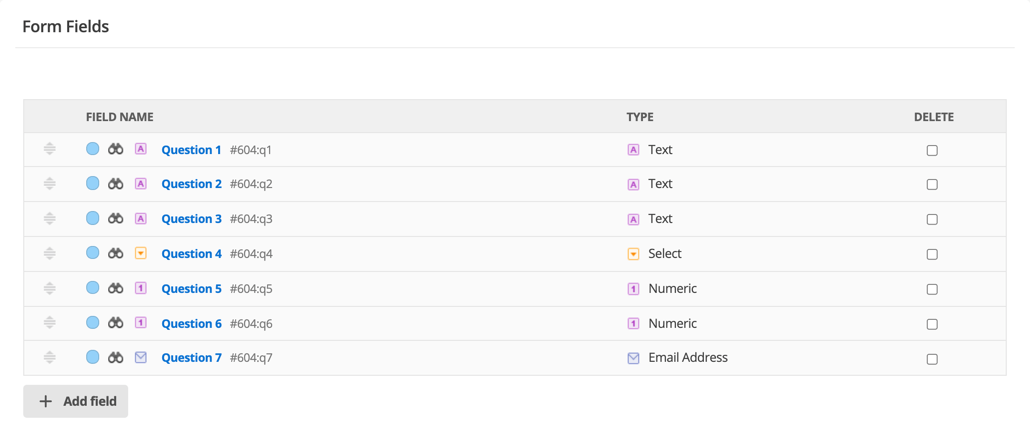
Seven question assets now appear in the asset tree and are listed in the current form fields list:
Add another question to the form outside of the Personal information section:
-
Right-click on the Form contents asset in the asset tree and hover over the New child entry.
-
Select Form field - Text from the options presented.
-
In the dialog box that appears, type
Question 8for the field title. -
Select Create.
-
Close the details window that appears.
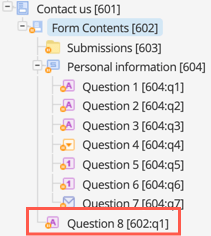
A "Question 8" asset will appear in the asset tree and be added to the current form fields section beneath the Personal information asset group.
Setting up each question
First name question
To set up the First name question:
-
Right-click on the
Question 1(text type) asset under the Personal information section of the asset tree. -
Select the Details screen and click Save.
-
In the Title field, enter
First name. -
In the Maximum length field, enter
50.
This setting will mean that users can only enter up to fifty characters in this field. -
In the Required entry? field, select the toggle to set the field as required.
-
In the Custom required error field, enter
Please enter your first name..
This text will be displayed on the form if the user does not answer this question. -
Click Save.
The name of the asset in the asset tree will change to First name.
Surname question
To set up the Surname question:
-
Right-click on the
Question 2(text type) asset under the Personal information section of the asset tree. -
Select the Details screen and click Save.
-
In the Title field, enter
Surname. -
In the Maximum length field, enter
50.
This setting will mean that users can only enter up to fifty characters in this field. -
In the Required entry? field, select the toggle to set the field as required.
-
In the Custom required error field, type
Please enter your surname..
This text will be displayed on the form if the user does not answer this question. -
Click Save.
The name of the asset in the asset tree will change to Surname.
Address question
To set up the Address question:
-
Right-click on the
Question 3(text type) asset under the Personal information section of the asset tree. -
Select the Details screen and click Save.
-
In the Title field, enter
Address. -
In the Height field, enter
3.
This setting will display a multi-line text field on the form for this question. -
Click Save.
The name of the asset in the asset tree will change to Address.
State question
To set up the State question:
-
Right-click on the
Question 4(Select type) asset under the Personal information section of the asset tree. -
Select the Details screen and click Save.
-
In the Title field, enter
State. -
In the Options field, enter the following options into the fields provided:
QLD,NSW,ACT,VIC,TAS,NT,SA, andWA. Initially only two entries will be provided but more will appear as they are filled.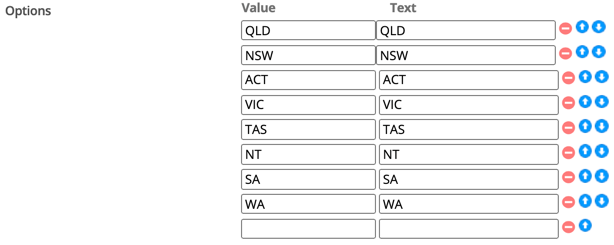
-
Click Save.
The name of the asset in the asset tree will change to State.
Postcode question
To set up the Postcode question:
-
Right-click on the
Question 5(numeric type) asset under the Personal information section of the asset tree. -
Select the Details screen and click Save.
-
In the Title field, enter
Postcode. -
In the Width field, enter
4. This setting will mean that the question field will be four characters wide. -
In the Maximum length field, enter
4. This setting will mean that users can only enter up to four characters in this field. -
Click Save.
The name of the asset in the asset tree will change to Postcode.
Email address question
To set up the Email address question:
-
Right-click on the
Question 6(email address type) asset under the Personal information section of the asset tree. -
Select the Details screen and click Save.
-
In the Title field, enter
Email address. -
In the Required entry? field, select the toggle to set the field as required.
-
In the Custom required error field, enter
Please enter your email address..
This text will be displayed on the form if the user does not answer this question. -
Click Save.
The name of the asset in the asset tree will change to Email address.
Phone number question
To set up the Phone number question:
-
Right-click on the
Question 7(numeric type) asset under the Personal information section of the asset tree. -
Select the Details screen and click Save.
-
In the Title field, enter
Phone number. -
In the Type field, select "Number" from the options.
-
In the Width field, enter
10.
This setting will mean that the question field will be ten characters wide. -
In the Maximum length field, enter
10.
This setting will mean that users can only enter up to ten characters in this field. -
Click Save.
The name of the asset in the asset tree will change to Phone number.
Comments question
To set up the Comments question:
-
Right-click on the
Question 8(text type) asset under the Form contents asset in the asset tree. -
Select the Details screen and click Save.
-
In the Title field, enter
Comments. -
In the Height field, enter
3. This setting will display a multi-line text field on the form for this question. -
Click Save.
The name of the asset in the asset tree will change to Comments.
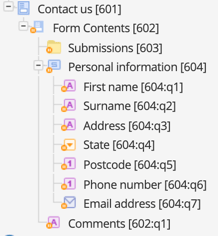
At the end of these steps, your Form Contents asset should have the following asset structure:
Defining the layout of the custom form
Page contents layout
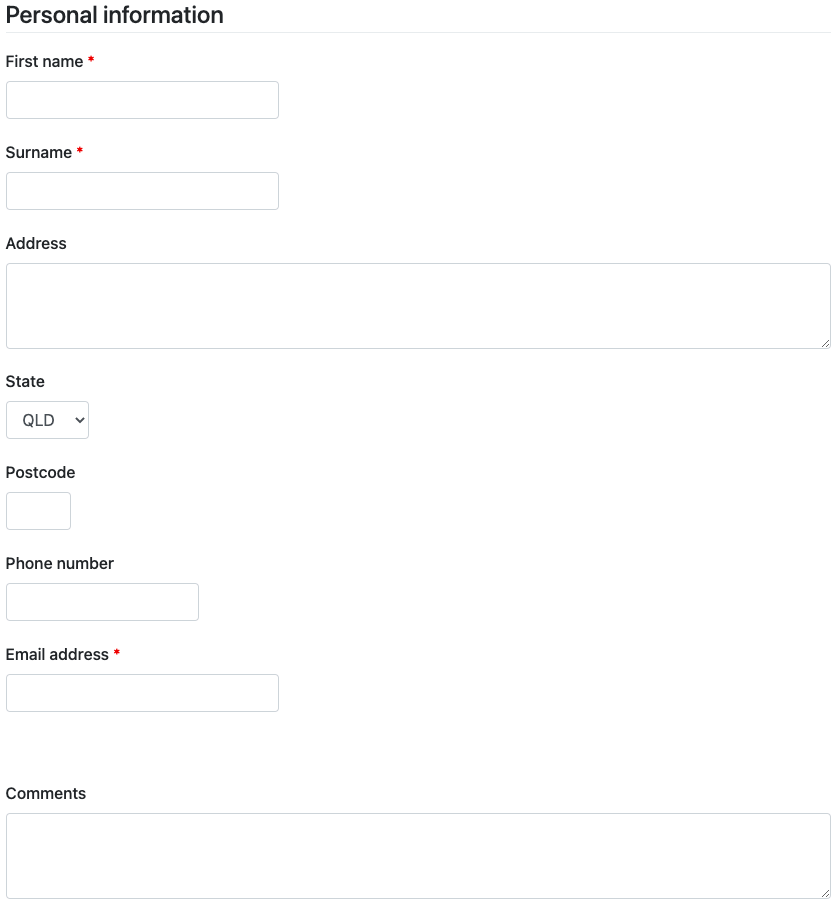
The default layout of the Contact us form is shown in the figure below.
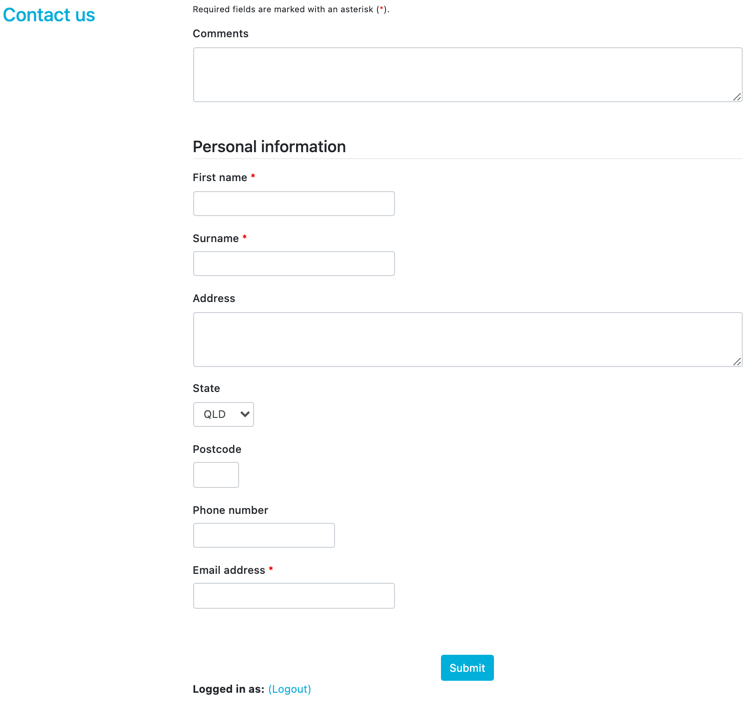
The comments question in this layout appears at the top of the form. There is no heading for the page. You need to change this layout to move the comments question to the bottom of the page, add a heading, and include additional features.
By default the Bodycopies folder you see in the figure is not present when creating a custom form. To change this layout you need to enable the Bodycopies folder on the Form contents asset:
-
Right-click on the Form contents asset.
-
Select the Details screen and click Save.
-
In the Formatting section, locate the Use bodycopy setting and select Page contents.
-
Click Save.
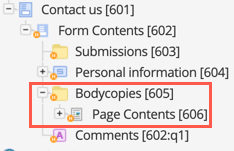
A bodycopies folder will appear in the asset tree, containing the page contents bodycopy.
-
In the Bodycopies folder, right-click on the Page contents bodycopy and select Contents.
-
Enter the following text into the WYSIWYG component.
Because asset IDs are different on each Matrix system, you must replace the 604and602in each keyword with the corresponding asset ID in your Contact us form.Please complete the form below. %form_errors% (1) %section_contents_604% (2) %question_contents_602_q1% (3) %submit_button% %reset_button% (4)1 The List of submission errors keyword replacement is added to the top of the form to display errors when the form is not completed correctly. 2 This keyword adds the "Personal information" section first in the form. 3 This keyword adds the "Comments" text field after the "Personal information" section. 4 The Submit button is also added so that the user can submit the form.
The new layout of the contact us form is shown in the figure below.
Thank you layout
The default layout of the Thank you page on the Contact us form shows the comments response at the top of the form. There is also no heading for the page. You need to change this layout to move the comments question to the bottom of the page, add a heading, and include additional features.
To change this layout you need to add the "Thank you" bodycopy:
-
Right-click on the Form contents asset.
-
Select the Details screen and click Save.
-
In the use bodycopy field, select Thank you.
-
Click Save.
The thank you bodycopy is added to the Bodycopies folder.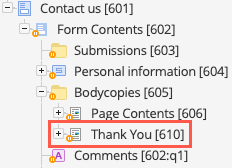
-
In the Bodycopies folder, right-click on the Thank you bodycopy and select Contents.
-
Enter the following content into the WYSIWYG component.
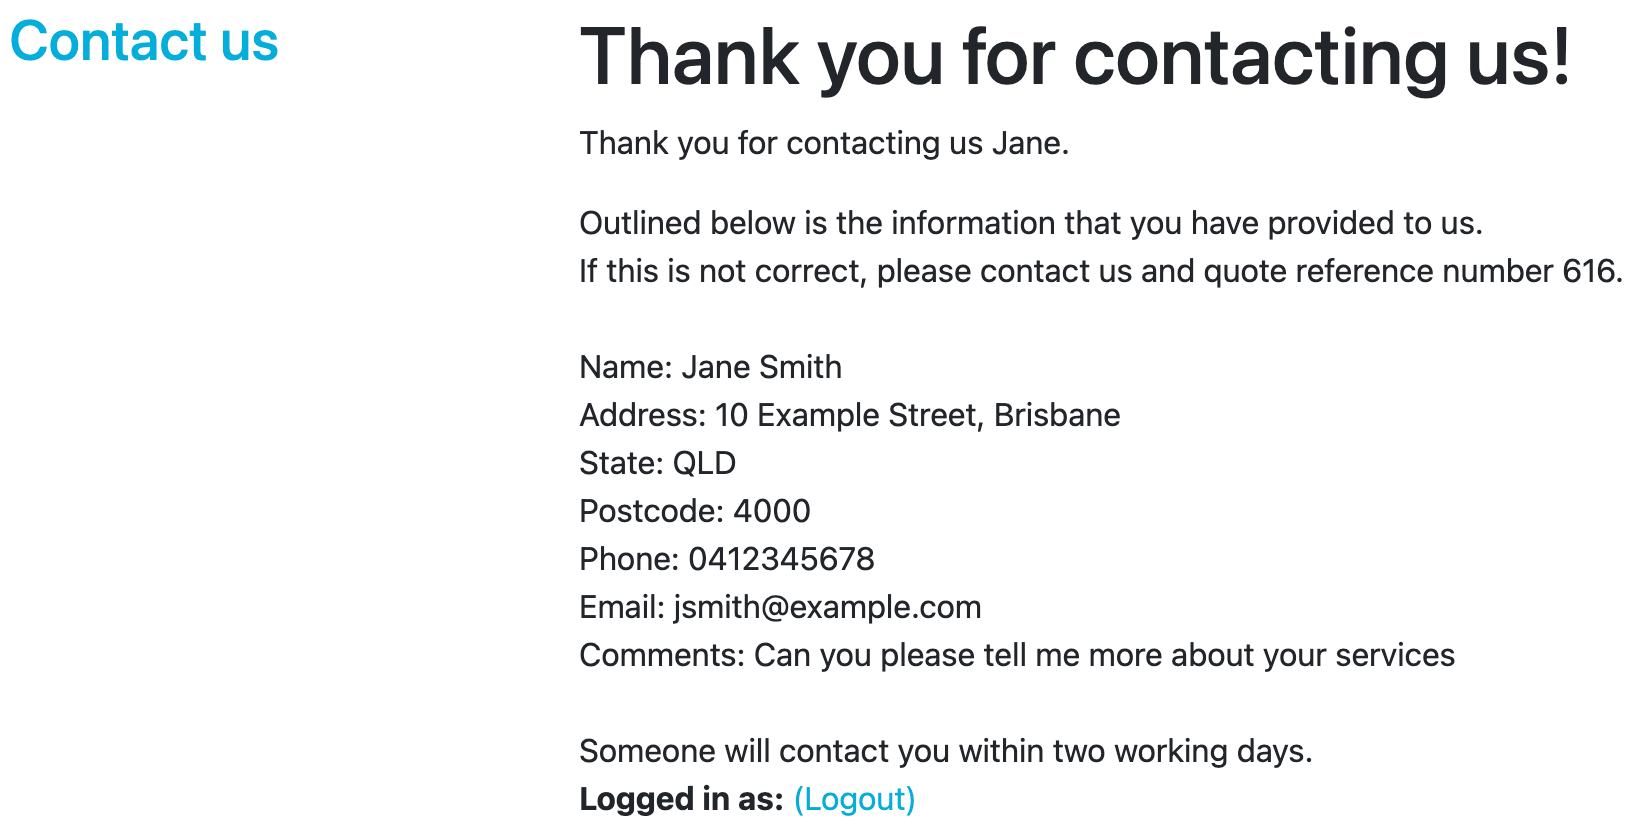
You can apply a H1 style to the first line. Thank you for contacting us! Thank you for contacting us %response_604_q1%. Outlined below is the information that you have provided to us. If this is not correct, please contact us and quote reference number %form_submission_id%. Name: %response_604_q1% %response_604_q2% (1) Address: %response_604_q3% State: %response_604_q4% Postcode: %response_604_q5% Phone: %response_604_q6% Email: %response_604_q7% Comments: %response_602_q1% Someone will contact you within two working days.1 Because asset IDs are different on each Matrix system, you must replace the 604and602in each response keyword with the corresponding asset ID in your Contact us form.
The new layout of the Contact us page is shown in the figure below.
Adding the CAPTCHA fields
To add the CAPTCHA field to the contact us form:
-
Right-click on the Form contents asset in the asset tree.
-
Select the Details screen and click Save.
-
In the Require CAPTCHA field, select
Yes. -
In the CAPTCHA key length field, enter
6to make the CAPCHA display six characters. -
In the CAPTCHA character zoom field, enter
3to make the CAPTCHA characters randomly zoomed between sizes1and3. -
Click Save.
-
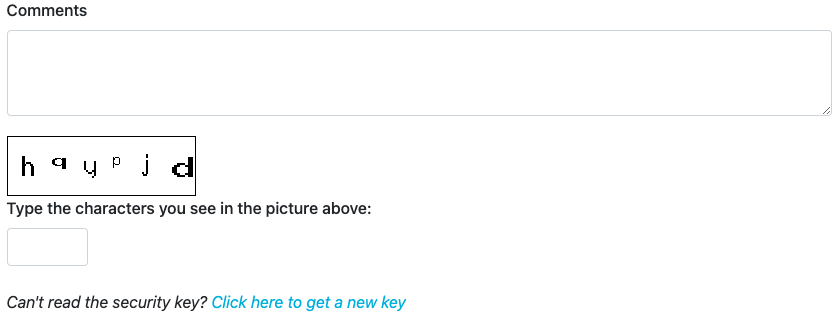
Add the CAPTCHA keyword replacement to the Page contents bodycopy, right below the
%question_contents%keyword.Please complete the form below. %form_errors% %section_contents_604% %question_contents_602_q1% %form_captcha% (1) %submit_button% %reset_button%1 This keyword adds the CAPTCHA field to the Contact us form.
Setting up the emails
Recipient email
The recipient email needs to be set up so that an email is sent to the site administrator.
To do this, follow these steps:
-
Right-click on the Form contents asset in the asset tree.
-
Select Email options.
-
Navigate to the Recipient email options section of the screen.
-
In the To field, enter the email address of the site administrator, for example,
admin@example.com. -
In the From field, enter the 'from' email address.
You can use the email address form field keyword replacement in this field (for example,%response_604_q6%). This replacement will use the email address that the user enters on the form. -
In the Subject field, enter a subject for the email. For example
%response_604_q1% %response_604_q2% has contacted Squiz.In this step you are using the user’s responses to the first name and surname form fields in the Subject of the recipient email. -
In the body field, the content shown in the figure below is added to the email’s HTML version.
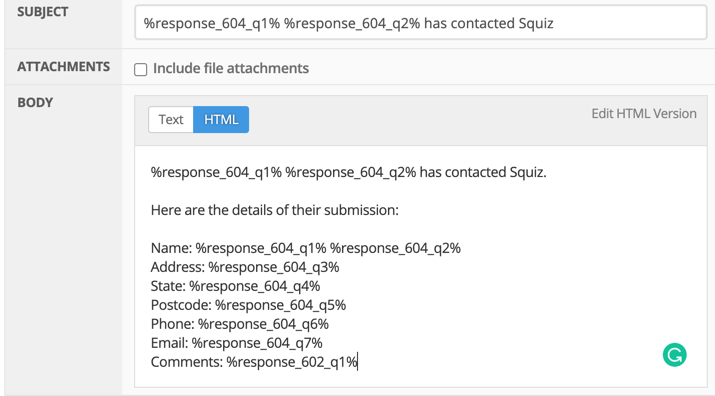
%response_604_q1% %response_604_q2% has contacted Squiz. Here are the details of their submission: Name: %response_604_q1% %response_604_q2% Address: %response_604_q3% State: %response_604_q4% Postcode: %response_604_q5% Phone: %response_604_q6% Email: %response_604_q7% Comments: %response_602_q1% -
Click Save to add the recipient email options to the Contact us form.
| You can find the keyword replacements for each question (with asset IDs relevant to your Matrix instance) in the Keyword replacements section. Click the list of keywords available for use in emails hyperlink to view all keyword replacements for the form. |
Receipt email
The receipt email needs to be set up so that an email is sent to the form user.
To do this, follow these steps:
-
Right-click on the Form contents asset in the asset tree and select Email options.
-
Navigate to the Receipt email options section of the screen.
-
In the Receipt recipient form field field, use the asset picker to select the
Email addressquestion.
This option will send an email to the address that the user enters on the form. -
In the From field, enter the 'from' email address, for example,
admin@example.com. -
In the Subject field, enter a subject for the email; for example: Thank you for contacting Squiz.
-
In the Body field, the content shown in the figure below is added to the email’s HTML version.
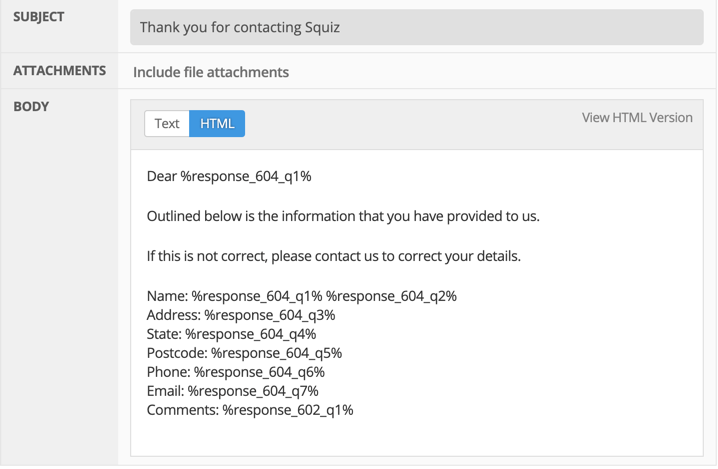
Dear %response_604_q1% Outlined below is the information that you have provided to us. If this is not correct, please contact us to correct your details. Name: %response_604_q1% %response_604_q2% Address: %response_604_q3% State: %response_604_q4% Postcode: %response_604_q5% Phone: %response_604_q6% Email: %response_604_q7% Comments: %response_602_q1% -
Click Save to add the receipt email options to the Contact us form.
| You can find the keyword replacements for each question (with asset IDs relevant to your Matrix instance) in the Keyword replacements section. Click the list of keywords available for use in emails hyperlink to view all keyword replacements for the form. |
Final steps
Before making the Contact us form live to the public, check the following:
-
The layout of the Page contents is correct.
-
The required form fields are validated, and the error messages appear on the form.
-
That you can fill out and submit the form.
-
The layout of the Thank you layout is correct.
-
The recipient email is sent to the contact within the organization.
-
The receipt email is sent to the user who filled out the form.
-
The submission is logged to the database.
Once you are sure the custom form is working correctly:
-
Load the Details screen of the Contact us form.
-
In the Change status field, select Approve and make live.
-
Click the Cascade status change button.
-
Click Save to make all assets live.
-
Check that the Contact us asset has public read permissions, and allow these permissions if not already inherited from your site asset.