Custom form fields
You can add form fields to either the custom form or to a section within the form itself. When you use sections, you can group similar form fields. For example, you can group form fields related to users' contact information in a section called Contact details.
The form field types that are available for a custom form are as follows:
-
Text
-
File upload
-
Password
-
Select
-
Tickbox table
-
Date/time
-
Tickbox list
-
Country
-
Email address
-
Option list
-
Numeric
Read the Custom form field types documentation for more information about each of these form field types.
Adding a form field to the custom form
To add a form field to the custom form (that is, not within a section):
-
Right-click on the form contents asset in the asset tree.
-
Select Form contents.
-
In the Form fields (not attached to a section) part of the screen:
-
Select the form field type in the Add form fields field.
-
Select how many form fields to add of this type (if you want to add two fields, select
2).
-
-
Click Save.
The form fields will be listed in the current form fields section, as shown in the figure below.
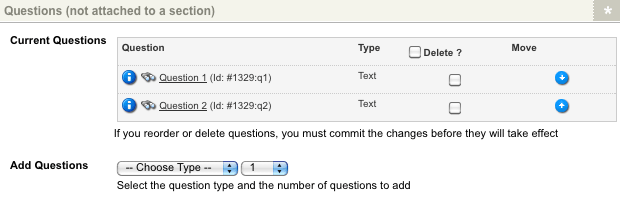
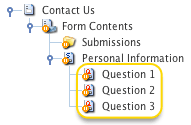
A form field asset will also appear in the asset tree for each field added, as shown.
For each form field listed, the following information is shown:
- Form field
-
This shows the name of the form field. When you click on the form field name, the Details screen will be displayed to modify the settings for that form field. The content of the Details screen will vary depending on the type of form field you have selected. For more information about each form field type’s Details screen, refer to the form field type chapters in this manual.
- Type
-
This shows the form field type that has been added.
- Delete
-
This field allows you to delete a form field from the form.
To delete the field:-
Click on the Delete box.
-
Click Save.
Alternatively, to delete all form fields on the form:
-
Click the box at the top of the column.
-
Click Save.
-
- Move
-
This field allows you to re-order the form fields for the form.
To re-order the fields:-
Click on either the
 arrow or
  arrow to move the form field.
 -
Click Save.
-
You can add additional form fields to the form by using the add form fields field.
Adding a form field to a section
To add a form field to a section:
-
Right-click on the section asset in the asset tree.
-
Select Details.
-
In the form fields section:
-
Select the form field type in the Add form fields field.
-
Select how many form fields to add of this type (if you want to add two fields, select
2).
-
-
Click Save.
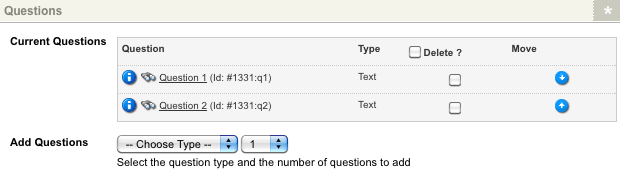
The form fields will be listed in the current form fields section.
A form field asset will also appear in the asset tree under the section asset for each form field added.

For each form field listed, the following information is shown:
- Form field
-
This shows the name of the form field. When you click on the form field name, the Details screen will be displayed to modify the settings for that form field. The content of the Details screen will vary depending on the type of form field you have selected. For more information about each form field type’s Details screen, refer to the form field type chapters in this manual.
- Type
-
This shows the form field type that has been added.
- Delete
-
This field allows you to delete a form field from the form.
To delete a field:
-
Click on the box.
-
Click Save.
Alternatively, to delete all fields on the form:
-
Click the box at the top of the column.
-
Click Save
-
- Move
-
This field allows you to re-order the form fields for the form. To re-order fields:
-
Click on either the
arrow or arrow to move the form field. -
Click Save
-
You can add additional form fields to the form by using the add form fields field.
Editing a form field
To edit the settings of a form field:
-
Right-click on the asset tree’s form field asset.
-
Select Details.
Here you can change various information for the form field, including its name and note field, and add validation to the field. The available fields on the Details screen will depend on the type of form field you are editing.
For more information about each form field type’s Details screen, refer to the form field type chapters in this manual.
Deleting a form field from the custom form
To delete a field that has not been added to a section:
-
Right-click on the form contents asset in the asset tree.
-
Select Form contents.
-
In the Form fields (not attached to a section) part of the screen:
-
Select the Delete box for the form field you want to delete.
-
Click Save.
-
The form field will be deleted from the form, and the asset moved to the trash.
Deleting a form field from a section
To delete a form field added to a section:
-
Right-click on the section asset in the asset tree.
-
Select Details.
-
In the form fields section:
-
Select the Delete box for the form field you want to delete.
-
Click Save.
-
The form field will be deleted from the section, and the asset moved to the trash.
Validating a form field
For each form field on the form, you can add either simple or complex validation rules. Simple validation rules allow you to define whether or not the field is mandatory. For example, if you have a name form field that the user must fill in, you can change the simple validation rules to say it is required.
Complex validation rules allow you to add additional rules to the form field.
For example, your site has a form field where the user can upload a file.
You may want to specify that they can only upload a file that ends in doc (in other words, a Microsoft Word document).
This validation can be achieved by adding a complex validation rule.
Adding simple validation rules
To add a simple validation rule to a form field:
-
Right-click on the Form field asset in the asset tree.
-
Select Details
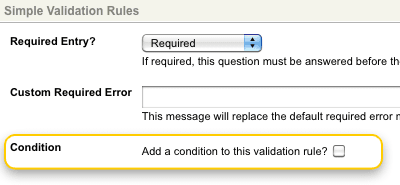
The simple validation rules section will appear, as shown:
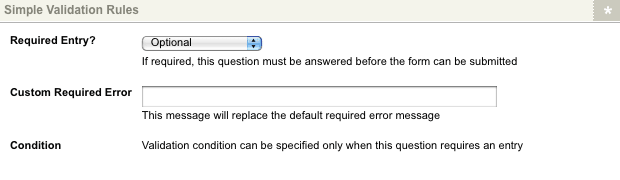
The Required entry field is optional by default. To make a form field mandatory, select Required in this field.
You can also enter a customized error message in the custom required error field. This message will appear on the screen if the form field is required and the user has not entered a value for it when they try to submit the form. If you do not enter an error message, a default message will appear similar to:
Form field <FIELD_NAME> is a required field; it must be filled in.
You can also add a condition on the validation rule by configuring the condition field.
This field is only available when the Required entry? option on the simple validation rule is set to Required.
Read Adding conditions to simple and complex validation rules for more information.
Simple validation rules can only be changed for the following form field types:
-
Text
-
Tickbox list
-
Email address
-
Option list.
Adding complex validation rules
To add a complex validation rule to a form field:
-
Right-click on the form field asset in the asset tree.
-
Select Details.
The complex validation rules section will appear, as shown in the figure below.
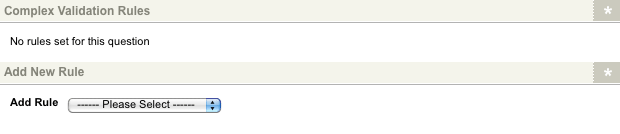
By default, no complex validation rules will appear for the form field.
To add a new rule:
-
Select the rule you want to add from the add rule field.
-
Click Save.
Additional fields will appear in the complex validation rules section, as shown in the figure below.
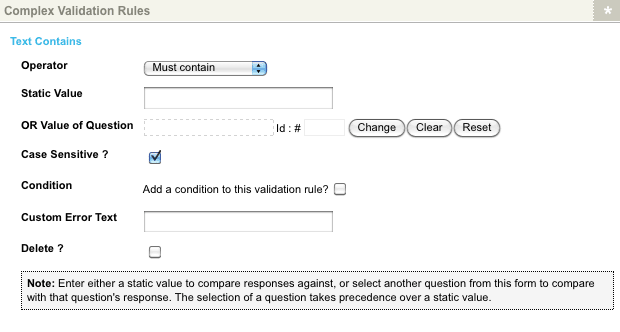
Set up the rule as required using the fields that are provided in this section.
If a complex rule is added to a form field, the submission will not be accepted unless the data entered matches the rule.
For example, an Upload a file field with complex validation rules limiting uploads to .doc files requires the user to upload a Word document for their submission to be accepted.
You can add a condition on the validation rule by configuring the condition field. Read Adding conditions to simple and complex validation rules for more information.
The complex validation rules that are available will depend on the type of form field you are editing. For more information about each of the rules and set them up, refer to the form field type chapters in this manual.
Adding conditions to simple and complex validation rules
Conditions can be specified on both simple and complex validation rules, allowing you to enable specific validation rules only if a particular condition is met. You can enable and configure rule conditions through the condition field of your validation rule.
To add a new condition to a validation rule:
-
Click the Add a condition to this validation rule? checkbox.
-
Click Save.
Additional configuration options will be displayed, as shown in the figure below.

Select a form field to check against the defined condition in the condition field configuration options. You can set the condition to either match or not match a specified regex value or be greater or less than a specified numeric value.
You can configure a single condition for each Validation rule on a form field. If this condition is met, the rule will be applied to the form field; it will not be used if the condition is not met.
A restaurant booking form requires patrons to select a banquet option if the No. of guests form field is eight or more.

To set this validation up, the restaurant would configure a validation rule requiring a response on the Set menu form field if the No. of guests field is greater than 7.
Morphing a form field
You can change (morph) a form field from one type to another using the Settings screen.
On the Settings screen, find the morphing section and the asset type field. This section will show you the current type of the field.
Selecting a different type will first show you a warning that notifies you that some attributes and data will be lost in the morphing process.
For example, if you change a select field to a text field, you will lose all the select field options as these are not used for a text field.