Password reset page
A password reset page allows your users to reset their passwords if they have forgotten it. The user enters their user name into the text box on the password reset page to reset their password. Squiz Content Management then sends an email containing the URL where they can change their password. Once they have changed their password, they can sign in.
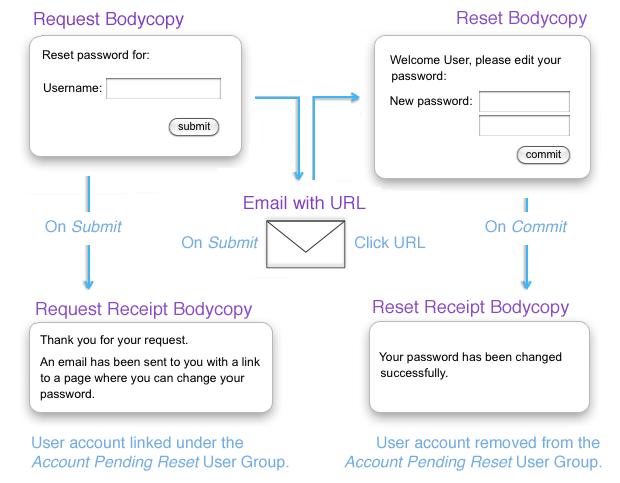
The next figure shows how this process works using the bodycopy assets created under the password reset page in the asset tree.
Read more about each of these bodycopies on this page.
For this process to work, the email address needs to be specified for the user account. As the user has forgotten their password, this page does not require the user to be signed in. Instead, it uses the email address specified for validation of the account. If the email address has not been specified, they will not receive an email; hence will not be able to reset their password.
If the user enters a user name that does not exist, the request receipt bodycopy still displays. This condition unintentionally gives the impression that the user name does actually exist.
As the user is not signed in when they are using this page, you need to grant public read permission and change its status to live. If you do not grant public read permission, the user will need to sign in to see the page, which they cannot do as they have forgotten their password.
| When you create a password reset page, Squiz Content Management will set all required information for the email and the bodycopies to their defaults. This setting means it is ready to go public as soon as its status has been changed to live, and the public read permission has been granted. Then you can change the information being shown through the Details screen and the bodycopies. Once your password reset page is created, you can configure its settings on its associated asset screens. |
The majority of these screens are the same as a Standard page. This chapter will only describe the Details screen, which is different for a password reset page.
Additional dependant assets

When you create a password reset page, several assets are automatically created beneath it, as highlighted:
You can use these assets to define the contents and layout of the password reset page.
- Account pending reset
-
This user group will contain the user accounts where the user is resetting their password. Once they have reset their password, the user account is removed from this user group.
- Request
-
This bodycopy is used to define the initial layout of the password reset page. This layout should allow users to enter the user name of the account they want to reset.
- Request receipt
-
This bodycopy is used to define the password reset page’s layout once the user has entered their user name. It should inform the user that an email has been sent. For example:
Thank you for your request.
An email has been sent to your email address.
This bodycopy will show regardless of whether or not the user name they entered exists in the system.
- Reset
-
This bodycopy is used to define the password reset page’s layout when the user is changing their password. This layout should display the password fields and the Submit button.
- Reset receipt
-
This bodycopy is used to define the password reset page’s layout once the user has reset their password.
Details screen
The Details screen allows you to configure the settings of the password reset page. Read the Asset details screen documentation for more information about the Status, Future status, Thumbnail sections.
Read the Custom form contents documentation for more information about the CAPTCHA, Google RECAPTCHA, hCaptcha, and Spam prevention: Honeypot question sections.
Request validation
This section allows you to format the email the user receives when they request their password to be reset. By default, the email will be sent to the email address specified for the user account. The request validation section of the Details screen is shown in the figure.
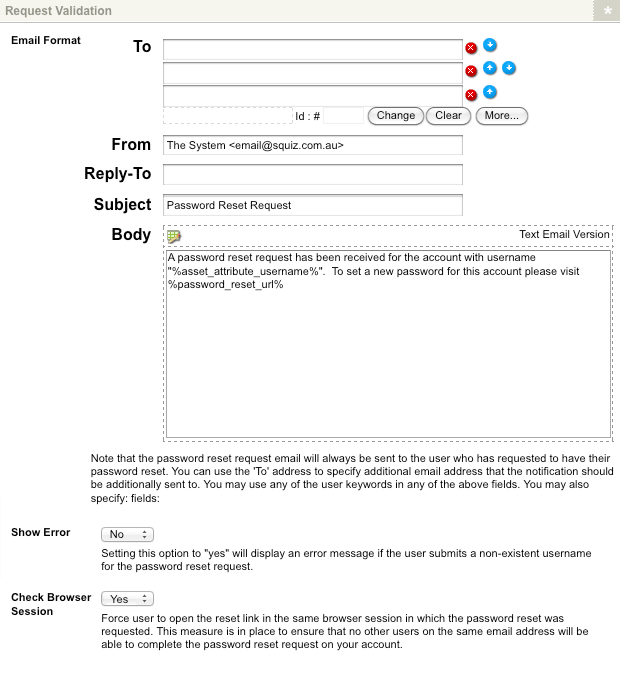
The fields available are as follows:
- To
-
Enter any additional email addresses to which the email should be sent. For example, if you want to notify a system administrator that a user has requested that their password be reset, add the system administrator’s email address in this field. You can either specify the email address in the text fields or select their user account from which their email address is sourced.
- From
-
Enter the email address for the From address of the email. This address will default to the email address entered onto the System configuration screen. Read Outgoing email for more information about this screen.
- Reply-to
-
Enter the email address to which a user can reply. If no reply-to address is configured, the header will not be sent on the email.
- Subject
-
Enter the subject of the email. By default,
Password reset requestwill appear in this field. - Body
-
Enter the contents of the email. By default, the text email version will show. If you wish to format the HTML email version:
-
Click the
 icon.
The WYSIWYG editor will appear.
icon.
The WYSIWYG editor will appear. -
Ensure you include the keyword replacement
%password_reset_url%in the body of the email.
-
- Show error
-
Select whether to display an error message if the user enters a username on the password reset page that does not exist. By default, this option is disabled as a security precaution to not reveal users' usernames in the system.
- Check browser session
-
This option allows you to force users to open the emailed reset link in the same browser that requested the password reset. This measure ensures that no other users on the same email address can complete the password reset request on another user’s account. By default, this option is enabled.
| If a user exceeds the Max login attempts setting and incorrectly enters the password more times than allocated, their user asset will be set to Under construction. This status means they will not receive any system emails from this page. The user asset will need to be made live before resetting their password through the password reset page. |
Keyword replacements for the password reset email
Within the available fields in the request validation section, you can use any of the keyword replacements available for the user assets.
For example, if you want to show the account’s username in the email body, you can use the keyword replacement %asset_attribute_username%.
Additionally, the keyword replacement %password_reset_url% is also available.
This keyword replacement will include a hyperlink to the reset bodycopy where the user can enter a new password.
Without this hyperlink, the user will not be able to reset their password.
Request bodycopy
The request bodycopy is used to define the initial layout of the password reset page. This layout should allow users to enter the user name of the account they want to reset.
For example, for the password reset page shown in the figure, the user can enter the username of the account to which they want to reset the password.

To change what information is being shown:
-
Right-click on the request bodycopy in the asset tree.
-
Select Edit contents.
-
Click on the
icon – the WYSIWYG editor will appear. -
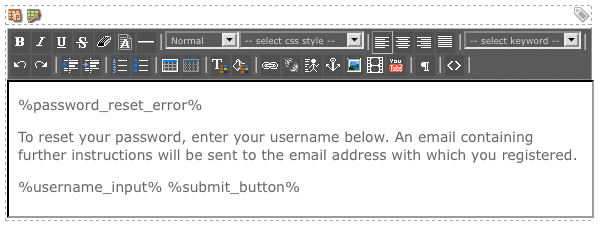
Use keyword replacements and formatting to layout the information to show on the page. By default, the information shown in the figure will appear in the WYSIWYG editor.
Keyword replacements on the request bodycopy
A list of keyword replacements is provided in the WYSIWYG editor toolbar on the Edit contents screen of the request bodycopy. You can use these keyword replacements in conjunction with text, images, and links to layout what to show on the page.
| You need to include the keyword replacements, the Submit button, and the input field for the username so that the user can submit their request to reset their password. |
The standard keyword replacements that are available include the following:
- The submit button
-
This will show a button to allow your users to submit their username.
- Error messages
-
This will show any error messages that display when resetting the password.
- The input field for username
-
This will show a text field where the user can specify the account’s username to which they want to reset the password.
Request receipt bodycopy
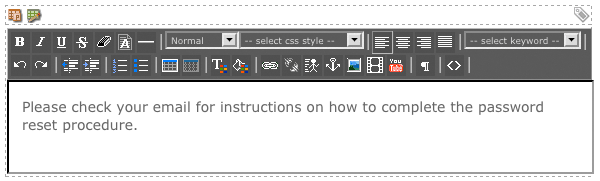
The request receipt bodycopy is used to define the password reset page’s layout once the user has entered their user name. It should inform the user that an email has been sent, for example, 'thank you for your request. An email has been sent to your email address'. For example, for the password reset page shown in the figure, the user is informed that an email has been sent with further instructions.
This layout has been defined in the request receipt bodycopy. This bodycopy will show regardless of whether or not the user name they entered exists in the system.

To change what information is being shown:
-
Right-click on the request receipt bodycopy in the asset tree.
-
Select Edit contents.
-
Click on the
icon – the WYSIWYG editor will appear. -
Use keyword replacements and formatting to layout the information to show on the page.
By default, the information shown in the figure will appear in the WYSIWYG editor.
Reset bodycopy
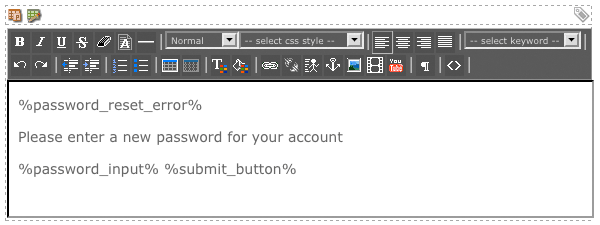
The reset bodycopy is used to define the password reset page’s layout when the user is changing their password. This layout should display the password fields and the Submit button. For example, for the password reset page shown in the figure, the user can reset their password using the fields shown. This layout has been defined in the reset bodycopy.

To change what information is being shown:
-
Right-click on the reset bodycopy in the asset tree.
-
Select Edit contents.
-
Click on the
icon – the WYSIWYG editor will appear. -
Use keyword replacements and formatting to layout the information to show on the page.
By default, the information shown in the figure will appear in the WYSIWYG editor.
Keyword replacements on the reset bodycopy
A list of keyword replacements is provided in the WYSIWYG editor toolbar on the Edit contents screen of the reset bodycopy. You can use these keyword replacements in conjunction with text, images, and links to layout what to show on the page.
| You need to include the keyword replacements, the Submit button, and the input field for a password reset so the user can submit their new password. |
The standard keyword replacements that are available include the following:
- The submit button
-
This will show a button to allow your users to submit their username.
- Error messages
-
This will show any error messages that occur when they are resetting their password.
- The input fields for password reset (new and confirmation password input fields)
-
This will show two fields side-by-side. The user can enter their new password into the first field and confirm it in the second field.
- Input field for the new password
-
This will show a field where the user can enter their new password. You also need to use the keyword replacement input field to confirm the new password. Doing this is necessary so the user can confirm their new password.
- Input field to confirm the new password
-
This will show a field where the user can confirm their new password. You also need to use the keyword replacement input field for the new password. Doing this is necessary so the user can enter their new password.
Reset receipt bodycopy
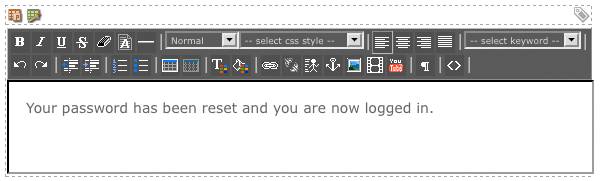
The reset receipt bodycopy is used to define the password reset page’s layout once the user has reset their password. For example, for the password reset page shown in the figure, a message is shown informing the user that they have successfully changed their password and can sign in. This layout has been defined on the reset receipt bodycopy.

To change what information is being shown:
-
Right-click on the reset receipt bodycopy in the asset tree.
-
Select Edit contents.
-
Click on the
icon – the WYSIWYG editor will appear. -
Use keyword replacements and formatting to layout the information to show on the page.
By default, the information shown in the figure will appear in the WYSIWYG editor.