Sending data to a recipient list / branching a flow
A Recipient List is a message processing pattern used to send a copy of the same message to multiple predefined recipients.
The process outlined here builds on the process learned in the pages creating your first integration flow and creating webhook flow. It includes information on how to create branches in an integration flow.
Creating recipient list
In the following scenario the system receives a message containing the information about a pet as follows:
{
  "name": "Gromit",
  "status": "sold",
  "department": "sales"
}
This scenario is almost identical to the creating a webhook flow tutorial with the addition of the department parameter.
The steps below use the same sample data and flow as a basis, and develop them further.
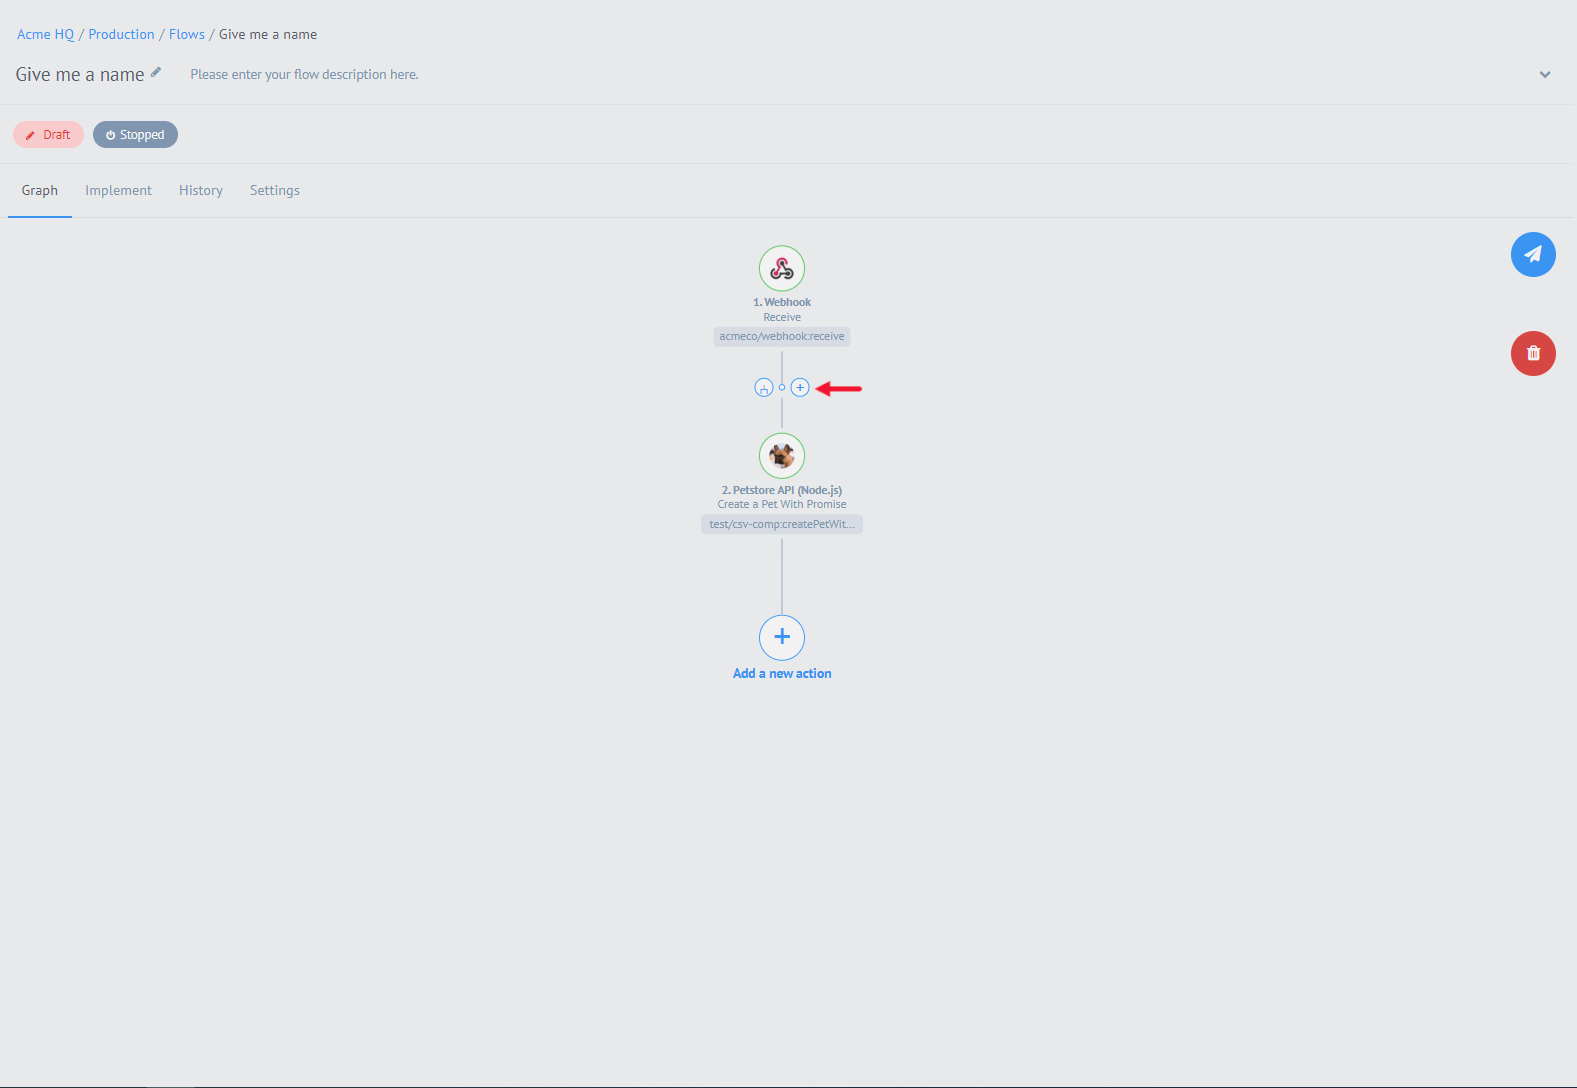
The screenshot above shows the webhook flow completed.
-
Mouse over the line connecting the components to see the two blue circles
-
Click the circle with the Branch icon to create a second branch at this point
Tip: The circle with the cross can be used to add a step between these two components.
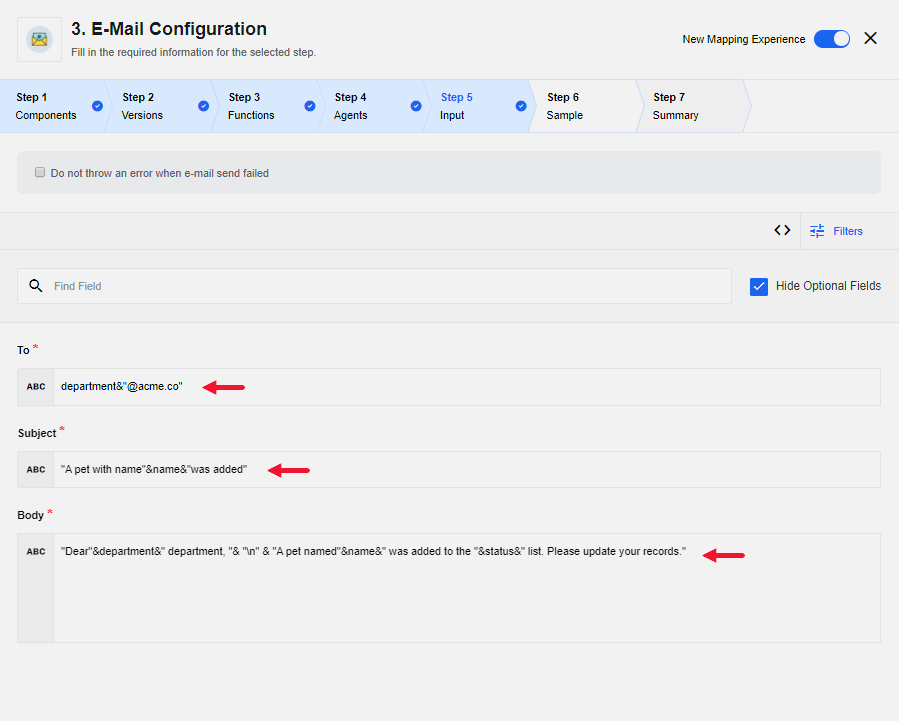
You are now required to select a component to receive data from the webhook in the new branch. In this case we want to send an email. Search for and select the Email component and populate the Input fields follows:
- To
-
department & "@acme.co" - Subject
-
"A pet with name " & name & " was added" - Body
-
"Dear " & department & " department," & "\n" & "A pet named " & name & " was added to the "& status &" list.
Please update your records."
Remember, the variables department, name and status get their values from the incoming Webhook component.
Click Continue to proceed.
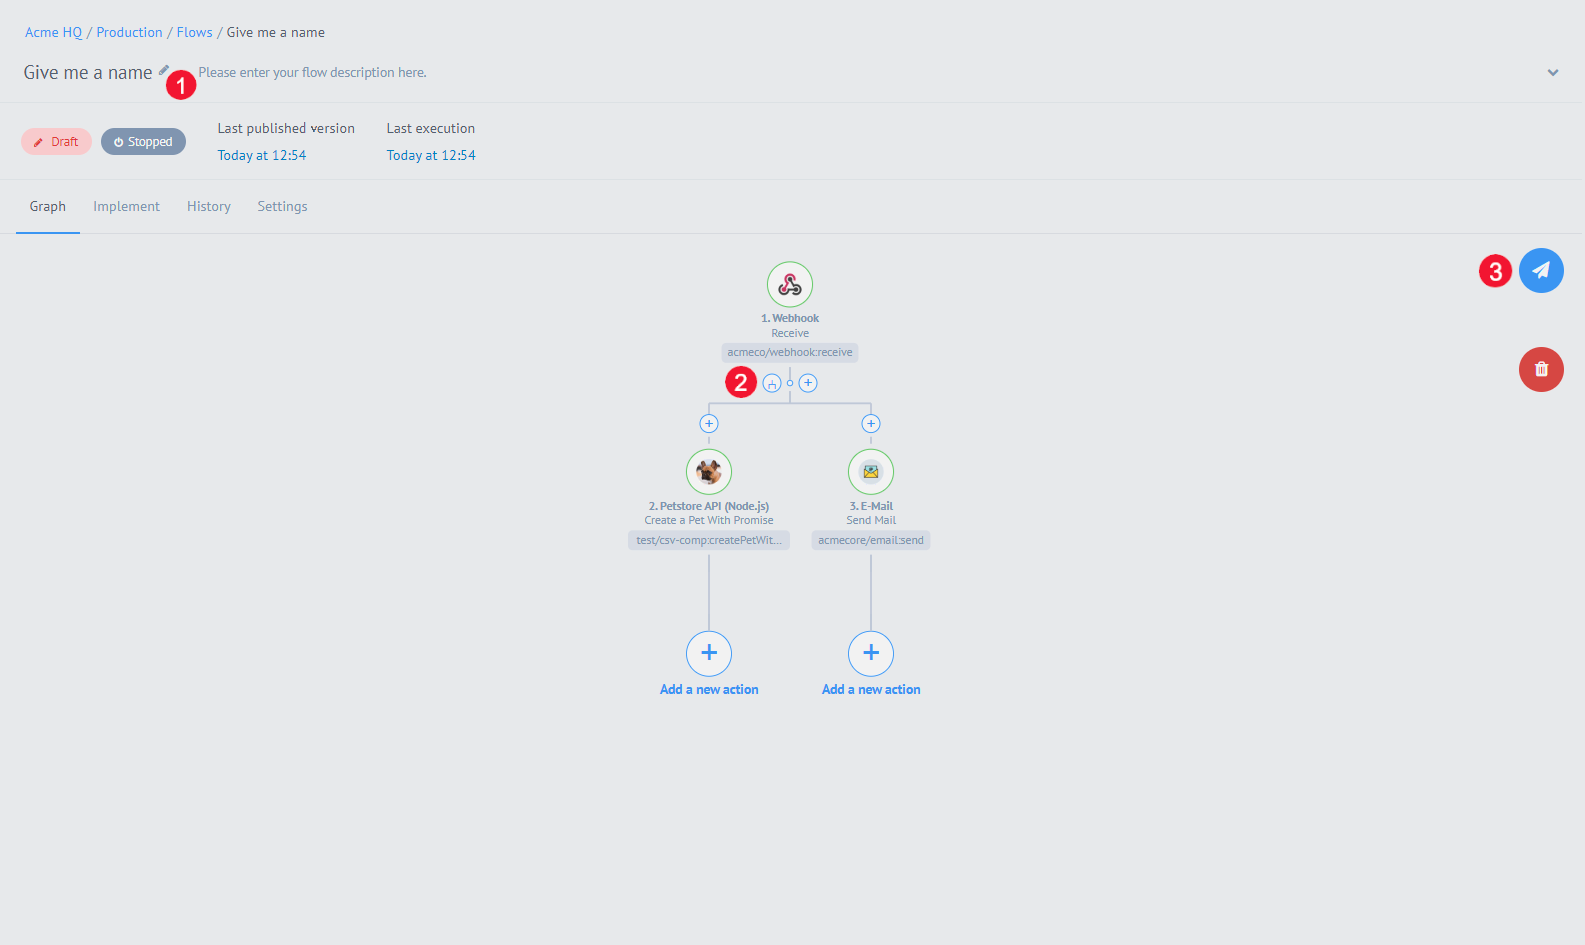
The flow has been completed.
As per the image you can now name it, create more branches, or publish it.
-
In this case we will name and publish the flow.
-
When the flow is published, click "Start".
-
Copy the Webhook URL displayed on the page to send payloads.
-
You can now use a tool of your choice to send a payload to the copied URL of the Webhook.
Here is the example of payload:
{
  "name": "Gromit",
  "status": "sold",
  "department": "sales"
}
Let us send a couple of payloads to see the recipient list in action. The following screenshot shows the details of a flow execution.

In the screenshot above you see that after 3 requests were sent to the flow’s URL, the Webhook component passed its messages to both branches.