Creating OAuth2 app in Salesforce
When you deploy the Salesforce component separately into a dedicated tenant or your developer team it can not use the OAuth App specifically created for our main tenant.
Therefore you must create a different OAuth App and add the required environment variables to the component setup.
Create new OAuth App
-
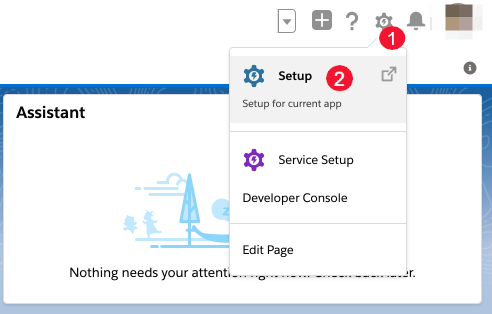
Navigate to the Salesforce setup section. Sign in to your account and select the Setup menu.
-
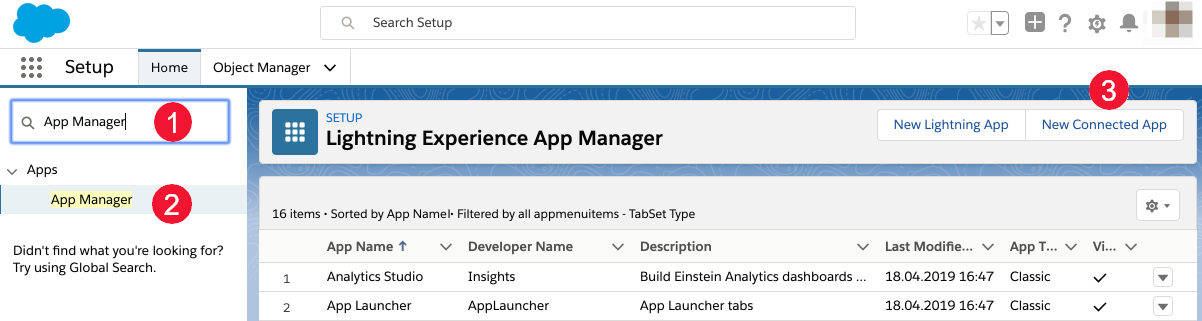
On the left-side menu use the Quick Find and search for 'App Manager'.
-
Click the result to navigate to the App Manager page.
-
Click on the New Connected App button to start.
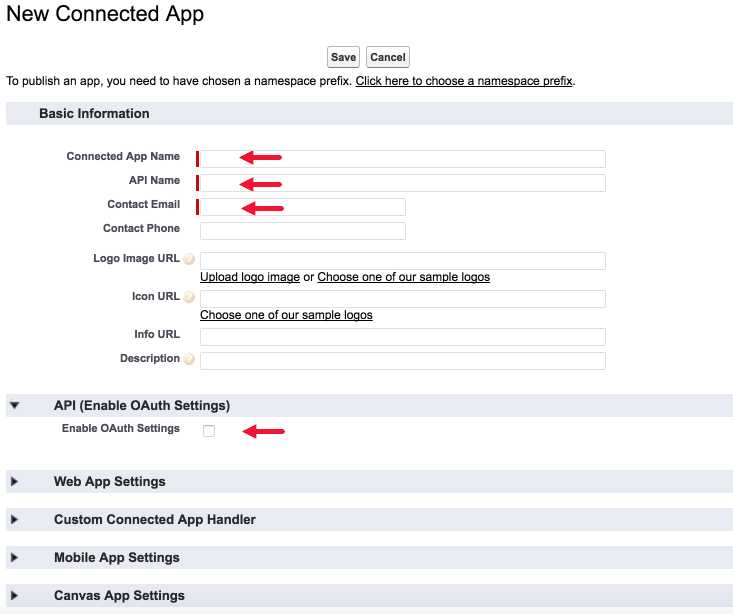
This will open a new window:
-
Complete the marked fields:
-
Connected App Name
-
API Name
-
Contact Email
-
-
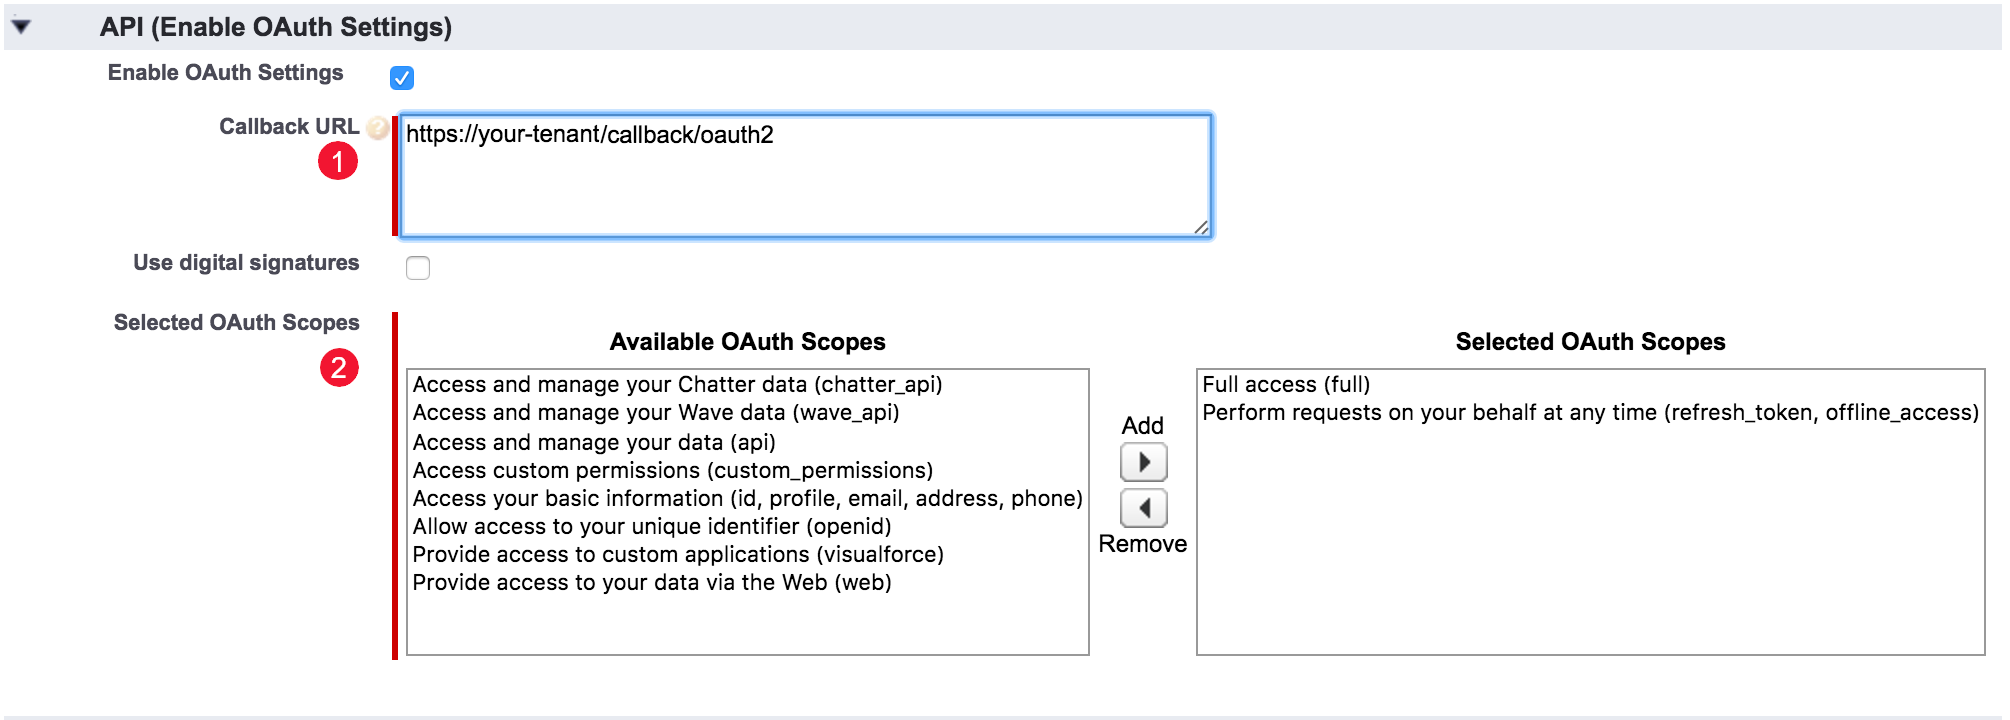
Select the API (Enable OAuth Settings) option to enable OAuth settings. This will open another setup screen:
-
Enter the correct callback URL. For example;
https://app.connect.squiz.cloud/callback/oauth2. -
Select OAuth scopes. Read the API (Enable OAuth Settings) content in the Salesforce documentation for more information. You must select at lease the following two settings:
- Full access (full)
-
This allows access to all data accessible by the signed-in user and encompasses all other scopes. This option, however, does not return a
refresh_token. For that, you need to explicitly request therefresh_tokenscope to get one. - Perform requests on your behalf at any time (refresh_token, offline_access)
-
This option allows a
refresh_tokento be returned if you are eligible to receive one. This lets the app interact with the user’s data while the user is offline. Therefresh_tokenscope is synonymous with offline_access.
-
Click the Save button to save your OAuth app.
-
You can now return to the Salesforce component’s Authentication content and continue.