Flow linking
The Flow Linking component is designed to make the creation and management of complex workflows simpler.
It provides a graphical user interface (GUI) for creating complex workflows using drag-and-drop.
The Flow Linking component also allows for connecting workflows together and passing data between them.
When to use
The Flow Linking component is for users who need to automate complex workflows involving multiple steps and systems and who prefer a GUI-based approach to workflow automation.
The Flow Linking component example demonstrates how this mechanism works.
Triggers
Receive trigger from another flow
This trigger allows you to receive and validate requests from other actions.
| You can use the HTTP Request Reply component with the Reply action as the last step of the flow to get a result of the execution. |
Actions
Trigger another flow
This action lets you trigger another flow with a request body.
| There are no limits on the number of flows that trigger the same flow with the Receive trigger. |
Configuration fields
- Lookup by ID
-
An optional boolean. If selected, the component will use flow ID instead of flow Name to trigger another flow.
- Retry errors
-
An optional boolean. If selected, the component will retry the request in case of errors. The exceptions are HTTP codes less than
500or equal to504.
Input metadata
- Flow Name to Call
-
A required String Enum. A single flow name from a list of flows with the Flow Linking Component as the trigger within the current workspace. An error will be thrown if the number of matching flows is not exactly 1.
- Flow ID to Call
-
A required String Enum. A single flow ID from a list of flows that have the Flow Linking Component as the trigger within the current workspace.
Enum is only available if the number of the flows is less than 100. Otherwise, manually specify the name or ID of the flow. - Data to transfer
-
A required Object. JSON object containing data to send into the subsequent flow.
Known limitations
-
Receiving a trigger from another flow has a restriction on receiving a sample. The sample must be provided manually.
You can, however, safely ignore the
Shared Secret is not valid!error. -
Flow Name to Call lists all flows that contain Flow Linking Component technical trigger name -
receiveTrigger.
Flow linking usage example
If you have a flow with many steps or if you want to split your flow into separate parts, you can use the Flow Linking component.
For example, suppose you have a flow that receives and transforms data, and a second flow that receives the transformed data and sends an email.
In this case, you can use the Flow Linking component at the end of the first flow and as a trigger in the second flow to receive the data
First flow
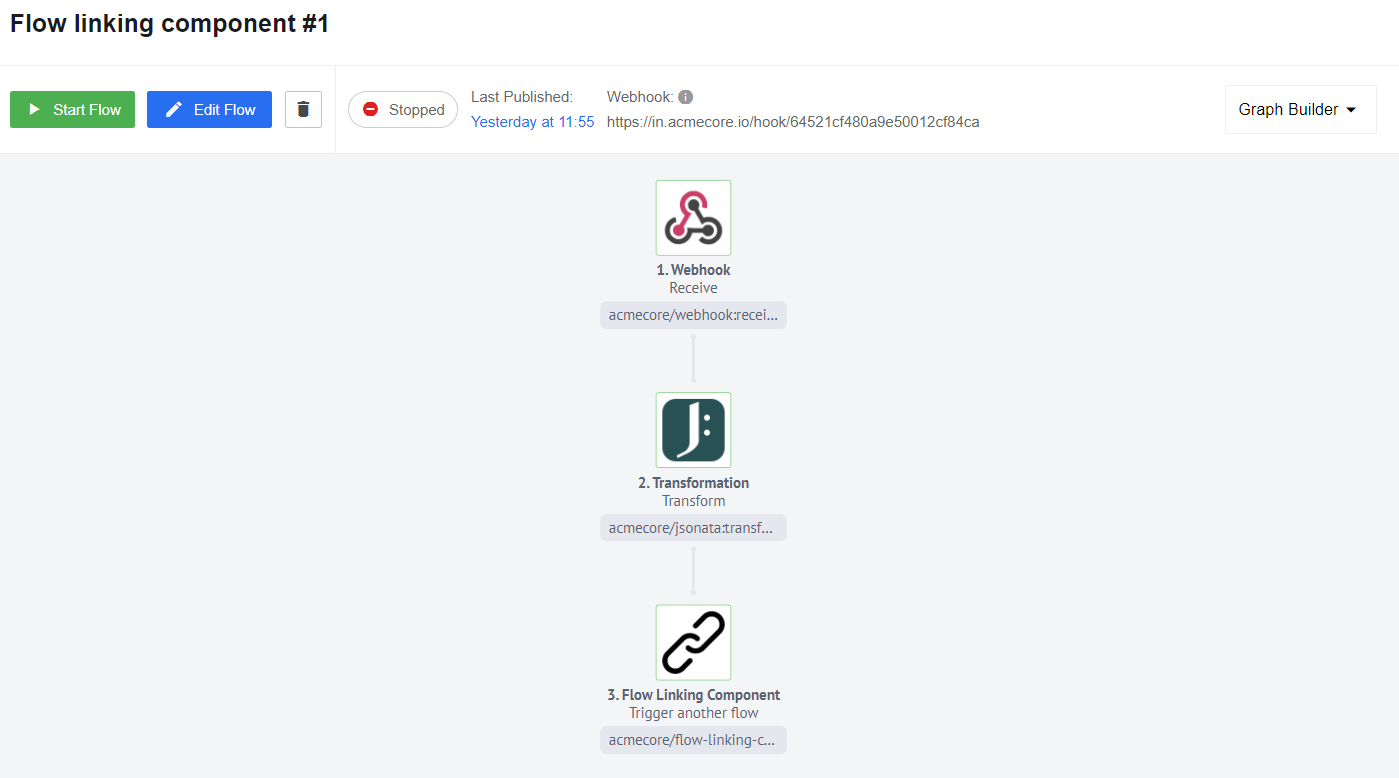
-
Use the Webhook component to receive some incoming data.
-
Use the Transformation (Jsonata) component to transform the data.
-
Create the Flow Linking component after configuring and publishing our triggered flow.
The Flow Linking component needs a published flow to connect to for mapping.
If the flow is still in draft mode and has not been published, the Linking component cannot see it.
-
If you have already created and published the triggered flow, you can proceed to set the Flow name and choose the data you want to transfer from the previous step.
-
If your credentials are the same, the name of the triggered flow should appear in the allowed values list, and you can select it.
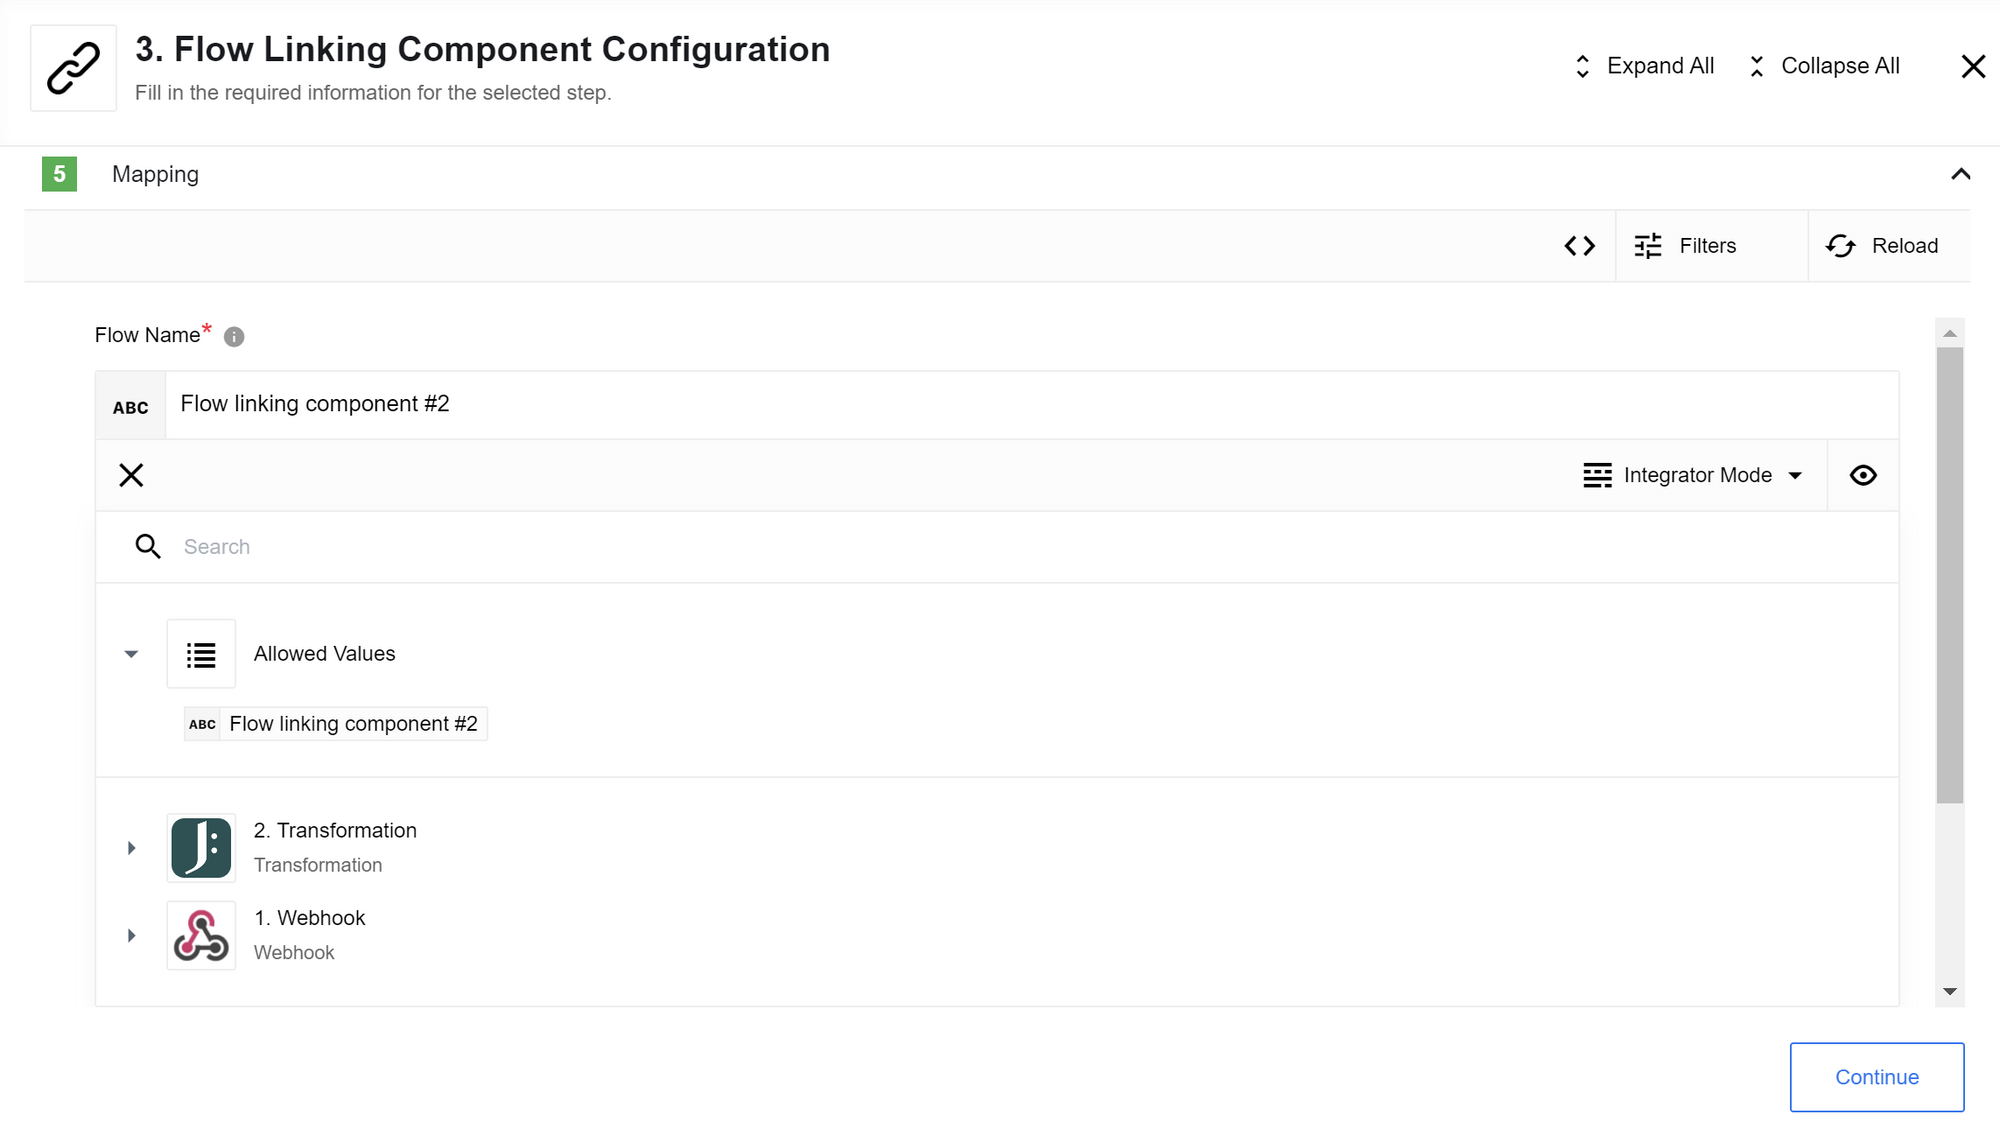
-
Before proceeding, ensure that the second flow is active so that you can receive a sample in the first flow. Verify that the triggered flow is currently running.
-
Once you have received a sample successfully, you can save and publish the first flow.
Second flow
The second flow will receive the request from the first flow.
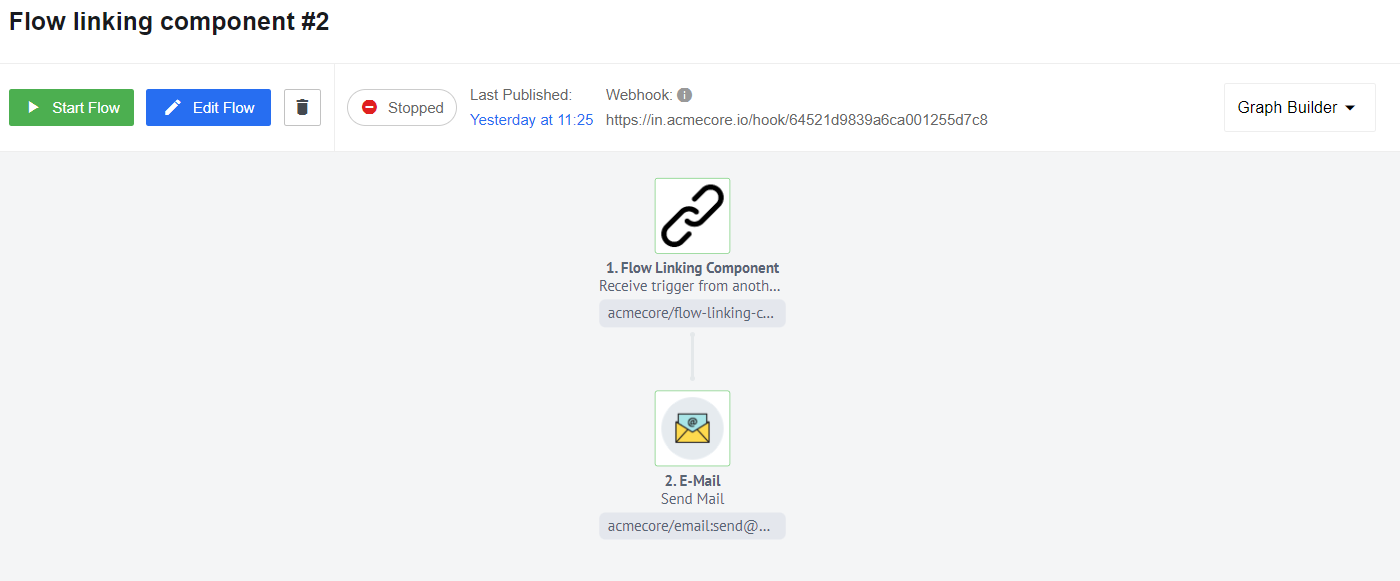
-
Use the Flow Linking component as a trigger. To connect the flow, choose the same credentials as the first flow.
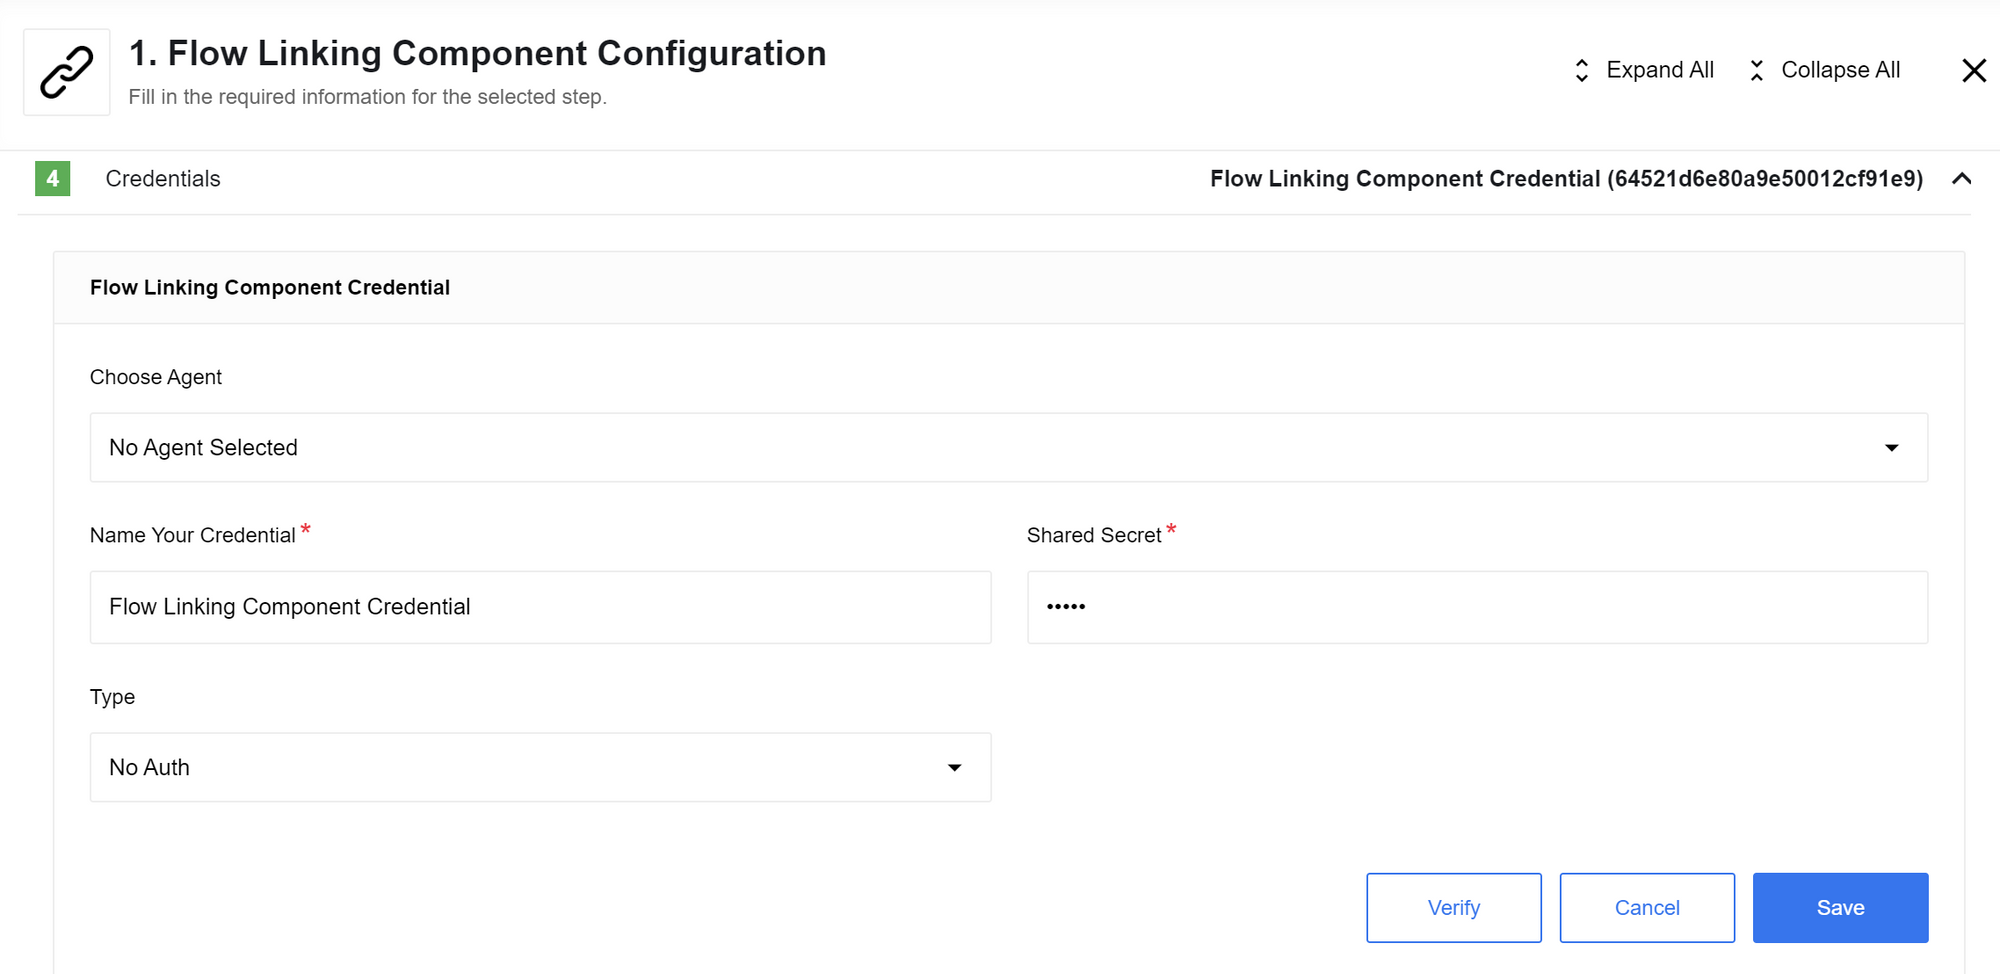
-
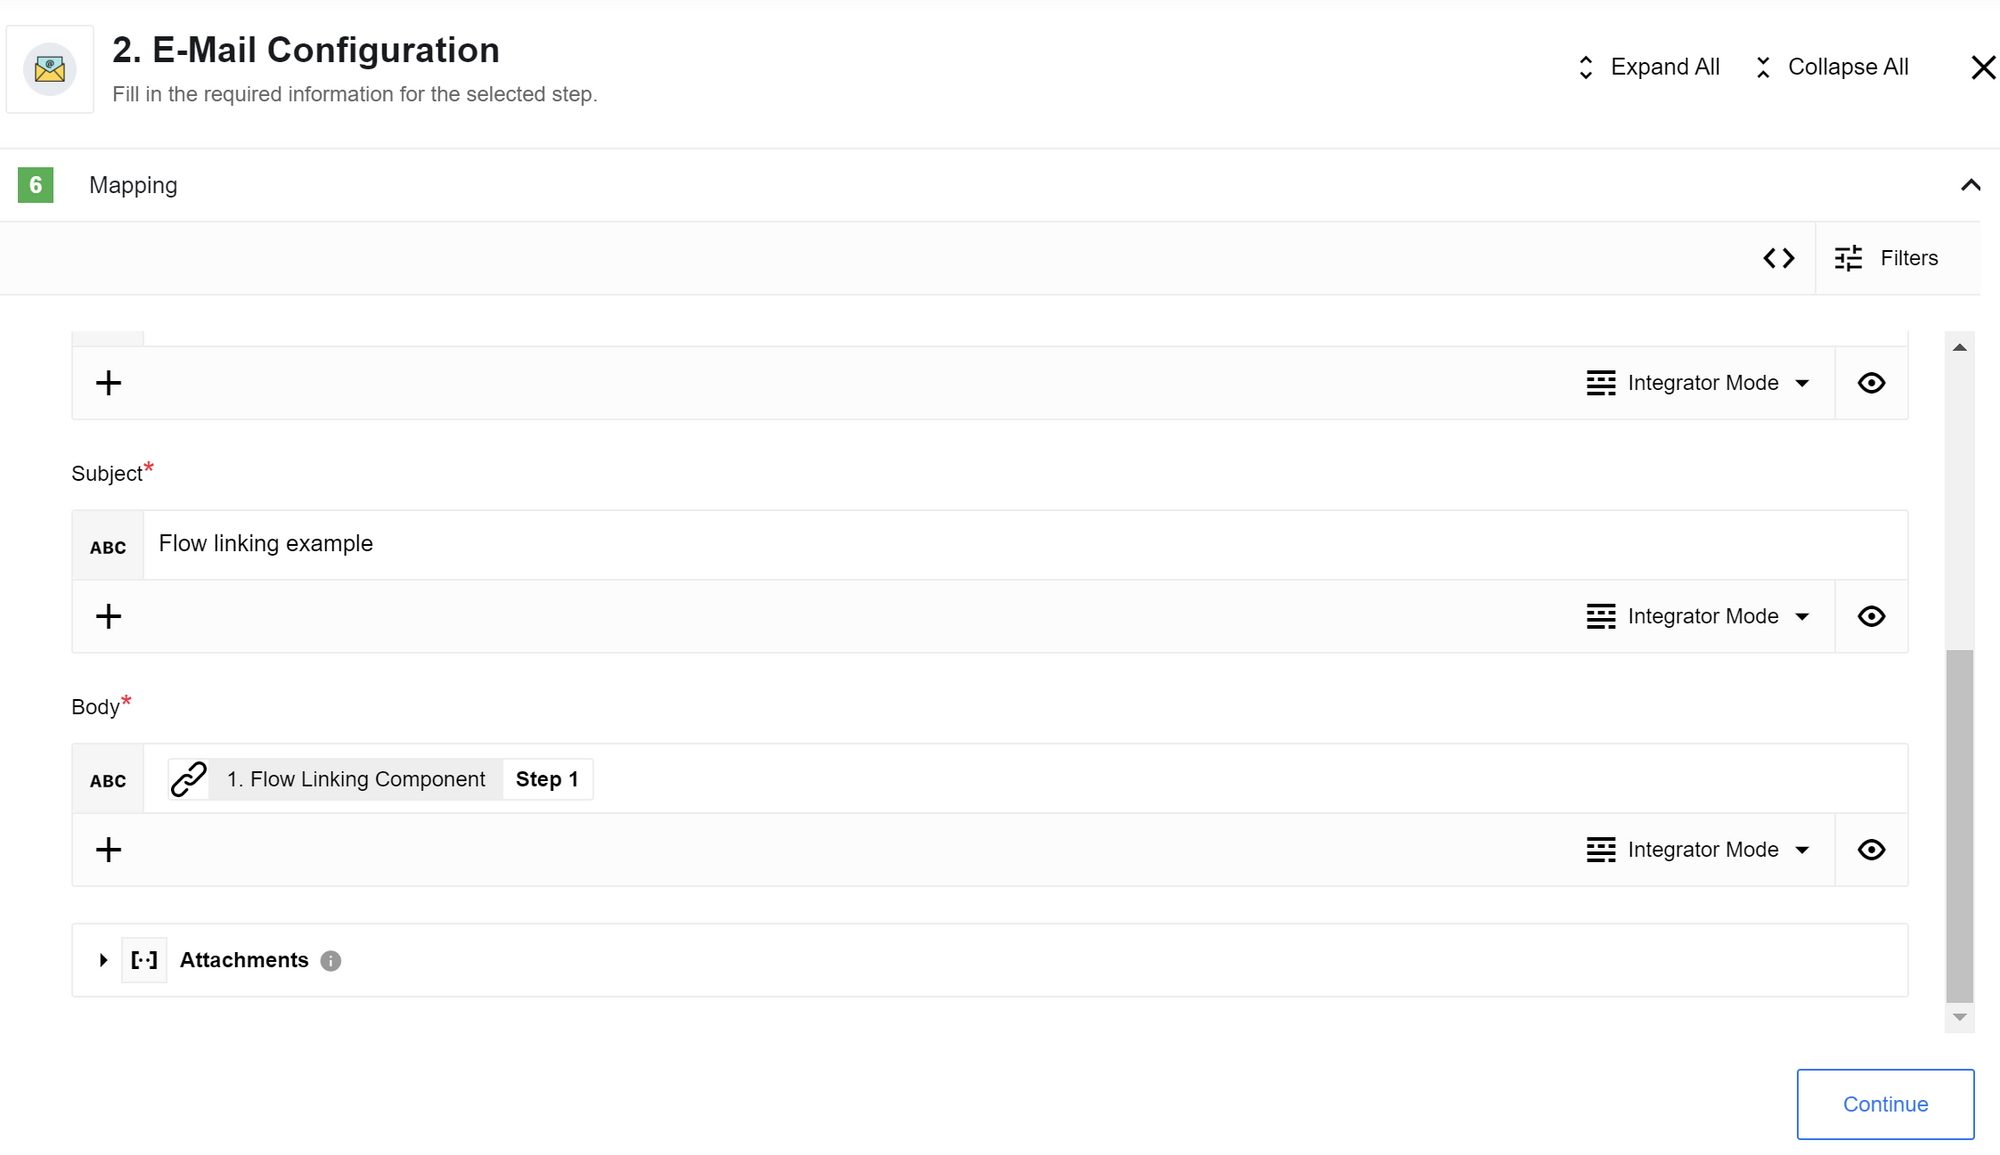
Use the Email component, which will send the data by email.
-
Use the following expression in the Body field to pass the data from the Flow Linking component into your email body:
"textBody": $getPassthrough()."step_1” -
After you publish the second flow, you can click the Run button.