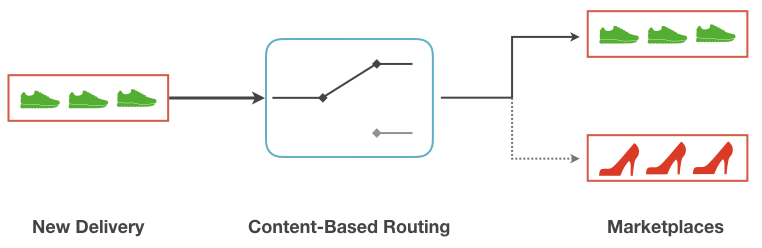
Content-based routing
The Content-Based Router (CBR) is a message processing pattern that uses the content of a message to define what happens to that message. Your Connect has a Content-Based Router component that enables you to set this up easily.
Scenario: You are selling shoes online. You have an Amazon store for sports shoes and a store on another site for ladies' shoes. Suppliers send through their delivery details via the same API. The Category field in the API defines the shoe type and can be used to identify the correct shop. You can set up a rule in a CBR component that handles this rule and posts the shoes to the correct store.
We will now look at the process of building a flow for the shoe store scenario. This explanation assumes a knowledge of basic flows and webhooks.
The trigger component for flow is a webhook that receives the product data from an ERP system.
The Webhook receives JSON data as follows:
{
  "ProductID": 345664,
  "SKU": "0406654603",
  "Product Name": "Sport Shoes XL Tracker",
  "Price": 107.99,
  "Quantity": 50,
  "Colour": "green",
  "Type": "shoes",
  "Category": "sport",
  "Size": 42,
  "Weight": 0.5
}
The "Category" field defines the shoe type and where it should be posted. We will now use a Content-Based Router component and build that rule.
As you can see below, to find the Content-Based Router component type the word content in the component search field.
As an Action component, the Content-Based Router component is only available to select after a trigger component has been added to the flow.
|
As per the image below the first step is to define what branches you need. You will need a branch for each path message might go down - in this case one for each store. You may also need a catch-all branch for any errors.
-
Choose "Create Branch" to add a new branch and define its rules
-
Choose "Create Default Branch" to create a catch-all branch for any data that doesn’t fit the rules of the other branches
| A Content-Based Router component with a single branch acts as a simple filter. |
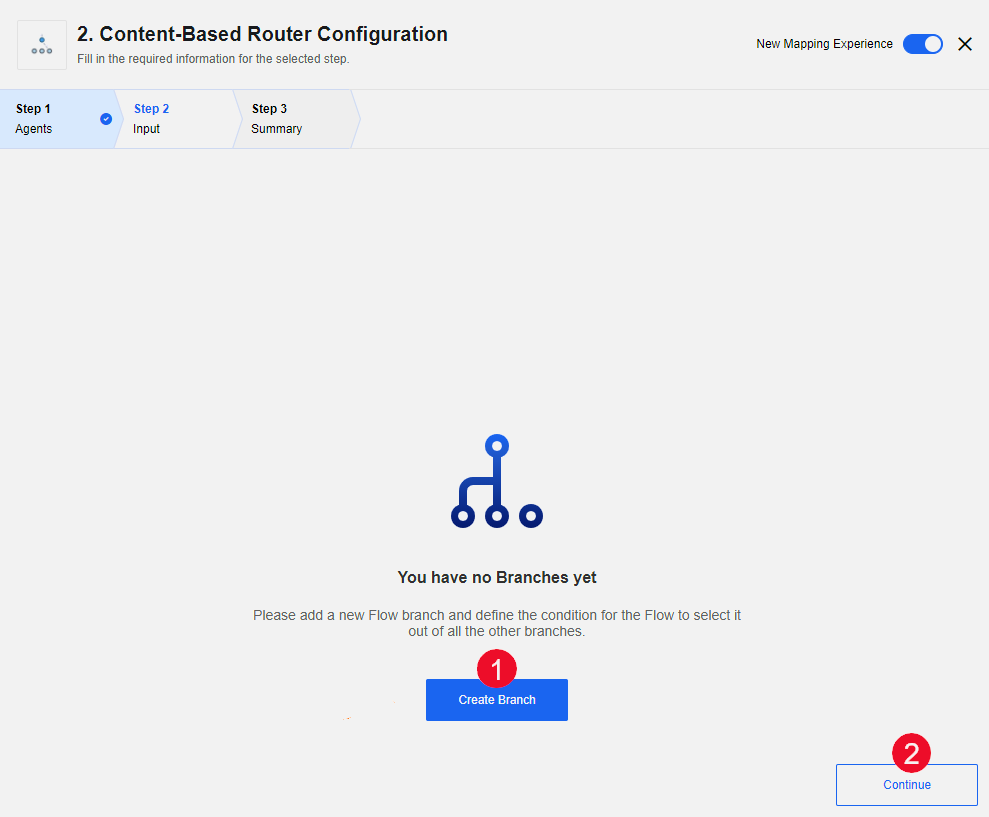
As you can see in the above screenshot you need to add branches in the next step. These branches are used to route messages to different recipients, your stores in this example. To add a branch either click on the "Create Branch" tab or on the "Continue" button.
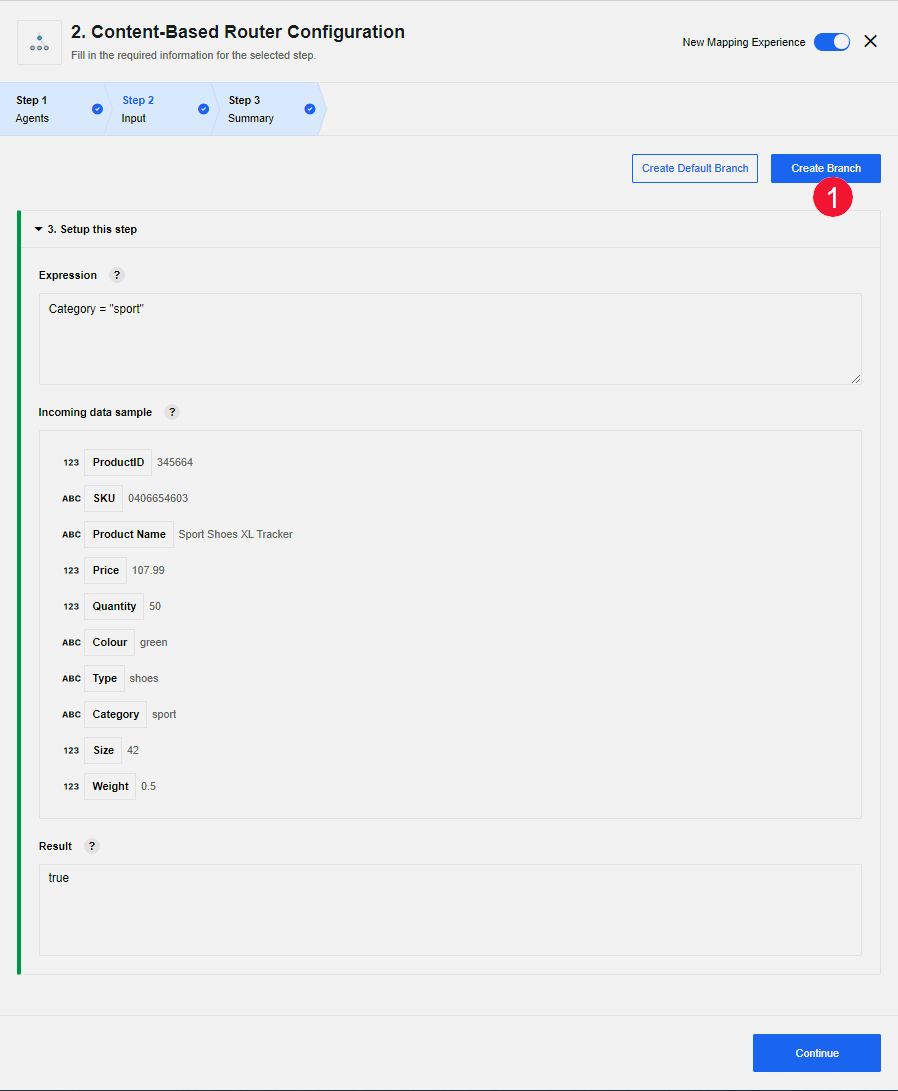
We must now configure the rule for the branch. The screen shows sample data.
-
Type the JSON expression required for the rule
Category = "sport". -
The result of JSONata expression evaluation gets displayed below the data sample field. This JSONata expression evaluates to a
booleanvaluetruesince in the incoming dataCategoryhas a value of"sport".
Continue choosing "Create Branch" and configuring rules until all expected categories are covered. Consider adding a Default rule to catch any orders with unexpected categories.
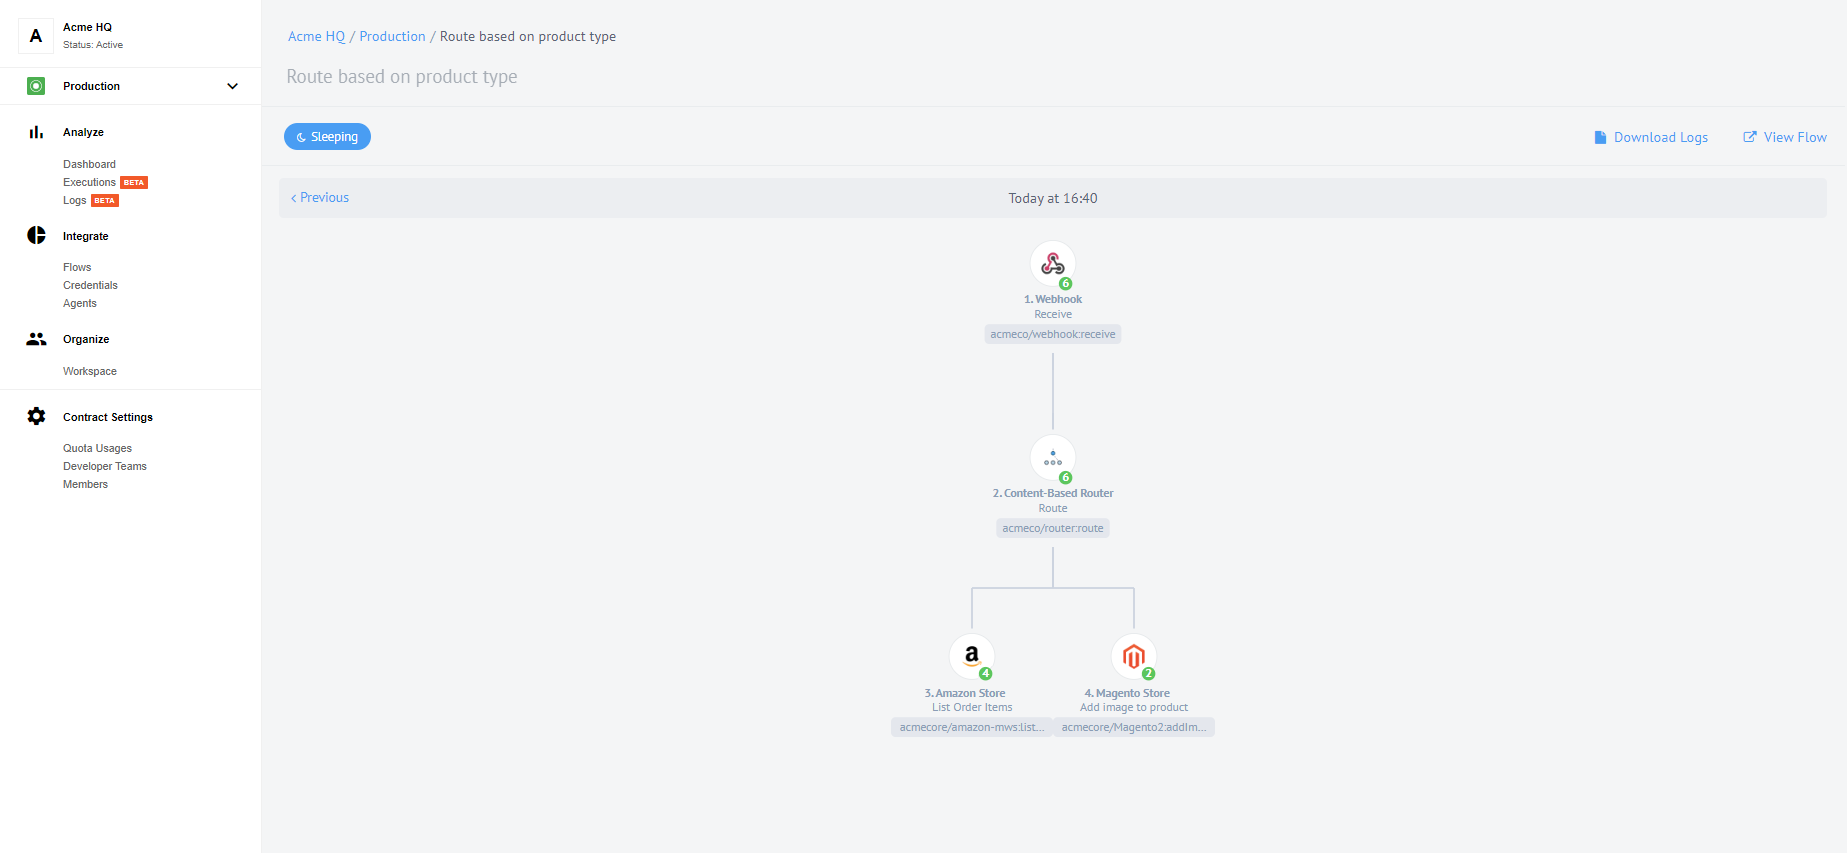
Complete the configuration of each branch to define the service that the data should be sent to. In the above image data is bring sent to Amazon if the category is Sport and Magento if the category is Ladies.
The image above shows the execution result after test 6 entries of the product information. From those 6 the 4 contained sport shoes and 2 had ladies shoes. The messages were routed accordingly.