User interface overview
This document is a basic guide to main the elements of the platform and how they are used.
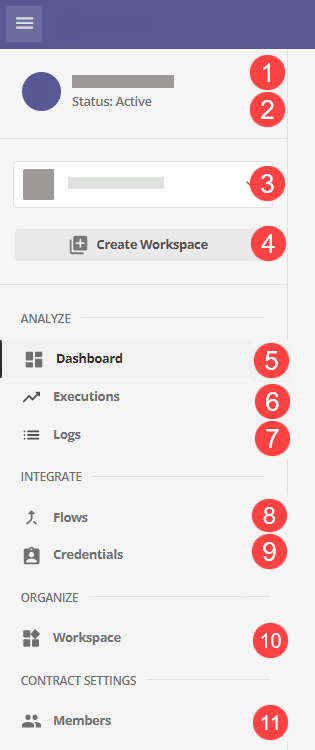
Navigation menu
The Navigation menu is located to the left of the screen when using the product.
It can be toggled between visible and hidden by using the ![]() icon.
icon.
It contains the following elements:
-
Your Contract name.
-
Your Contract status.
-
The Workspace you are in.
-
The Create a new Workspace button.
-
A link to the Dashboard screen (the default landing screen).
-
A link to the Executions screen.
-
A link to the Logs screen.
-
A link to the Flows screen.
-
A link to the Credentials screen.
-
A link to the Workspace screen.
-
A link to the Members screen.
Dashboard
The page is the default page that displays when you open the platform.
It displays:
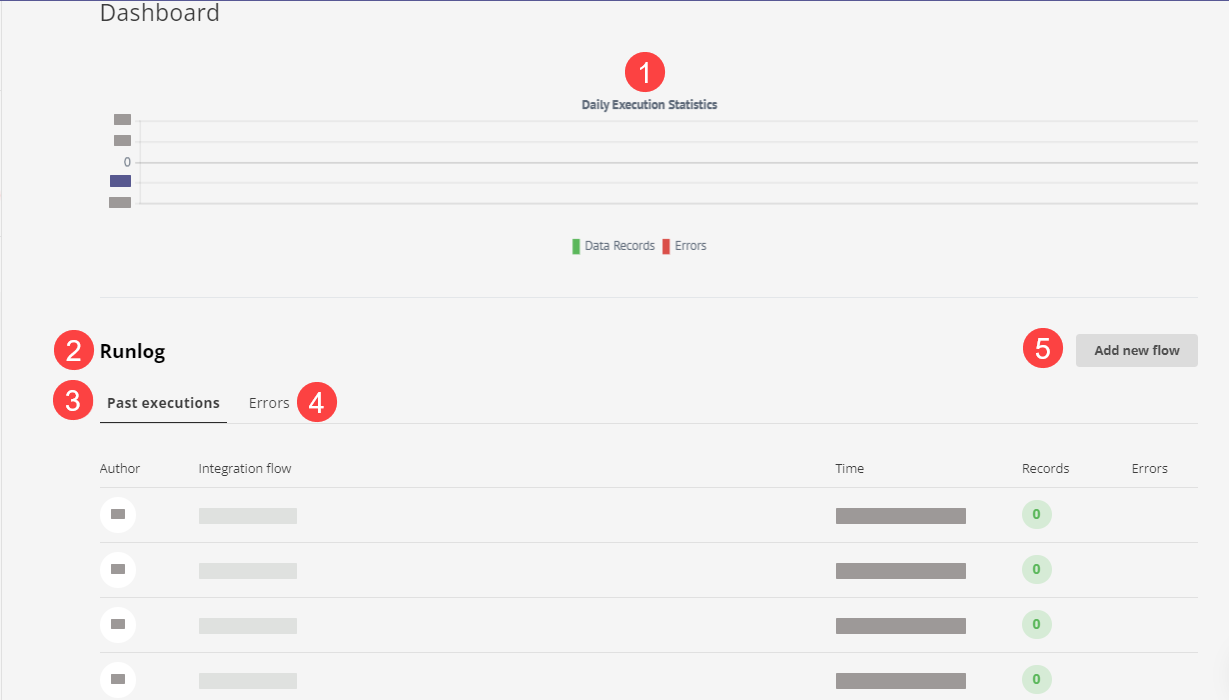
-
Daily execution statistics.
-
The Runlog section.
-
The Runlog Past executions tab.
-
The Runlog Errors tab.
-
The Add a new flow button.
Executions
Click the entry to view a simple history of each flow that was executed on your platform. Use the filters to help you find specific information.
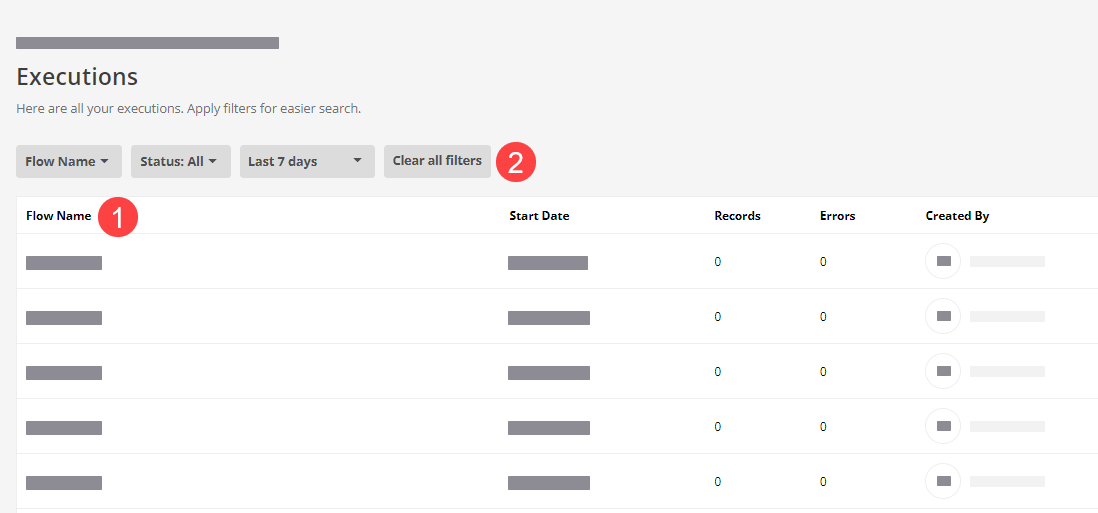
-
Flow history.
-
Search filters.
Logs
Click the entry to access a more comprehensive set of information about activity on your platform.
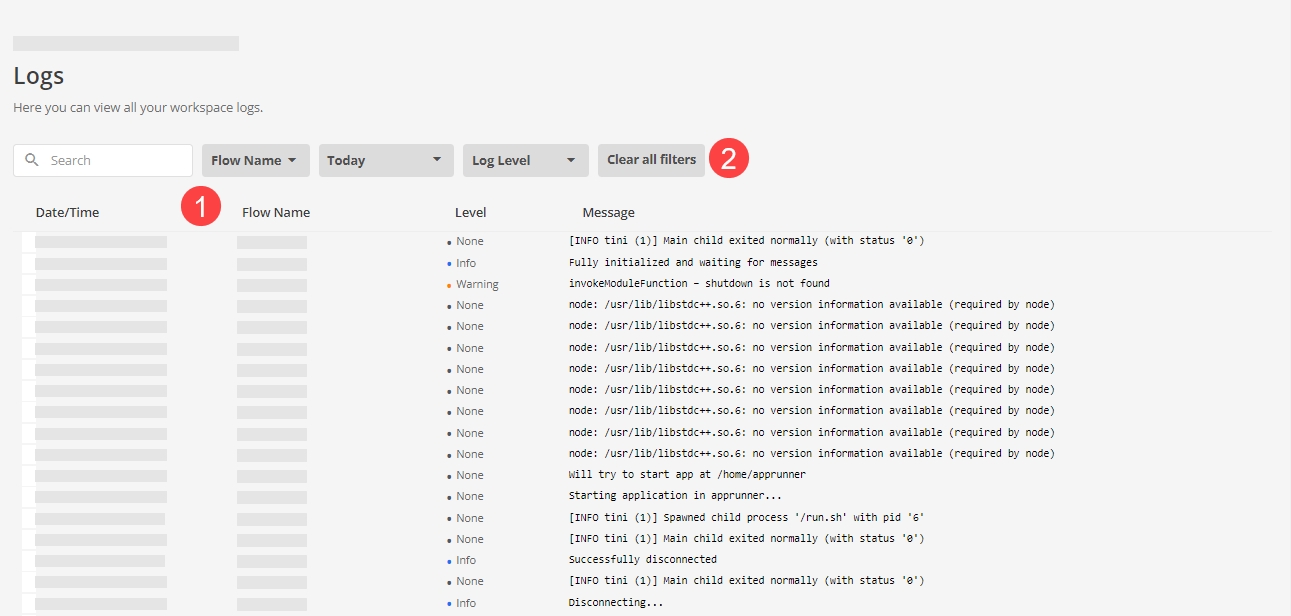
-
The full logging history is available for every execution.
-
Use the filters to help you find specific information.
Read the Logs documentation for more information.
Flows
The page displays, and allows you to manage, all the Flows configured in your workspace.
A Flow is a workflow that defines how data in synchronized between two or more platforms. An integration between platforms may use a single flow or multiple flows.
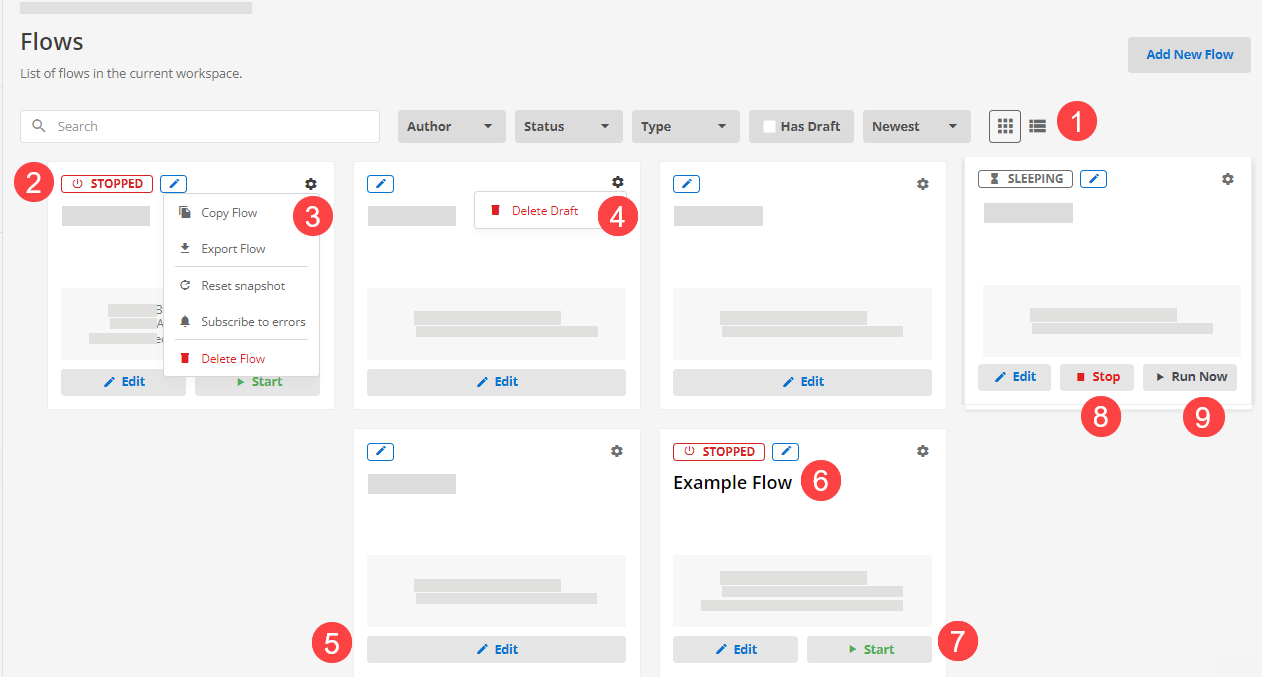
-
Use the search and filter functions to find what you need.
-
The flow status indicates the current status of the flow.
-
Use the configuration (
 ) menu for various actions, including copying and deleting a flow.
 -
Draft flows can only be deleted.
-
Edit a flow.
-
Click the flow name to open it for review or editing.
-
Start a flow.
-
Stop a flow.
-
Run a flow.
Read the Managing Flows documentation for more information.
Credentials
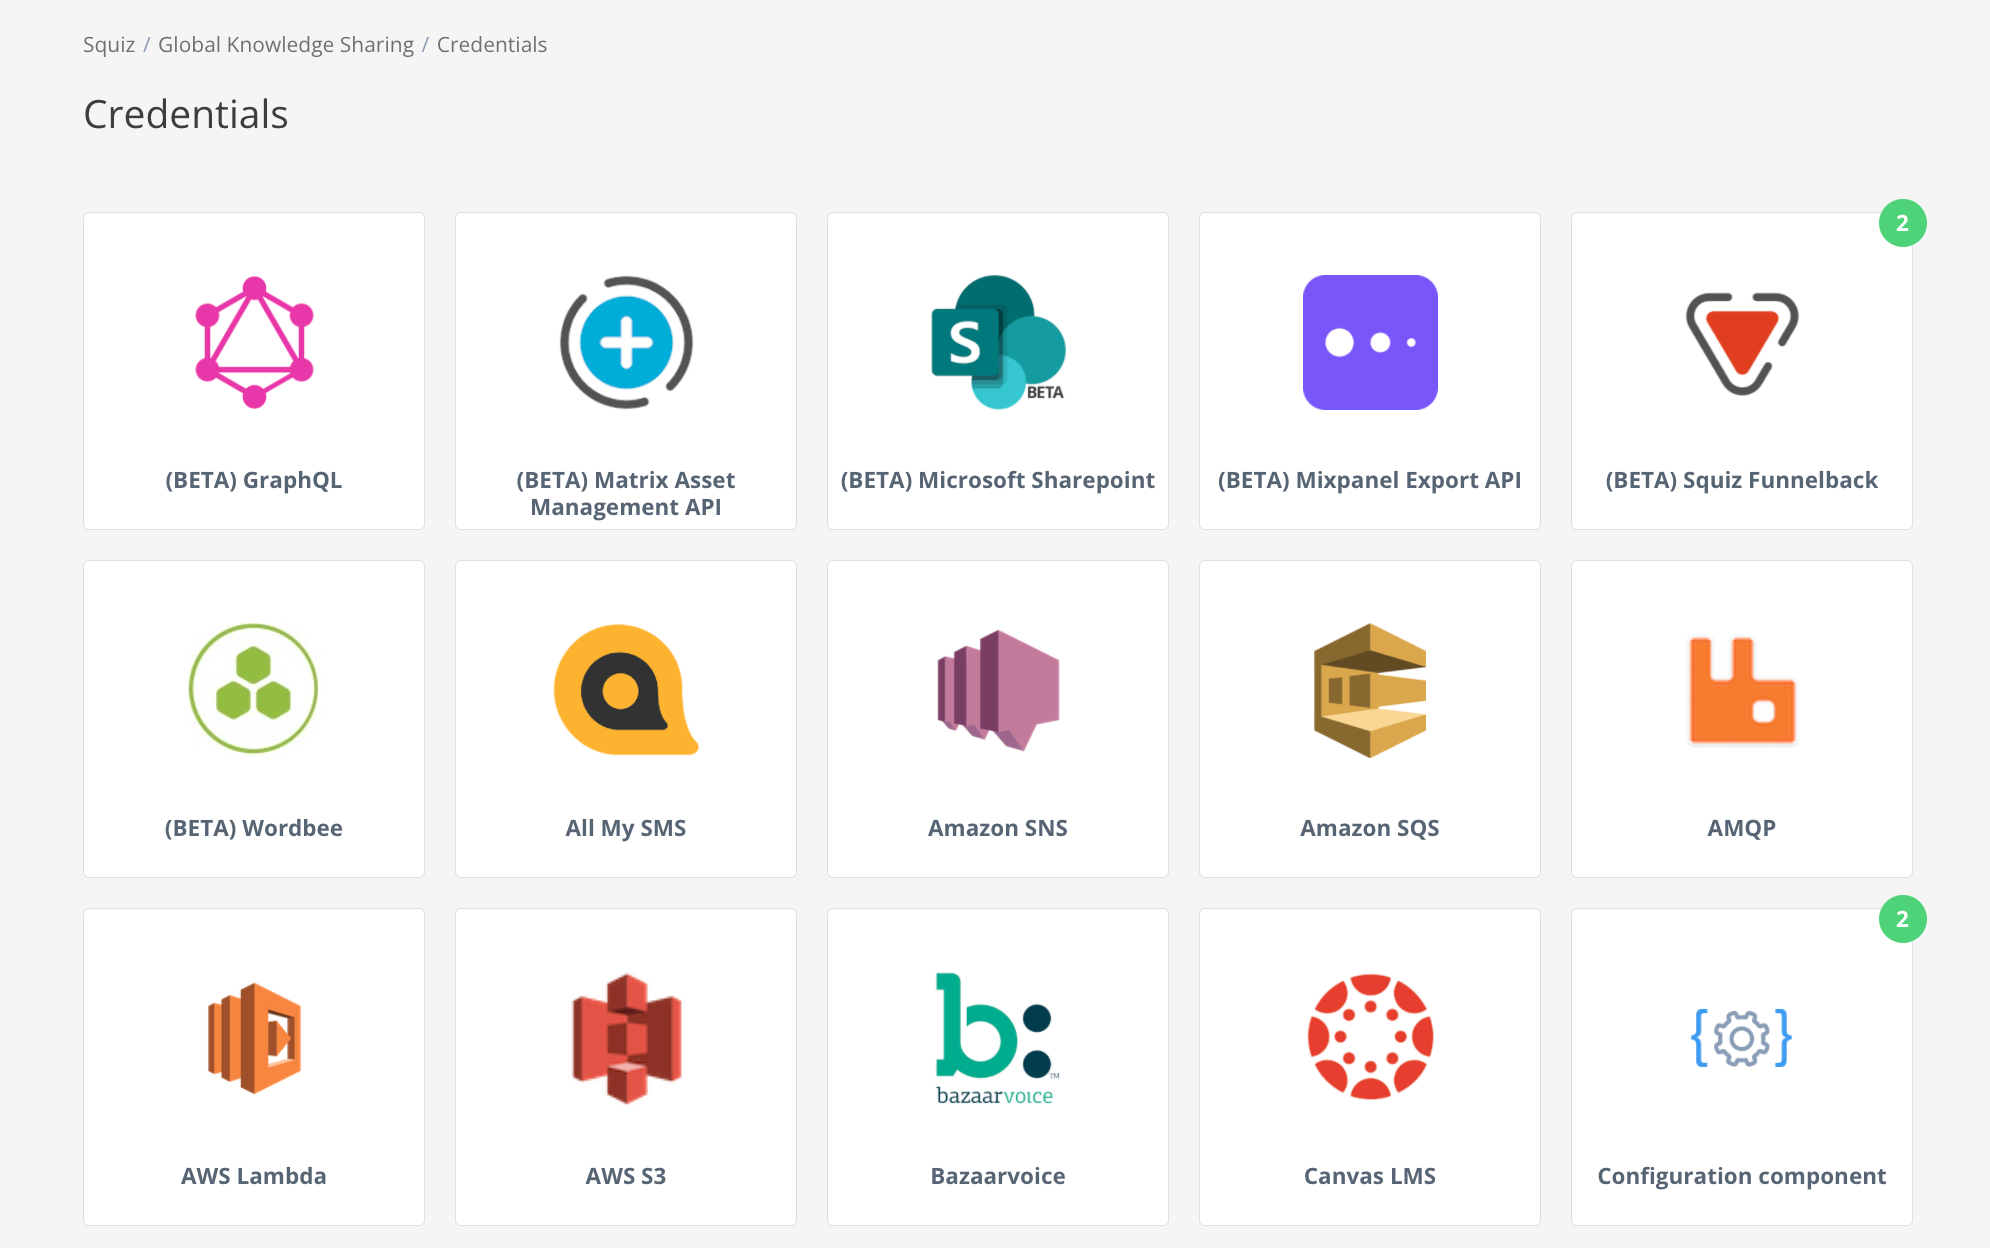
The page displays a list of Components that may require Credentials to work.
Click any component to view or add credentials. A count of all valid credentials you have for any given component will be shown in a green dot on its thumbnail.
Read the Credentials documentation for more information.
Workspace
The page is for Contract administration tasks such as changing a workspace name or deleting a workspace. The page also enables Admins to manage what users have access to the workspace.
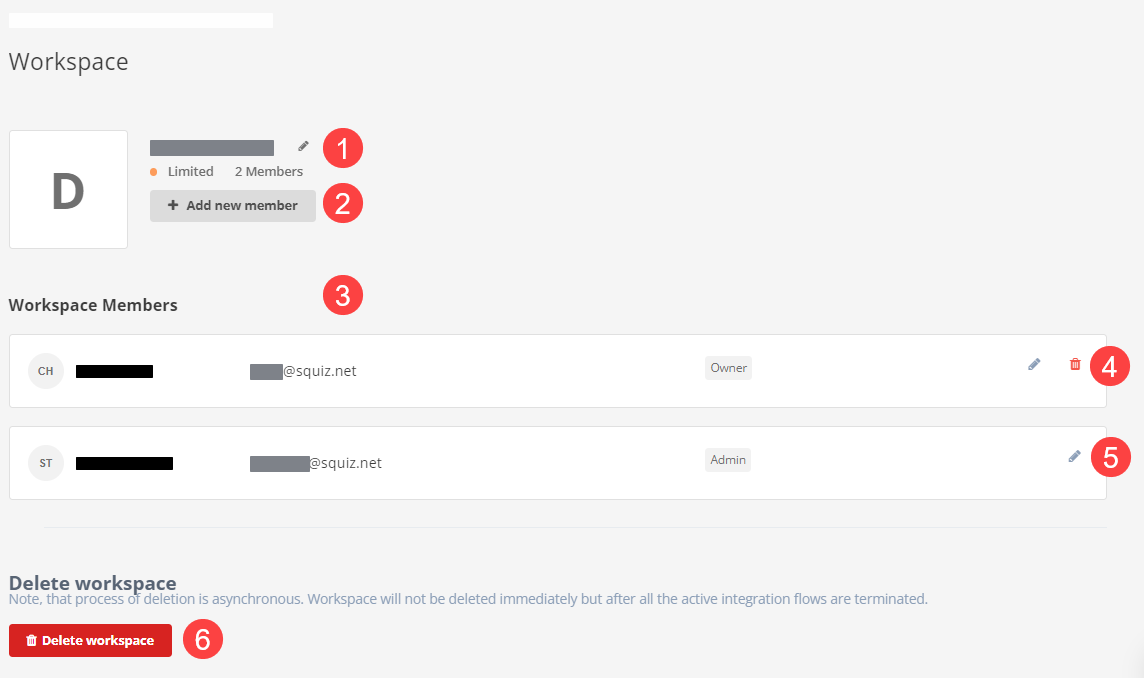
-
Editable workspace name.
-
Add existing contract members to the workspace.
-
Review the member list.
-
Delete members.
-
Edit members.
-
Delete the workspace.
Read the Managing workspaces documentation for more information.
Members
The tab enables the Contract Owner to manage overall platform access. A list of all Contract Members and their roles is available.
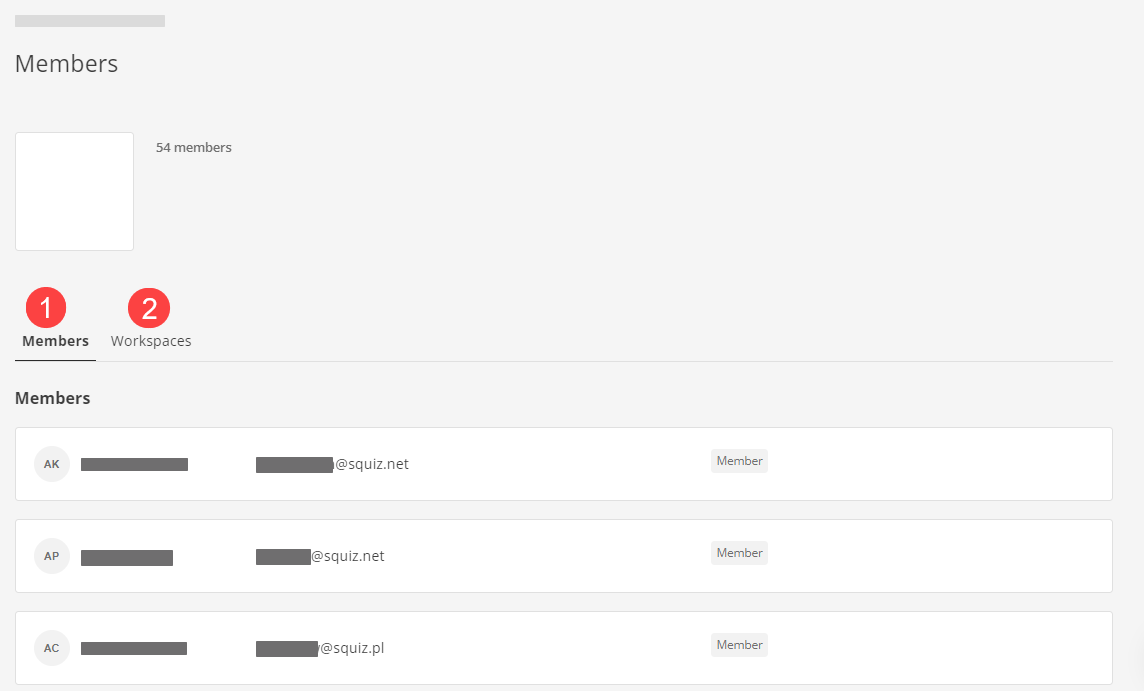
-
A list of all Contract Members and their roles.
A user must be invited to the contract (through DXP Console) before they can be added to a workspace. -
A list of all workspaces.
On the tab you will see:
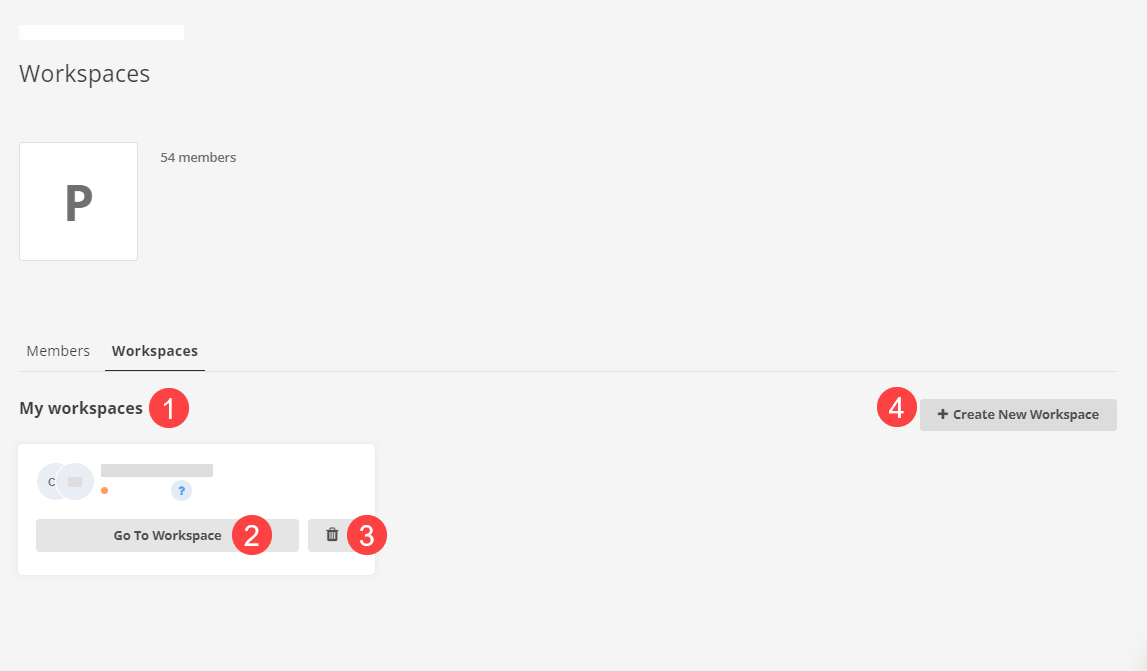
-
A list of your workspaces, including some details about each.
-
The Go to workspace button.
-
The Delete workspace button.
-
The Create new workspace button.