Creating OAuth2 app
Introduction
The Microsoft Outlook component uses the Active Directory OAuth 2.0 protocol and requires a dedicated OAuth2 app registration. This article will guide you through the process.
During the process, you will be asked to enter a Redirect Address for your application.
This URL is:
https://app.connect.squiz.cloud/callback/oauth2Read the OAuth callback redirect URL article for more information.
Once you finish this guide, you will have your application’s OAUTH_CLIENT_ID and OAUTH_CLIENT_SECRET values to add as environment variables to the Outlook component repository.
Creating OAuth2 app
-
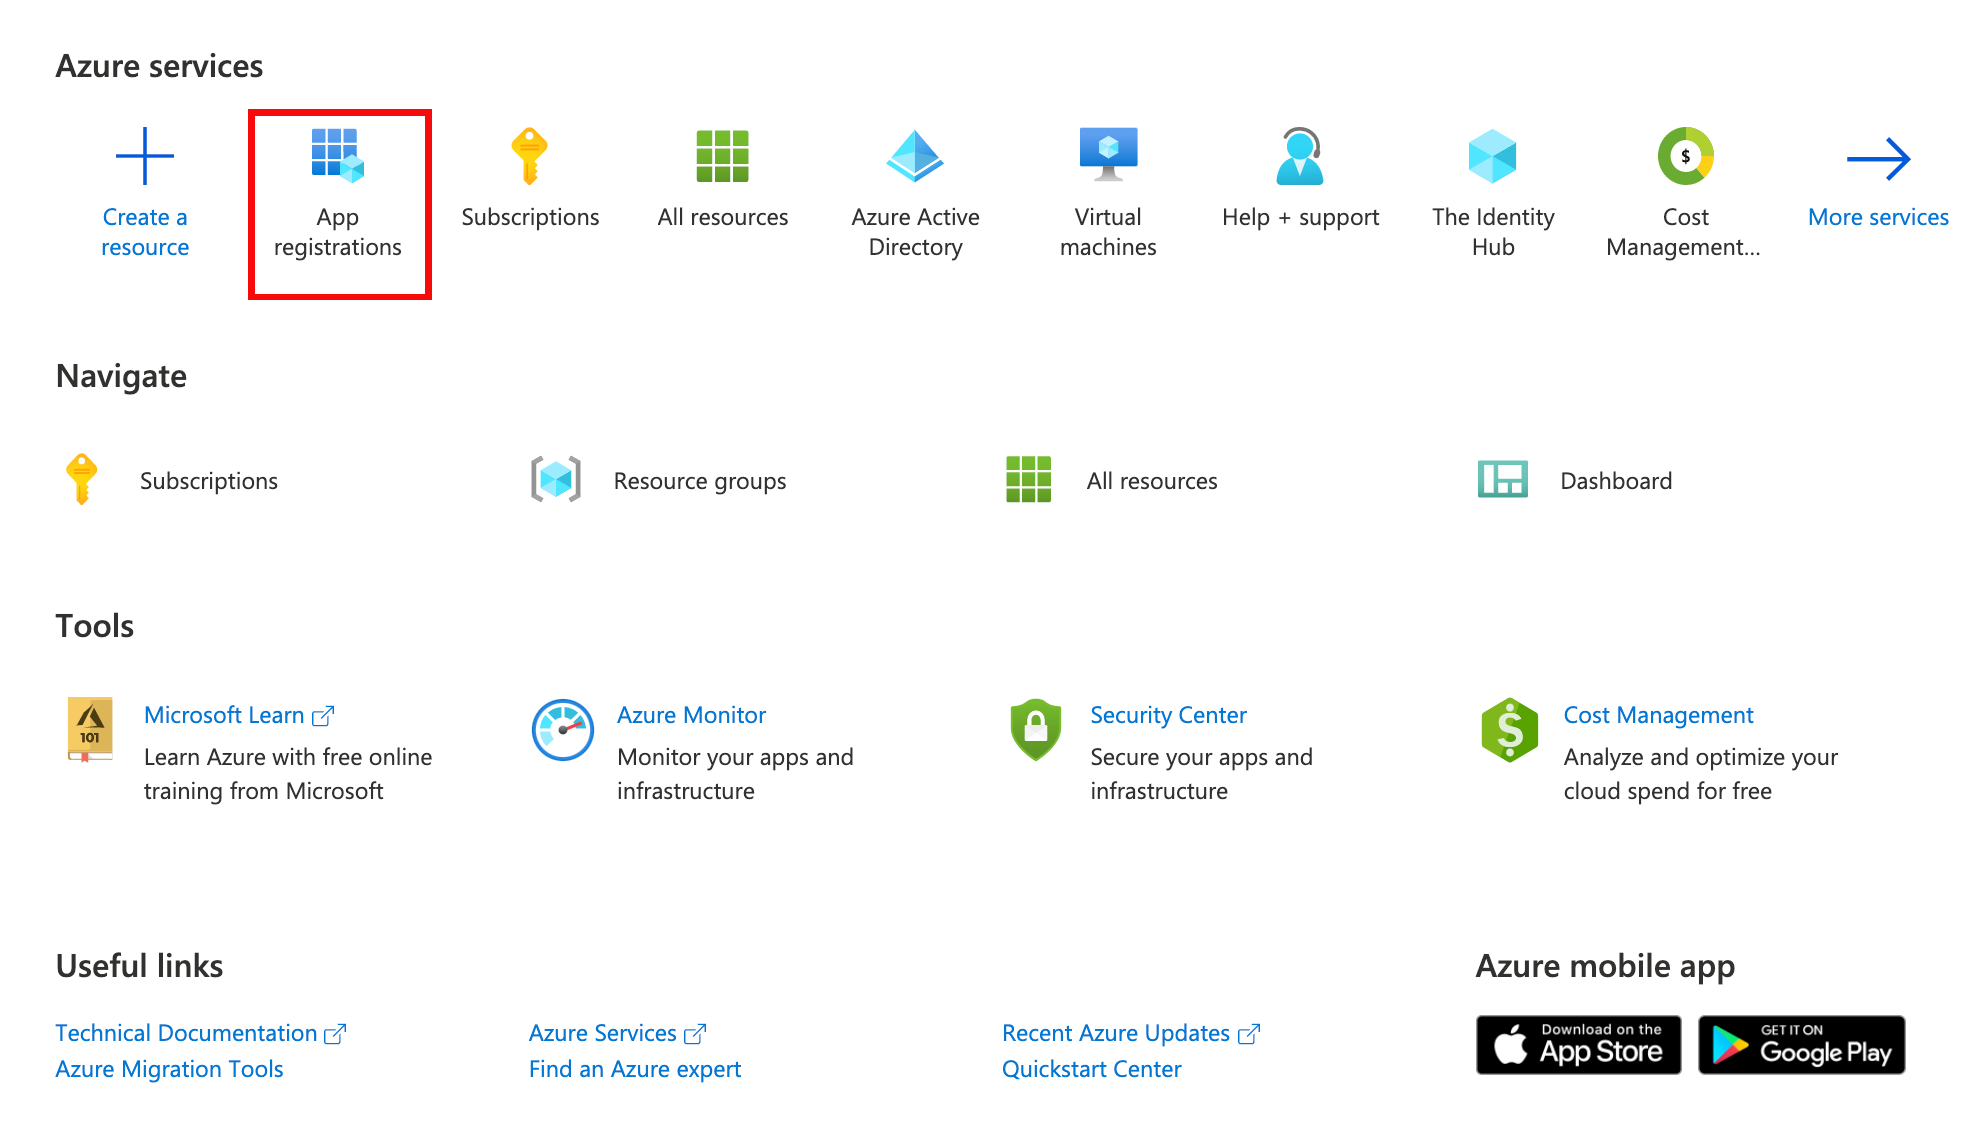
Login to Azure Portal and select App registration to begin.
-
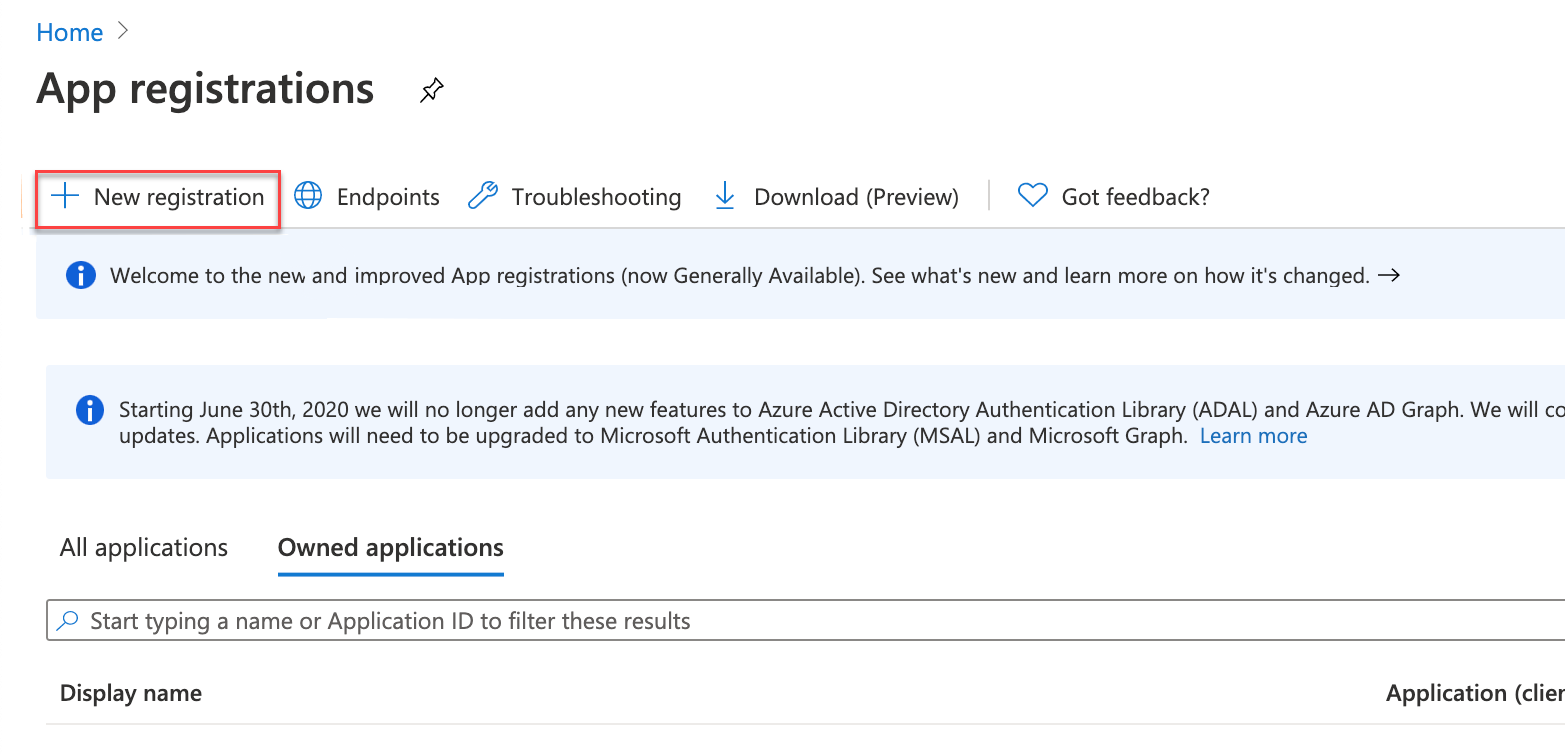
A new configuration page will open where you can see all the registered applications your account has. Select + New registration to create a brand new one.
-
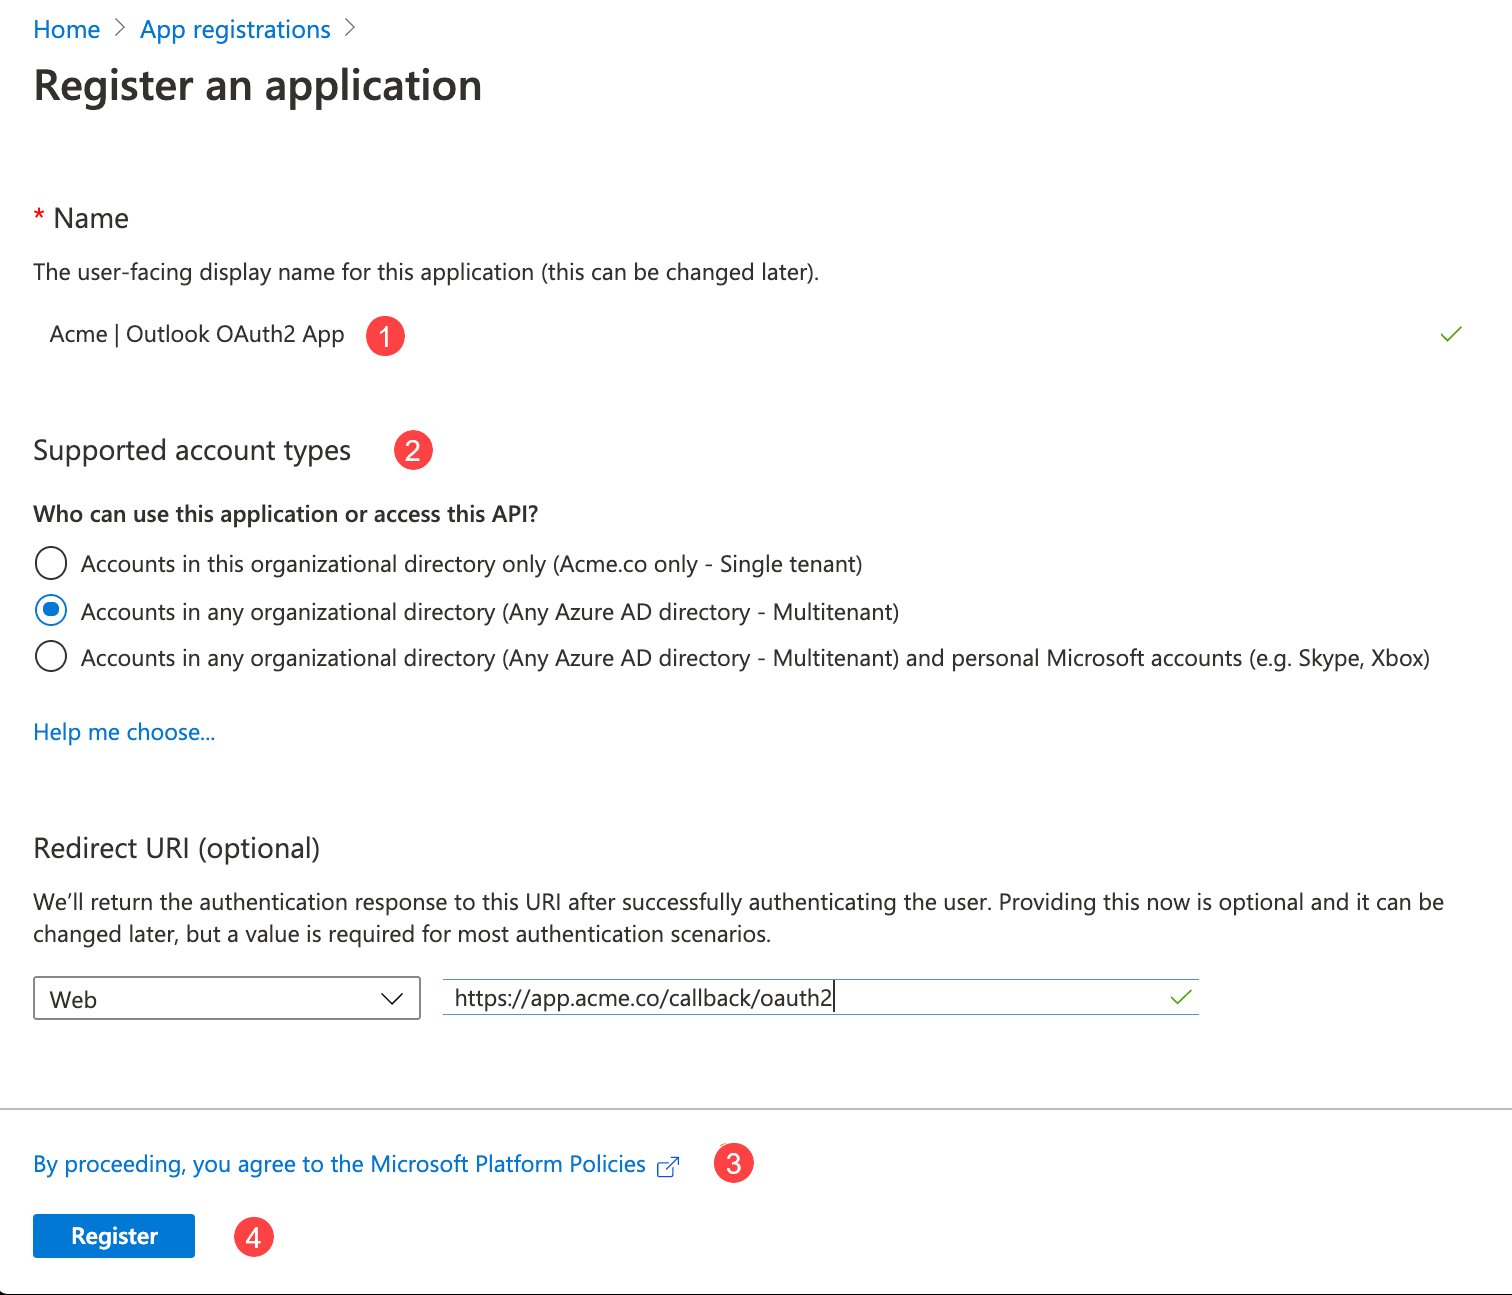
Configure the initial setup of your application. Use the callback address here.
-
Give a memorable name to your application.
-
Select the access type. Select Multitenant (the second option) if you are unsure about this.
-
Callback address. The screenshot shows a generic address; you should enter
https://app.connect.squiz.cloud/callback/oauth2and leave the drop-down menu Web. -
Press Register to save and navigate to the next screen.
-
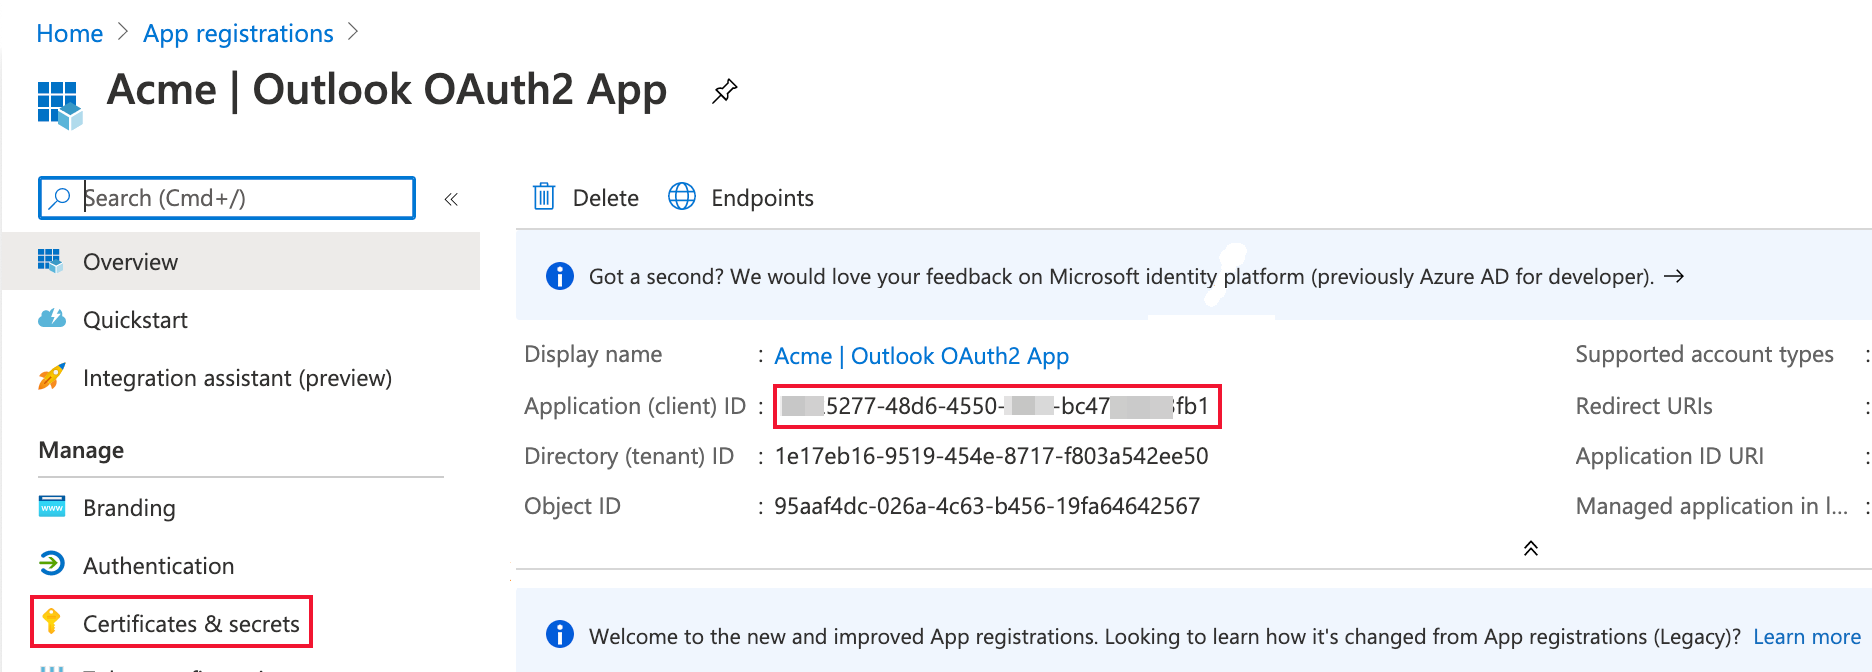
Here you have the basic configuration of OAuth2 application. Several IDs are available.
-
Copy the Application (Client) ID value; this is your
OAUTH_CLIENT_ID.
-
-
Click the Certificates & secrets option in the left pane to navigate to a different page to create your
OAUTH_CLIENT_SECRETvalue.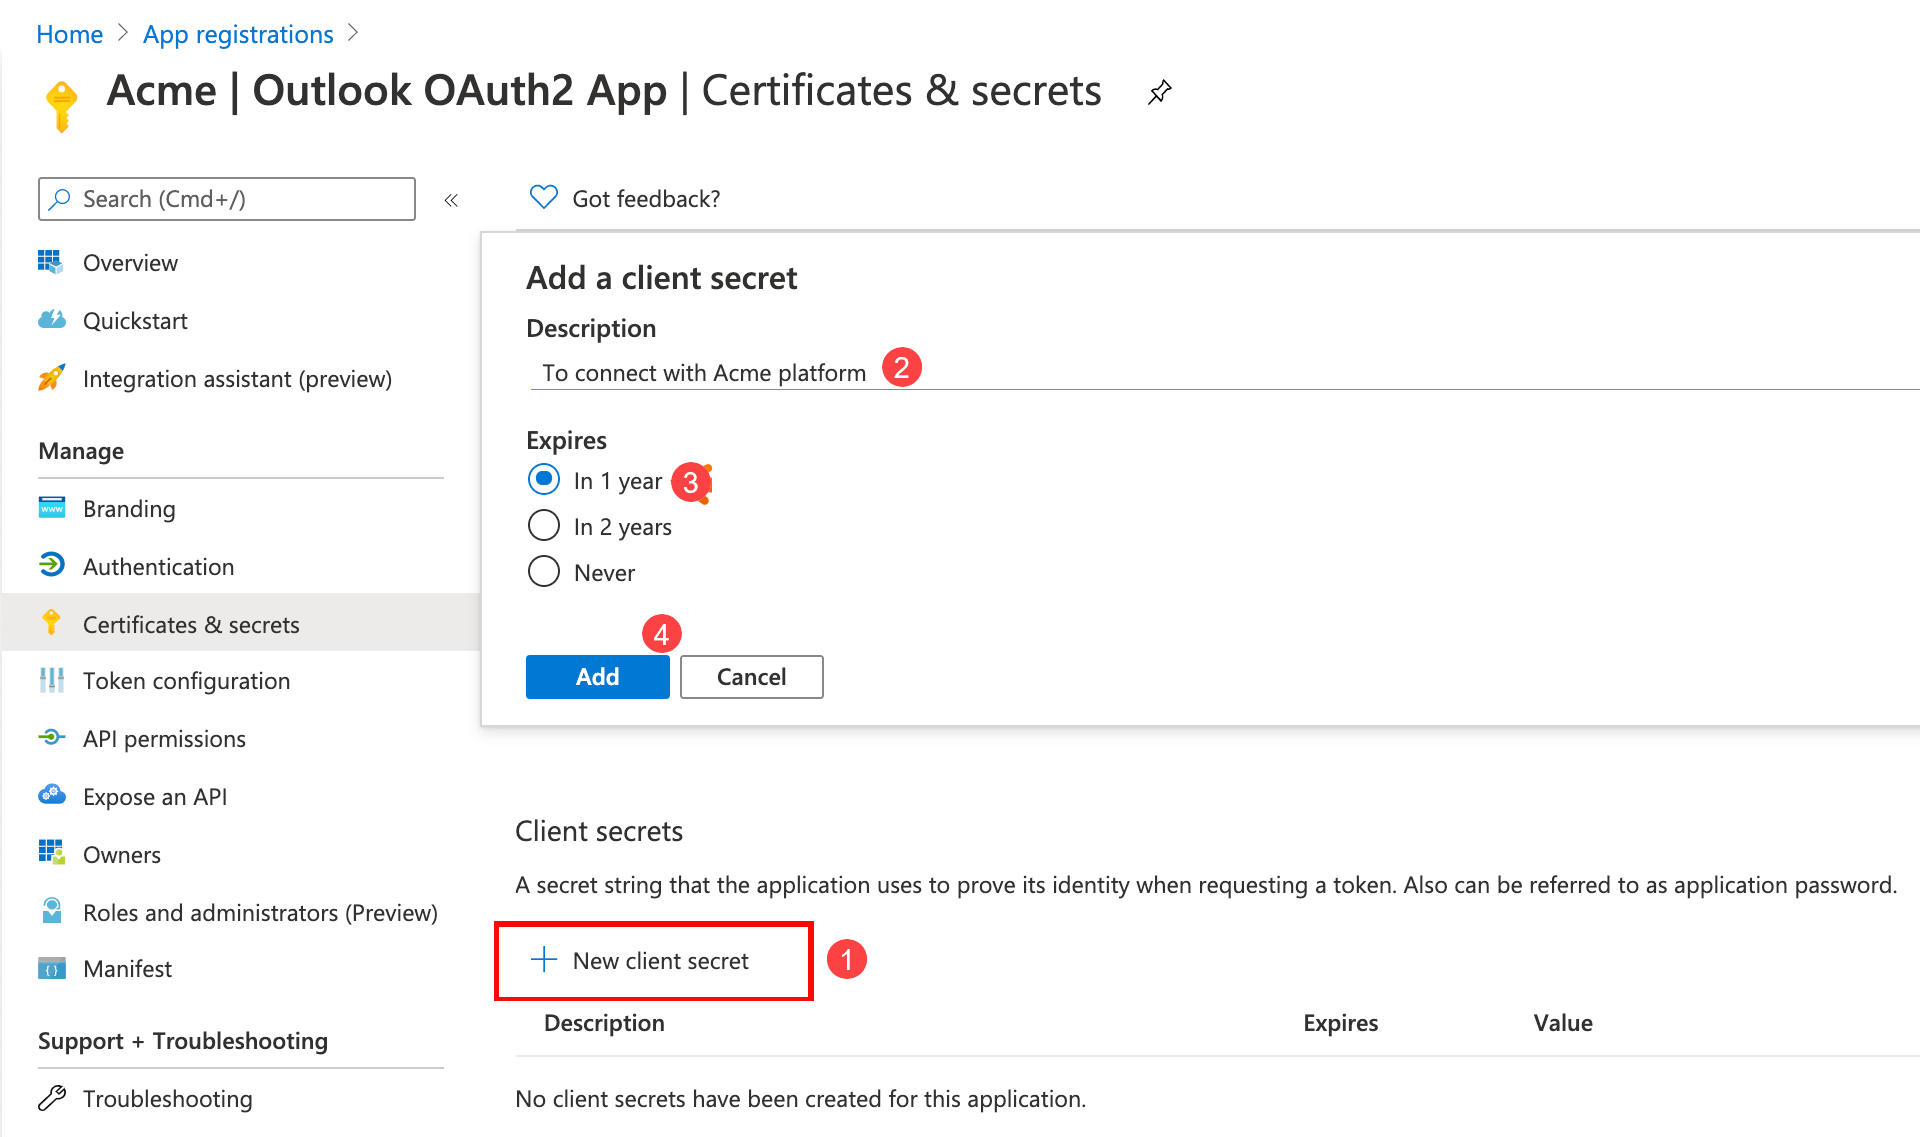
Scroll to the Client secret section.
-
Click on + New client secret to start. The Add a client secret window appears.
-
Add a description of your secret to help identify it later.
-
Select an expiration period.
-
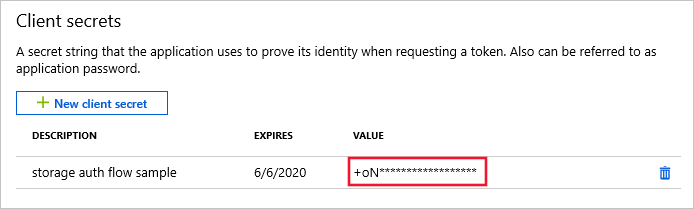
Click Add to save the settings and generate the secret value. You will see a screen with generated secret value.
-
Click copy. This value is your
OAUTH_CLIENT_SECRET.Copy the value before navigating away from the screen. Next time you visit this screen, you will be unable to see the value and be forced to create a new one.
You now have both necessary values.
The OAuth2 app requires further configuration before use.
Configuring OAuth2 app
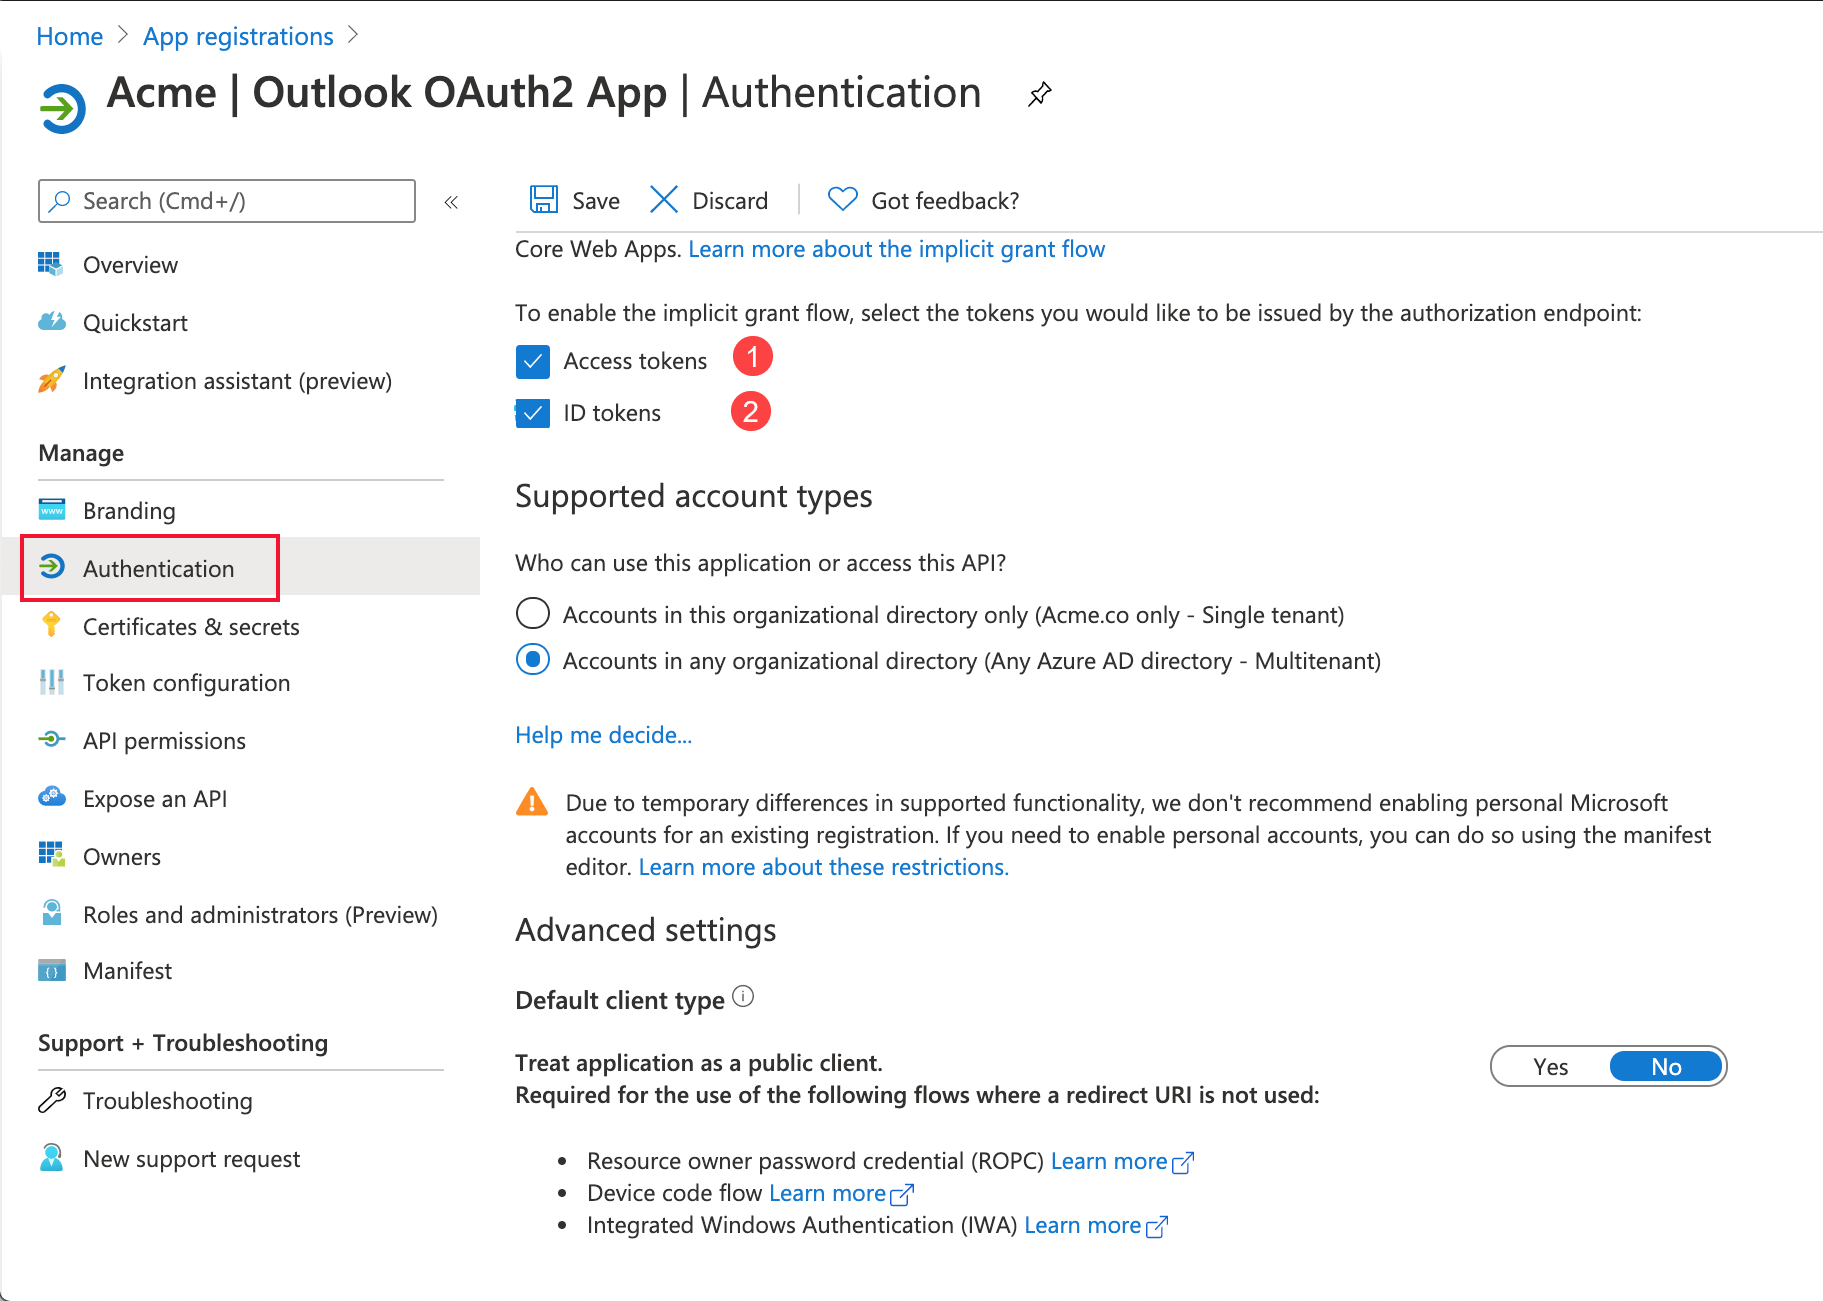
You must configure the newly-created OAuth2 app to exchange data. You need to add the ability to exchange access and ID tokens.
-
Navigate to the Authentication section in the left pane.
-
Scroll until you see information about granting the tokens.
-
Select both the ID and access tokens and save them. Do not change anything else on this page.
You must now extend the grant scopes of this OAuth2 app.
-
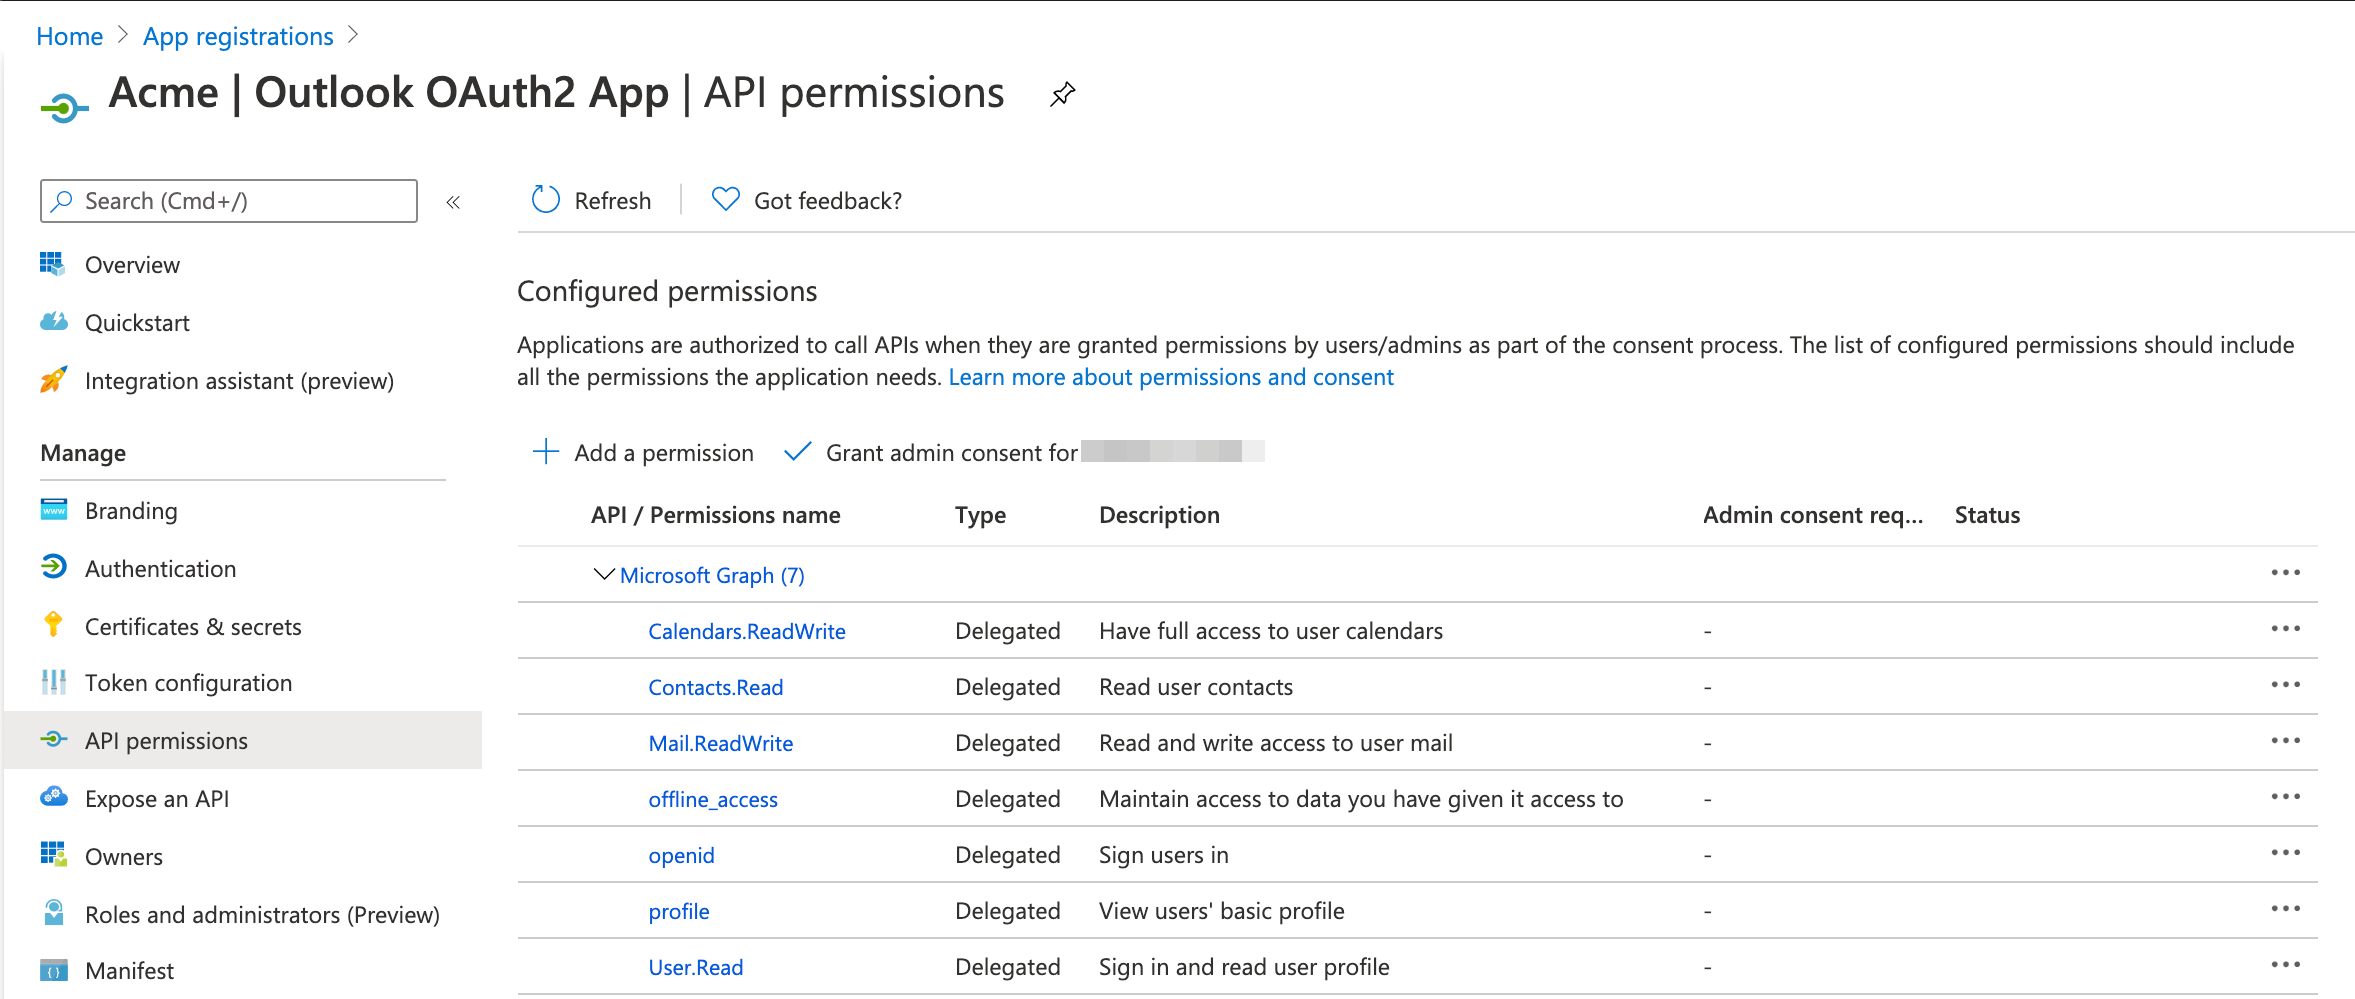
Navigate to the API permissions section in the left pane. By default only the
User.Readscope is added.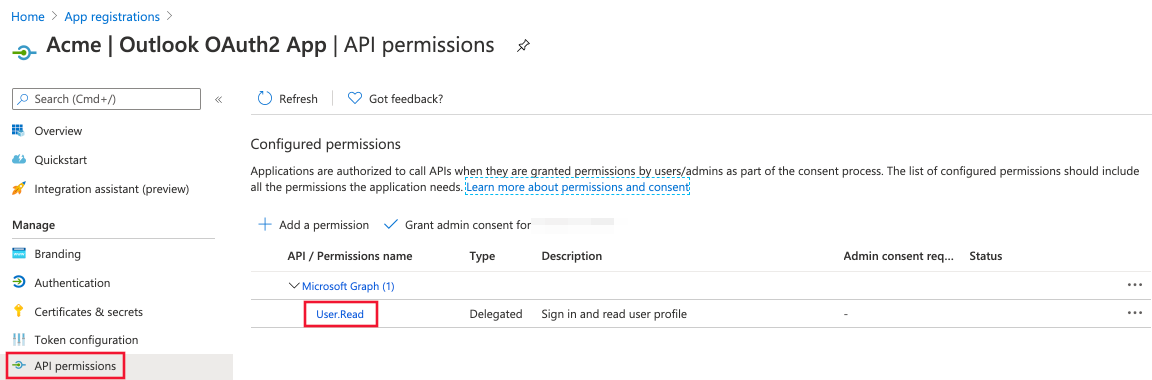
-
Click on Microsoft Graph to open scope explorer.

-
Select the following scopes in Delegated access mode:
Calendars.ReadWrite-
Have full access to user calendars.
Contacts.Read-
Read user contacts.
Mail.ReadWrite-
Read and write access to user mail.
offline_access-
Maintain access to data to which you have given access.
openid-
Sign users in.
profile-
View users' basic profile.
User.Read-
Sign in and read user profile.
Your OAuth2 app is ready.
You can now leave the Azure portal and go back to the platform to finish the configuration on platform side.
Configuration on platform
Now that you have the OAUTH_CLIENT_ID and OAUTH_CLIENT_SECRET values, you need to add these values as environment variables to the component repository on the platform.
| If you don’t have access to the component repository ask the support to help you. |
-
Navigate to the Outlook component repository.
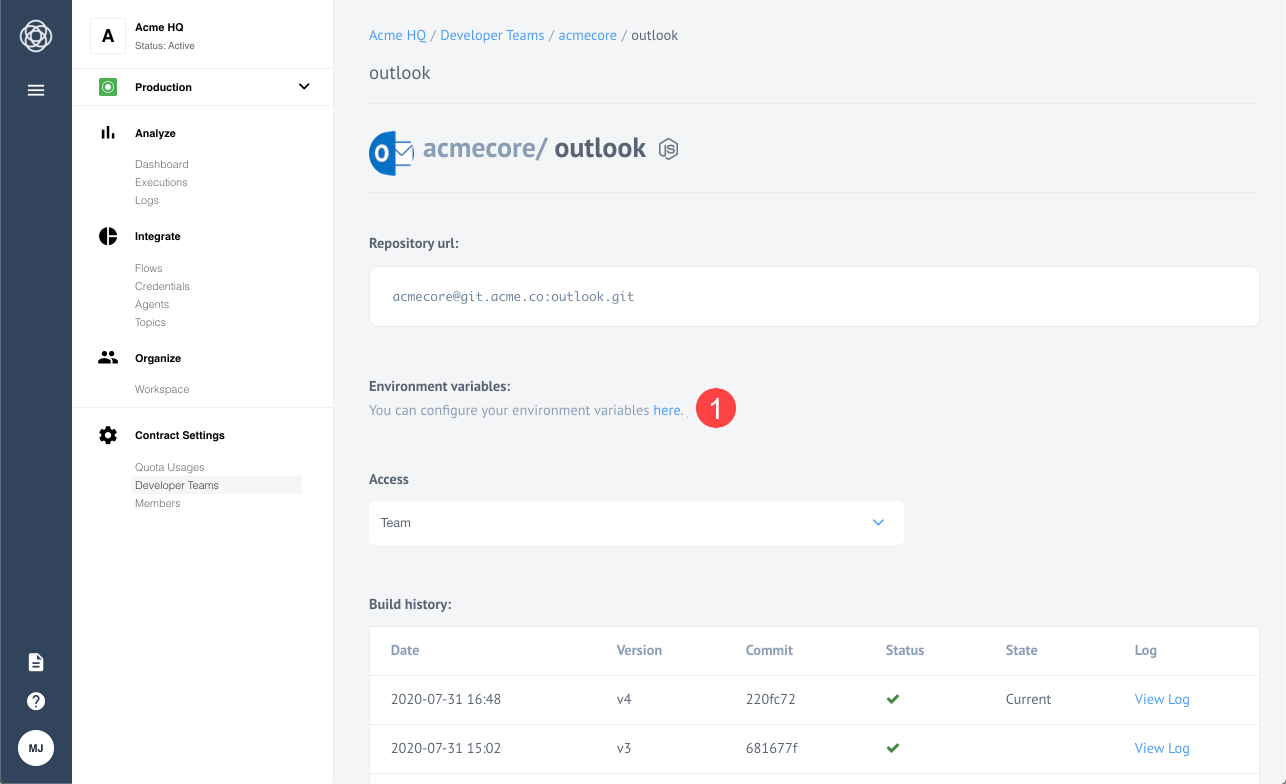
-
Click to open the configuration page to set the environment variables.
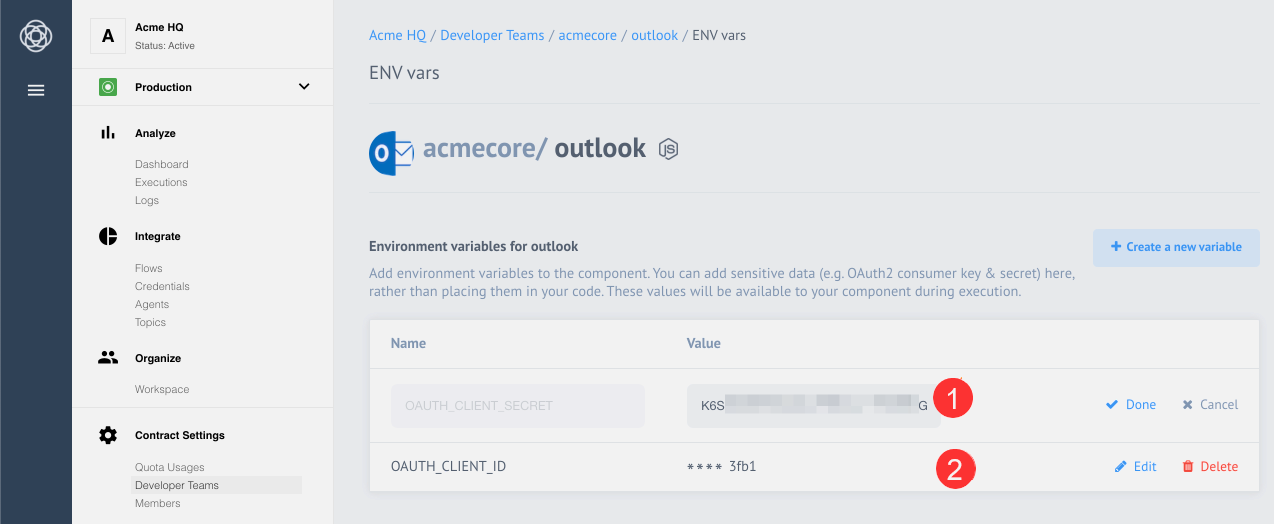
Once you have successfully added environment variables, you need to create a credential for the Outlook component for OAuth2 authentication.