Creating OAuth app for HubSpot
This document describes creating an OAuth2 app for HubSpot and using the newly generated client ID and client secret to configure an authentication client.
Creating OAuth2 app
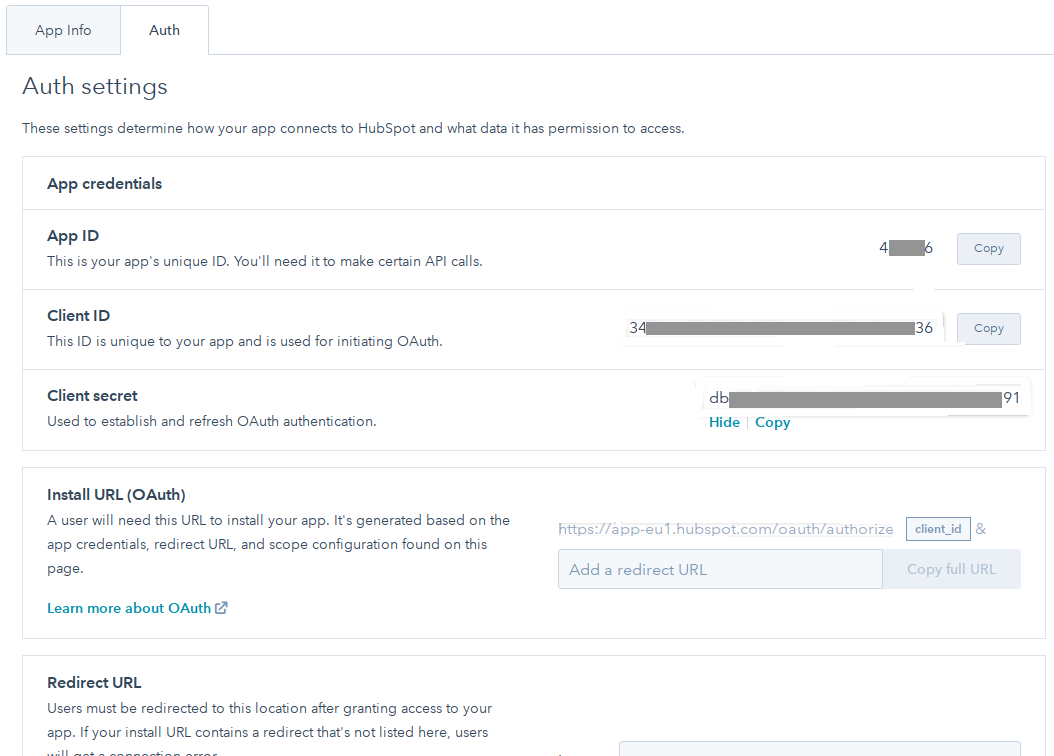
The HubSpot component authentication uses OAuth 2.0. You must create an OAuth2 app with HubSpot before using it with Integrations.
The Redirect URL of Integrations is https://app.connect.squiz.cloud/callback/oauth2 . When creating the app in HubSpot, you must paste this URL to the Redirect URL field.
Read the HubSpot documentation for a detailed explanation of the process.
Next, on Integrations, you must select an existing authentication client from the Choose Auth Client list or create the new one for the HubSpot Credential.
OAuth2 client creation
You can now create an authentication client using the details output by the HubSpot OAuth2 app creation. Select the +Add new client option from the Choose auth client menu while creating the HubSpot credential to see an OAuth2 client creation pop-up form:
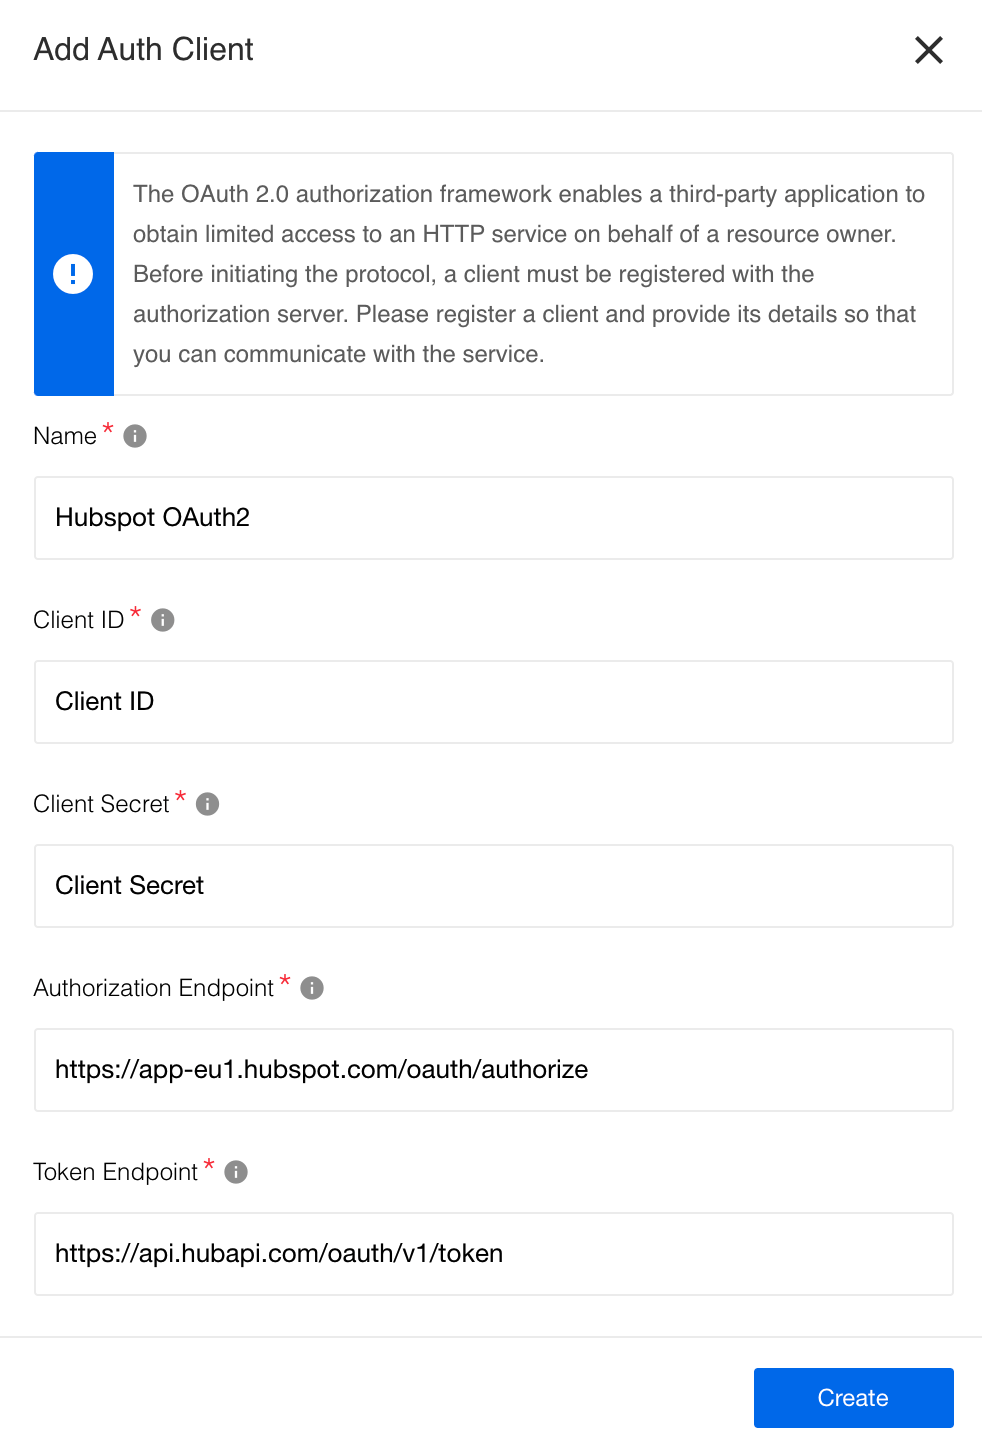
The following fields are required to create an oAuth2 client:
| Field name | Mandatory | Description |
|---|---|---|
Name |
True |
Your Auth Client’s name. |
Client ID |
True |
Your OAuth client key (provided by HubSpot). |
Client Secret |
True |
Your OAuth client secret (provided by HubSpot). |
Authorization Endpoint |
True |
Your OAuth authorization endpoint. For example, https://app.hubspot.com/oauth/authorize. |
Token Endpoint |
True |
Your OAuth Token endpoint for refreshing an access token: https://api.hubapi.com/oauth/v1/token. |
HubSpot credential creation
-
Complete the Name Your Credential field.
-
Select the Auth Client from the Choose Auth Client field dropdown list.
-
Complete the Scopes field with the text below, as shown in the following image:
crm.objects.contacts.read crm.objects.contacts.write crm.schemas.contacts.read crm.schemas.contacts.write crm.objects.owners.read.
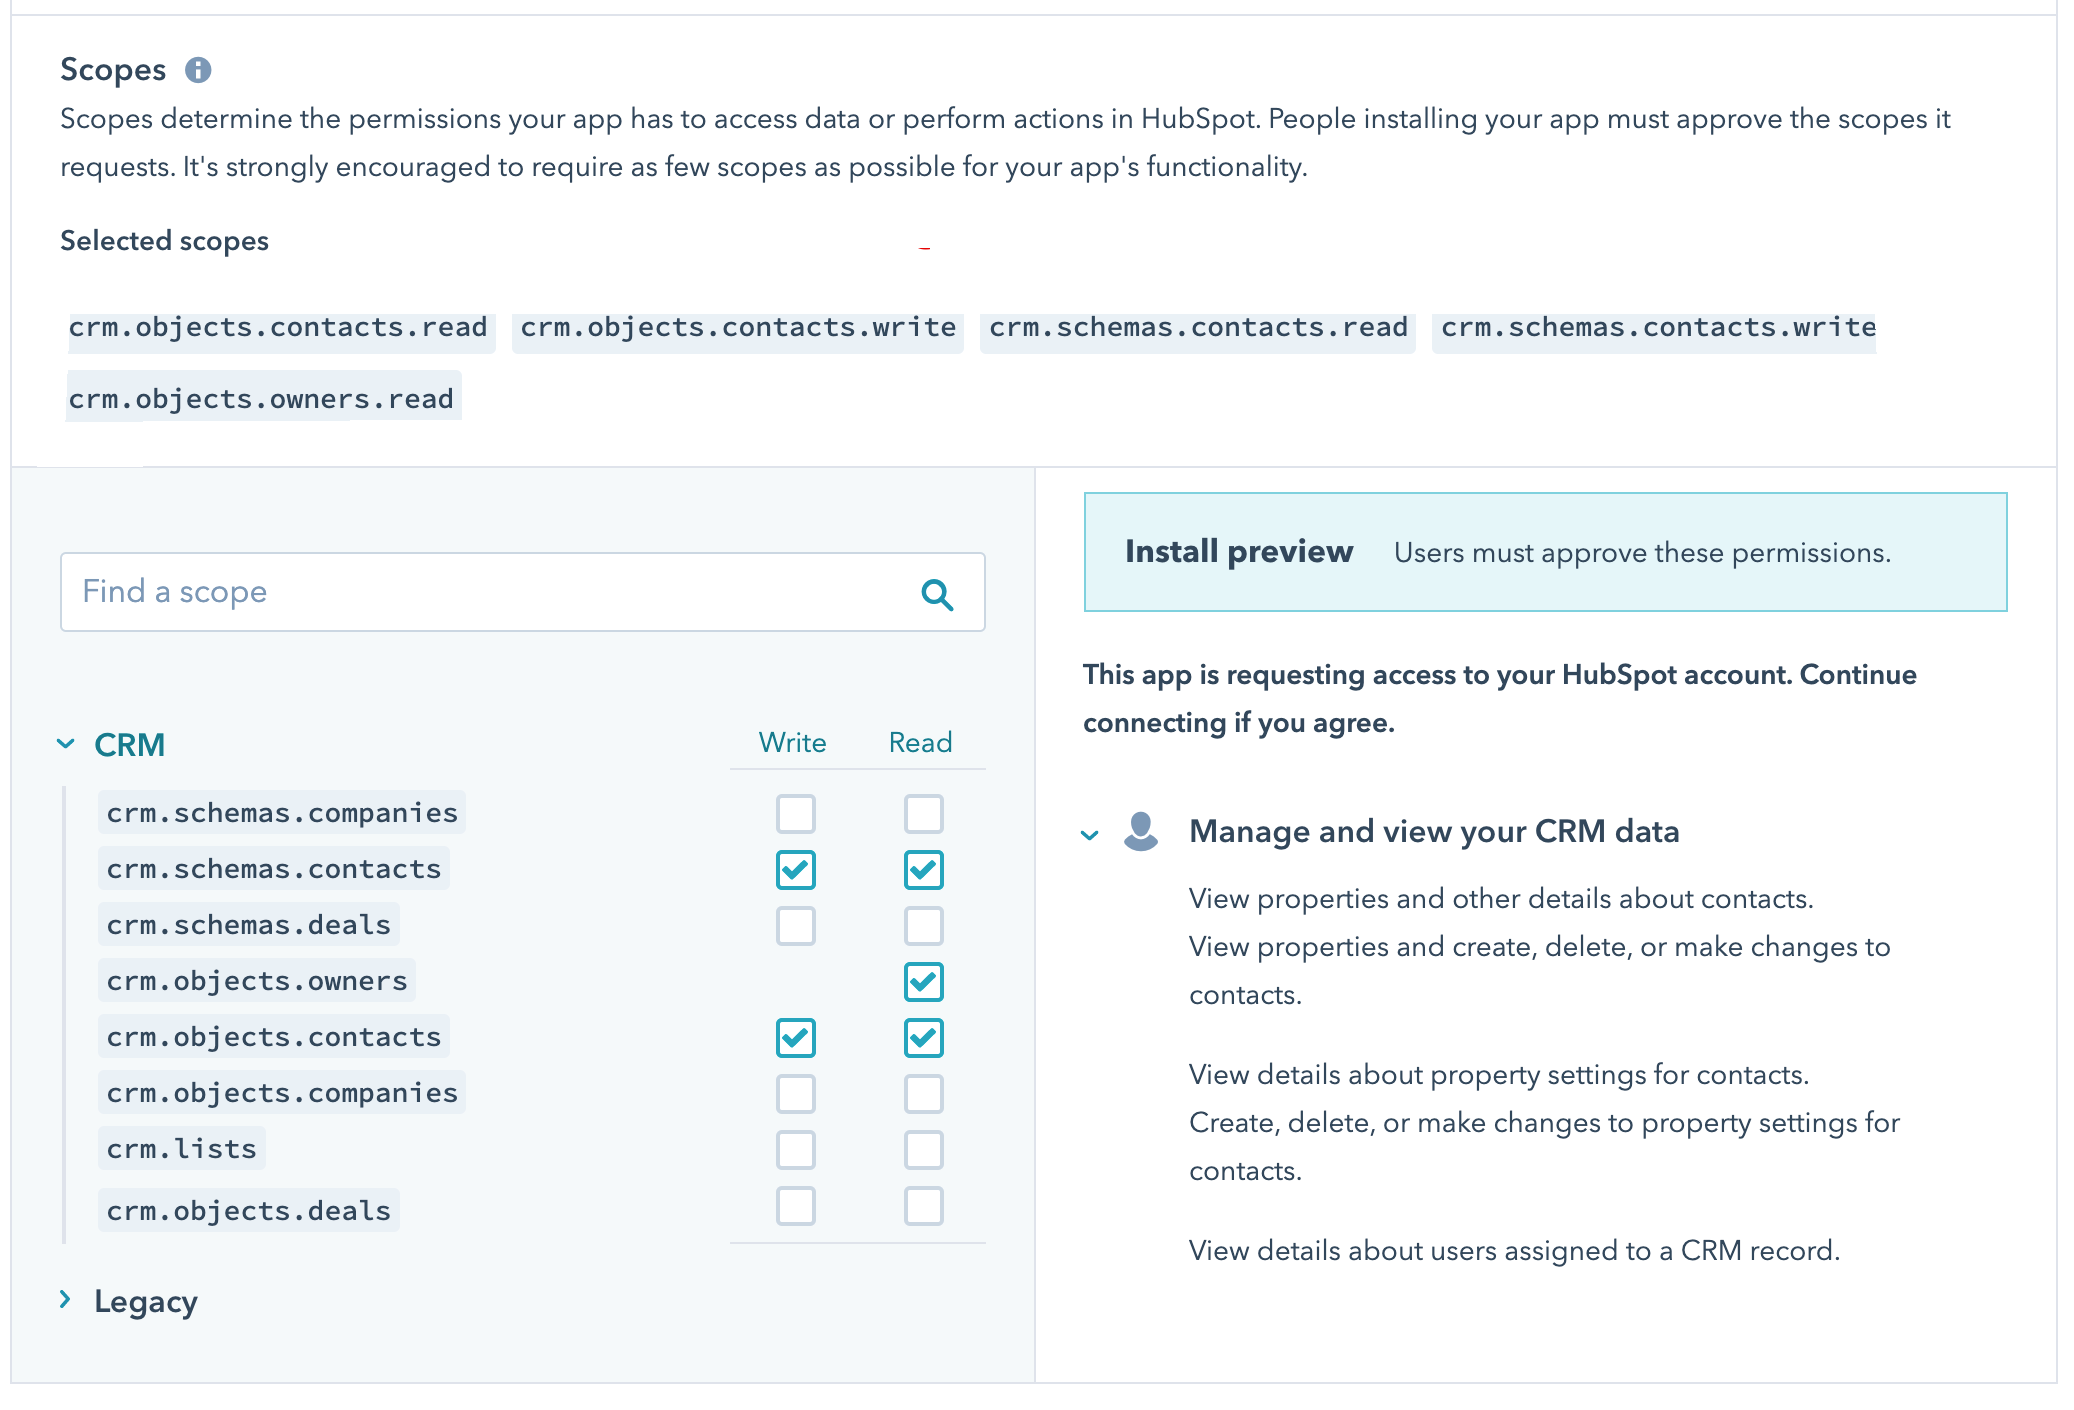
| When you select scopes, you will see them added in the Selected scopes field. Copy them to use during the credential creation process on the platform. These scopes must match; otherwise, you will not be able to use this component. |
Complete the form as shown in the screenshot and click the Save button to create an authentication client for your credential creation.