Tealium integration
Squiz has built an integration with Tealium using existing Squiz DXP features.
The integration enables real-time web personalization by connecting visitor data in Tealium directly with Squiz DXP. A Squiz DXP instance queries visitor profiles from Tealium in real-time.
When a visitor requests a page, Squiz DXP accesses their Tealium profile and instantly evaluates segmentation rules. Personalized content is then delivered based on a visitor’s most recent behaviors and attributes, as stored in Tealium, without relying on periodic data imports or manual synchronization.
Customer data from Tealium is also available within Squiz CDP and the Visual Page Builder. Marketers and content authors create, preview, and publish personalized experiences using no-code tools.
Benefits
Integrating Tealium with Squiz DXP provides several benefits:
- No-code personalization
-
Content authors can build, manage, and deploy personalization rules without requiring custom development by using the Visual Page Builder.
- Real-time data activation
-
Serve personalized content based on visitor behavior, as it happens.
When a visitor’s attributes change in Tealium (such as earning a new badge), their website experience can update on the next page load.
- Unified segmentation
-
Access Tealium attributes, badges, and audiences directly within the Squiz CDP Segment Builder. This removes the need to define and sync audiences between two different systems.
- Improved user experience
-
Visitors receive content and offers that are relevant to their known interests and recent behavior, which can lead to increased engagement and better conversion rates.
How it works
The integration connects two complementary platforms:
- Tealium AudienceStream (Data Hub)
-
This is where your customer data is collected and managed. Tealium tracks user events, creates visitor attributes (for example,
lifetime_event_count), and assigns badges (for example,frequent_visitor). - Squiz DXP (Experience Hub)
-
Activate that data through Squiz CDP segmentation and real-time personalization in Visual Page Builder.
You will primarily work within two areas of Squiz DXP:
- Squiz CDP
-
To build audience segments using your Tealium data.
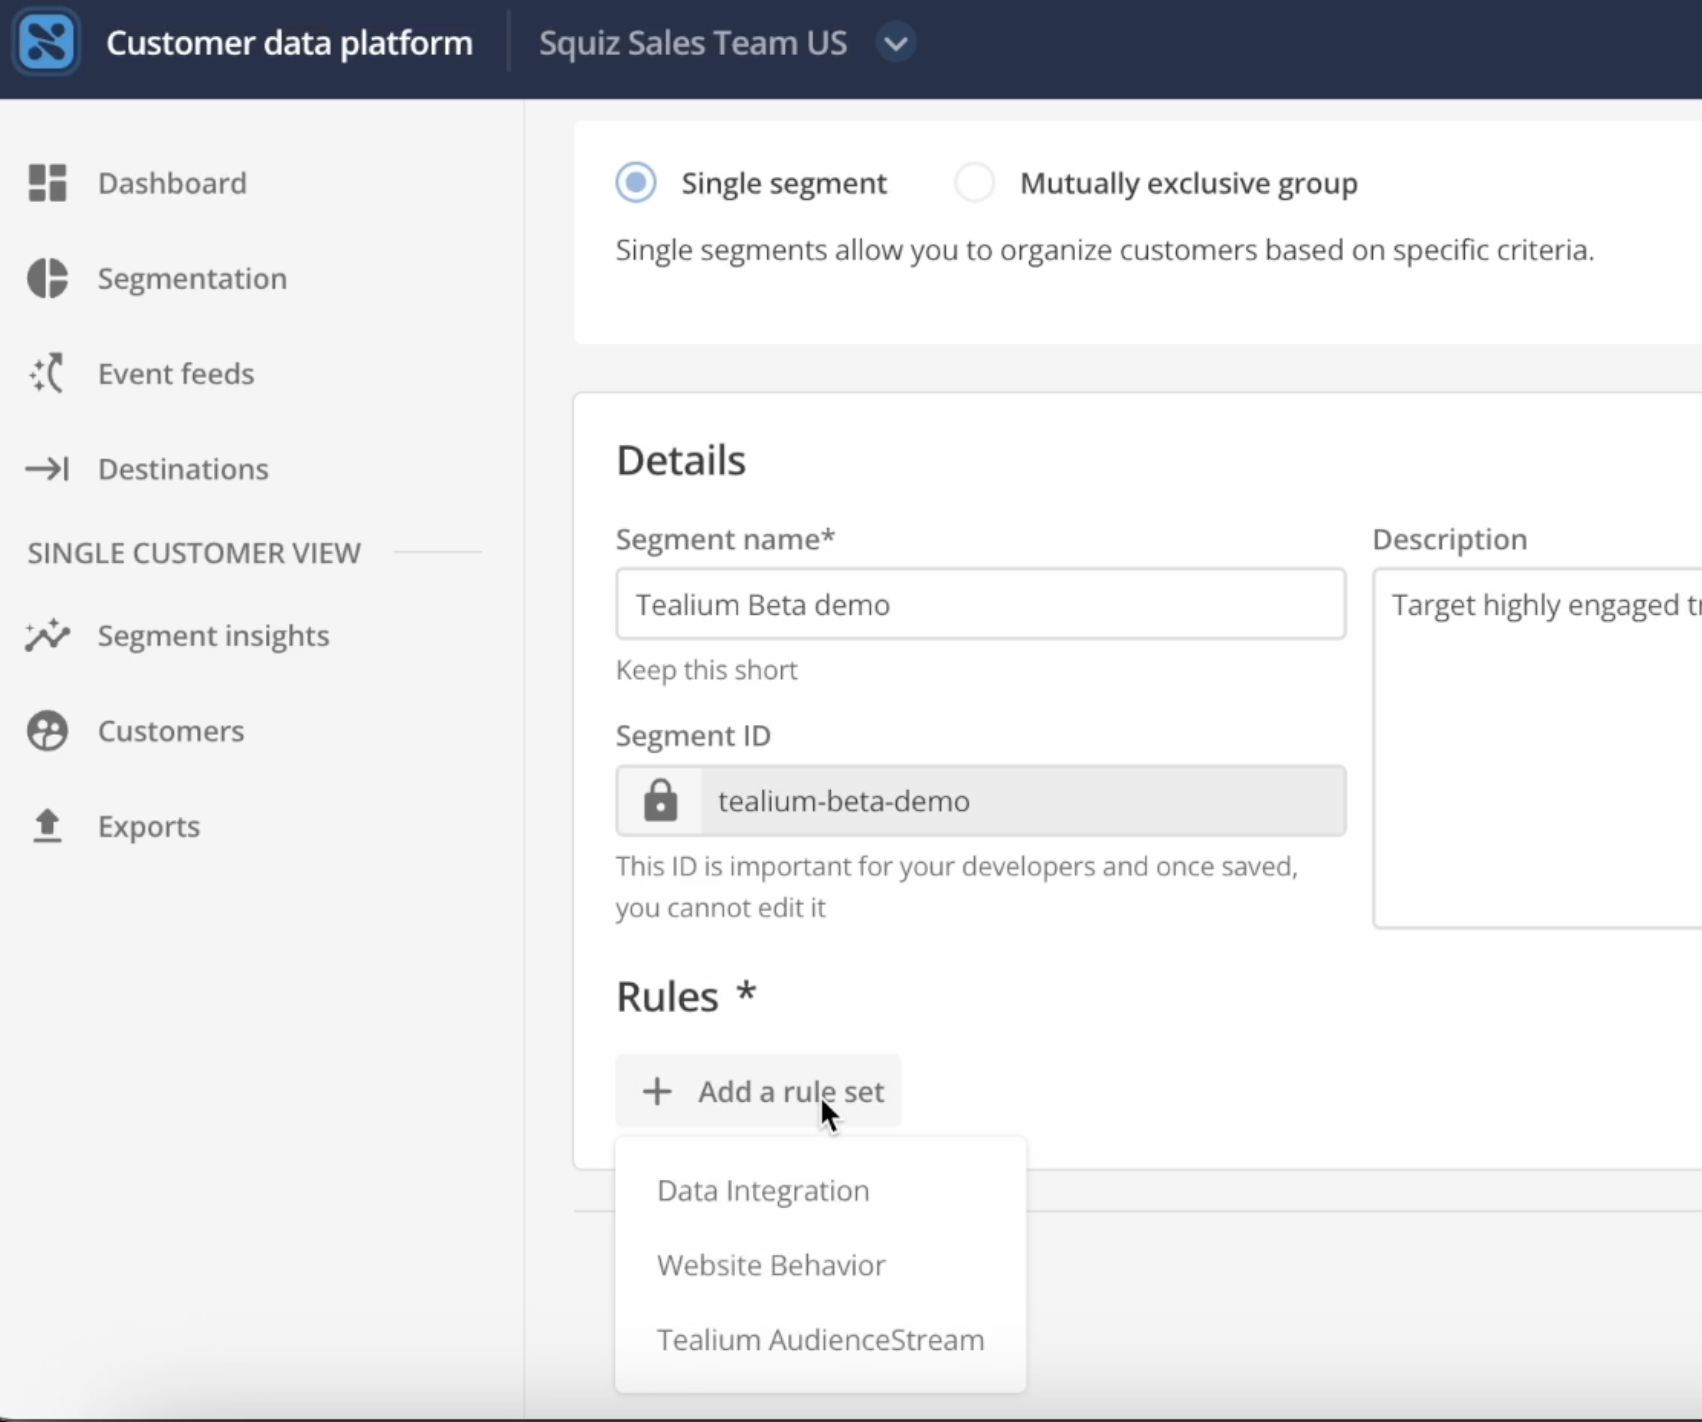 Figure 1. Tealium CDP Segment creation interface
 - Squiz Visual Page Builder
-
To apply those segments to your website’s page components.
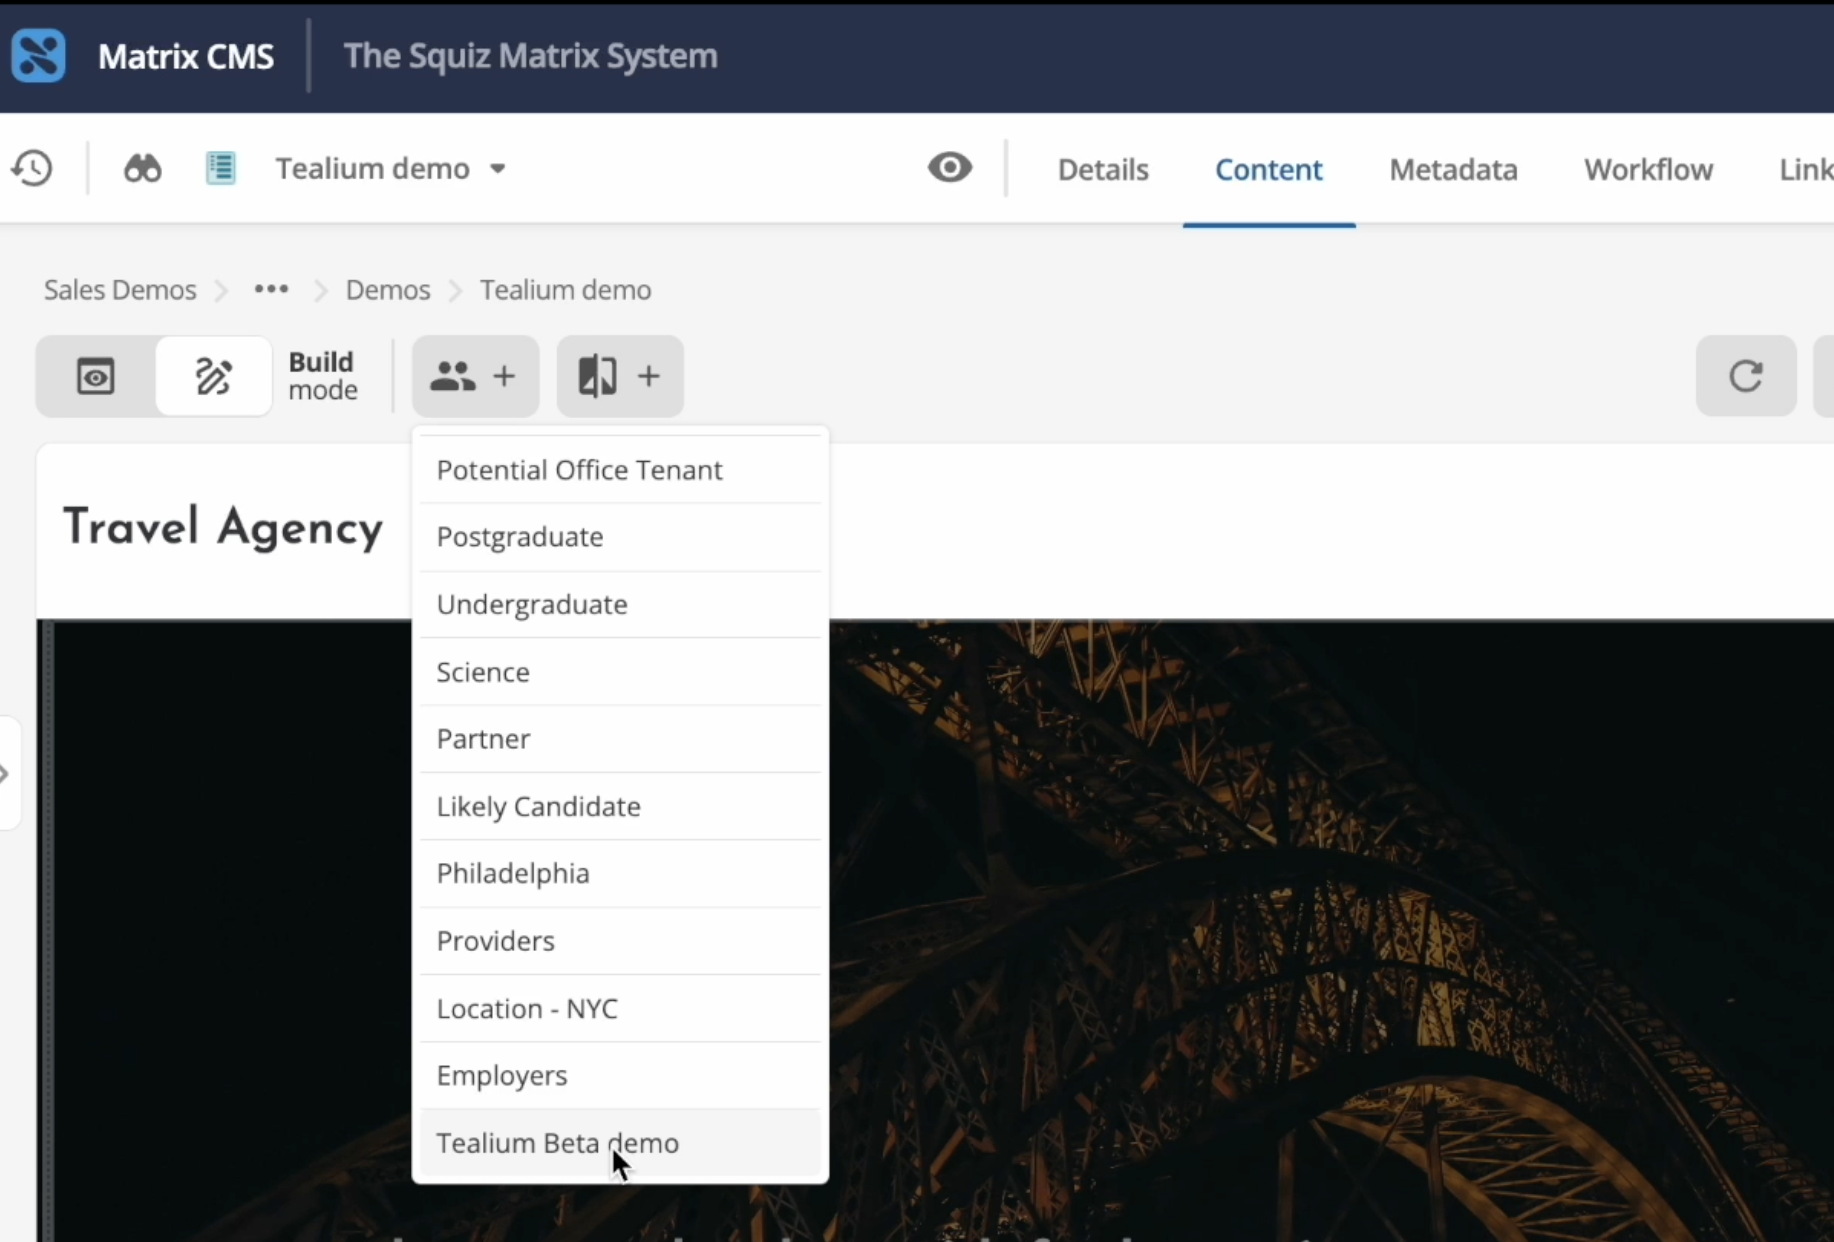 Figure 2. Tealium Visual Page Builder personalization interface
Configuration
The Tealium integration is managed through the Squiz DXP Console Extension UI. See the Extension UI documentation for more information about managing extensions.
|
Please contact Support to enable the feature flag required for the Tealium integration in CDP. |
-
Navigate to Configuration from your Squiz DXP Console dashboard.
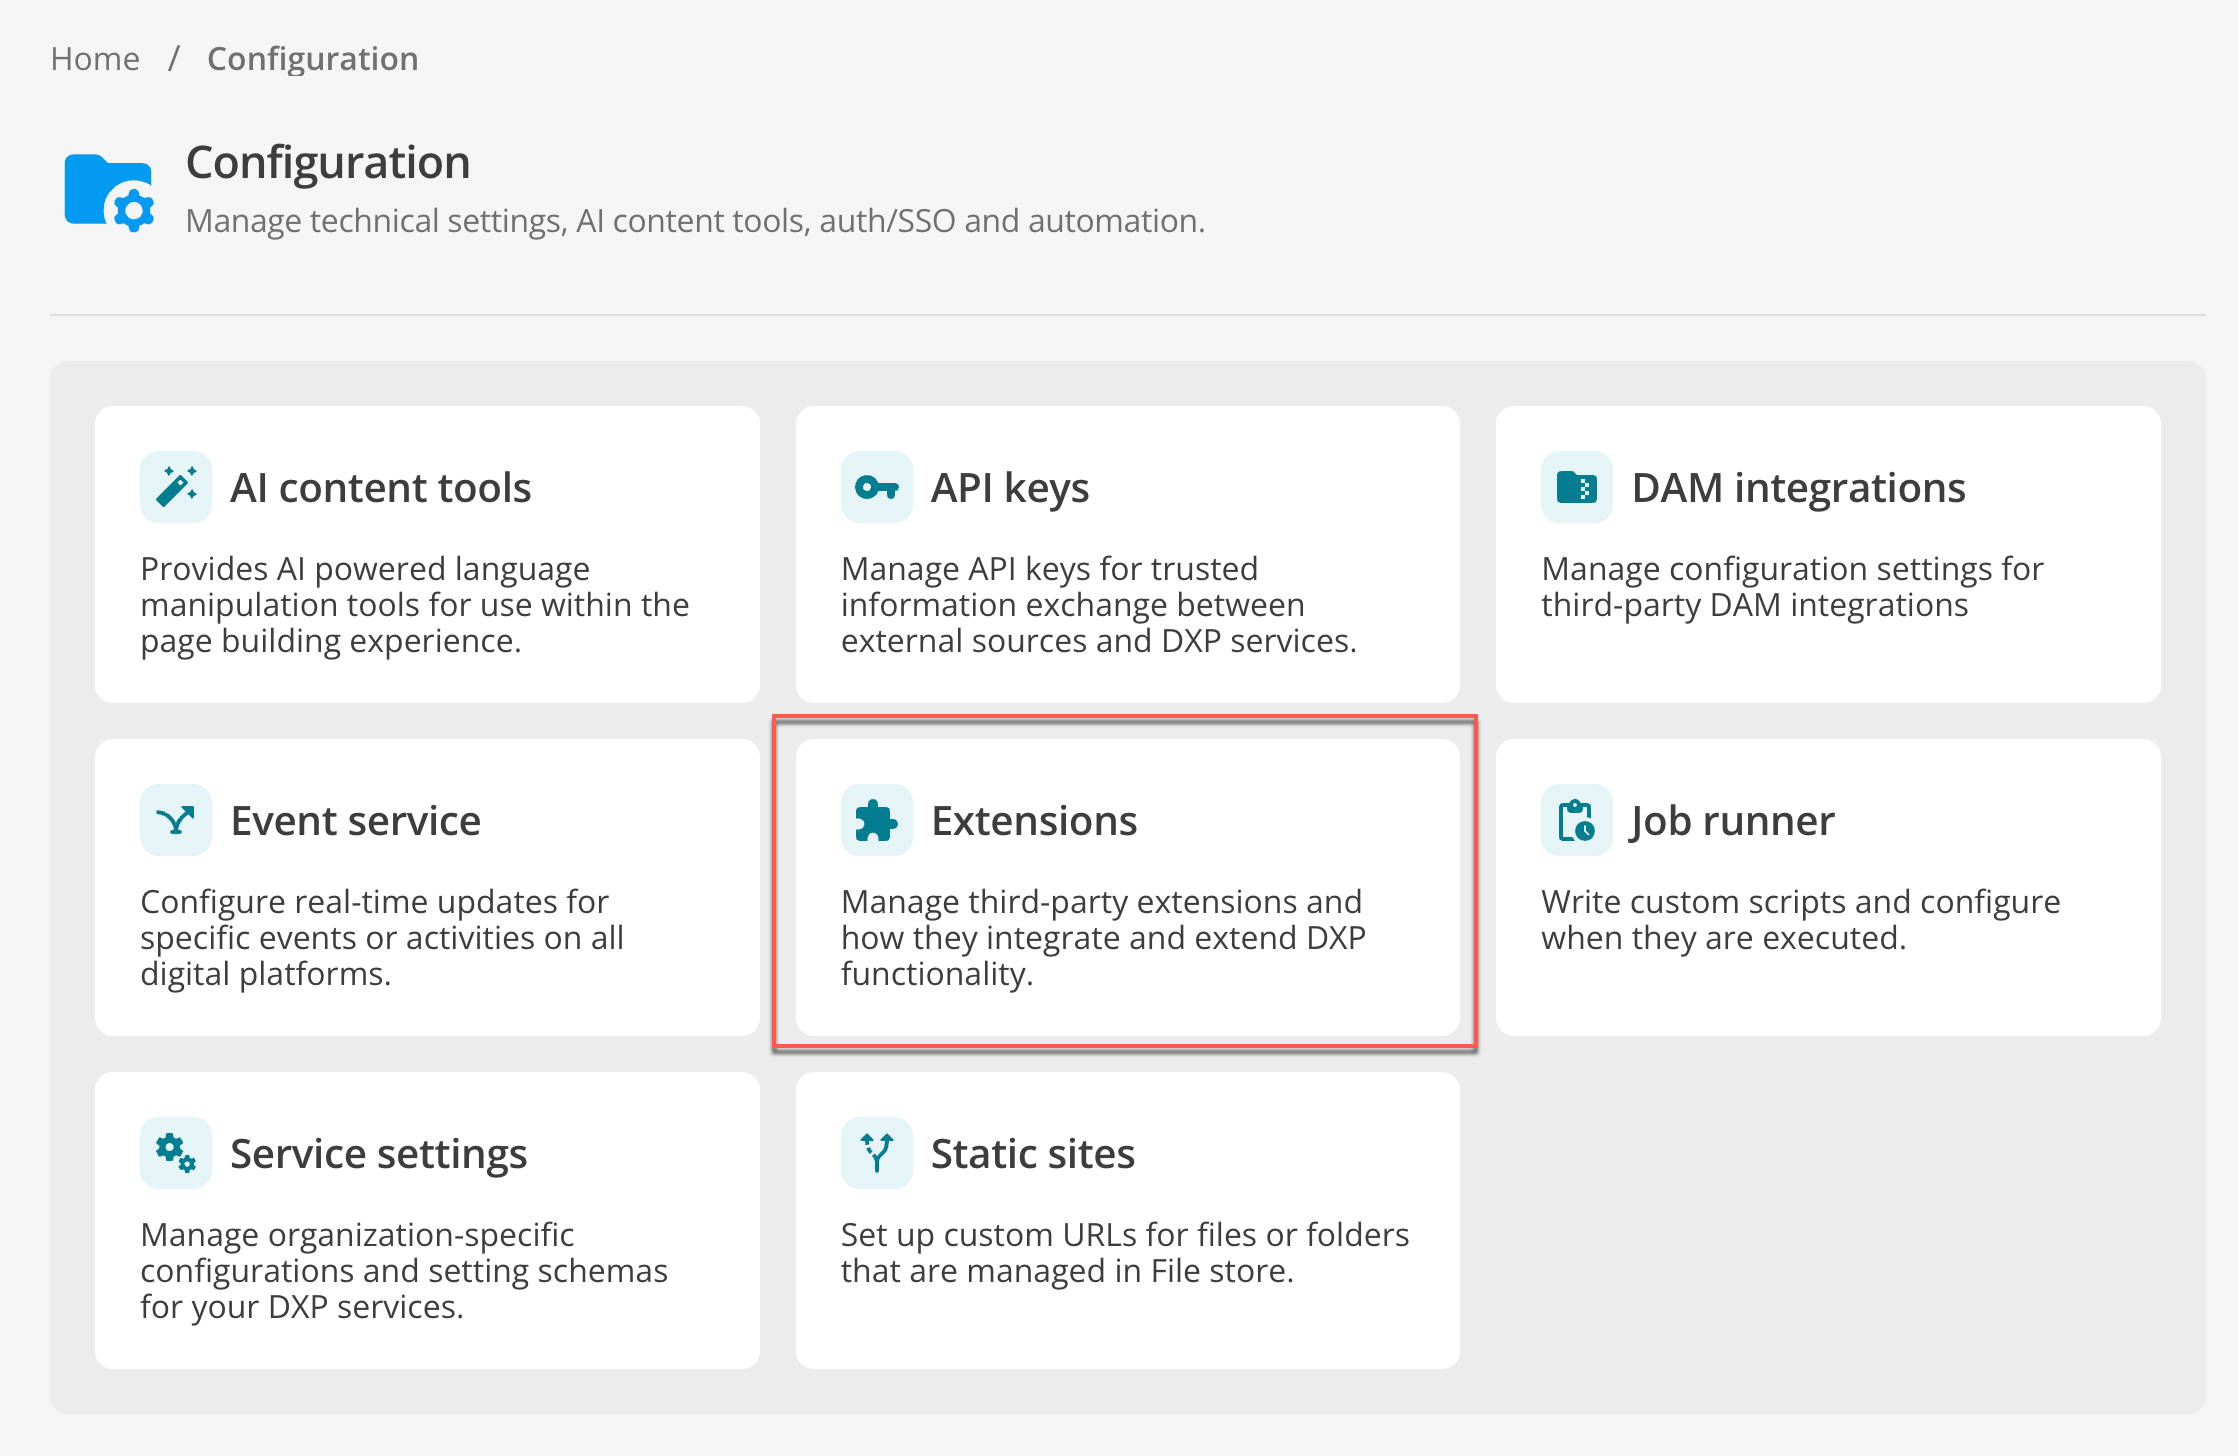 Figure 3. The Extensions tile within the Squiz DXP Console Configuration dashboard
 -
Click the Add extension button.
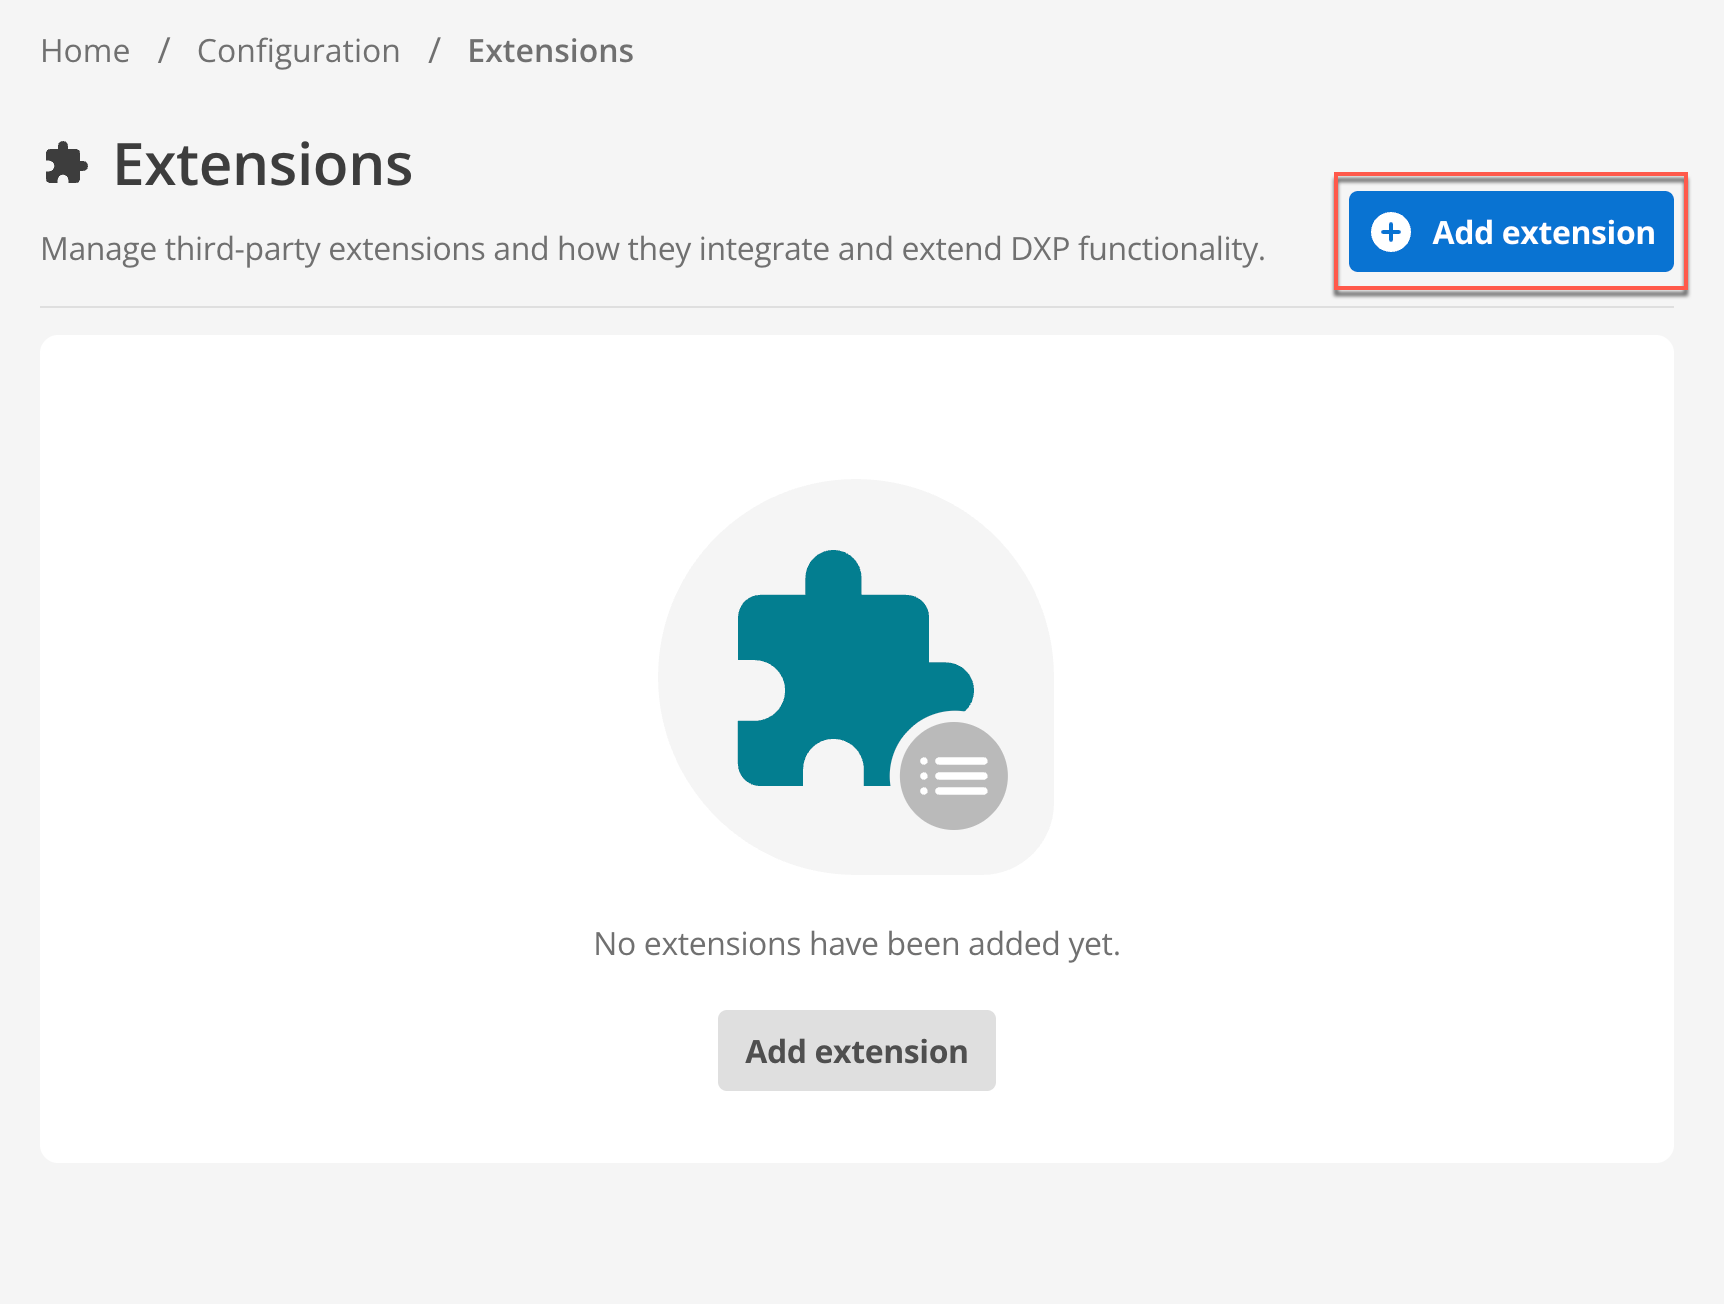 Figure 4. The Extensions landing page showing the 'Add extension' button
 -
Choose the Tealium CDP extension type.
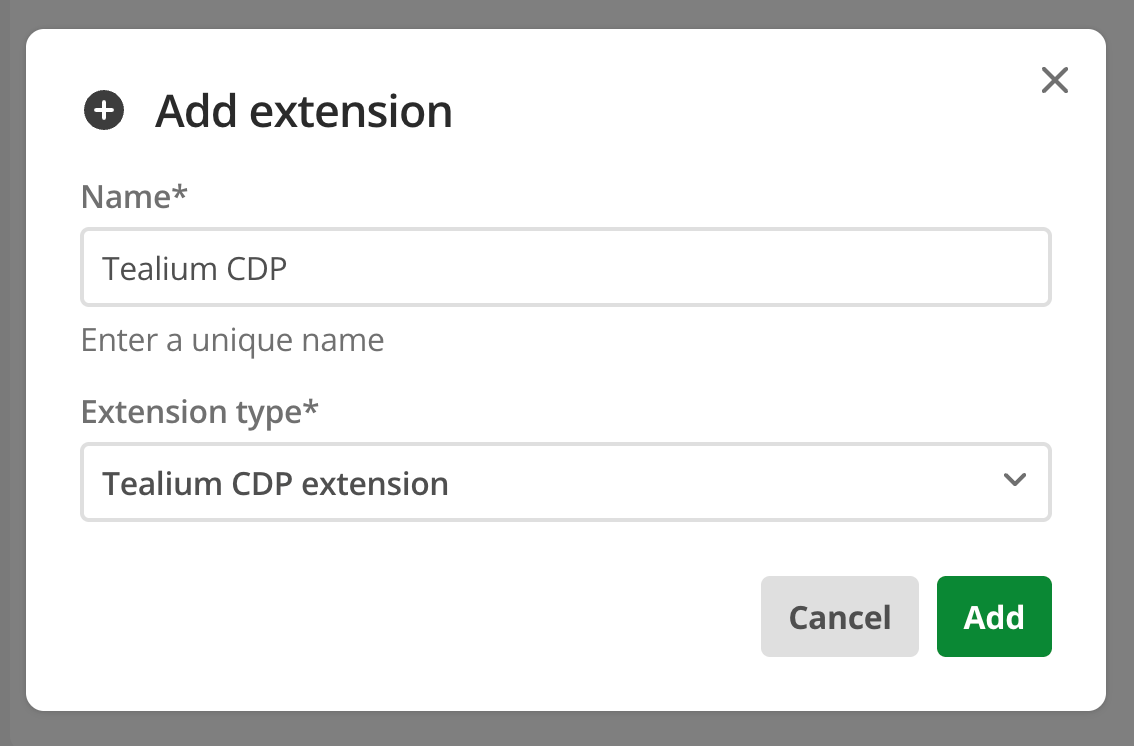 Figure 5. The Create an extension modal for Tealium CDP
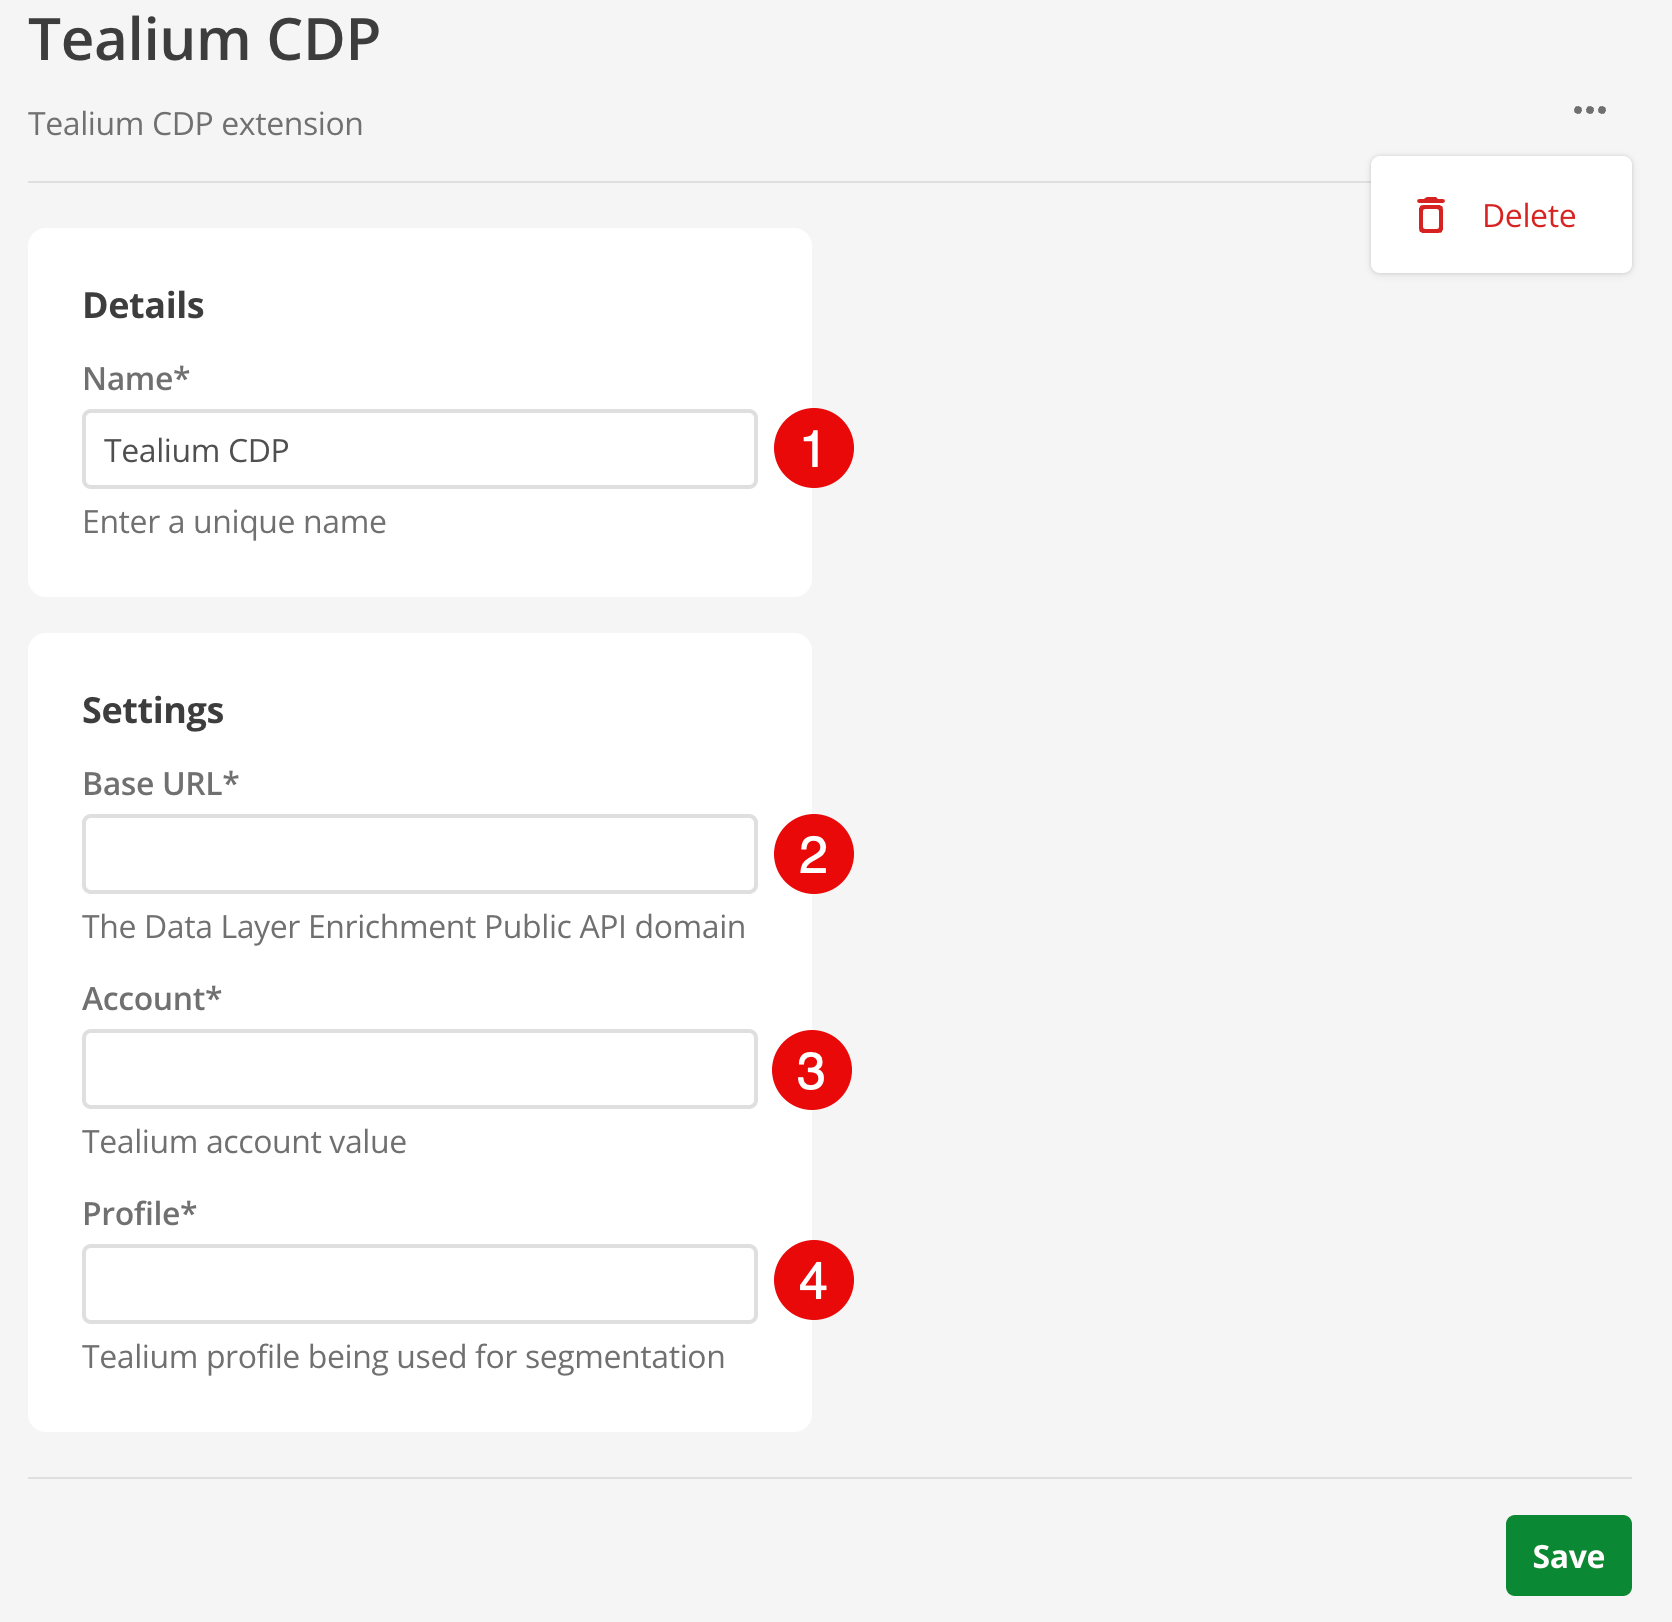
Provide these values for connecting Squiz DXP with your Tealium instance:
-
Name: A descriptive name for the extension (for example, Tealium CDP).
-
Base URL: The base URL of your Tealium deployment. Include the HTTP(S) protocol in the URL. For example,
https://visitor-service-ap-southeast-2.tealiumiq.comThis is a required value. -
Account: The name of the Tealium account.
For example,
squiz-sandboxThis is a required value.
-
Profile: The name of the Tealium profile.
For example,
mainThis is a required value.
Tealium visitor ID requirement
Ensure that Tealium is configured to generate the {{utag_main_v_id}} visitor identifier cookie.
For Squiz DXP to retrieve a visitor profile from Tealium AudienceStream during page requests, a Tealium visitor identifier must be available in the visitor’s browser.
Squiz DXP uses this identifier to retrieve visitor profiles from Tealium AudienceStream for audiences, badges, and visitor attributes.
If the {{utag_main_v_id}} cookie is not present, Squiz DXP cannot retrieve the visitor profile, so Tealium-based segmentation and personalization will not be applied.
Verify the visitor ID cookie
Open your browser developer tools and confirm that the {{utag_main_v_id}} cookie is present for your site.
Example:
{{utag_main_v_id=0197f7d00001001f8c7c4c1a4b6f05076001006f00838}}Tealium configuration
For Tealium implementations using utag.js version 4.50 or later, the {{utag_main_v_id}} cookie may not be created automatically for all visitors.
Tealium documentation: Tealium Collect tag cookies
Ensure one of the following is configured:
-
The Tealium Collect tag is deployed and generating the visitor ID.
-
The
{{always_set_v_id}}setting is enabled in Tealium to force generation of the visitor ID for all visitors.
Example configuration:
window.utag_cfg_ovrd = window.utag_cfg_ovrd || {};
window.utag_cfg_ovrd.always_set_v_id = true;
After configuration, verify that the {{utag_main_v_id}} cookie is present before testing Tealium-based personalization in Squiz DXP.
Before you begin in Squiz DXP, ensure your Tealium AudienceStream instance is configured to capture the data you want to use.
This integration can access:
- Audiences
-
Broad groups of users (for example, Travel Site Visitors).
- Badges
-
Specific achievements (for example, Frequent Visitor, Fan).
- Attributes
-
Any visitor attribute, such as
lifetime_event_countorlast_visit_date.
Creating a segment in Squiz CDP
First, define the audience you want to target.
-
Navigate to Squiz CDP from your Squiz DXP dashboard.
-
In the left-hand menu, select Segmentation.
-
Click the Create a segment button.
-
Enter a clear Segment name (for example, Engaged Travel Planners).
-
In the Rules section, click Add a rule set.
-
From the dropdown, select the Tealium AudienceStream rule set.
-
Build your rule by referencing your Tealium data:
- **Object
-
Choose what to check: Audiences, Badges, or Other attributes.
- ID/Name
-
Select the specific Tealium attribute from the dropdown (for example,
Frequent visitorbadge orlifetime_event_countattribute). - Rule
-
Set the logic (for example, is assigned for a badge, or
Greater than 2for an event count).
-
Add multiple rules using AND/OR logic (for example, Visitor has Frequent visitor badge AND Lifetime event count is greater than 2).
-
Click Save to finalize your segment.
For more information about creating segments, read the Create a single segment page in the Customer Data Platform documentation.
Applying the segment in Visual Page Builder
For detailed instructions on how to apply personalization segments to content blocks, see the Add personalization to a content block page in the Visual Page Builder documentation.
Visitor experience
For more information about personalization, see the Personalization page in the Visual Page Builder documentation.