Asset Bank
Squiz has built an integration with Asset Bank using existing Squiz DXP features.
This integration enables users to use imagery managed in external digital asset managers within their page content.
Users can configure the integration to use Asset Bank with their DXP components.
The integration works with squizimage and squizlink Component input fields, as well as Component WYSIWYG Link and Image.
Anywhere an image or link is used in a formatted text or as an image or link is included in a component, you can select an image from Asset Bank as a source.
|
This integration requires the Content Management system’s This is the default permission in newly created systems, but systems created before the release of DAM integrations might not have it applied yet. |
Create the Asset Bank authorization application
You need to create an authorization application in Asset Bank and obtain the necessary credentials to pass through to the DAM integration configuration in Squiz DXP.
The application provides the necessary authentication information for these integration points:
-
DAM configuration settings as described in Squiz DXP Configuration.
-
DAM integration selection options in the Content Management frontend, as described in How Content editors use the Asset Bank integration.
Create the Asset Bank authorization application
| Read the Asset Bank API Documentation for the latest vendor configuration documentation. |
-
Navigate to the area and click Add new OAuth2 credentials.
-
Fill in the form:
- Name
-
Squiz Content Management Integration
- Description
-
Squiz API credentials for integrating with Squiz Content Management.
- Client ID
-
Click Generate to generate the client ID automatically.
- Secret
-
Click Generate to generate the secret automatically.
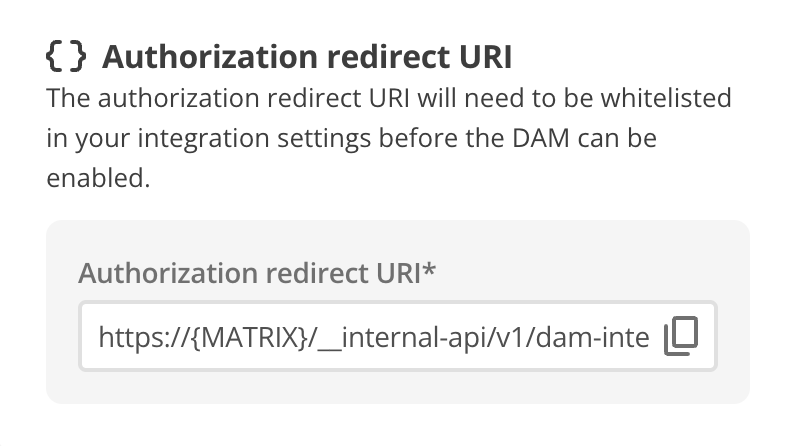
- Redirect URIs
-
Copy the URI from Step 15: Authorization Redirect URI and replace
MATRIXwith the actual CMS domain.
-
Copy the values for
Client IDandSecretto a temporary location so you can add them into the Squiz DXP configuration settings. -
Save the form.
Set the URL signing secret
| Make sure URL signing is enabled or the integration may not work as expected. |
For AssetBank to return a valid URL for a file, you also need to configure the secret key for URL signing.
-
Navigate to the page.
-
Click Manage your API settings.
-
Set the Secret key for URL Signing.
Squiz DXP Configuration
To present Asset Bank as a Digital Asset Management (DAM) option, Asset Bank must be integrated through the DXP configuration settings page.
This procedure assumes you have the Admin, Developer, or Owner role required to undertake this task.
| All steps and fields in this procedure are required except where noted. |
-
Navigate to
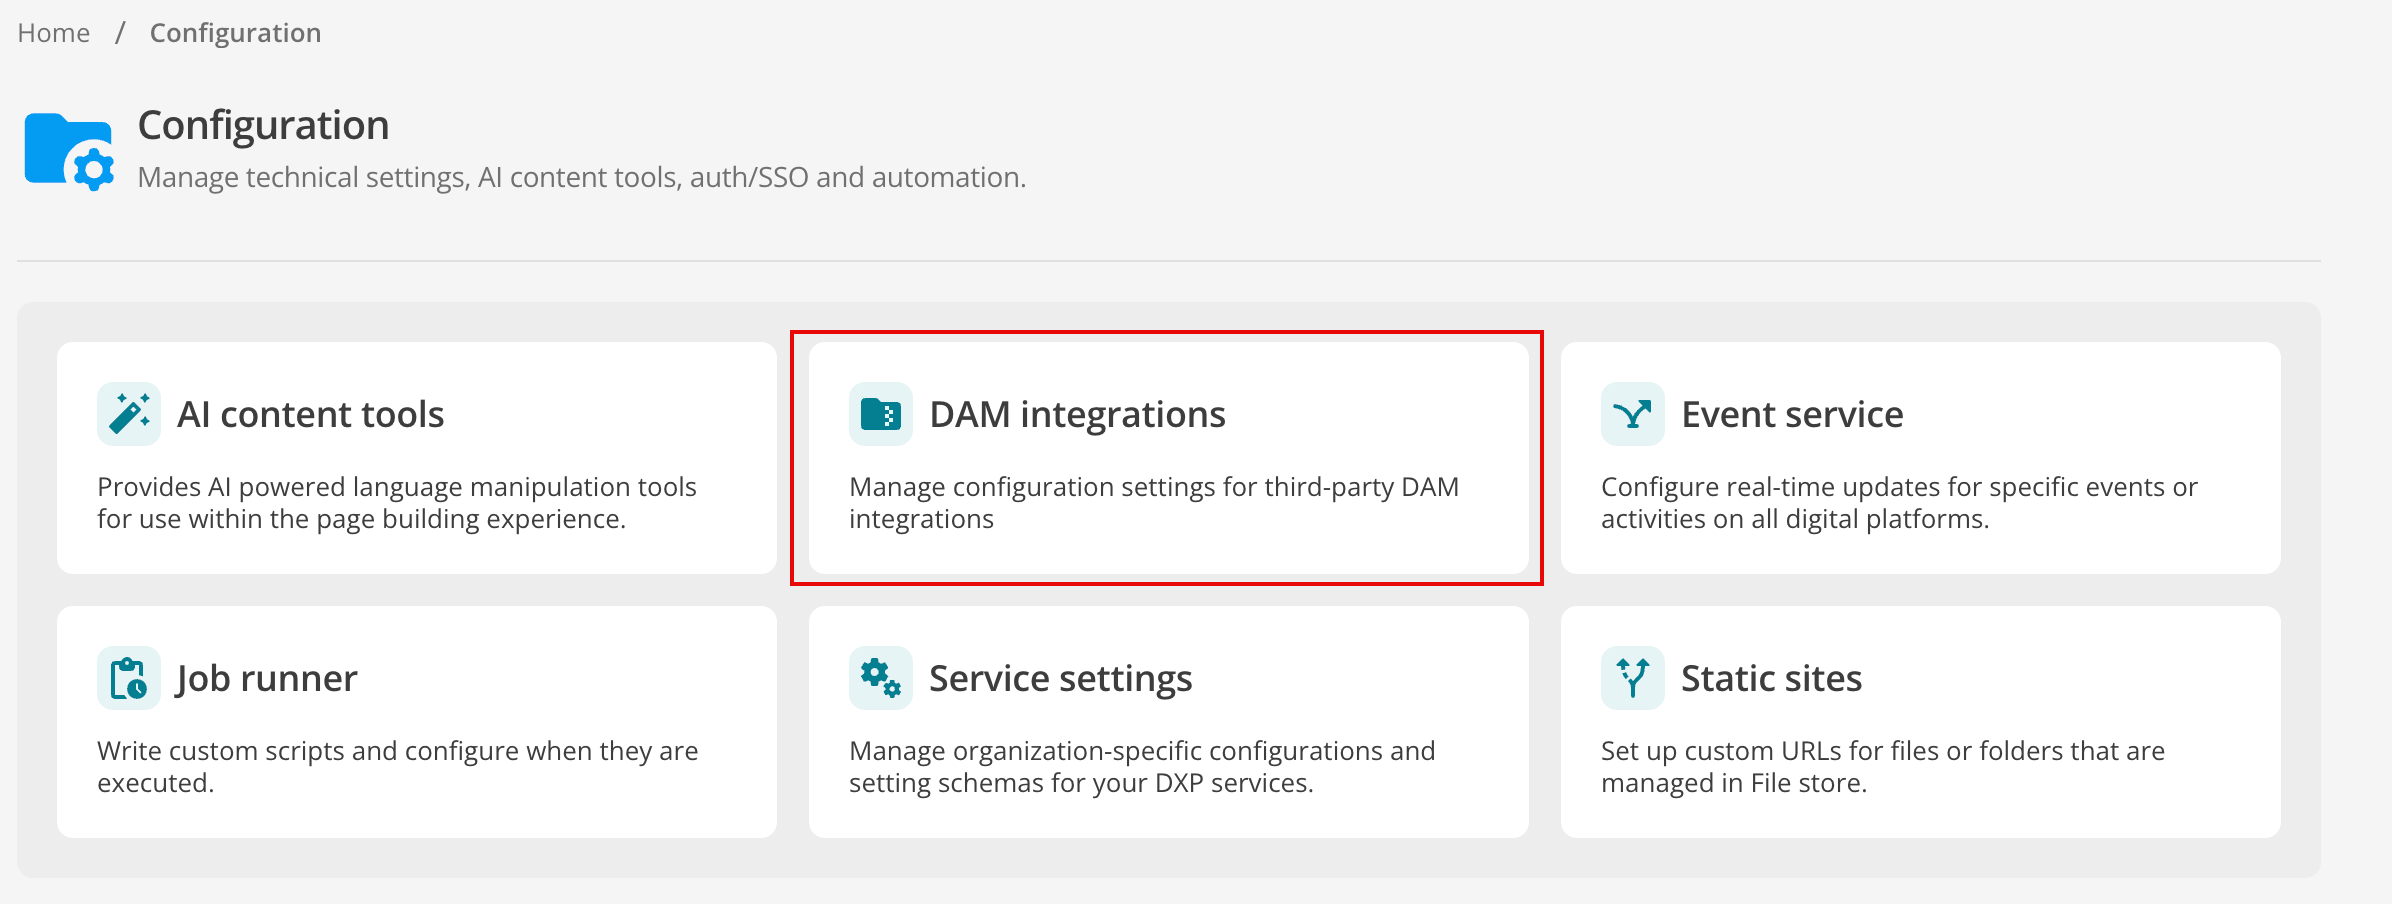 Figure 1. Configuration page with DAM integrations highlighted.
 -
Click the Add DAM button.
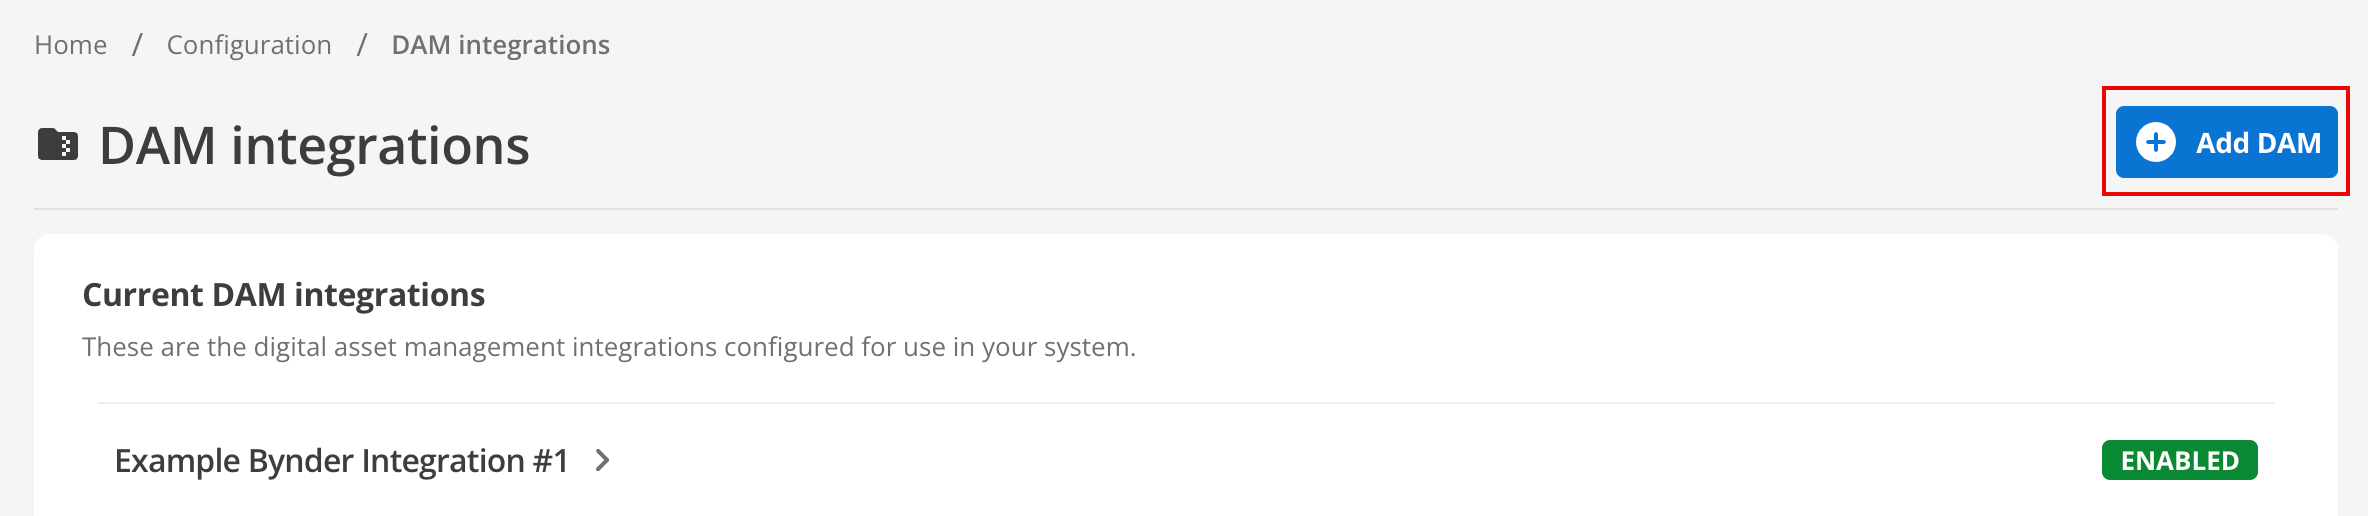 Figure 2. DAM integrations page with ⊕ Add DAM button highlighted.
The ⊕ Add DAM dialog appears.
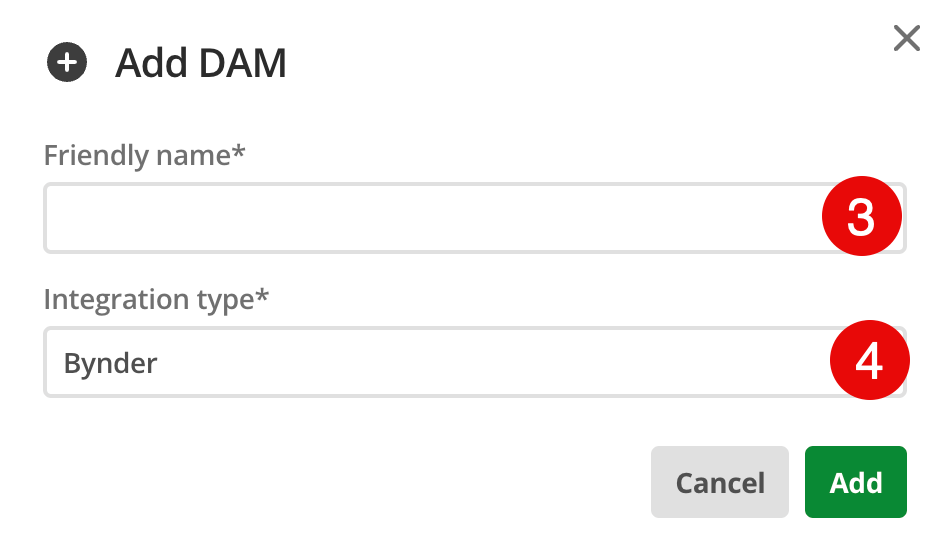 Figure 3. ⊕ Add DAM dialog.
 -
Provide a Friendly name for the integration.
Choose a name that is descriptive and memorable. Generic names are challenging to manage in greater numbers.
-
Select Asset Bank from the Integration type drop-down and then click Add.
-
On the Details section confirm the Friendly name.
This field automatically takes the value provided previously in the ⊕ Add DAM dialog.
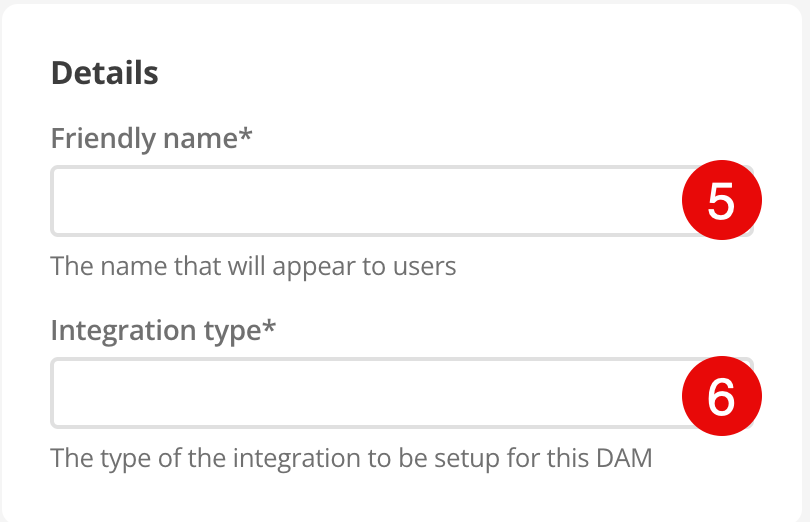 Figure 4. Add DAM details.
 -
Select Asset Bank from the drop-down list in the Integration type field.
Configure the render settings
-
Provide the sign-in details for your Asset Bank instance based on the configuration made in Create the Asset Bank authorization application:
 Figure 5. Render settings dialog.
- Auth URL
-
This URL is used to redirect the user to the authorization application endpoint in the front-end authorization flow.
The format is as follows: https://ASSETBANK_URL/oauth/authorize.
Replace ASSETBANK_URL with the root domain from step 9.
- Client ID
-
This is the Client ID for the front-end application authorization flow.
- Client Secret
-
This is the secret for the front-end application authorization flow.
Configuration settings
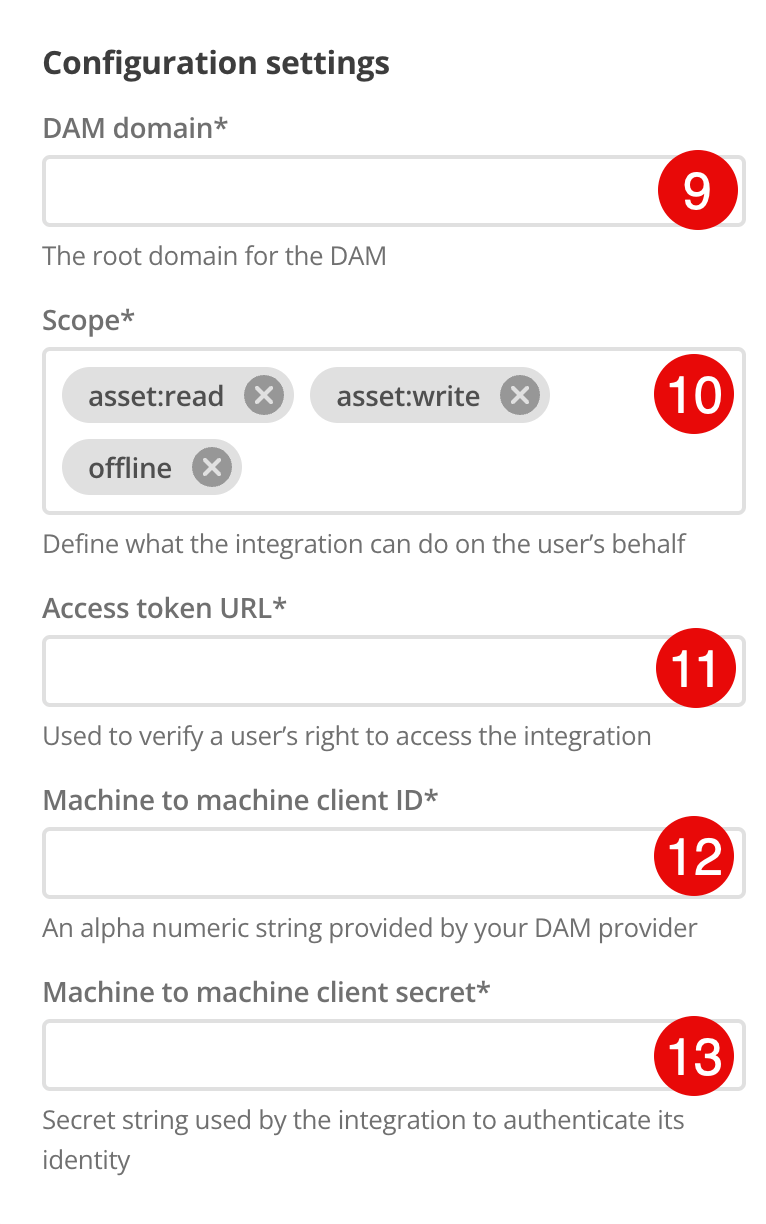
-
Supply the root domain for your Asset Bank instance in the DAM domain field.
-
Add (or confirm) the Scopes available to the integration.
-
Provide the Access token URL.
This is the URL to the token endpoint to retrieve an access token which can be used to authorize API requests in machine to machine flow.
The format is as follows: https://ASSETBANK_URL/oauth/token.
Replace ASSETBANK_URL with the root domain from step 9.
-
Copy the
Client IDyou saved in Create the Asset Bank authorization application and paste the value into the field. -
Copy the
Client Secretyou saved in Create the Asset Bank authorization application and paste the value into the field.
How Content editors use the Asset Bank integration
-
Navigate to a content page asset that has a component that uses an image or link. Alternatively, add such a component to a new page.
-
Click the Choose image button, and you will be presented with the following options:
-
Matrix.
-
Asset Bank.
-
Select the Asset Bank option.
-
Sign in to the service if prompted. Click the button and a window will open to allow you to sign in.
-
After authentication, you will be returned to your content page, and the files from Asset Bank will be available to select and fill.
Original and thumbnail image varieties are automatically retrieved from Asset Bank and made available when selecting an image to insert into your content.