Bynder
Squiz has built an integration with Bynder using existing Squiz DXP features.
This integration enables users to use imagery managed in external digital asset managers within their page content.
Users can configure the integration to use Bynder with their DXP components.
The integration works with squizimage and squizlink Component input fields, as well as Component WYSIWYG Link and Image.
Anywhere an image or link is used in a formatted text or as an image or link is included in a component, you can select an image from Bynder as a source.
|
This integration requires the Content Management system’s This is the default permission in newly created systems, but systems created before the release of DAM integrations might not have it applied yet. |
Configuration
To use Bynder as a Digital Asset Management (DAM) option, Bynder must be integrated through the DXP configuration settings page.
This procedure assumes you have the Admin, Developer, or Owner role required to undertake this task.
| All steps and fields in this procedure are required except where noted. |
-
Navigate to
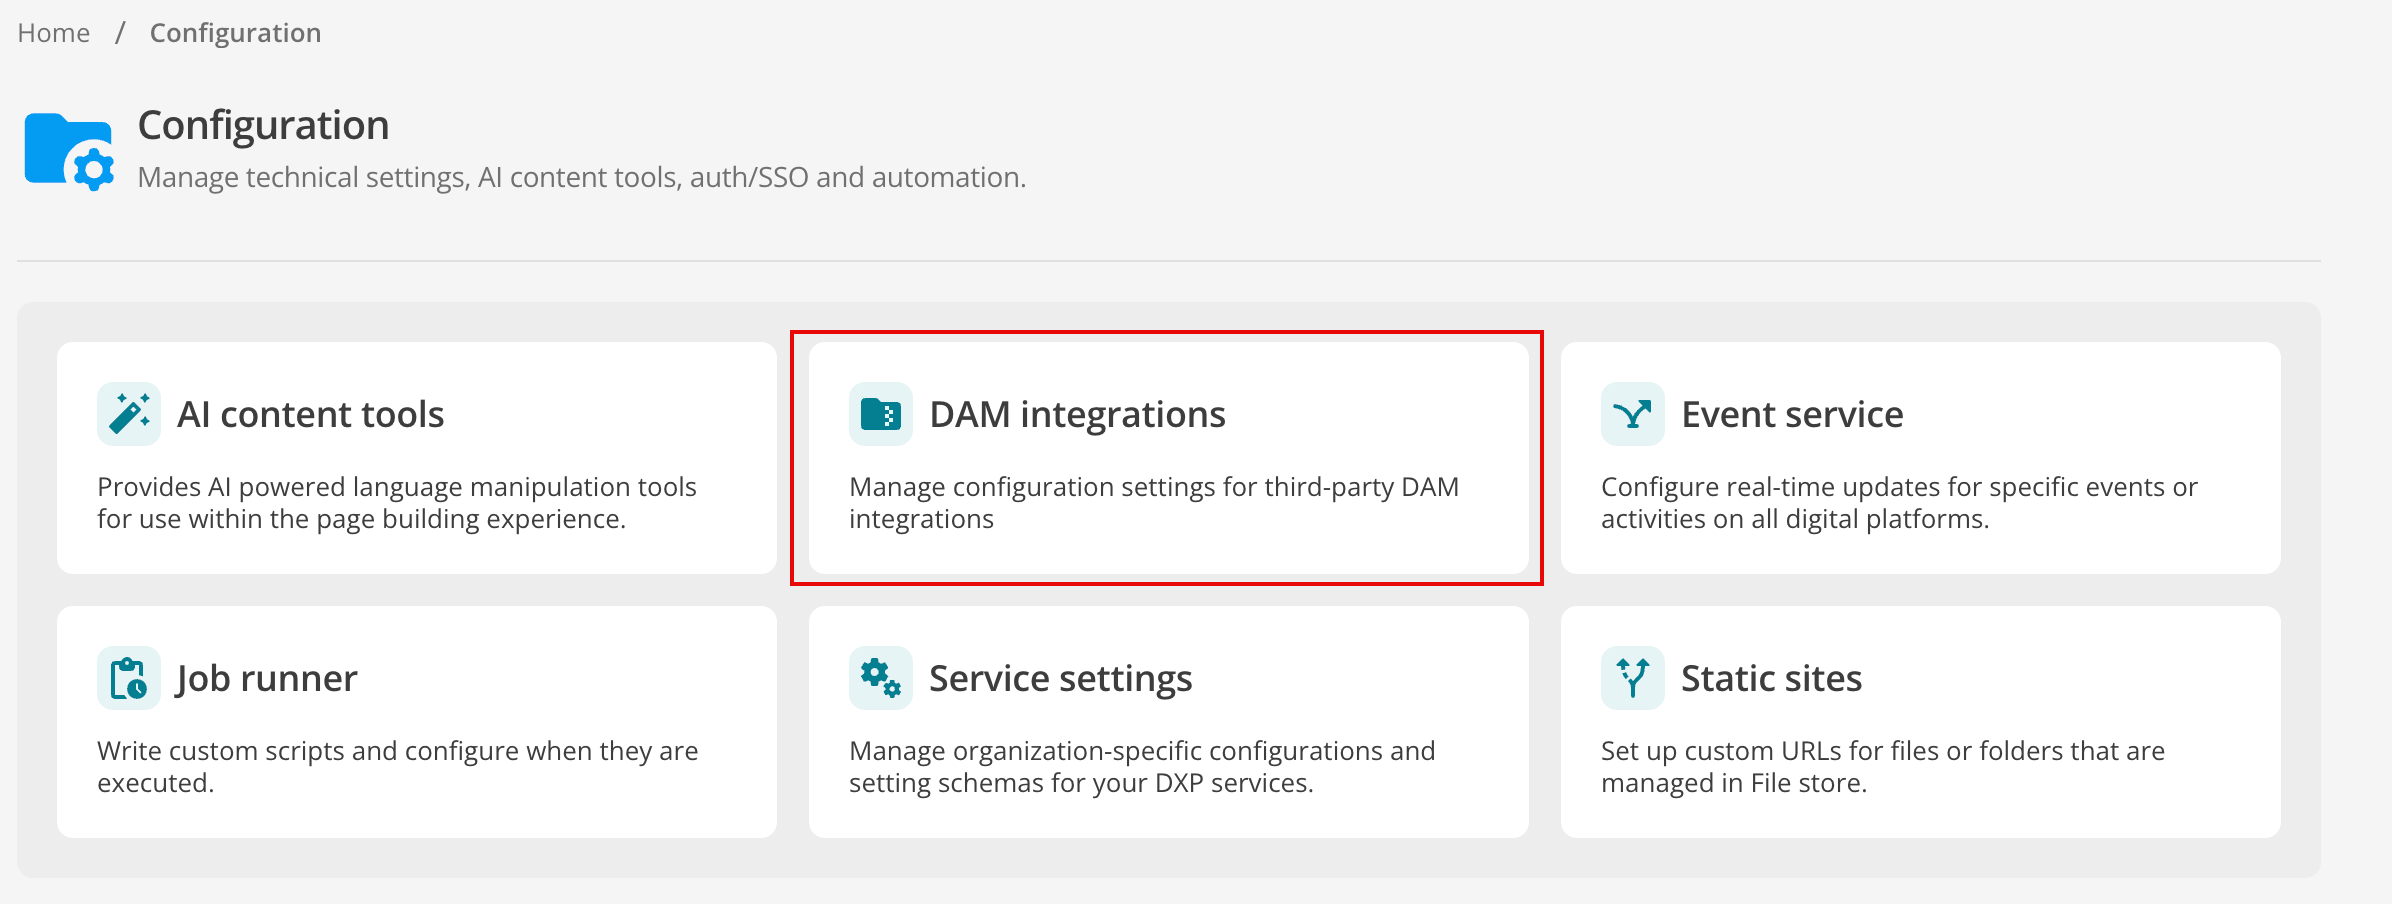 Figure 1. Configuration page with DAM integrations highlighted.
 -
Click the Add DAM button.
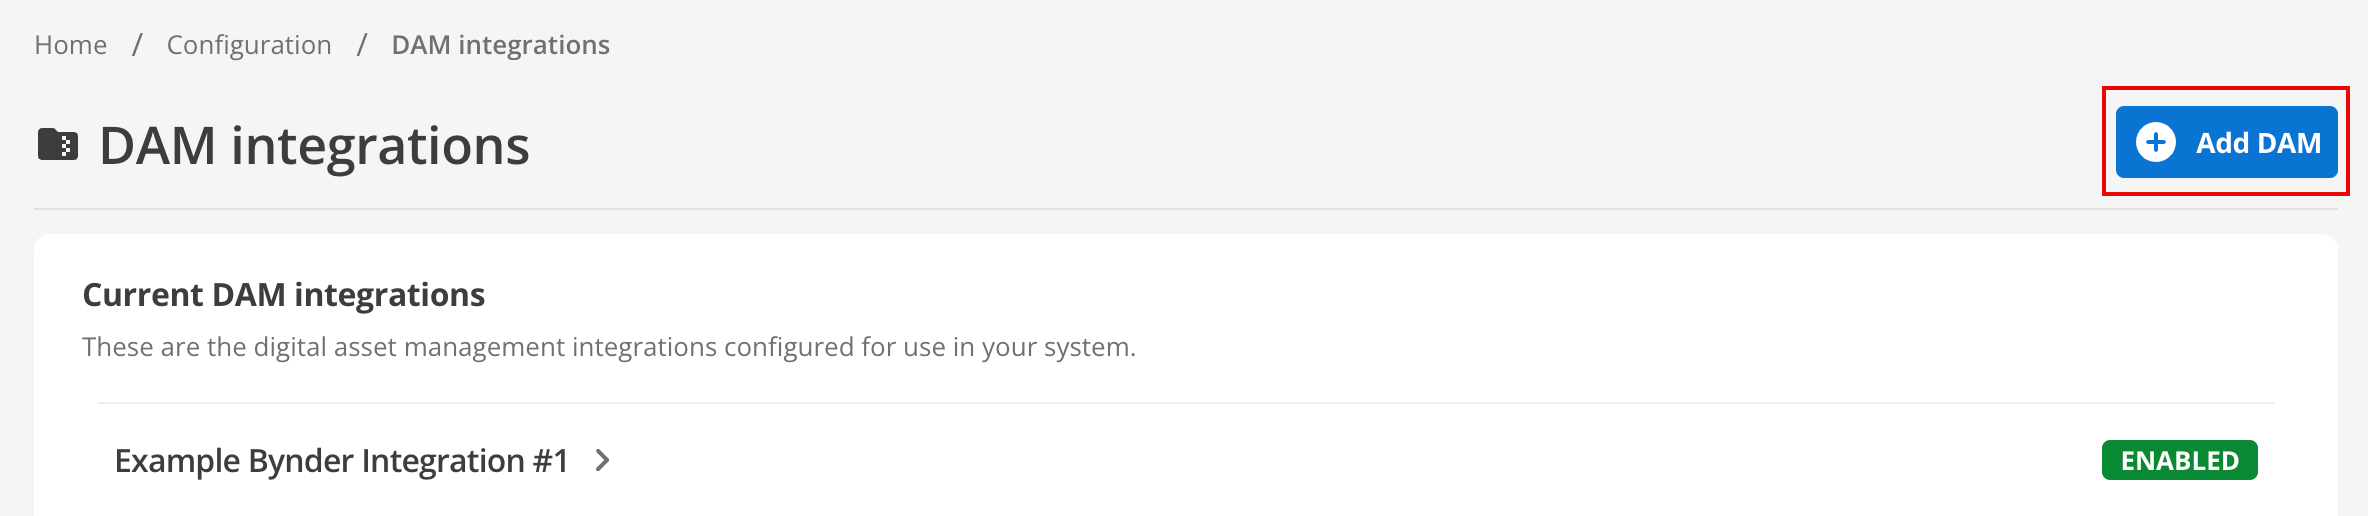 Figure 2. DAM integrations page with ⊕ Add DAM button highlighted.
The ⊕ Add DAM dialog appears.
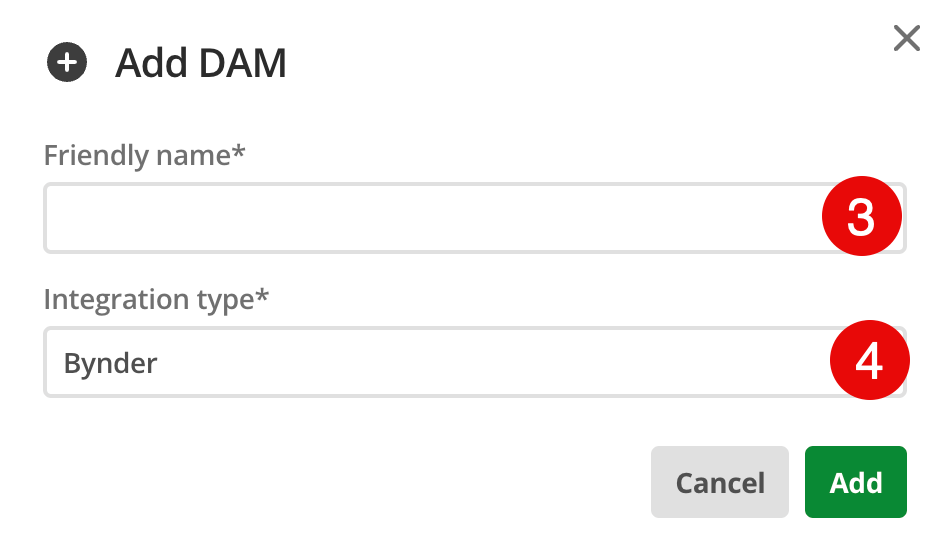 Figure 3. ⊕ Add DAM dialog.
 -
Provide a Friendly name for the integration.
Choose a name that is descriptive and memorable. Generic names are challenging to manage in greater numbers.
-
Select Bynder from the Integration type drop-down.
-
Click the green Add button.
-
Supply a Friendly name.
This field automatically takes the value provided previously in the ⊕ Add DAM dialog.
-
Select Bynder from the drop-down list in the Integration type field.
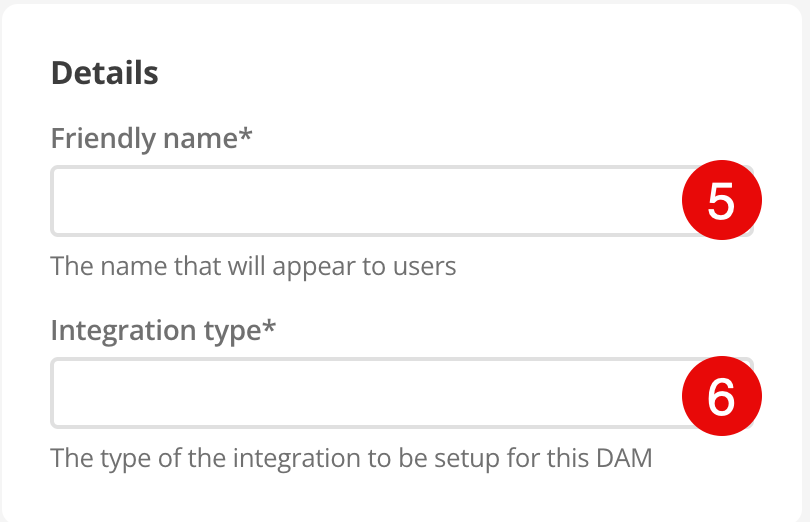 Figure 4. Add DAM details.
-
Provide the sign-in details for your Bynder instance:
-
Enter Auth URL.
This URL is used to redirect the user to the authorization application endpoint in the front-end authorization flow.
The format is as follows: https://BYNDER_URL/v6/authentication/oauth2/auth.
Replace BYNDER_URL with the root domain from step 9.
-
Enter Client ID.
This is the Client ID for the front-end application authorization flow.
-
Enter Client Secret.
This is the secret for the front-end application authorization flow.
-

-
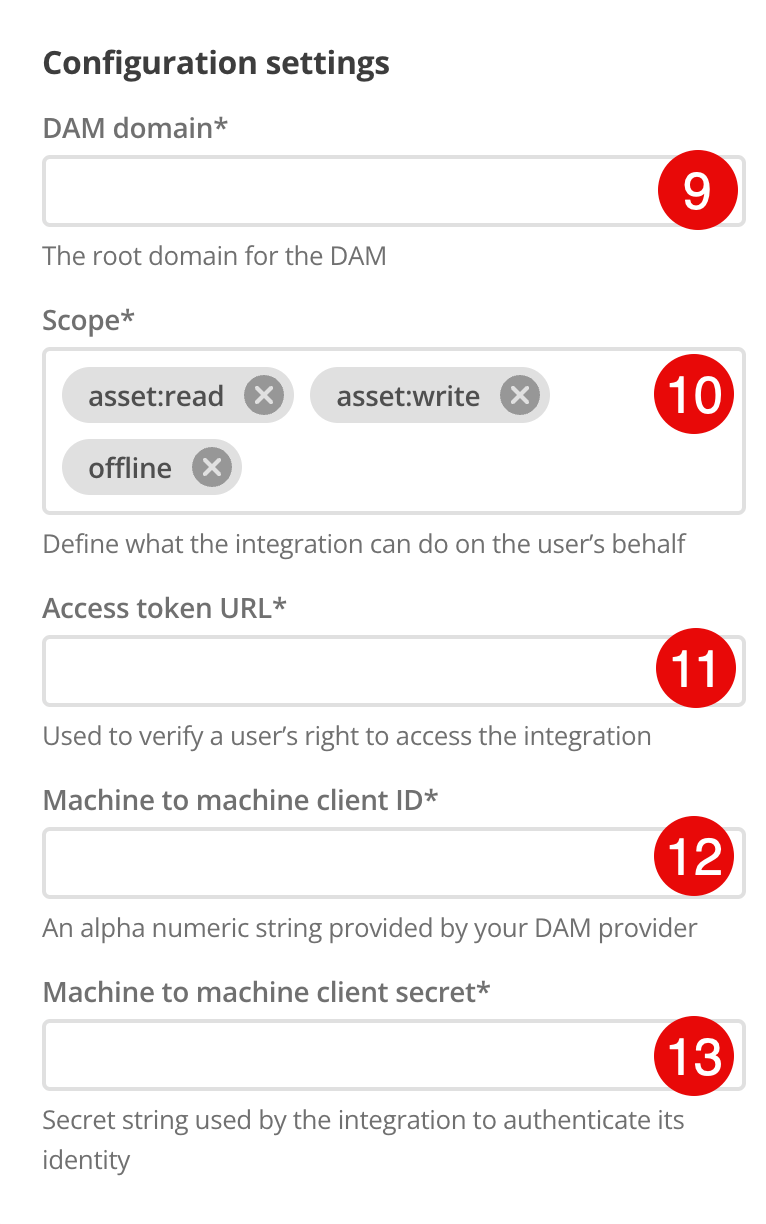
Supply the root domain for your Bynder instance in the DAM domain field.
-
Add (or confirm) the Scopes available to the integration.
-
Provide the Access token URL.
This is the URL to the token endpoint to retrieve an access token which can be used to authorize API requests in machine to machine flow.
The format is as follows: https://BYNDER_URL/v6/authentication/oauth2/token.
Replace BYNDER_URL with the root domain from step 9.
-
Enter the Machine to machine client ID.
This is the Client ID for the machine to machine application authorization flow.
-
Provide the Machine to machine client secret.
This is the secret for the machine to machine application authorization flow.
-
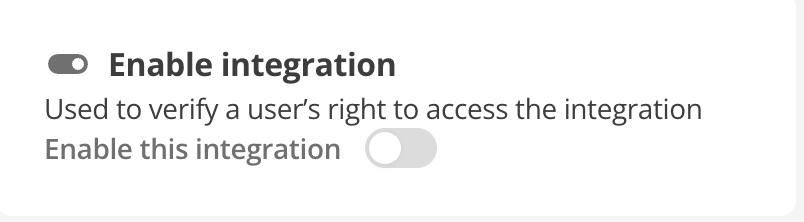
Toggle this switch to enable the integration.
-
Supply an Authorization redirect URI
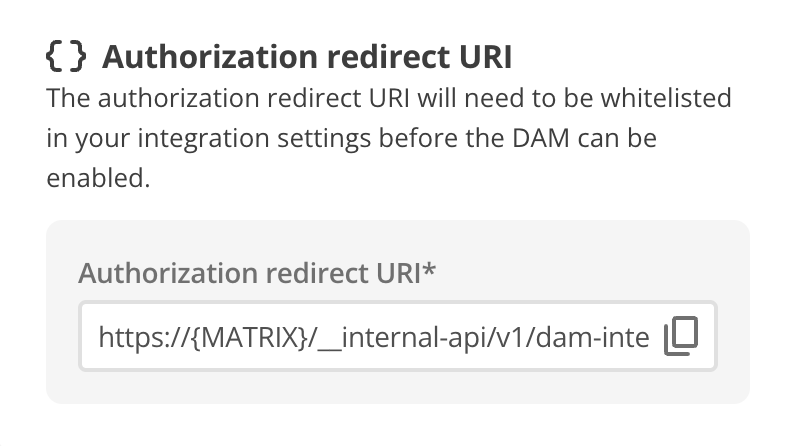 Figure 8. Authorization redirect URI.
Setting Up Bynder Integration
This section explains how to create your own integration in Bynder and obtain the necessary credentials.
Creating OAuth Applications in Bynder
-
Log in to your Bynder instance.
-
Click on the cog icon in the top right corner and select .
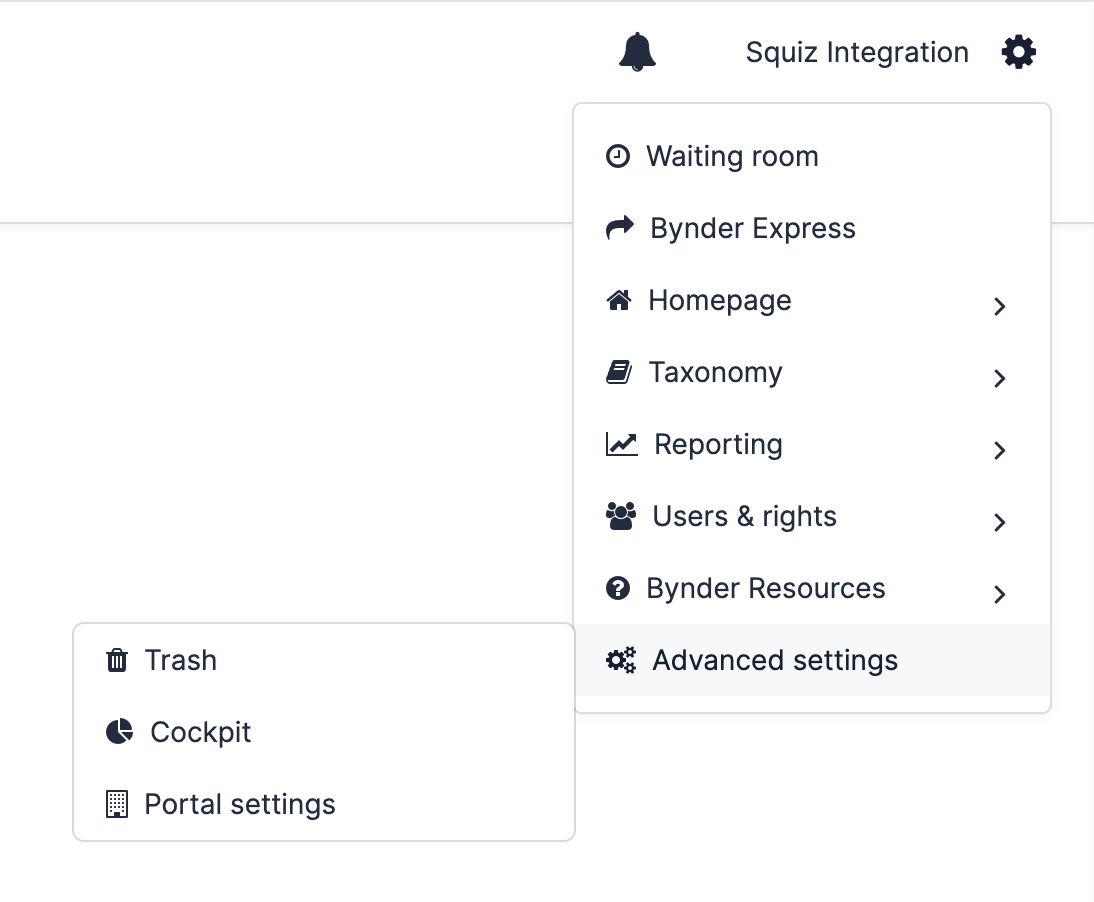 Figure 9. Advanced settings → Portal settings.
 -
From the left-side menu, click on OAuth Apps.
-
Click the Add new app button.
 Figure 10. Add new app button.
Creating the two required authorization applications
Two applications have to be created:
Creating Front-End Authorization Application
-
Click Add new app.
The Add new app form presents.
-
Fill in the form:
- Application name
-
Front-End Authorization Application.
- Homepage URL
-
(Leave empty)
- Application description
-
This is to allow access for frontend applications.
- Integration
-
Select other.
- Integration name
-
Client authorization flow.
- Select grant type
-
Authorization Code + Refresh Token.
- Authorization Redirect URIs
-
Copy the URI from Step 15: Authorization Redirect URI and replace
MATRIXwith the actual CMS domain. - Set HTTP access control (CORS)
-
Leave blank.
- Select scopes
-
Select the following scopes:
-
asset:read
-
asset:write
-
offline
-
-
Click the Register Application button.
-
Copy the Client ID.
Paste this value into the Client ID field of Render settings.
-
Copy the Client Secret.
Paste this value into the Client Secret field of Render settings.
Creating Machine to Machine Authorization Application
-
Click Add new app.
The Add new app form presents.
-
Fill in the form:
- Name
-
Machine to Machine Authorization
- Home Page URL
-
(Leave empty)
- Description
-
This is to allow access for backed applications.
- Integration
-
Select other.
- Integration Name
-
Machine authorization flow.
- Select grant type
-
Client Credentials.
- Assigned User
-
From the dropdown, select the user who will authenticate on behalf of the system.
- Set HTTP access control (CORS)
-
Leave blank.
- Select scopes
-
Select the following scopes:
-
asset:read
-
asset:write
-
asset.usage:read
-
asset.usage:write
-
collection:read
-
collection:write
-
-
Click the Register Application button.
-
Copy the Client ID.
Paste this value into the Client ID field of Render settings.
-
Copy the Client Secret.
Paste this value into the Client Secret field of Render settings.
API rate limits
The Bynder API enforces a rate limit of 4500 requests from a single IP address in any five-minute time frame.
Read the Bynder documentation for more information.