API keys
Squiz DXP API keys function as secure authentication tokens. These tokens allow third-party tools to connect to and integrate with Squiz DXP.
Each API key has specific access permissions, ensuring only authorized applications can interact with specific data and functionality within the Squiz DXP.
As part of Squiz DXP Configuration, the API keys UI allows appropriately-credentialed Squiz DXP users to create, manage, edit, and delete Squiz DXP API keys.
Create a Squiz DXP API key
Navigate to the Squiz DXP Dashboard, then follow these steps:
-
Click the Configuration card.
-
Click the API keys card.
The API keys page loads.
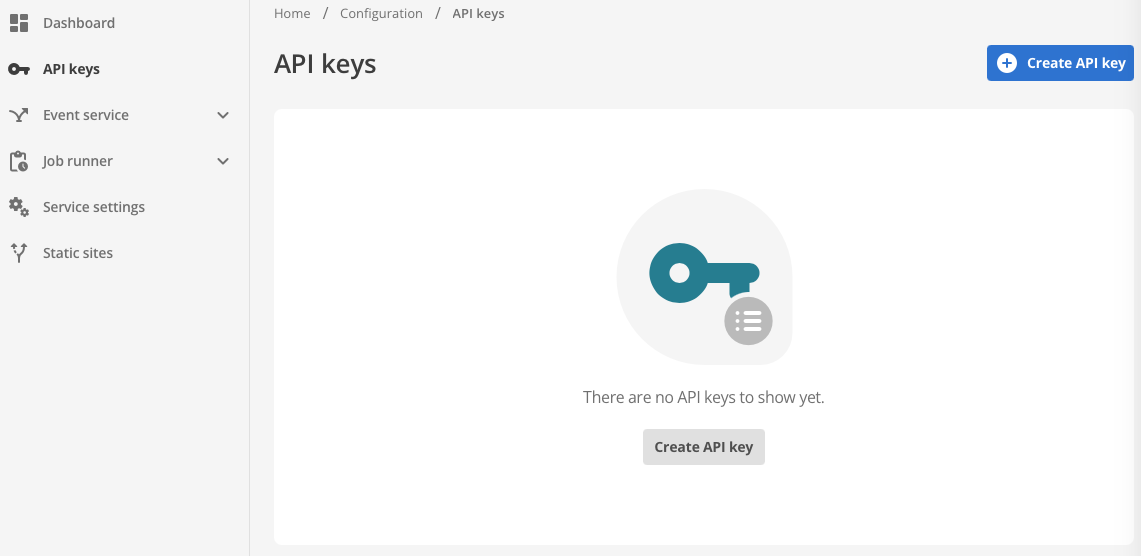 Figure 1. A Squiz DXP API keys home page with no created API keys.
-
Click the ⊕ Create API key button.
The Create API key page loads.
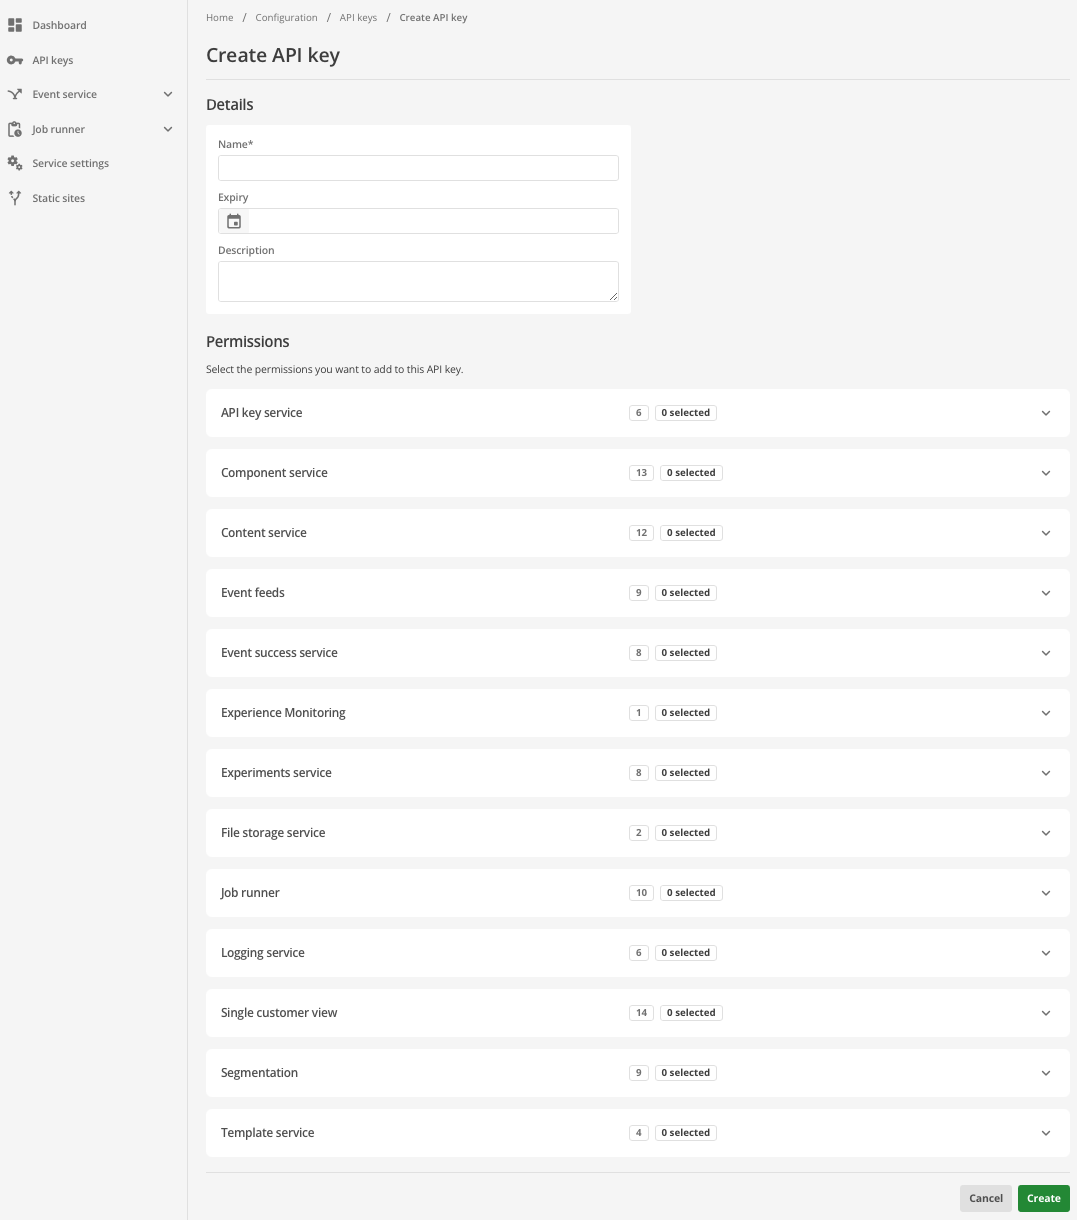 Figure 2. Squiz DXP Create API key page
 -
In the Details section, enter a
-
From the Permissions section
-
Select the permissions to add to this key.
For example, the screenshot following shows an API key with permission to delete existing API keys one at a time.
This key is also set to expire at midnight on 2026-04-02.
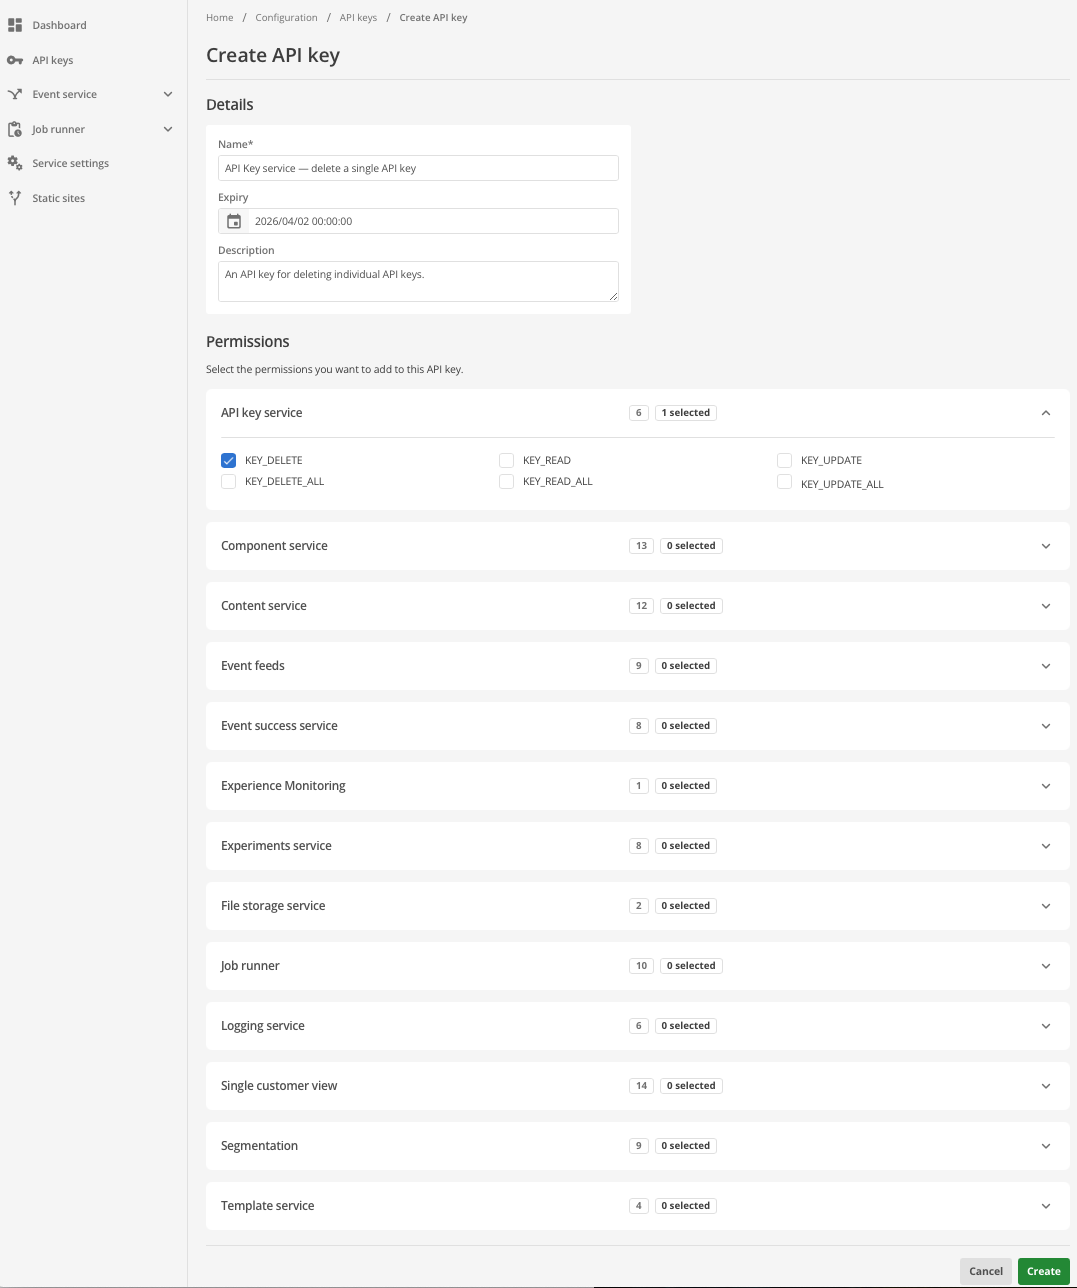 Figure 3. An API key being created.
-
-
After selecting all required permissions, click Create.
-
The API key has been created dialog presents, including the API key string.
-
Copy and securely store the displayed API key before doing anything else.
As the dialog notes, this dialog is the only time the new API key will be displayed.
Copy and securely store the key before doing anything else.
The copy button immediately adjacent to the API key obviates the need to select the string before copying.
-
Click the Close button.
The dialog closes and the new API key’s status changes to Enabled.
As soon as an API key is created, it can be used. To prevent an API key from being used, you can Change the status of a Squiz API key.
-
Click Save.
Manage Squiz DXP API keys
API keys are presented as a table on the API keys page.
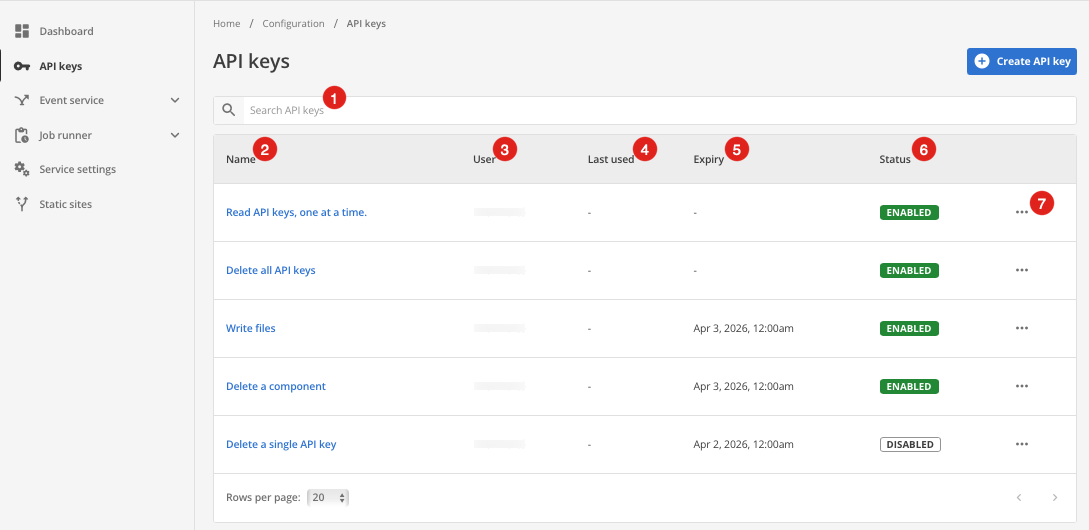
The table sorts keys in the order of creation and presents the following information and options for each key.
- 1 Search API keys
-
-
See Search for Squiz DXP API keys for details.
-
- 2 Name
-
-
Click this to load the edit page for that key.
A given API key’s edit page is functionally identical to the Create API key page.
However, edits to an existing key do not generate a new API key.
-
- 3 User
-
-
The name of the person who created the listed API key.
-
- 4 Last used
-
-
The date and time the API key was last used.
-
- 5 Expiry
- 6 Status
-
-
API keys have one of two statuses: Enabled or Disabled.
-
Disabled API keys cannot be used.
-
- 7 (More options)
-
Opening the menu for an API key presents two options: Enable/Disable and Delete.
 Figure 5. An open more options menu showing the Disable and Delete menu options.
Change the status of a Squiz API key
API keys have one of two statuses: Enabled or Disabled.
To change the status of a particular API key:
-
Click the (More options) menu for that API key.
-
The option presented depends on the API key’s current status.
The menu presents the Disable option for an Enabled API key and an Enabled option for a Disabled API key.
-
Click the option to change the API key’s status between Disabled and Enabled states.
Search for Squiz DXP API keys
The Search API keys field searches the contents of the Name fields and Permissions fields of all API keys.
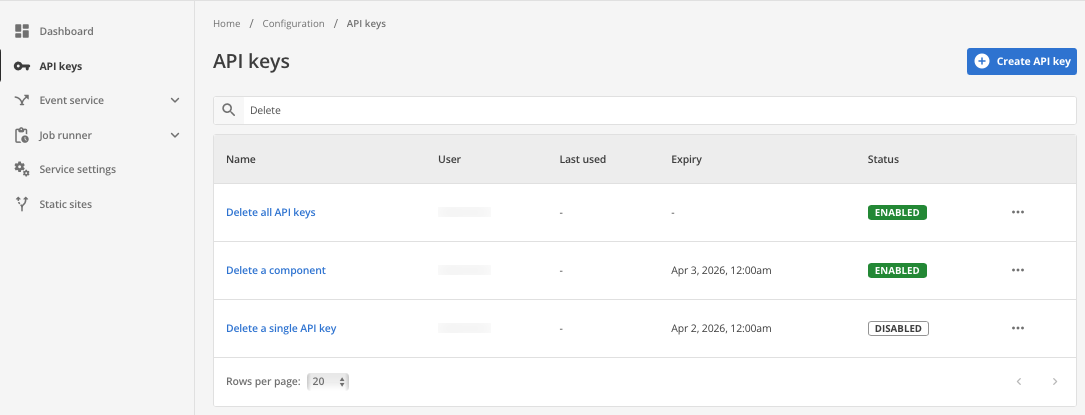
For example, given the example API keys page presented earlier, a search on Delete returns the following:
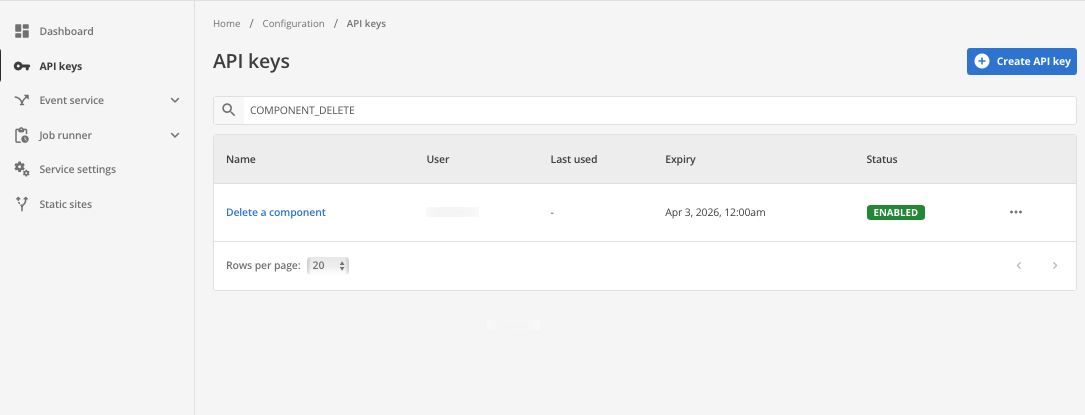
However, a search on COMPONENT_DELETE returns the following:
The first search returns all API keys with the word Delete in their name.
The second search, however, returns the only API key with permission to use COMPONENT_DELETE from the Component Service section.
This can be useful for finding and editing the details of a particular key when the API name is the primary or even sole piece of information available (for example, an API name included in a configuration file).
Edit a Squiz DXP API key
Navigate to the Squiz DXP Dashboard, then follow these steps:
-
Click the Configuration card.
-
Click the API keys card.
The API keys page loads.
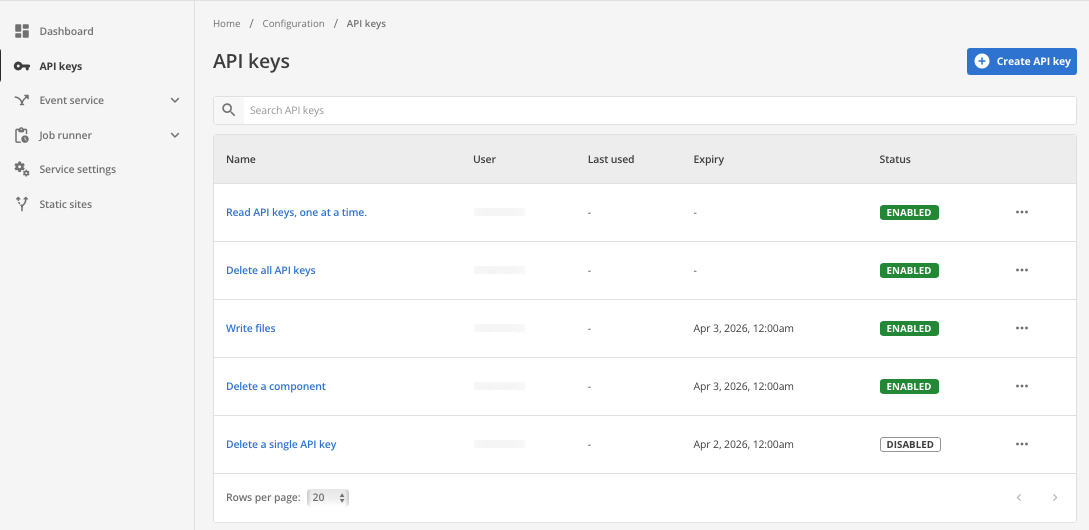 Figure 8. A Squiz DXP API keys home page with five API keys.
 -
Click the name of the API key to be edited.
The name-of-api-key-here page loads.
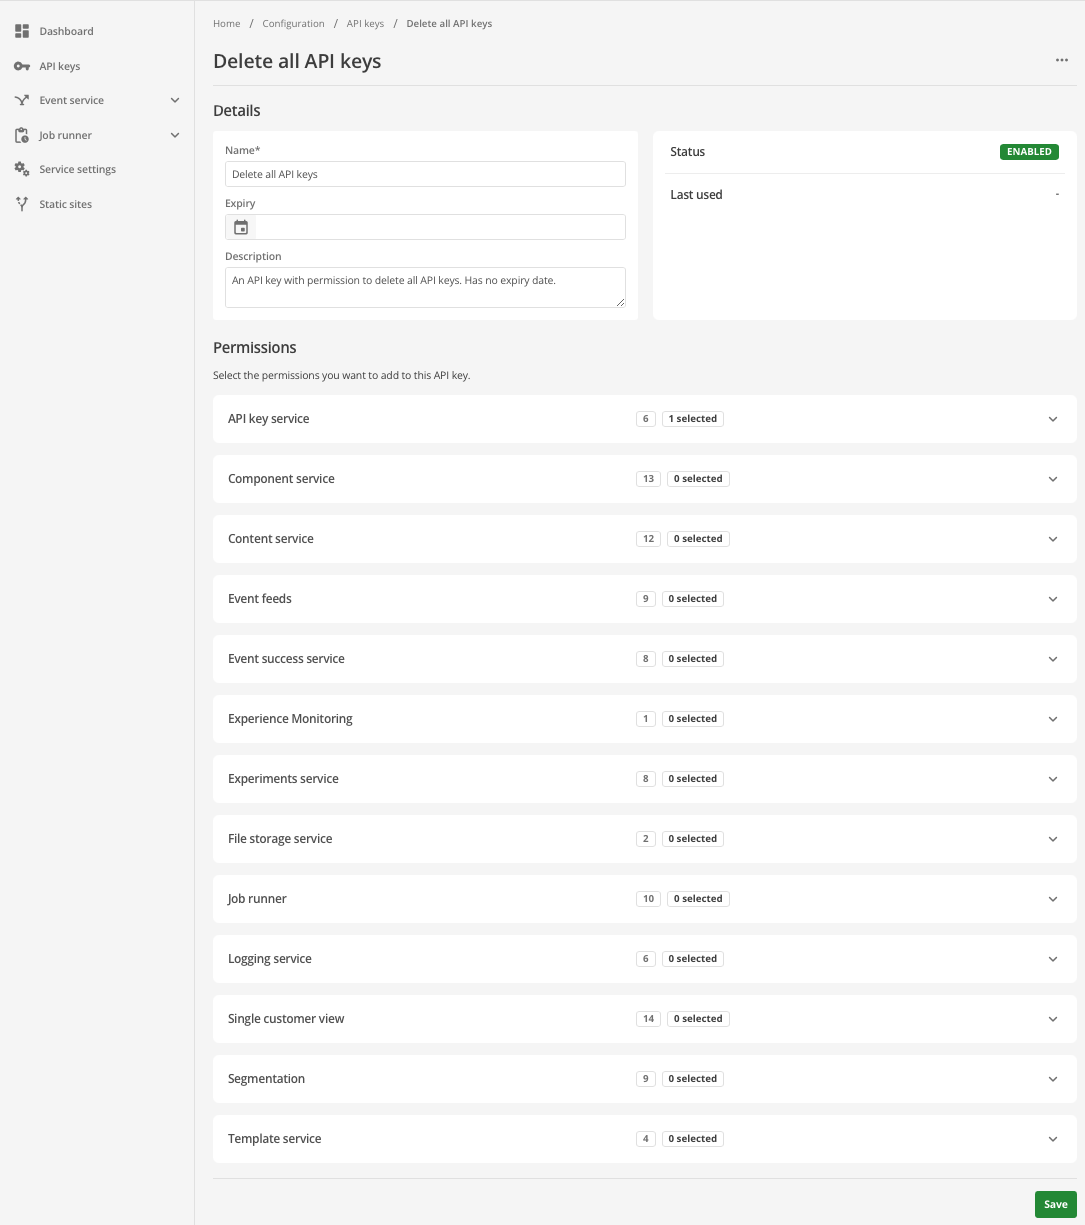 Figure 9. Squiz DXP Edit API key page
This page functions identically to the Create a Squiz DXP API key page.
-
Edit values and add or remove API permissions as required.
-
Click Save.
Delete a Squiz DXP API key
To delete an API key:
-
Click the (More options) menu for that API key.
-
Click the Delete option
The Delete API key dialog opens.
-
Click Delete to delete the API key.
Clicking Delete deletes the API key instantly and permanently.
This action cannot be undone.
-
The API keys page refreshes, and the deleted key is no longer present in the list of API keys.