Build content pages with translated content
When your Squiz Content Management instance has been configured with Content Management Contexts paired to DXP languages, you can use the Translations feature in content page assets to add versions of content in different languages.
| This page assumes content page translation support is already configured. |
Add translatable fields to your custom components
Squiz-provided components have fields configured as translatable. If your Content Management system has been set up to pair DXP languages to Content Management Contexts, any Squiz components in your system will automatically show the Translations options described in this section.
As a component developer, you need to make a small change to the component manifest to support translations.
The mechanism for marking a field as translatable is to add the property "translatable": true to that field’s definition within the custom component’s manifest.json.
Translation support is not limited to text fields because the depth of a site translation may extend to images, headers, footers, carousels or any component with language change implications.
At a minimum, all editable text fields in custom components should be marked as translatable when you are developing custom components.
All fields without the translatable property will not be translatable with this feature.
It is recommended that you ensure you don’t have any hardcoded text in your custom components, so that these components can support all languages.
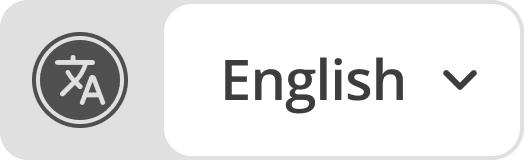
About the language button
The language button appears as a menu option in the Content screen.

The language button and menu options show the same language list as the Contexts switcher in the Content Management toolbar.
| If you do not have Languages support configured on your Content Management site, you will not see this menu option. Read Why is the Languages menu not appearing in Page Builder? to solve this issue. |
About the translations status icons (stamps)
The status icons used through the page building experience are referred to as stamps throughout the interface. The stamps appear in the language selector and in the page outline view.
On the language button
Stamps indicate the overall translation status of the content page based on all paired DXP languages.
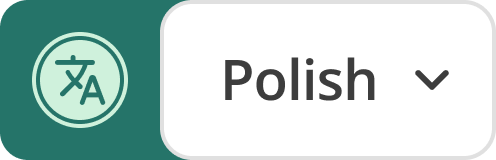
- Solid circle
-
 All content blocks in all languages are translated.
 - Dashed border circle
-
 Not all content blocks in all languages are translated.
 - Strikethrough circle
-
 There is no content in any language to translate.
In the language button menu (expanded)
Stamps beside each language indicate the translation status of the content page for that language.
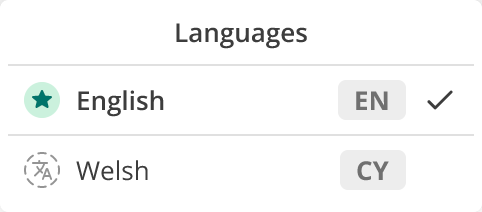
- Star
-
 Shows against the default language.
 - Solid circle
-
 All content in that language is translated.
 - Dashed border circle
-
Not all content in that language is translated.
- Strikethrough circle
-
There is no content in that language to translate.
In the page outline
When viewing a non-default language, stamps indicate the translation status of the content block for that language.

- Solid circle
-
This content block is translated in this language.
- Dashed border circle
-
This content block is not yet translated in this language.
- Strikethrough circle
-
This content block cannot be translated.
Create a language version for a content block
You can add a language version to translatable content blocks using the inline edit view or the page outline view.
Before you start
Make sure that your Content Management instance has DXP languages paired to existing Content Management Contexts.
Steps
-
Hover over the content block in the inline editor.
-
Click + button on the block that shows “Create version for <language>” when hovered over.
You can also use the menu:[⋯] in the page outline and then click Create version for [language] -
Confirm that the block icon changes to green, indicating that you are editing the language version for that content block.
-
Edit the translatable fields offered in the inline editing view.
You can also expand the content block in the Page Outline view to add your translated text edits.
Non-translatable fields can be revealed with the Show all fields toggle but can only be edited when viewing the Default language.
-
Click Save after you have added the translation to the content block.
| Content blocks that do not have a translated version fallback to the default language content. |
Translate A/B testing or personalised version content blocks
To translate a Personalised or A/B testing version content block:
-
Create a personalised or A/B testing variant content block in the default language.
-
Switch to an alternate language.
-
Create a language version of the personalised or A/B testing variant content block.
| You cannot create a personalised or A/B testing variant content block when in an alternate language. |
Edit a language version for a content block
You can make edits to content pages containing translations by using the language selector. The stamps indicate the status of the translations for the selected language.
Once you have selected the language, you can supply the translated text by editing content blocks using the inline edit view or the page outline view.
Before you start
Make sure that your Content Management instance has the DXP languages paired to your Content Management Contexts.
-
Read About the translations status icons (stamps) to understand what the different translation stamps indicate on partially translated content pages.
-
Read the language-to-context pairing section to understand the relationship between Content Management Contexts and DXP languages.
Steps
-
On the content page asset, select the Content screen.
-
Use the Language selector to identify translation gaps for the available languages, or simply choose a language to update translations for.
-
Click Edit to acquire the page locks.
-
Select the language for which you want to update translated content.
-
Use the page outline view to identify which content blocks have stamps indicating that translations are missing, or to choose a block to update translations for.
-
Edit the translatable fields offered in the inline editing view.
You can also expand the content block in the Page Outline view to add your translated text edits. Non-translatable fields can be revealed with the Show all fields toggle but can only be edited when viewing the Default context. -
Click Save after you have added/edited the translated version of the content block.