Westpac PayWay
Use the Westpac PayWay integration to take credit card payments on your form if you have a Westpac PayWay account.
Customer payments will be securely processed through the Westpac PayWay platform.
|
This documentation assumes you have experience creating forms in Advanced Forms. If you do not, read the Getting started documentation to begin creating forms. |
Adding the payment field
-
Set up a form with all the required fields, then drag in the Payment field.
-
In the Question field, enter a heading such as Pay Now or Credit Card Details.
-
Select Tick if answering this question is compulsory if users must make a payment before they can submit the form.
-
(Optional) Check the Enable Test Payment mode checkbox to enable testing payment logic with fake credit card details.
-
In the Payment Provider field, select Westpac PayWay.
-
Click the ➕ Add credentials button.
-
Enter the following information:
-
(Optional) Name.
-
Your Westpac PayWay Client/Merchant ID.
-
Your API Secret Key
-
Your API Publishable Key.
The information for the required fields is available from Westpac PayWay.
-
-
Click Save.
Credentials for this payment provider are now saved and can be used across different forms. -
(Optional) Enter a payment amount without a currency symbol but with a full-stop (period) decimal point.
For example,
100.00.If your payment amount depends on the user’s choices on the form, enter a default amount here.
Optional: Dynamically change price
If you want the payment amount to change depending on what the user selects in the form (for example, making a product selection), do the following:
-
Check the Change price dynamically based on form choices checkbox.
-
Return to your form and add field(s) to determine the price.
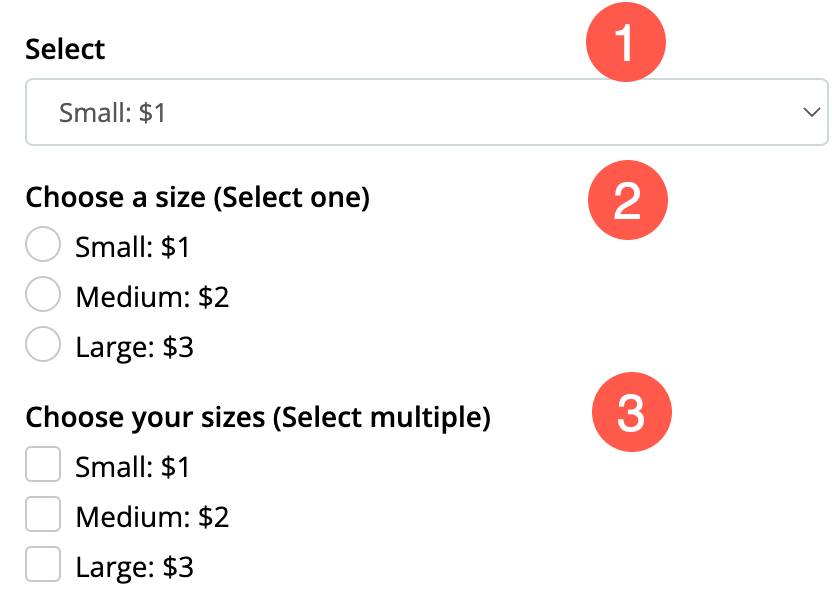
There are two methods which you could use.Selection amounts
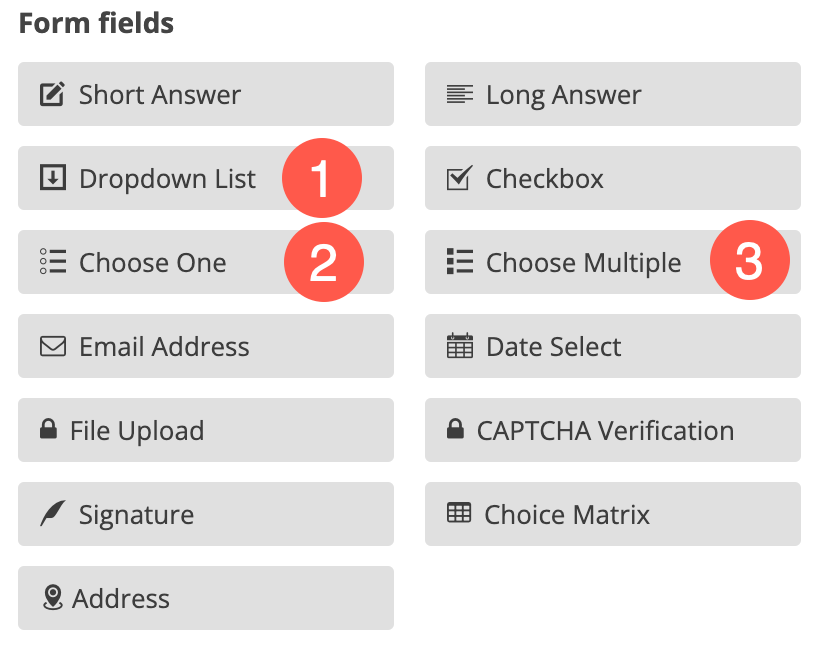
Use one or more of these field types and ensure the option includes a currency symbol (
$):Multiple fields that contain a currency symbol will be combined to total the final payment amount.
Precalculated amounts
Use a Short answer or Calculation field named Amount to set an amount.
The payment price will be taken from this field.
This field must be named Amount. If it not so-named, the calculation will fail. -
Save your form when you are finished editing.
(Optional) Show Advanced Options
Click the Show Advanced Options button to reveal multiple optional settings.
-
(Optional) Add a value to the Question (Label) field.
When a Question (Label) is specified, it will override the Question (Name) on your form.
Using this feature, you can:
-
Show multiple fields with the same question or label.
-
Use internal field names for reporting purposes, but show user-friendly field labels on the form.
-
-
(Optional) Check the Hide the question checkbox.
This setting hides the Question (Name) label when selected.
It leaves the answer box in place.
-
(Optional) Add further information and instruction.
When populated, this field presents immediately adjacent to the Question (Name) field.
-
Add text to display in a clickable button which initiates the payment.
-
Hide this field until certain conditions or responses in other fields are met.
For more information, see the Conditional logic section.