Browse resources through the component editing UI
Use the resource browser for SquizImage and matrix-asset-uri.
After you have a component setup with these inputs you can use these within the Matrix component editing UI.
-
Navigate to the component editing UI for a site page with your component set added to it.
-
Add the component that contains either of these inputs to the page. The resource browser launcher will present:

-
The process for adding an image or an asset is essentially the same. This procedure shows the process for selecting an image.
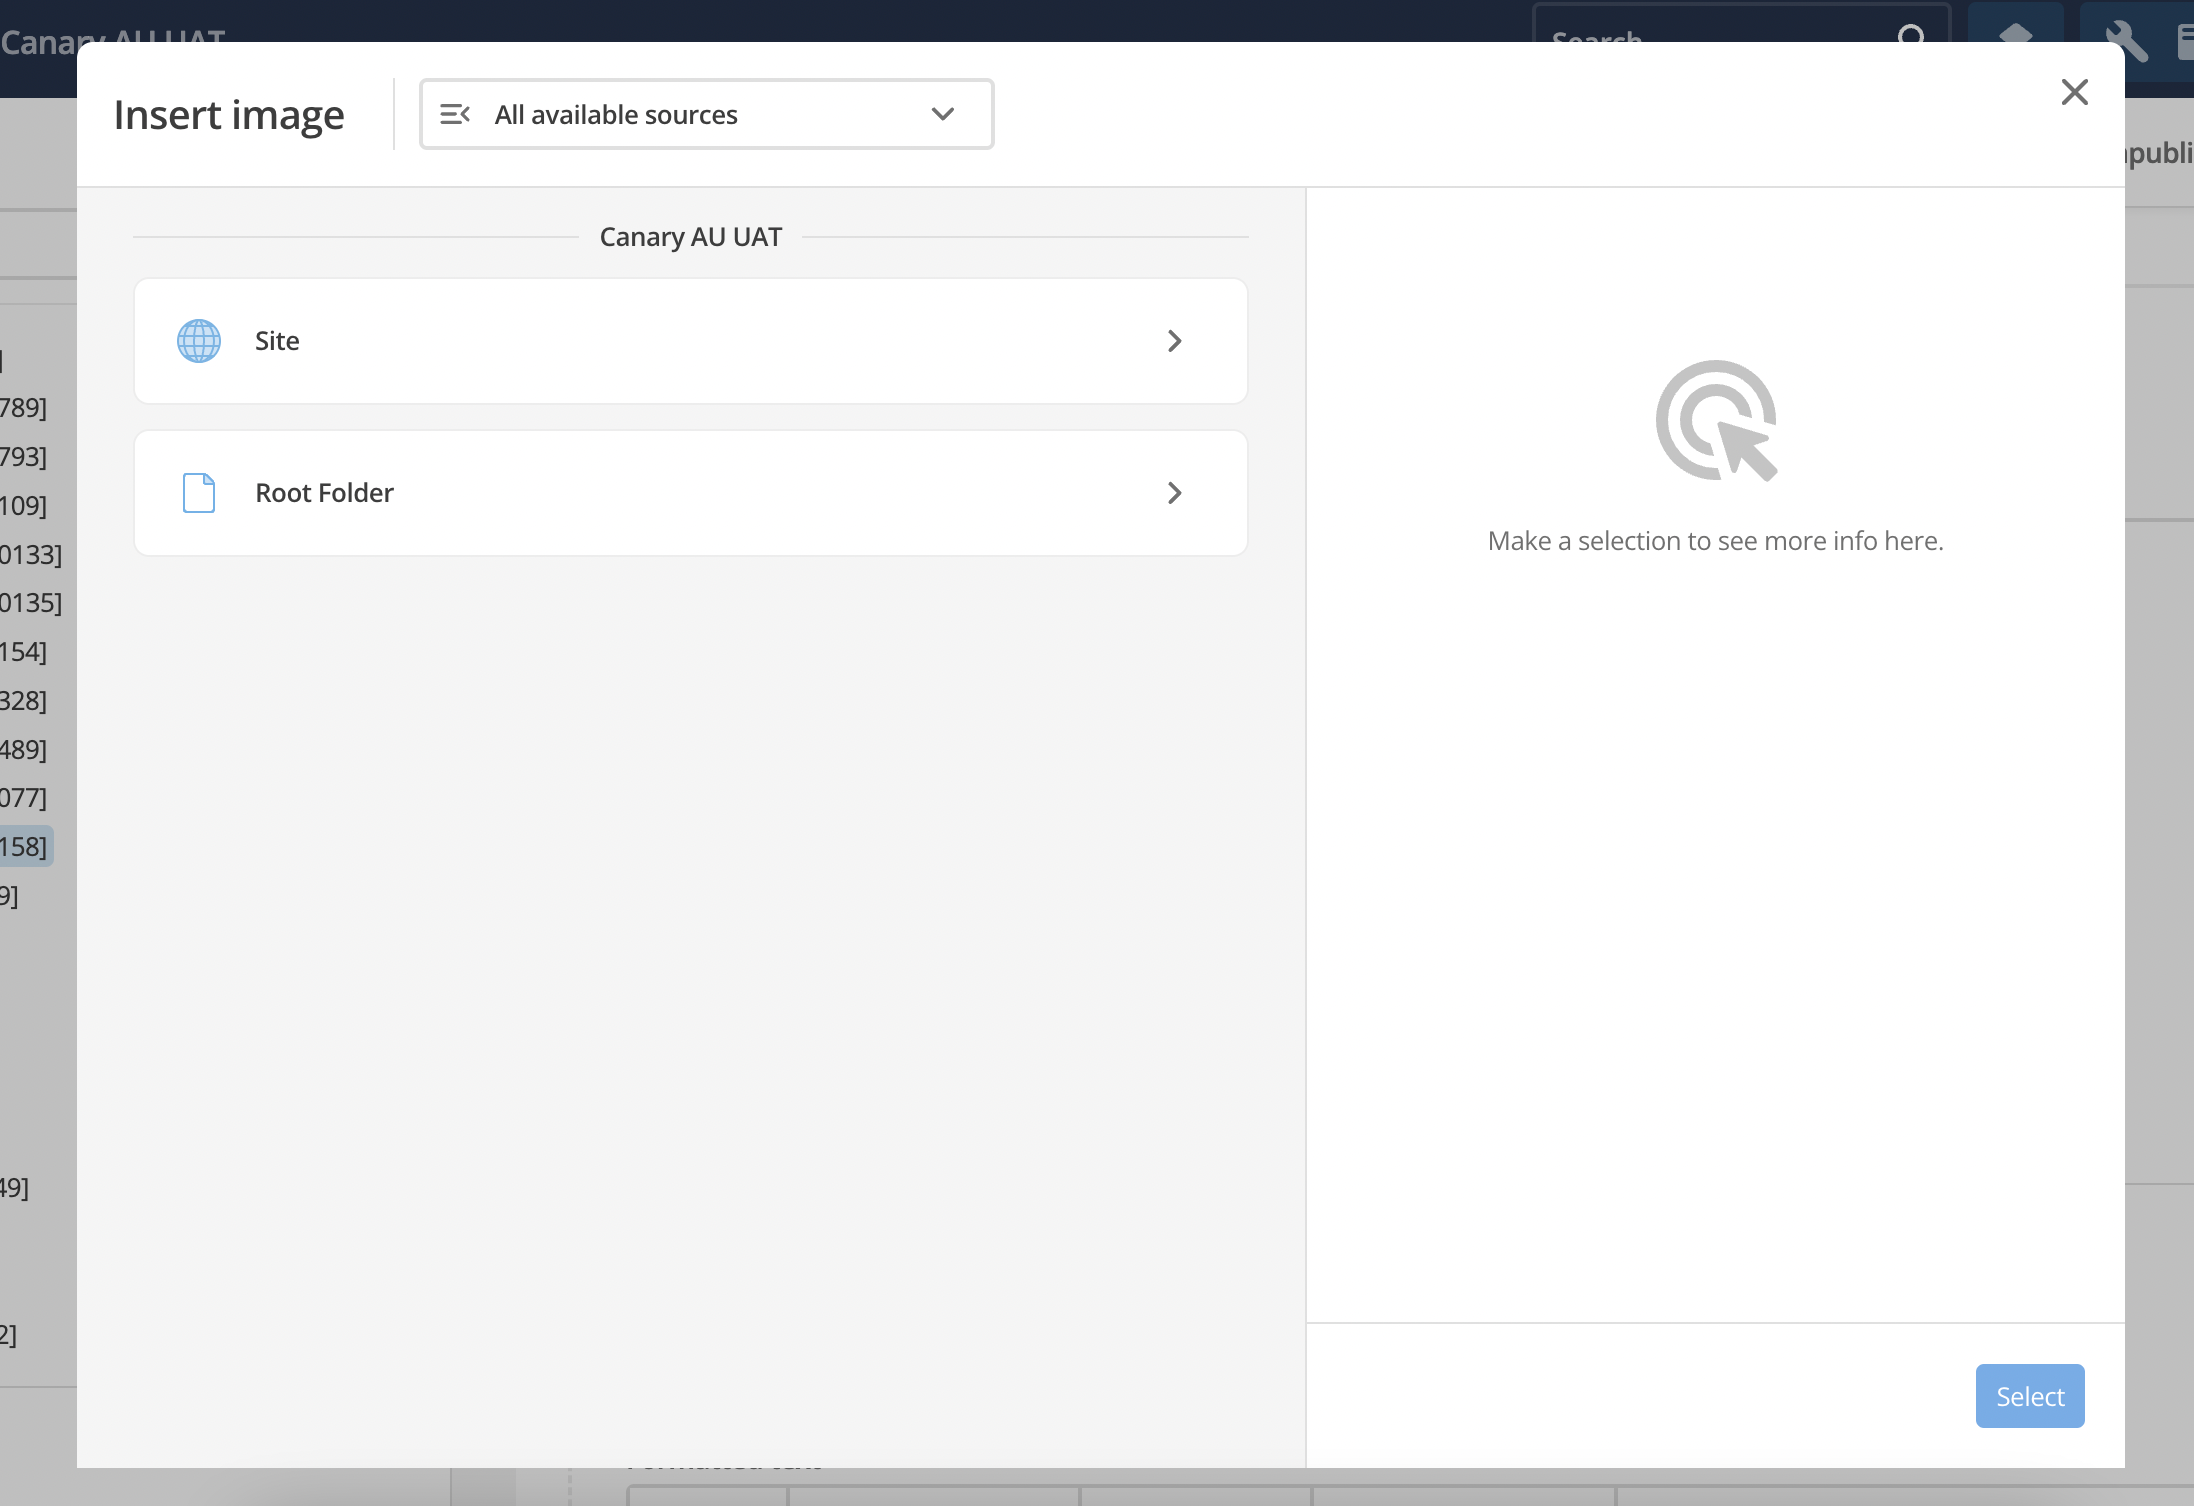
Click the Choose image button in the resource browser launcher. The Insert image dialog presents:

The particular Insert image instance shown above presents both the Site source and the Root Folder source.
It does this because these root nodes were specifically picked.
If no root nodes are explicitly set, the dialog defaults to the current site as the root node.
-
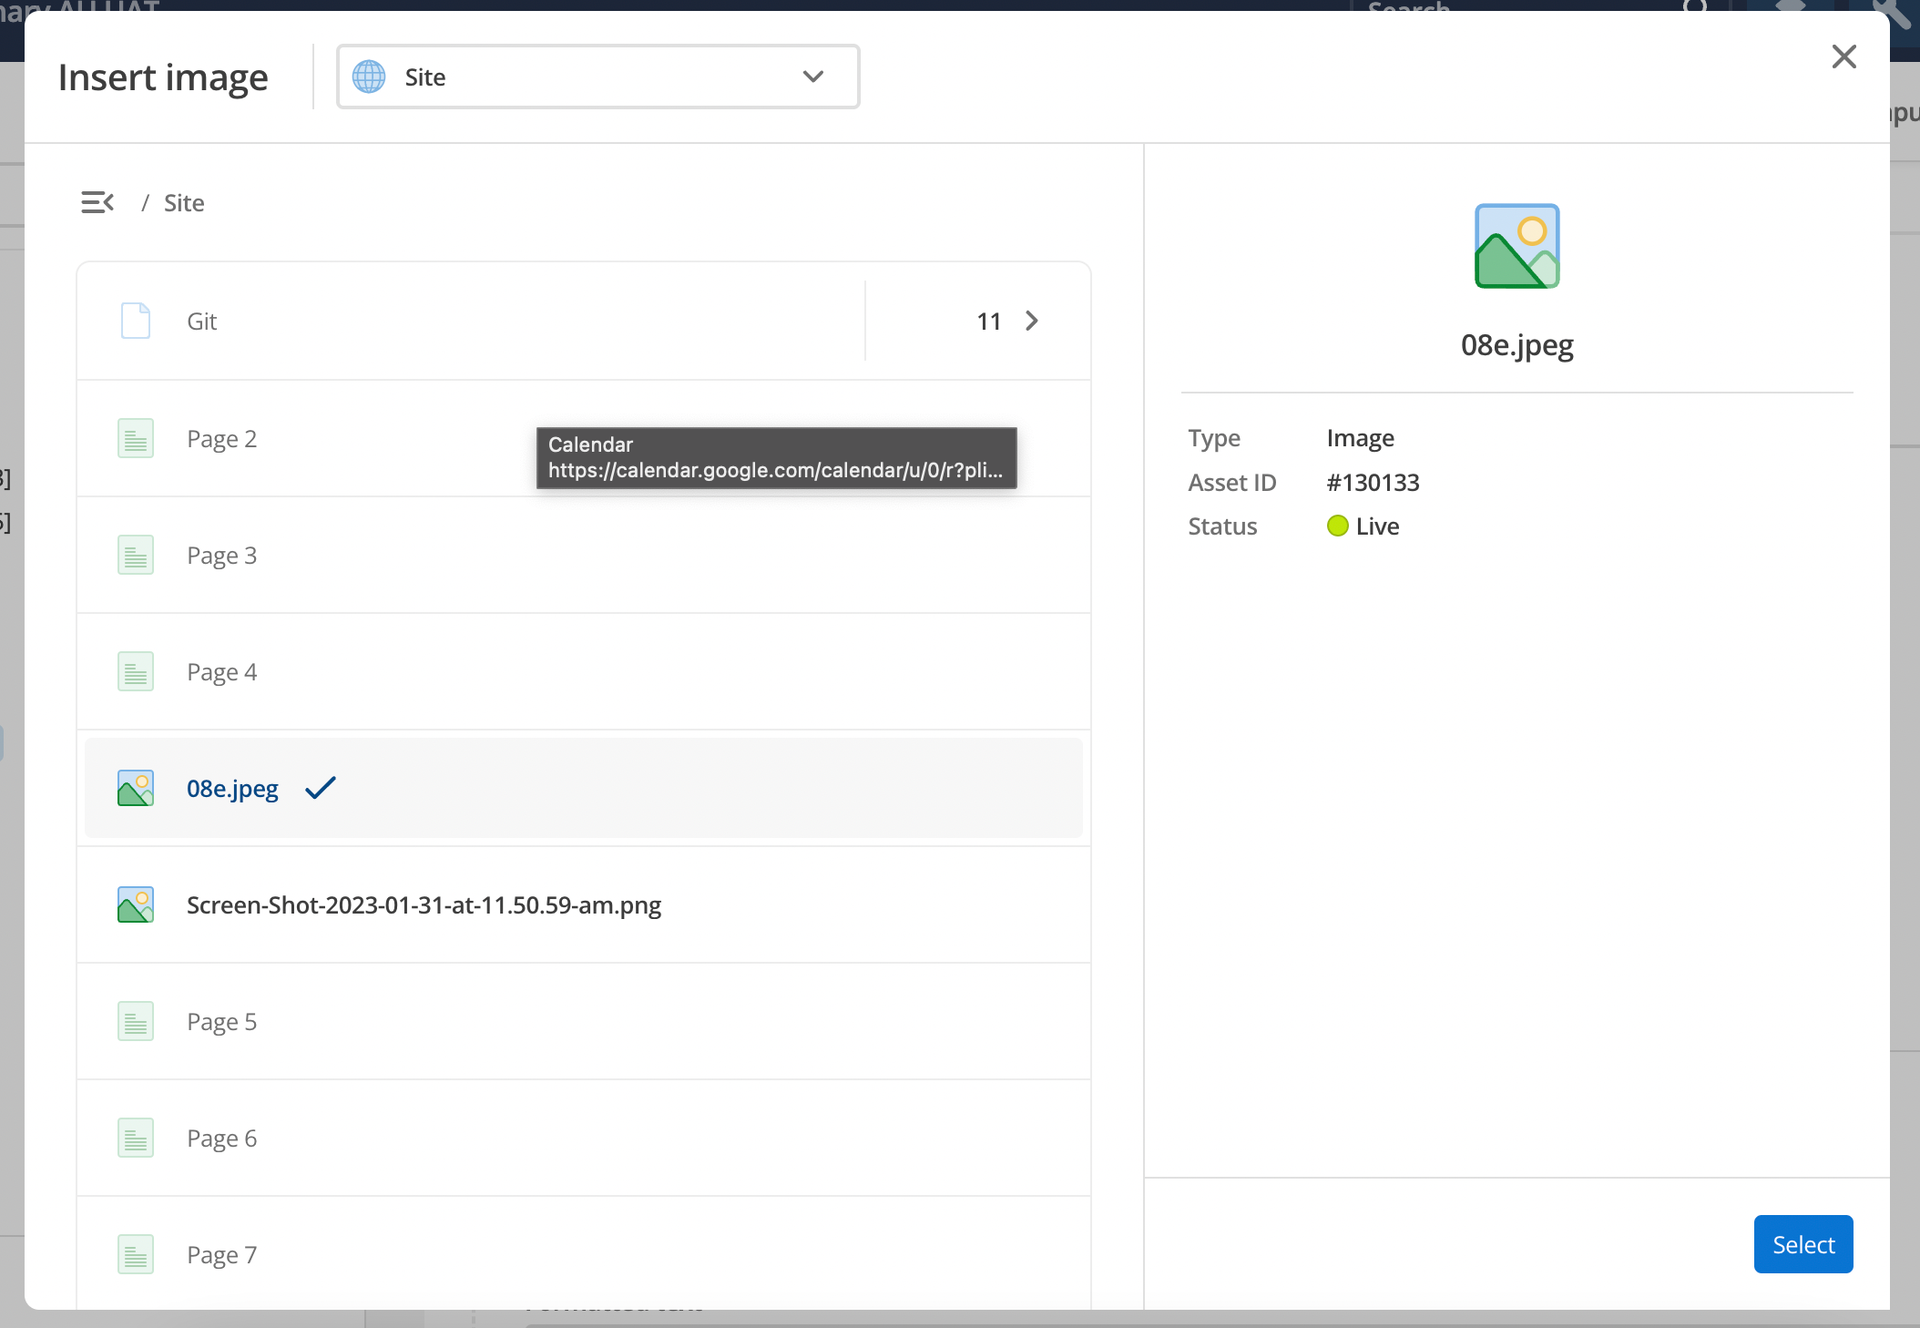
Navigate into a root node and navigate down the paths to the desired resource.
In the presented example, the Site source was selected and the desired image — 08e.jpeg — is selected.
When an image or asset is selected information about the image or asset presents in the right-hand panel.

In the presented example, some listed items present as unavailable. As noted above, this procedure shows the image selecting process. These unavailable items are not images and are, in this context therefore, set as unavailable.
If
matrix-asset-uriwere the input type, this example would invert: the presented images would be unavailable, and the non-image assets would be available. -
After you have chosen the asset you wish to add to the page, click Select.
-
With the image to be added to the page selected, click Select. The selected image displays.

If the displayed image is incorrect or otherwise not wanted, click the close button — ✖ — to delete and restart the process.
Once the desired image is in place, save the page.