Add formatted text to a content page
You can add a text block to your page that offers a selection of formatted text options, perfect for when you only need to add plain text elements to a page with some light formatting applied.
With this block type, you can still use the Personalization (Pink Blocks) and A/B Testing (Blue Blocks) capabilities.
Before you start
Read About the editing experience to learn the Page Builder interface basics.
Adding a block to the page
-
At the bottom of the Page outline column are two buttons: Add text and Add component
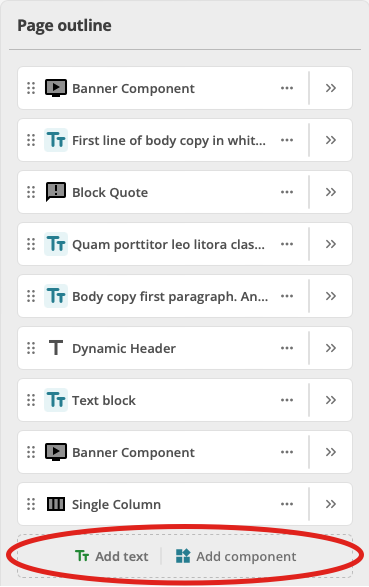 Figure 1. Page outline column with Add text and Add component buttons highlighted.
 -
To add a text block, click the Add text button.
An empty text block is added at the end of the Page outline column.
-
Material can be added to this text block by
-
making the newly-added text block active and adding material inline.
-
clicking the Page outline edit control; clicking the Quick edit button; and adding material.
You can switch between using either of these editing interfaces at will. Changes made in one will carry to the other.
-
Text editing options
Text blocks offer the expected formatting options available to text entered in the block.
- Text type
-
-
Body copy (aka paragraph text)
-
Heading level 1
-
Heading level 2
-
Heading level 3
-
Heading level 4
-
Heading level 5
-
- Text formatting
-
-
Bold
-
Italic
-
Underlined
-
- Text alignment
-
-
Left-aligned
-
Centered
-
Right-aligned
-
Justified
-
- Lists
-
-
Unordered (aka bulleted) lists.
-
Ordered (aka numbered) lists.
When the insertion point is within a list item, pressing the TAB key nests that list item under the immediately preceding item.
Contrariwise, when the insertion point is within a list item, pressing the SHIFT+TAB keys promotes the list item.
-
- links
-
-
internal links (to pages on the same site)
-
external links (to outside pages and sites).
-
Editing through the Page outline column
The Page outline column offers a convenient but less feature-rich editing environment.
-
Within the Page outline column, click the double chevron () icon.
-
Within the configuration view for the formatted text component, click the Quick edit button. The text box below will switch from gray to white to indicate that it is now editable.
-
Placing your cursor in the text box will reveal the limited formatting bar:
-
When you are finished editing the page, you can click the Close button at the top of the editing interface.
Page outline editing options
The options available in the limited edit bar of the Page outline column, from left to right, are:

-
Bold
-
Italics
-
Clear
This icon only becomes active when text is both formatted and selected. -
Headings
Options H1 through H6 are available in a dropdown. -
Formats
-
Paragraph
-
DIV
-
Quote
-
PRE
-
-
Toggle source view
This option opens an HTML version of the content in an editable overlay.
Editing through the Content column
Clicking into the editable text box in the Content column will present a more feature-rich editing experience.
-
Enter your text and optionally use the text editing options listed below to enhance the presentation of your text.
-
Click away from the text field to add other content blocks to your page or reorder blocks.
-
Select Save at regular intervals to save any changes you make to the content page.
You can click out of the text block to add other content blocks to your page.
Content column editing options
Most of the options available in the full edit bar of the Content column are standard text formatting tools.
The following list highlights some less-common tools.

-
Applying a class to content
This icon is only active when text is selected in the text box. -
Removing formatting
This icon only becomes active when text is both formatted and selected. -
Applying a format
The formats tool lets you control your content formats, whether they be paragraphs, divisions, quotes, or preformatted content. -
Inserting a horizontal rule
The horizontal rule tool lets you create a horizontal line within your content, used to define a thematic break. -
Adding an anchor ID
This option requires you to enter a unique ID for the anchor point. -
Using special characters
This option allows you to enter common special characters from a dropdown. -
Using the language tools
This icon is only active when text is selected in the text box. -
Viewing the HTML source code
This option opens an HTML version of the content in an editable overlay. -
Rewrite to …
This icon offers a selection of AI-assisted transformation options:Using AI tools in your DXP websites is discussed in more depth in the Configuration chapter of the Squiz DXP documentation.
- A/B Test Content Generator
-
This option summarizes the content supplied and offers a selection of different ways to present the message.
- Consistent Brand Voice - short prompt
-
This option rewrites the content into a voice that has been predefined by Site Builders or Administrators.
- Headline Generator
-
This option summarizes the content into a selection of attention-grabbing headlines.
- Lower Secondary Reading Level
-
This option rephrases the text to comply with the WCAG 2.0 AAA Guideline 3.1.5 for a lower secondary reading level.
- Squiz Marketing Tone of Voice
-
This option provides a summary of the content, rewritten as per a corporate style guide.
In each of these tools, you can choose to copy the new text, insert the new text after the original content, or use the new text to replace the original content.
Text blocks cannot contain only non-printing characters
Adding non-printing characters, such as hard returns or spaces, to an otherwise empty text block is not a safe way of either putting placeholder material in a text block or using a text block as a space-holder on a page.
In the absence of other characters or explicit mark-up, non-printing characters are not treated as required strings inside a tag.
Consequently, strings of hard returns or spaces or combinations of the two are not stored or saved.
This is a feature of the underlying HTML standard and cannot be changed by Page Builder.
If placeholder material is temporarily required in a text block, Lorem ipsum is recommended in the absence of any other alternative.
If white space is required for formatting and presentation purposes, the site’s CSS should be edited as required.
|
Remember to click Save to preserve your changes. |