Auto-sync IDP user accounts to SCV profiles
This guide explains how to configure and use the Identity Provider (IDP) Auto-sync feature within the Squiz Customer Data Platform (CDP).
This feature ensures that user profile data synchronizes in real-time from your IDP to your Single Customer View (SCV) whenever a user logs into a portal.
When a user logs in using a portal authentication domain, the IDP sends a payload of attributes (for example, first name, email, and department).
The Auto-sync feature intercepts this login event and performs the following actions:
-
Matches the user to an existing SCV profile, usually using their email address.
-
Creates a new profile if the user does not exist.
-
Updates the mapped attributes in the SCV profile instantly.
Prerequisites
Before you begin the configuration, ensure you meet the following requirements:
-
You have a Squiz DXP portal configured with an active Portal Authentication Domain.
-
You have an Identity Provider (IDP), for example Okta or Azure AD, configured to send the required user claims such as email and name.
-
You have CDP Administrator permissions within the Squiz DXP.
-
You updated the SCV schema to include attributes for portal authentication mapping.
Configuration
Setting up Auto-sync involves the following primary steps:
-
Define the authentication source.
-
Map the attributes.
Identify IDP attributes in DXP
First, you must verify exactly which attributes are passed from your IDP into the DXP environment.
-
Log in to your Squiz DXP instance.
-
Navigate to .
-
Select the specific domain used for your user logins.
-
Scroll to the Attribute Mapping section.
-
Note the attribute names listed under the Attribute column. These are the strings you must map in the CDP (for example,
given_name,email, andjob_title).
| Read the Squiz DXP portal authentication documentation for more information. |
Create the event feed
To handle the synchronization logic, you must create a specific event feed in the CDP.
-
Open the Customer Data Platform (CDP) from the DXP dashboard.
-
In the left-hand sidebar, click Event Feeds.
-
Click Create event feed in the top right and select Portal Authentication.
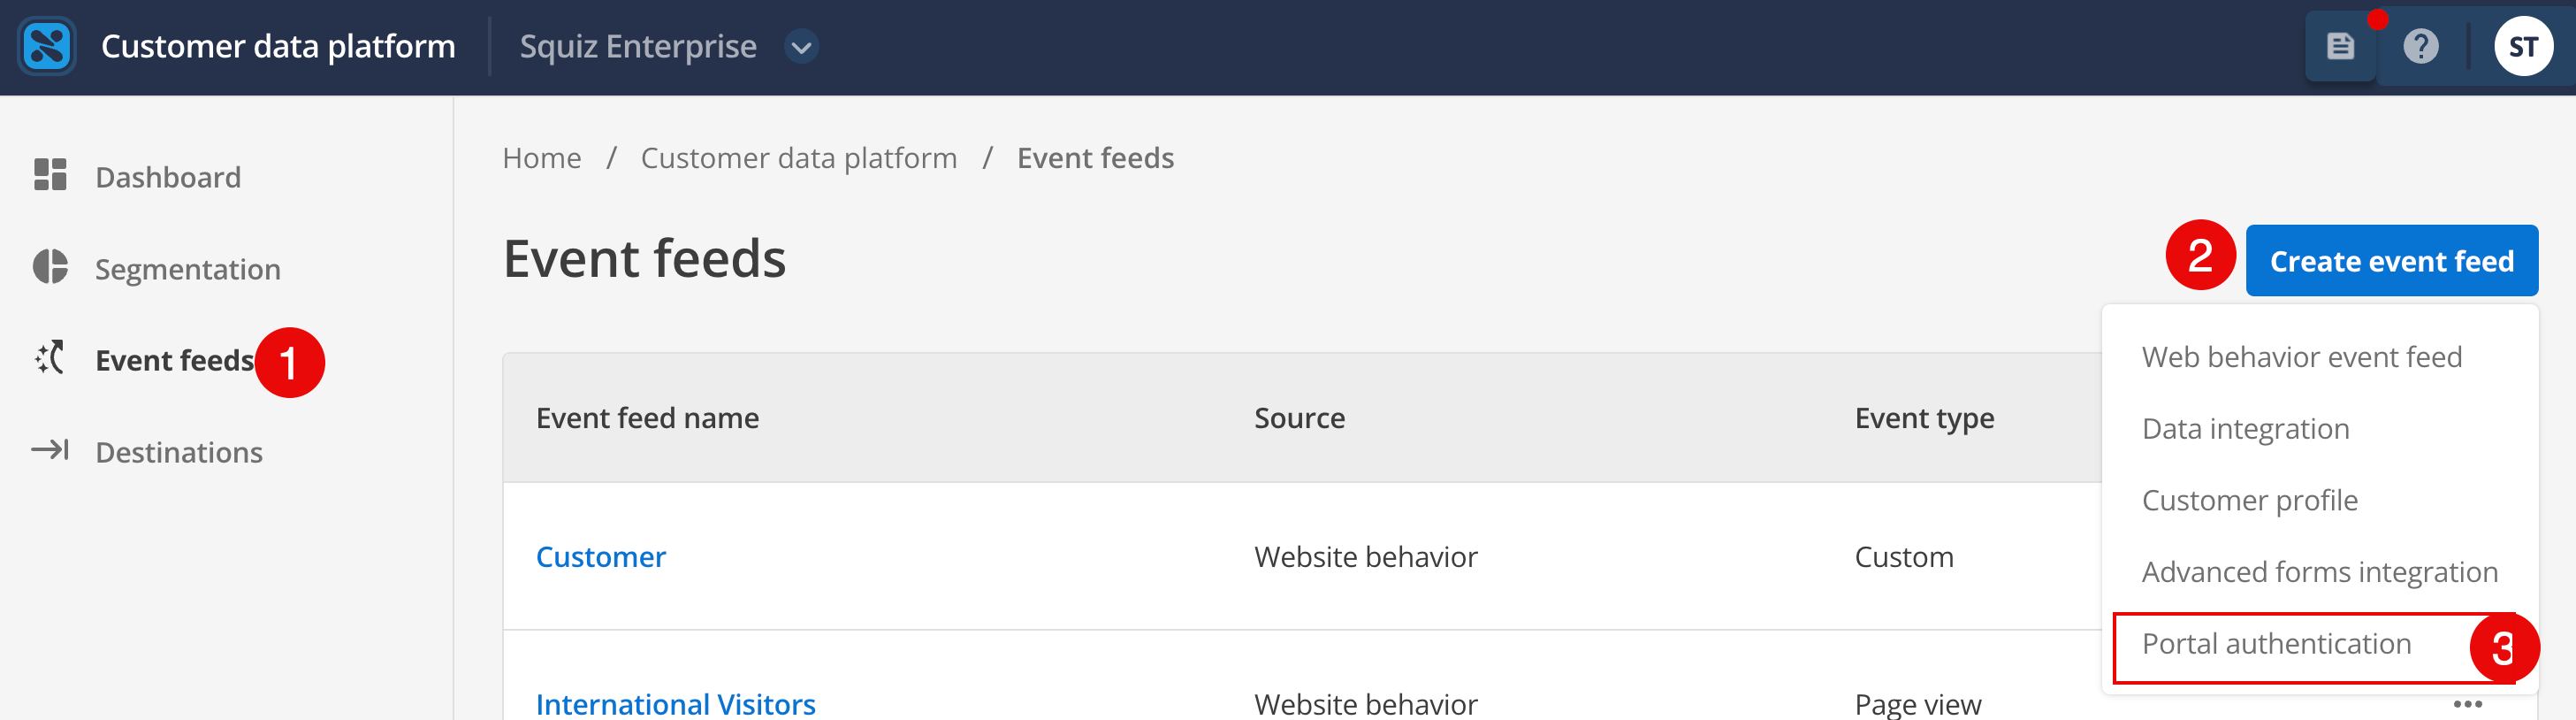 Figure 1. Click for full size.
 -
In the configuration modal, specify the following details:
- Name
-
Enter a unique name, for example
Global IDP Sync. - Source
-
Select Portal authentication from the drop-down menu.
-
Click Create.
Map attributes to SCV
After you create the feed, you must specify which IDP attributes correspond to which SCV fields.
-
In your new event feed, click Import from Portal Authentication.
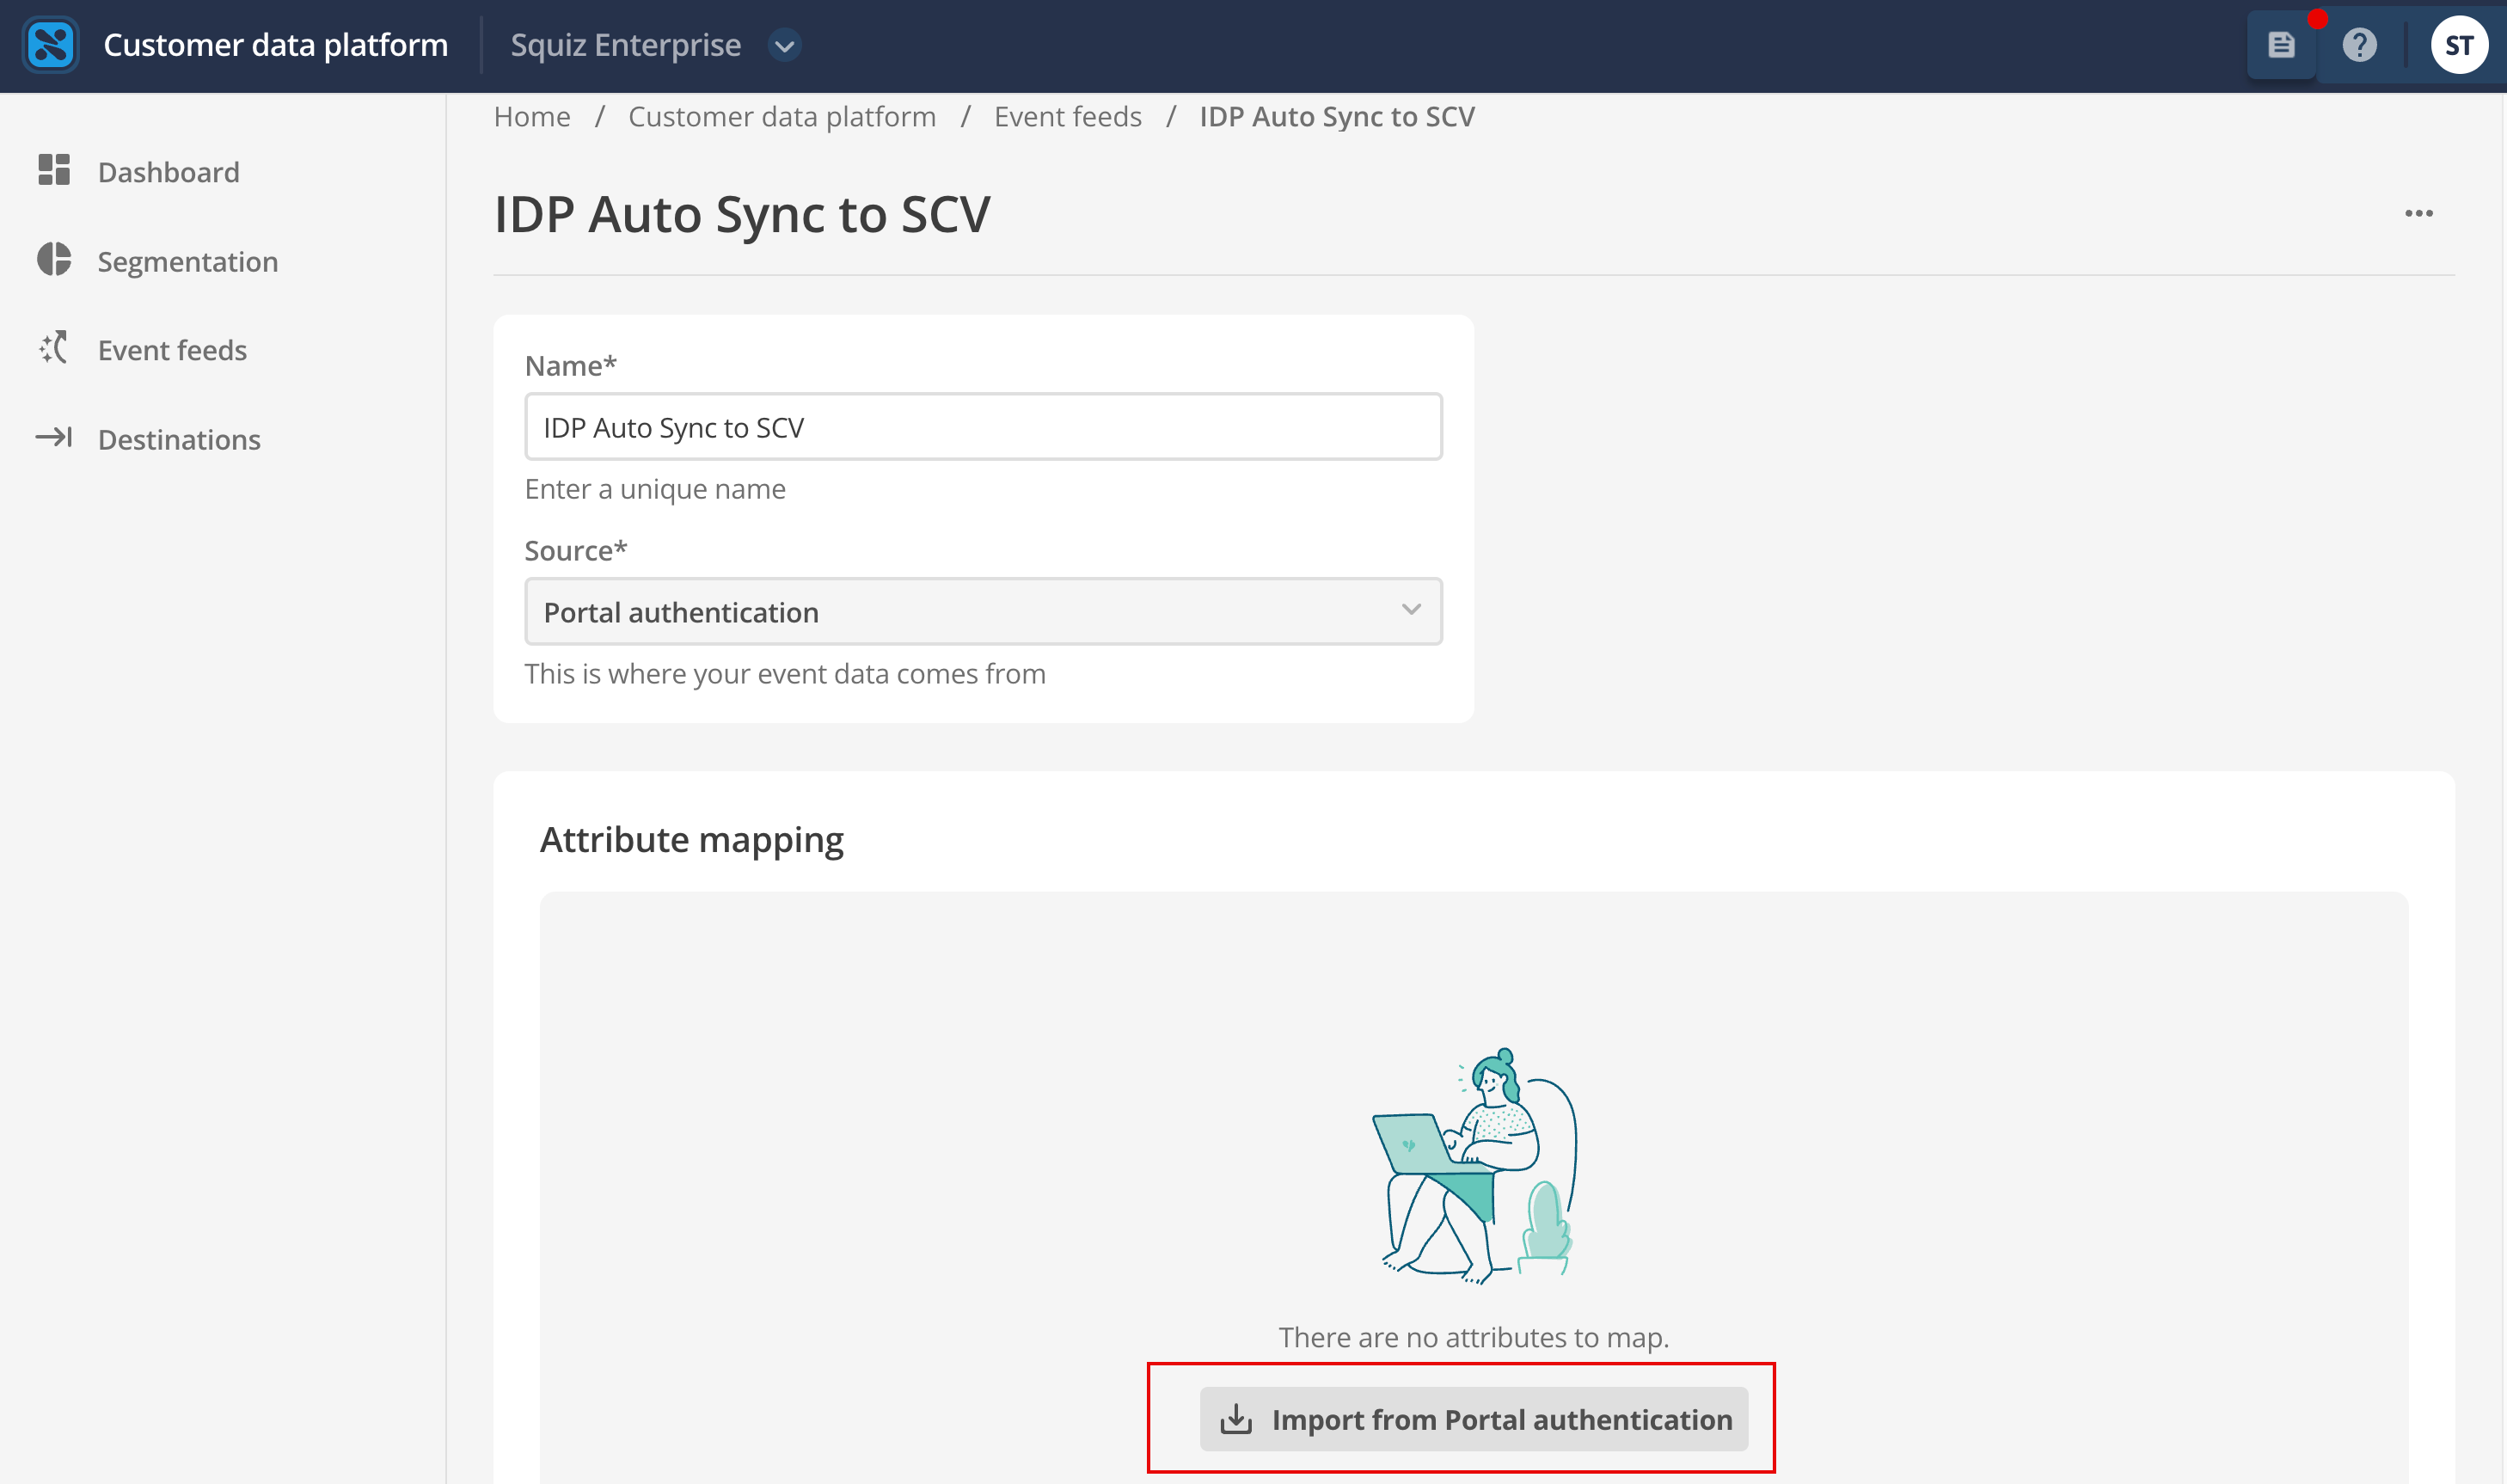 Figure 2. Click for full size.
 -
Select the domain you viewed in the previous step.
-
Use the drop-down menus in the Attribute Mapping table to map the From Portal fields to the To Single Customer View properties.
For example, you can map the following fields:
-
emailto Primary email. -
first_nameto First name. -
departmentto Organization.
-
-
Select Ignore this attribute for any attributes you do not want to sync.
-
Click Save.
Test the synchronization
To ensure the data is flowing as expected, you can perform a live test.
-
Open your portal in an incognito or private browser window.
-
Log in using a test account through your IDP.
-
Return to the Squiz DXP and navigate to .
-
Search for the email address of the test account.
-
Open the profile and verify the following details:
-
The Last Updated timestamp reflects your recent login.
-
The attributes, such as name and department, match the data in your IDP.
-
The Recent Events list shows a
dxp-login-event.
-