Add or configure a plugin to a data source or results page
Plugins can be added to a data source or results page from the plugins screen in the search dashboard.
To access this screen select the plugins option from the left hand navigation.
Find the plugin that you wish to add to your search and click on the corresponding tile.
Plugin setup
After you have clicked on the desired plugin you will be guided through the necessary steps to add the plugin to your search. You also see a similar set of steps (excluding the location step) if you are editing an existing plugin.
| The plugin setup requires plugins that support the Funnelback 16.20 plugin framework (funnelback-shared) or higher. If you try to configure or setup an older version plugin you will see a notification, and will only be able to choose the location for your plugin. You will then need to follow the steps to manually configure your plugin using the configuration key editor. |
View documentation
Before enabling a plugin you should carefully read through the plugin documentation to better understand how the plugin works and the available configuration options.
Click the view documentation button to access the documentation for the plugin you are enabling.
Location
The first step for setting up a plugin requires you to choose the data source or results page on which the plugin will be enabled.
If the plugin you have selected works on both data sources and results pages you will see a pair of radio buttons where you need to select if you wish to enable the plugin on a data source or a results page.
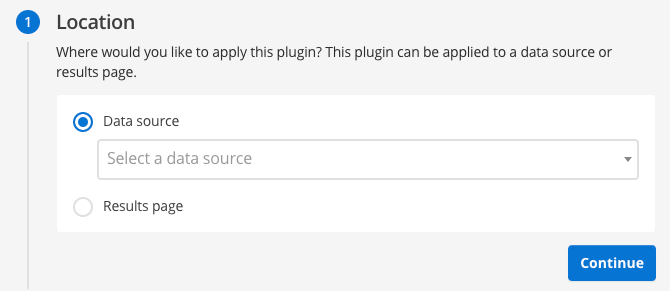
You will then be presented with a select menu where you can choose the data source or results page where you wish to enable the plugin.
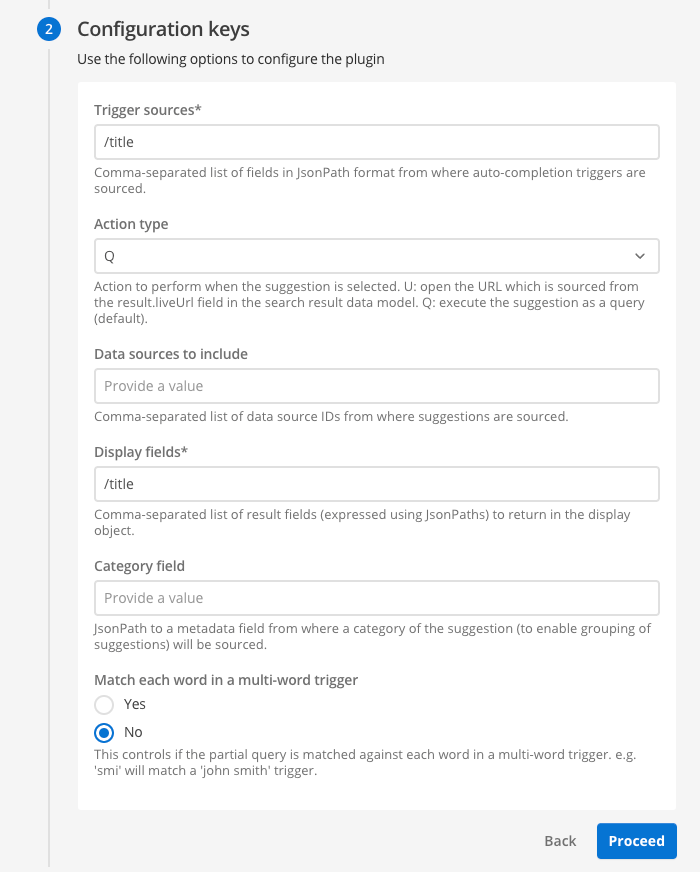
Configuration settings
The configuration settings step presents you with the different configuration settings that are available for the plugin.
Each field will present a short description that tells you what you need to enter into the input field, or if the field is optional.
Filter chain
When configuring a plugin on a push data source you must set the document filter chain (filter.classes) as a parameter when calling the API. Jsoup filters must still be set within the plugin configuration, and if you have a Jsoup filter you must also ensure that the push API calls include the Jsoup processing filter as part of the call.
|
The filter chain settings only apply to data source plugins that provide a filter, and you will only see this if it applies to your plugin.
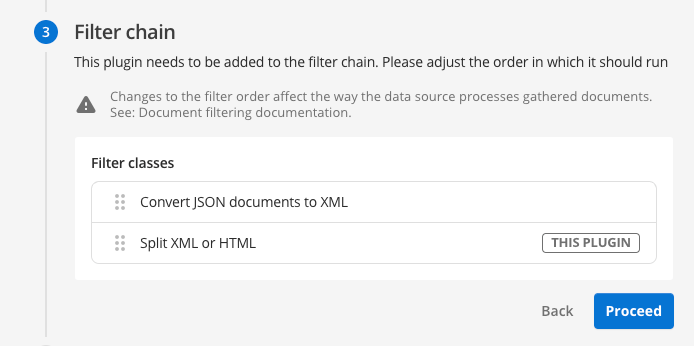
There are two different filter chains that you may need to configure when adding a plugin. Each of these correspond to a set of filters that are run in sequence, and can be reordered by dragging the items within the list.
-
Document filter chain (filter classes): This lists the order (from top to bottom) of the document filters that run as part of your update.
-
Jsoup filter chain (Jsoup filters): This lists the order (from top to bottom) of the html document (Jsoup) filters that modify your HTML document’s structure.
If your plugin uses Jsoup filters you will see both chains as Jsoup filters require a document filter (JsoupProcessingFilterProvider) which indicates the position in the main filter chain where the Jsoup filters are run.
The filters used by the plugin will display a this plugin label next to the filter name. You should review the list of filters and drag the plugin filter to an appropriate position in the execution order. For example, if the filter shown in the above example is being used to split an XML document that is converted from JSON then this has to run after any JSON is converted into XML. If you placed the filter before the Convert JSON documents to XML (JSONToXML) filter your search won’t operate as expected.
If you hover over a filter name with your mouse it will show the filter class name(s) in a tooltip. You normally won’t see these filer class names unless you are editing the data source configuration keys through the configuration key editor.
If you are enabling a plugin that uses Jsoup filters and the document filter chain is missing the Jsoup processing filter, then it will be added automatically, and you will also have the opportunity to adjust the position of the filter within the main filter chain.
|
Most of the time you can place your filter near the bottom of the list, but you should try to understand what the filter is doing and place it at an appropriate place in the sequence, otherwise the filtering might not work as expected. For example, if you are working on a JSON document there will be a step in the chain that converts this JSON document into XML. The JSON to XML filter needs to be ahead of any filters you add that make changes to XML. |
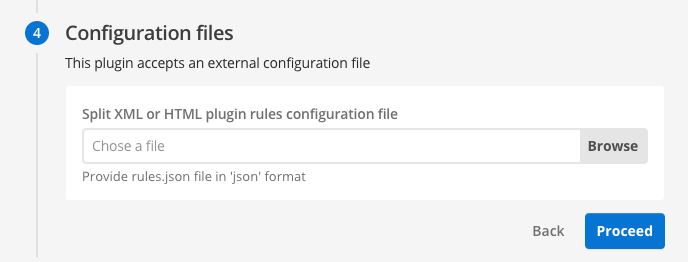
Configuration files
Some plugins make use of configuration files, usually to configure sets of rules that the plugin executes.
| Plugins that support a configuration file often also support global configuration keys, so you may set some configuration keys and also supply a configuration file. |
These configuration files can be uploaded here.
| The file uploaded does not validate your configuration file so check it carefully for correctness before uploading. If you upload a configuration file containing errors your plugin may not run as expected and it may result in your update failing. However, you can fix this by correcting any mistakes in the configuration file and uploading it again. |
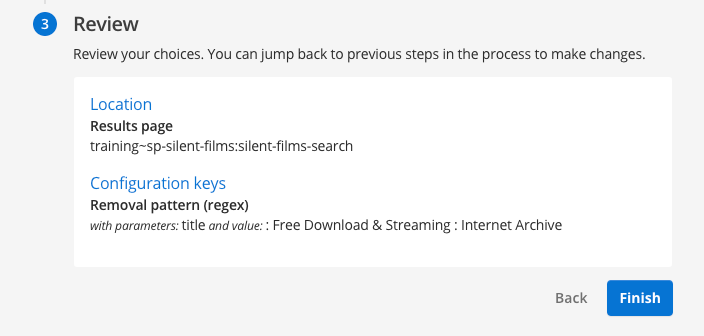
Review
The review step provides a summary of the plugin configuration that you have provided. When you click the proceed button, the settings will be applied to your data source or results page.
If you find some errors you can click back a previous step of the configuration wizard and fix the error.
| If you are setting up a results page plugin you need to publish the plugin after you’ve finished setting it up. see: Manage a plugin |
Tutorials
| The tutorial below outlines how to set up a very basic results page plugin. |
Tutorial: Use a plugin to manipulate search result titles as they are displayed
In this exercise we’ll make the same modification as in the previous exercise - to remove the : Free Download & Streaming : Internet Archive text from each title.
-
Log in to the search dashboard where you are doing your training.
See: Training - search dashboard access information if you’re not sure how to access the training. Ignore this step if you’re treating this as a non-interactive tutorial. -
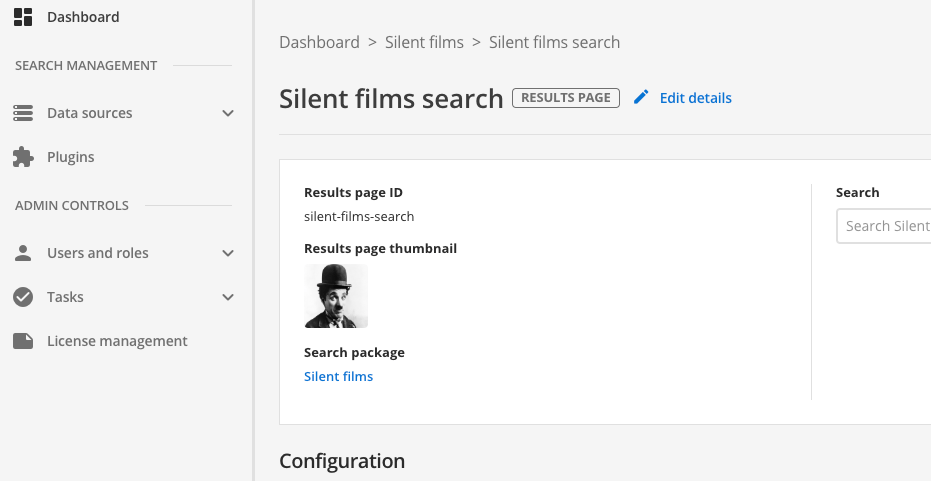
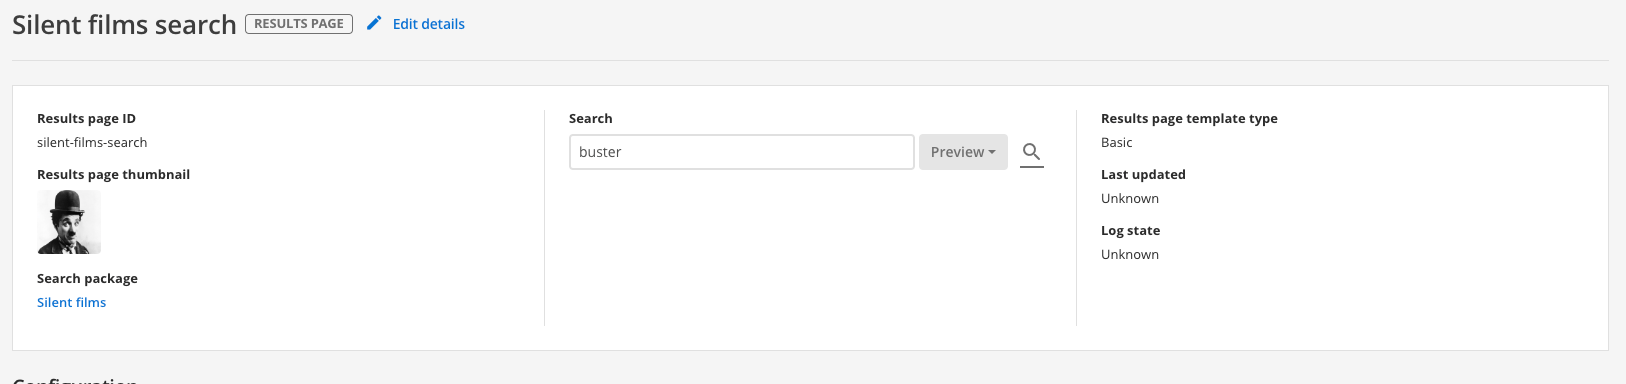
Navigate to the manage results page screen for the silent films search results page.
-
Run a search against the silent films search results page for buster and observe that the text for each result link ends with
: Free Download & Streaming : Internet Archive. This is the same as you saw in the previous exercise. We’ll now configure a plugin to remove the text. -
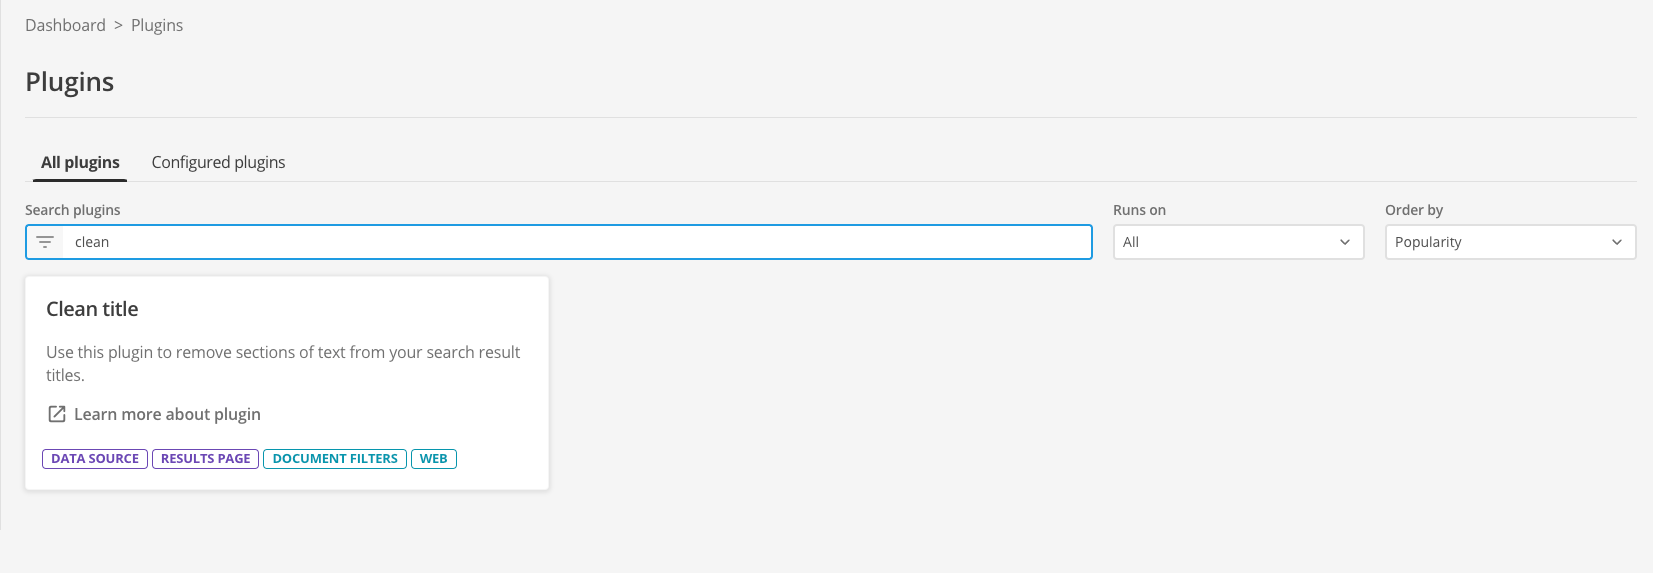
Navigate back to the search dashboard, then click the plugins item in the navigation. This opens up the plugins management screen.
-
The extensions screen lists all the available plugins.
-
Locate the clean title plugin in the list. The tile presents some background information on the plugin, and provides a link to the documentation for the plugin
-
Click the learn more about plugin link. This opens the plugin documentation in a new browser tab. Have a quick read of the documentation then switch back to the tab containing the configuration screen. Don’t close the documentation tab as you’ll want to refer to this to configure the plugin.
-
Click on the plugin tile. This opens the wizard which guides you through the steps required to configure your plugin. The view documentation button can be used to access the plugin documentation if you need more information.
-
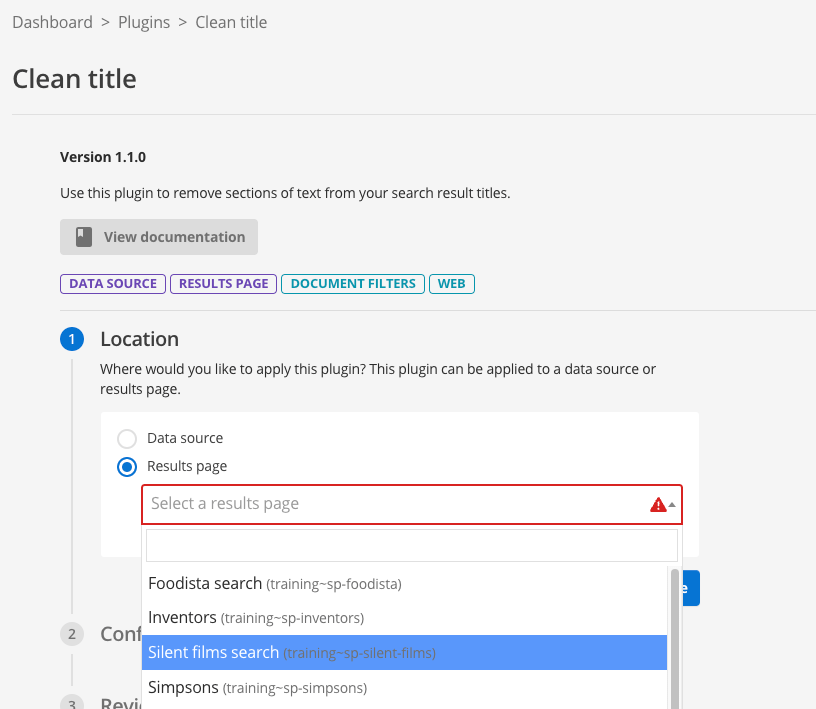
The location step is where you choose where to enable the plugin. If the plugin works on both data sources and results pages you will need to make a choice where you want the plugin enabled by selecting the appropriate radio button. You are then presented with a select list, where you select the results page or data source where you would like to enable the plugin. In this exercise we will enable the plugin on the results page. Select the results page radio button, then select Silent films search from the list.
-
In the configuration keys step you are presented with the various fields that you can configure for the plugin you’ve selected..
-
Add a new parameter with parameter 1 set to
titleand the value set to: Free Download & Streaming : Internet Archive, then press the proceed button. This configures the plugin with a rule called title to remove the string of text. The plugin supports multiple clean title rules. You define these in the same way, but with a different identifier (parameter 1).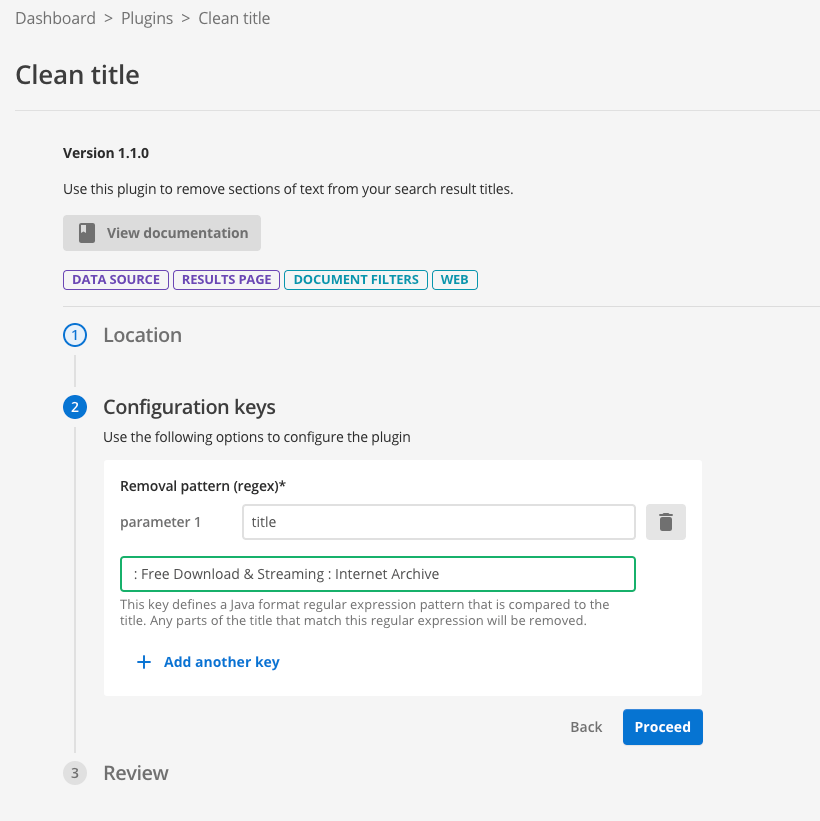
-
You will be presented with a summary outlining what you’ve configured for the plugin. Review the summary then click the finish button to commit the plugin configuration to your results page.
-
You will be directed to the results page management screen, where you can test out your plugin before you publish the changes. Run a search for buster (against the preview version of the results page) and observe that the titles have been cleaned.
-
Run the same search (against the live version of the results page) and observe that the titles still display text that you configured the plugin to clean. This is because the plugin configuration hasn’t been published.
-
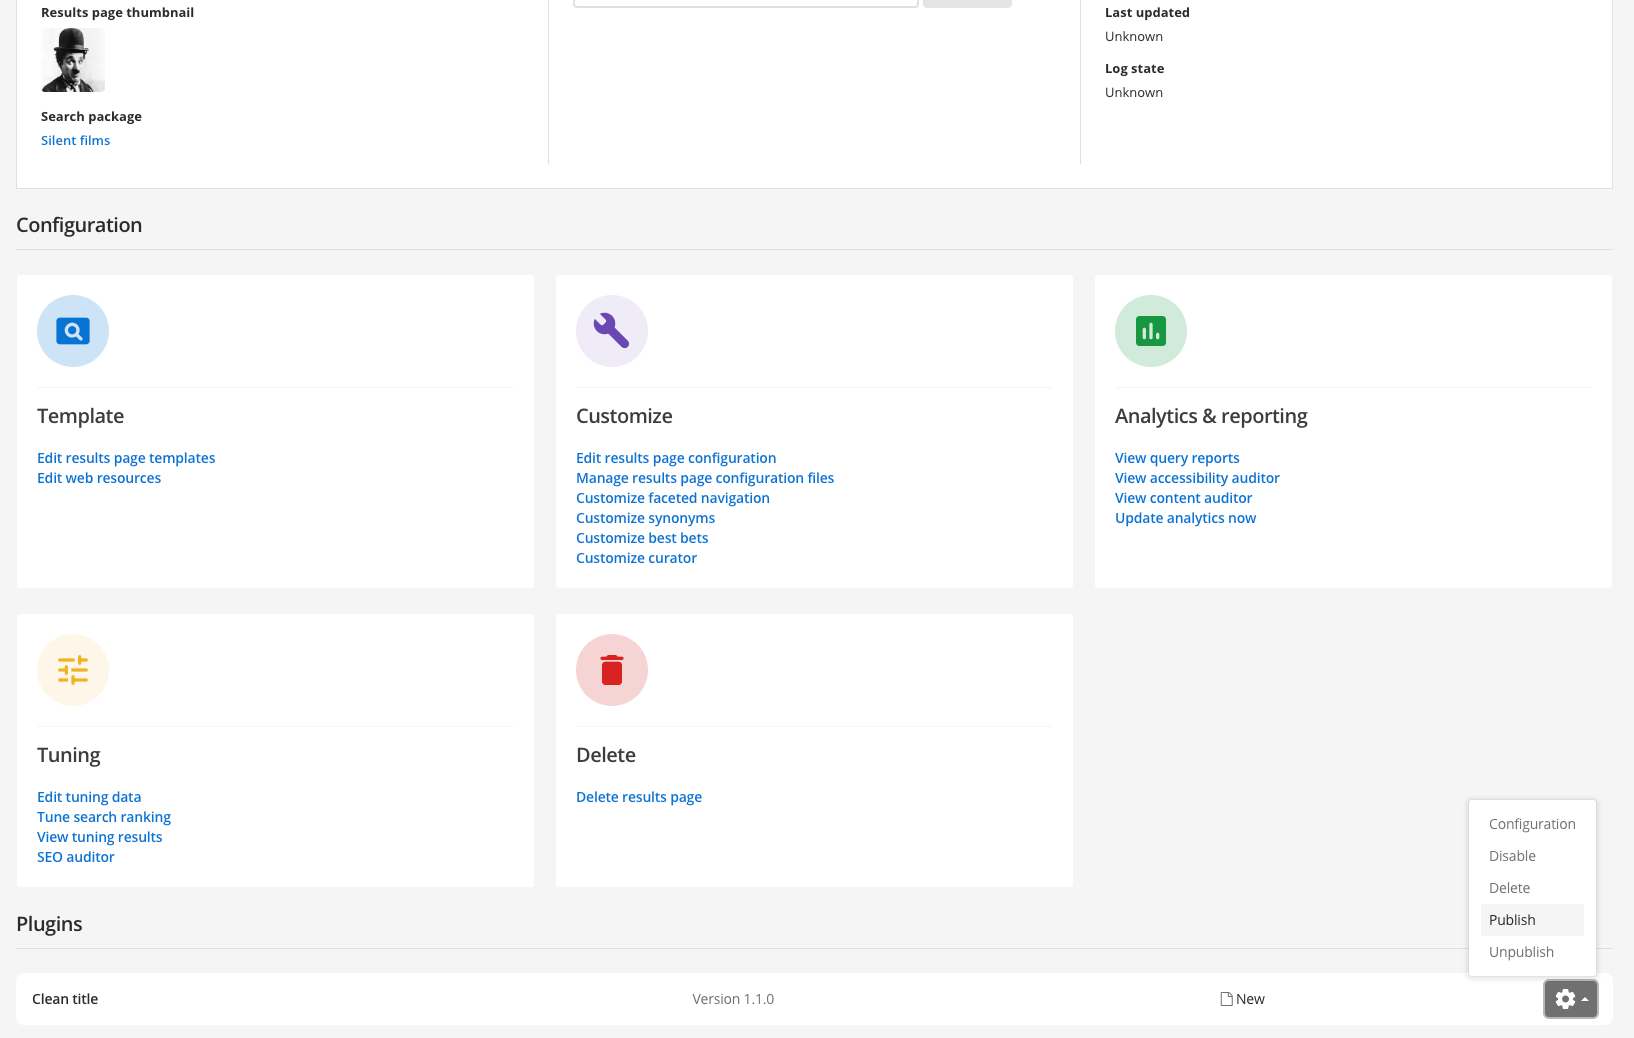
Return to the results page management screen and publish the plugin. Scroll down to the plugins heading then select publish from the menu for the clean title plugin. Observe that the menu also provides options to disable, delete and unpublish your plugin.
-
Rerun the search (against the live version of the results page) and observe that the titles are now cleaned.